
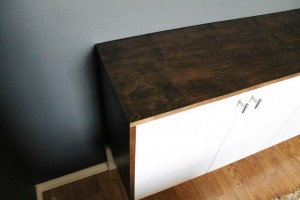
We’re back, as promised, to share all of the final details that went into above and on our DIYed fauxdenza. Styling is always so fun. Especially when it is a surface that can be styled and re-styled with changing seasons. Last night, we got the base of the styling done. The lamps installed (more on that in a minute) and our gallery hung. We also plopped our big, 20 pound wood ball from Indonesia…okay, HomeGoods, on there and called it a night. Oooo, a rare night shot.

In the morning, I still loved the industrial simplicity of the styling–we really try to keep things clutter-free around here–but I thought the left side could use a little somethin’ somethin’.

And that “somethin'” turned out to be petite roses from our front yard, a short stack of magazines and books, and a skull. The roses and skull next to each other give off a bit of a dia de los muertos vibe. Which I dig. Would it be completely inappropriate to keep Skully around all year?


Underneath the cabinets, he ran 2 six-foot extension cords (one from the outlet to underneath the first lamp and the other from underneath the first lamp over to the second) and then he secured the plugs artistically like so:

Ha! No one can see this, thank goodness. He did use heavy duty staples to carry the extension cord to the second lamp.


The big, wooden ball next to it is also a HomeGoods find. It is massive and weighs around 20 pounds. It was $30, and luckily Chris was even more excited about it than I was.


As for what is hanging out below, I mentioned the mini roses are from our garden. As much as I abhor our big rose bushes, the mini ones are very, very sweet. I plopped them in a small juice glass and called it good. I stacked Skully ($5 at Target. My secret is out.) on top of two great books and a stack of National Geographics (we have a ton of those) turned around so there is just a hint of their signature yellow exposed.

This view of him makes me laugh. Say, “Cheese!” He’s so friendly.


Hi Julia! I’ve been looking over your post on the Credenza setup and I was wondering what size are your black frames? Thank so much!
I think they’re 12×12
Perfect! Thanks so much for the quick response!!
It turned out so nice!! I love the pink flowers with the dark wall and the frames are perfect! Good work!
It turned out so nice!! I love the pink flowers with the dark wall and the frames are perfect! Good work!
nice! I have the same Target skull :)
That skull spray painted a rich gold would be totally appropriate year round.