
This project is sponsored by @Love_The_Room and Lowe’s.
Yesterday, Chris and I tackled another quick, easy and inexpensive before and after project at our friends’ home! The fireplace in their living room, the focal point!, needed some oomph. Here’s the thing about this before, it’s fine. And I think a lot of times, we live with fine for years and we get used to fine and maybe even accept fine as good. But the reason we wanted to tackle this fireplace is because with minimal effort (we did this whole project in half a day!) and money, you can love your home even more. You can make it great!
Here’s the before. (The multi-painted recessed brick, and one-dimensional trim really made everything feel flat–but it was a great starting point)

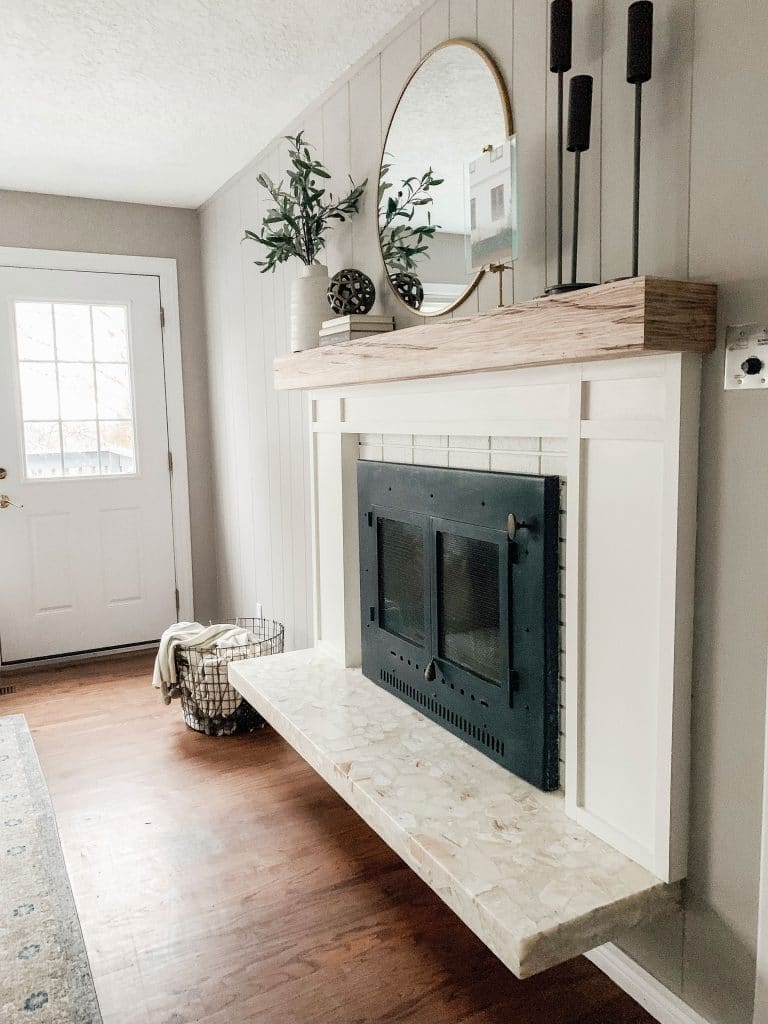
After a few hours, the fireplace now looks like this!


It all started with finding this amazing unfinished maple fireplace mantel at Lowe’s (it comes in 4 different sizes) and knew that it, with a little bit of trim and paint was all this fireplace needed to sing. (And maybe a new insert in the future ;)
Here’s how we did it:
• First, I taped off a simple trim pattern on the brick to guide us where the trim was going to go before we hung the mantel. It might seem counter-intuitive to hang the mantel first, but we felt like it would ensure everything was nice and snug.

• Installing the mantle was incredible simple–much like any sort of floating shelf. It comes with 2×2 boards that get screwed into the wall, first. If you have studs to screw into, then locate the studs and secure the board directly into them. Where we were dealing with brick, we first drilled 1/4in pilot holes through the 2×2, then held it in place and used the holes to guide a hammer drill equipped with a 3/16 masonry bit. We then used 1/4in concrete screws in the holes we drilled to fasten it to the wall. Be careful when doing this not to over-tighten. Concrete screws easily strip their holes, then you’re left either getting a thicker screw or drilling another hole.


Then, we faced the nailers with 3/4in cabinet-grade plywood on the fronts, then on the edges as well, using a brad nailer.


I picked up that can’t-go-wrong round mirror from Target and brought a few decor items from my stash to style the mantel.

But the mantel itself is absolutely stunning. We decided to keep it raw and love the grain and warmth (not to mention depth and surface and character!) it adds.

TOTAL: $318.62


Love the mirror were did you get it. I’m redoing my fire place it would beautiful!
I think Target
Great improvement overall but you should have taken off that weird floating stone shelf under the fireplace.
It looks like that’s a wood-burning fireplace, which would make the floating shelf a hearth. You can’t remove that. At best, you could build a sort of support for it, but you’d have to be careful about cinders.
I’m actually a little surprised they chose to add so much wood around the fireplace opening.
Beautiful! Can you tell me what color the wall is?
Can you share the paint color on the wall here? Thanks!
LOVE this so much! Might I ask where the pedestal photo frame is from?