
This post is sponsored by Lowe’s Home Improvement.
*Whew* What a makeover! What a room! What wonderful people! What a great team! But, I’m getting ahead of myself :)
In January, we put the call out: Win a bedroom makeover with CLJ and The Makerista! I have been a fan of Gwen’s for years, and even though we have different styles and tastes, I knew it would be a fun collaboration (and probably teach us a little more about mixing and matching designs as well as compromise). Lowe’s jumped on board to sponsor, and we were off!
We asked you to send in photos of your bedrooms — especially those of you with rooms that could really use some love, and boy did you! Hundreds of you used #CLJxMakerista to tell us your stories and show us your rooms. Some of you even nominated friends and family members who could use a little R&R as much as their bedrooms could use a reno. We were overwhelmed! We wanted to roll our sleeves up and tackle them all!
In the end, after much deliberation, we chose Cori and Chris Hutchinson from Scottsdale, Arizona. There bedroom was very outdated, but had a lot of character. We knew the transformation would be dramatic, but also a project that we could FINISH in a weekend. We had a healthy budget from Lowe’s ($7,500 — enough to include furnishings, decor and even a mattress in this makeover! PS … Lowe’s sells mattresses!), and Gwen and I each put together our own mood board of ideas. Before you go playing “I Spy” to see how we combined our ideas, check out this dramatic Before & After:

Shocking — isn’t it?! Not only was this the most rewarding Before & After we’ve ever done, it was also the most doable. And here’s how we did it…
1. We emptied the room :)
I know — this is the no-brainer. But it’s tough when you don’t have a team (Micah, Gwen’s husband, joined us as well as her assistant, Laura. My sisters, Victoria and Andrea — who work full-time on the CLJ team, were all-hands-on-deck.) helping to carry things out, and you’re not sure where to put things. I hear you! Before starting a reno like this, designate a room that can handle a little overflow and get everyone on board that things are going to get a little crowded in other parts of the house.

2. We tore up the carpet.
It was dingy and brown, and the homeowners were guessing it was about 60 years old. Underneath was a disintegrated green rug pad that came apart when we tried to pick it up. (Yuck) We got down to the concrete, and swept it good, pulling up tack strips all along the exterior of the room. It already felt so much better.
3. Next it was time to pick a paint color.

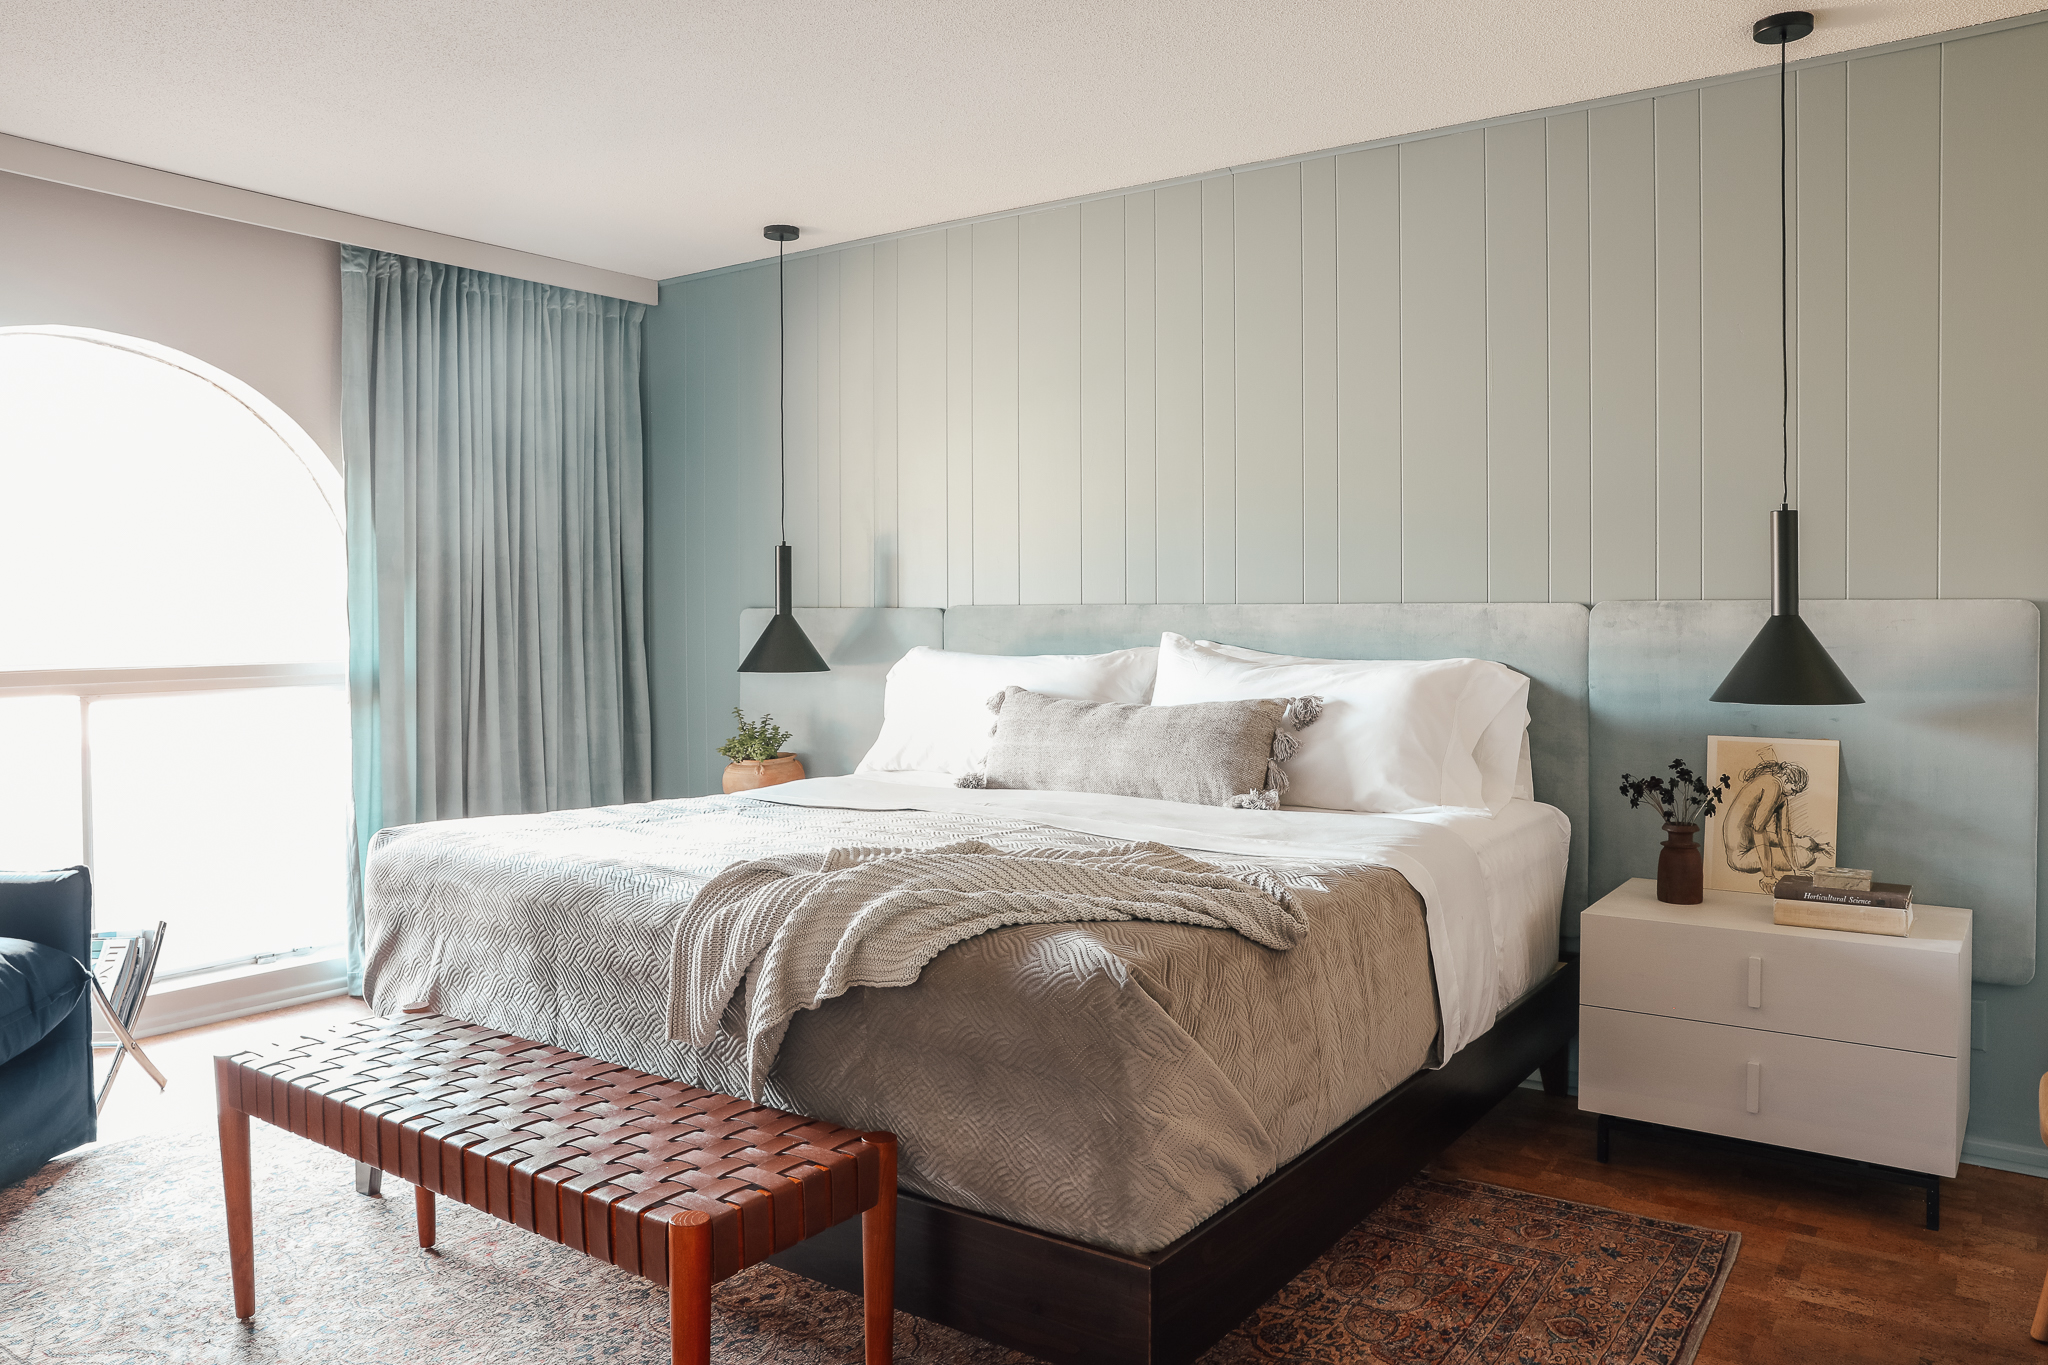
I was loving a neutral beige, and Gwen brought some beautiful blues to the table. We sampled four or five on the wall — and, I can’t stress this enough: Look at the paint in the room where it’s going. The beautiful Arizona sun was changing every color we knew and loved! Blues were going green! Beige was looking purple! Sample, and sample again. We decided on Farrow & Ball’s Oval Room Blue for the paneled walls and Revere Pewter for the adjacent walls — accenting the paneled walls with the blue. Both colors were expertly matched at Lowe’s with HGTV Home by Sherwin Williams Infinity line, which goes on like a dream, by the way.
4. But not before we primed everything!
The paneling, especially, was old, and in the words of Chris Marcum, “It’s not about how the paint will go on; it’s about how it will stay on.” There were two paneled walls in this bedroom, one in the hallway entry and one on the bed wall and a quick coat of primer would ensure the paint stayed in place and didn’t scratch off. Even if a paint has a primer built in, if you are painting wood paneling — it’s a great idea to prime it first.


5. We’d laid flooring.
We went with an easy-locking (“no glue, staples, or nails required) natural cork floor from Lowe’s. Gwen thought it would be a great nod to the home’s mid-century bones! I’ll be honest: It took longer than we thought. Even with Micah and Victoria laying the pieces and snapping them into place, and Chris cutting the edge pieces, corner pieces, and other unusual pieces, it took more than six hours over two days. (We had anticipated three hours.) This is a product you really have to get the hang of! And because this bedroom had a hallway, a bathroom, and a closet, there were a lot of quirky corners to work around. The end result was beautiful and soft underfoot, so we’re definitely recommending that you stick with it. The homeowners have big plans to extend it to other areas of their home, too!

6. We made a custom headboard.
We wanted something soft and tonal that would extend beyond the bed and really give the wall behind a focal point of texture. In both of our initial designs, Gwen and I envisioned a sectioned headboard to frame the bed and nightstands. We actually used the same curtain fabric that we used for the windows for the headboard and the textural contrast between the velvet and smooth, lined, paneling is so stunning in person.
To make the headboard, Chris used 1/2″ plywood to make the shape. We decided on rounded corners to make it feel a little more elevated. Cutting wood for the headboard is legitimately the hardest part of this easy DIY.

Then you just wrap the wood with batting. We used a double layer and this staple gun (your hand will thank you!). And do the same for the fabric.


When Gwen and I were finished upholstering each board, we attached two flush mount hangers to the back of each one to hang on the wall directly.


Repeat! Repeat! One trick is with this velvet, after they were all hung, we steamed it in one direction so there were no more crazy directional patterns in the fabric — HOORAY!
7. We installed furnishings.
One of my favorite parts of this project were the hours I was able to spend with Gwen assembling furniture and chatting away. It was our first time meeting but we have been online friends FOREVER so we had so much to catch up on and talk about. She’s such a delightful person! We ordered all of the furnishings from Lowe’s and spent a few hours together putting it all together while the floors were finishing up. A dresser! Chairs! Bed frame! Bench! Console table! A mattress! Almost every piece we unboxed, our team ooo’d and aaaaaaa’d and asked where it was from. Always Lowe’s!


8. We hung curtains.
As I mentioned above, we used the same curtain panels for the headboard as we did on the window wall. We ended up using three on each side of the window (for a total of six) to make sure they were nice a thick and could easily extend over the entire wall and cover the window if they wanted. They actually had the track system in place so we just re-used it and added a 1×4 in front to disguise the track system. If there was one thing I could change in this room, I probably would have used a slightly larger piece of wood (maybe a 1×6) and painted in the blue color. We thought that since the window wall was the neutral paint color, the trim should be the neutral color, but I think it probably should have blended with the curtains seeing these photos.


9. We installed lighting.
Their before bedroom had one singular lamp, so we knew we wanted to bring in more lighting so the bedroom could feel just as cozy when the sun went down. We hung pendants over the nightstands and instead of hard-wiring, we used a puck light inside (it comes with a remote and everything!) that makes the pendants instantly usable.

We also added a pretty lamp to the dresser and one to the console table, across from the bed, too.


Diversifying the type of lamps — pendants, task lamp and one that doubles as a sculpture on the console table — really keeps things interesting and not stale in this room. I always shoot for two to three light sources in EVERY room, and I haven’t met one that hasn’t benefited from it.
10. We loaded up the room with decor and accessories!
Cori and Chris had a lot of special pieces in their home that we pulled out of storage and put to use, mixing with pieces from Lowe’s. Vintage bowls and vases we filled with fresh flowers (that thoughtful Jenny Komenda brought by!).
Cori and Chris lost their two-year-old son last year, and we commissioned my sister, Victoria, to do a simple pencil sketch of William to hang.


And Jenny also brought by a large print of her Juniper Print Shop CANYON print to bring the Arizona landscape indoors.

The white abstract art above the console table is from Lindsay Letters, and everything else is from Lowe’s or vintage treasures the family owned.

In my DMs, I got a lot of questions about where the pack n’ play and bike went — very valid questions because design is only as good as it functions! We actually helped them move the bike into a spare office in their home that they eventually want to turn into a home gym and the pack n’ play is actually no longer in use on a daily basis so we were able to fold it up!
With so many wonderful helping hands, we were able to work quickly and keep the entire process and reveal a surprise for the family. It was emotional and wonderful. They were so incredibly grateful and we felt grateful to give them a fresh start and stretch our creative muscles.

We took a video of the reaction and throughout the process that we’ll be sharing next week!! So a little bit more to come on this bedroom! All the Lowe’s Sources below!
Paint Colors: Oval Room Blue, Revere Pewter
Flooring
Bed Frame
Mattress
Headboard DIY with these curtains
Sheets
Quilt Set
Blanket
Pillow
Nightstands
Pendants
Puck Light Kit
Bench
Rug
Curtains
Entry Hall Rug
Dresser
Task Lamp
Wicker Chair
Console Table
Lamp
Laundry Basket
Accent Chair
Magazine Rack
Mattress


Beautiful home and great renovation projects!!
I love this room so much and keep coming back to it as inspiration for my own- not sure if you know but a lot if not most of the source links just go back to the post :(. Just wanted to let you know!
What kind of batting did you use for that amazing DIY headboard? Attempting to mimic your work in my own bedroom, but I’ve never ordered batting before (and have to online now, as our stores are closed!), which is making it much more challenging. What do you recommend? Thank you!
I live in Canada and wanted these nightstands so badly!! The USA site has them for $260 – totally reasonable!! The Canadian site has them for $817!!! High-way robbery… :(
I will have to keep an eye on them to see if they go on sale! I’m so in love!!
I keep coming back to this post. So beautiful! Did you purposely pick a paint color to match the curtains perfectly or was that a happy accident?
It was on purpose. We chose the curtains first and then picked the paint color to match.