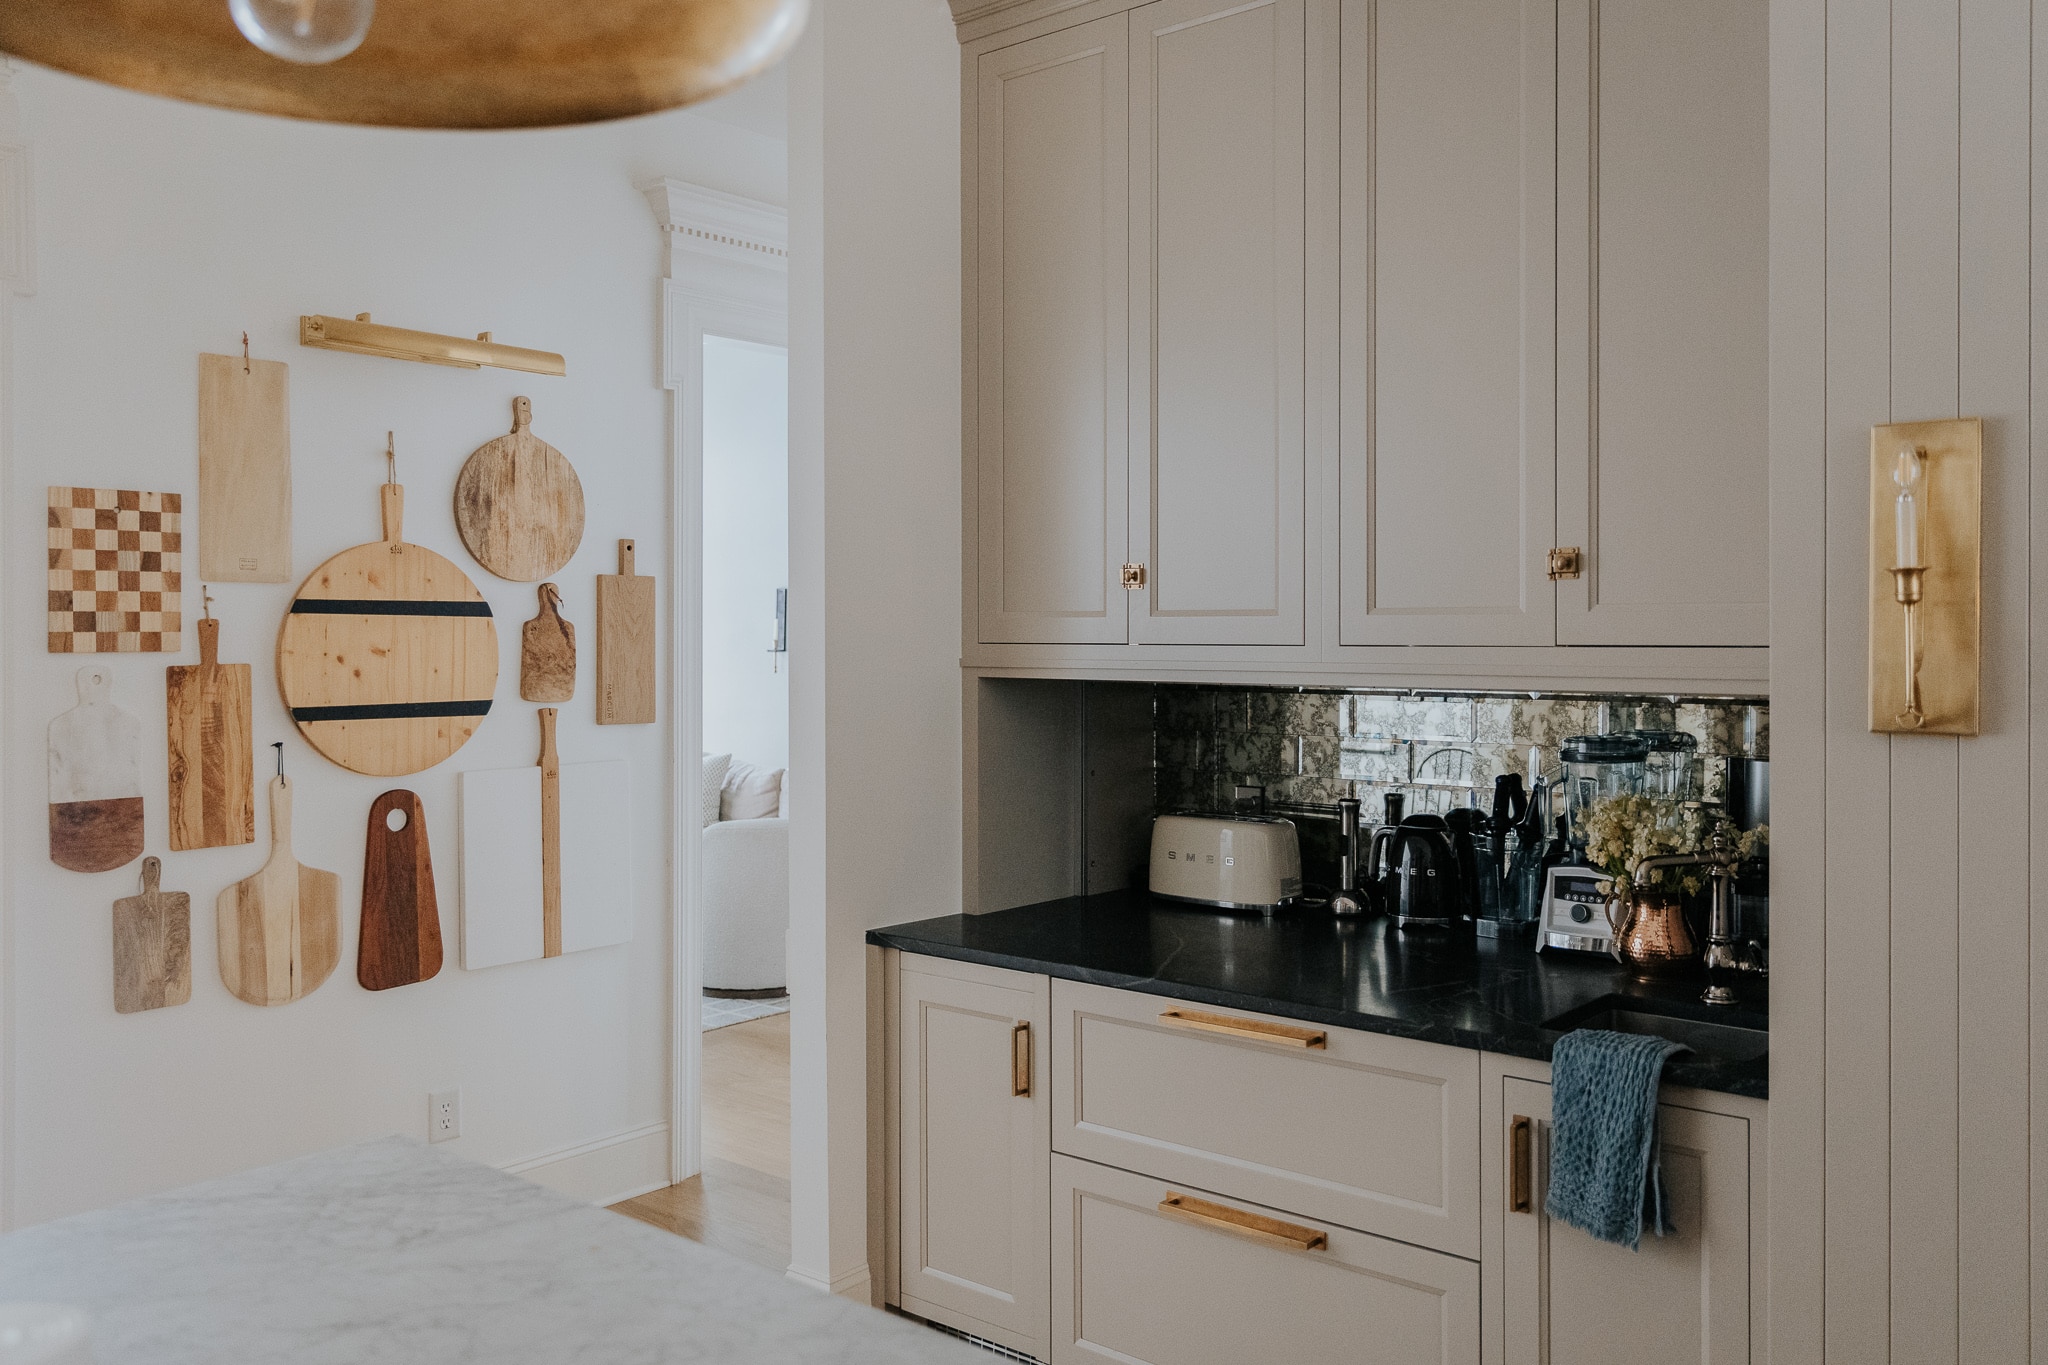
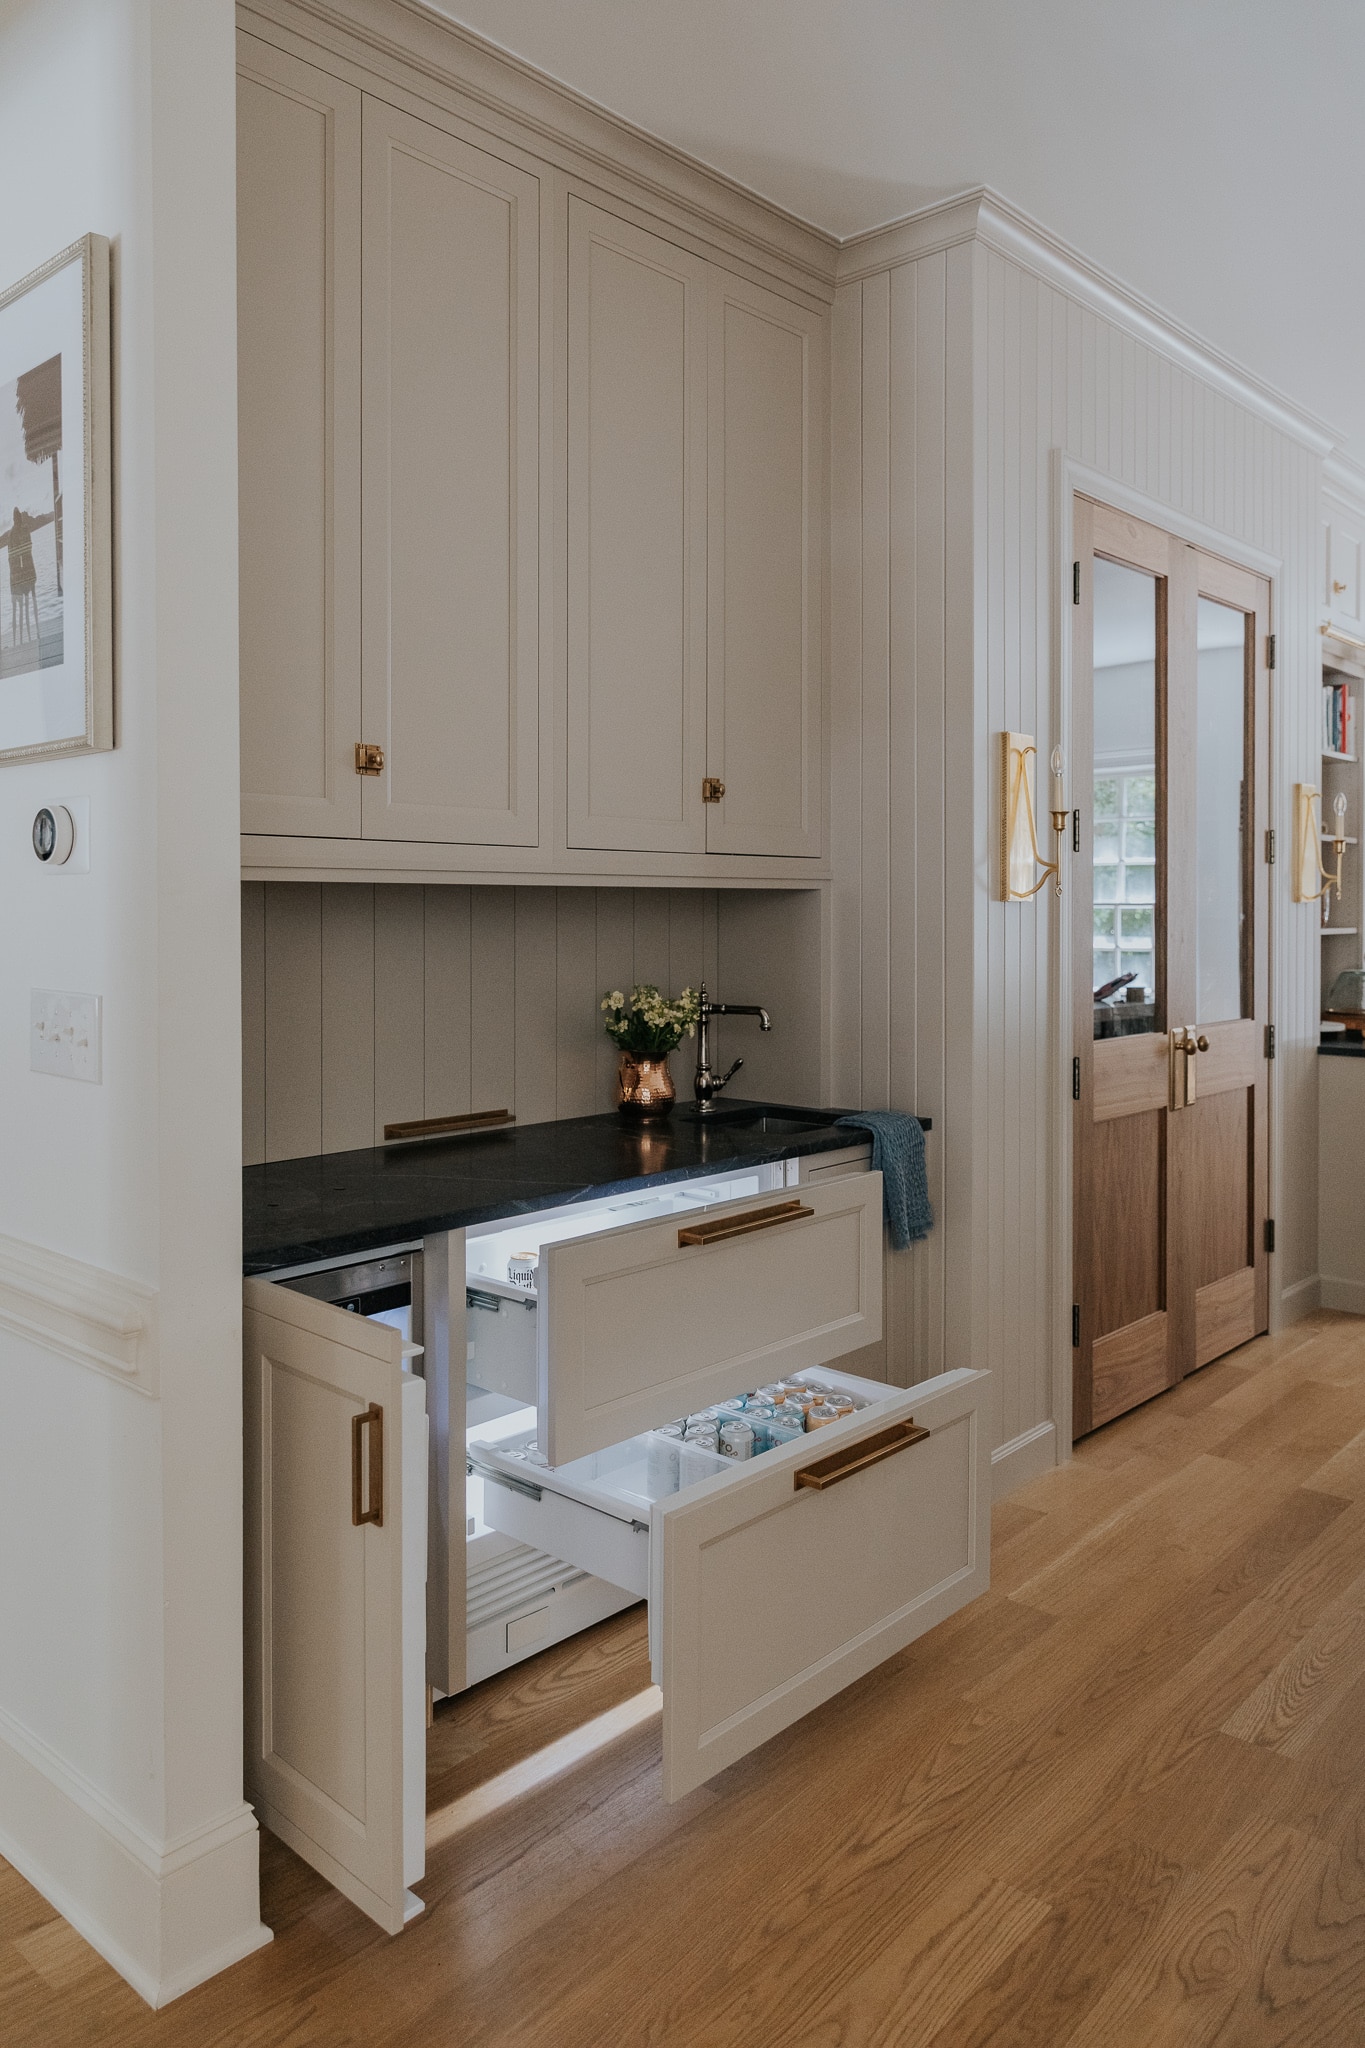
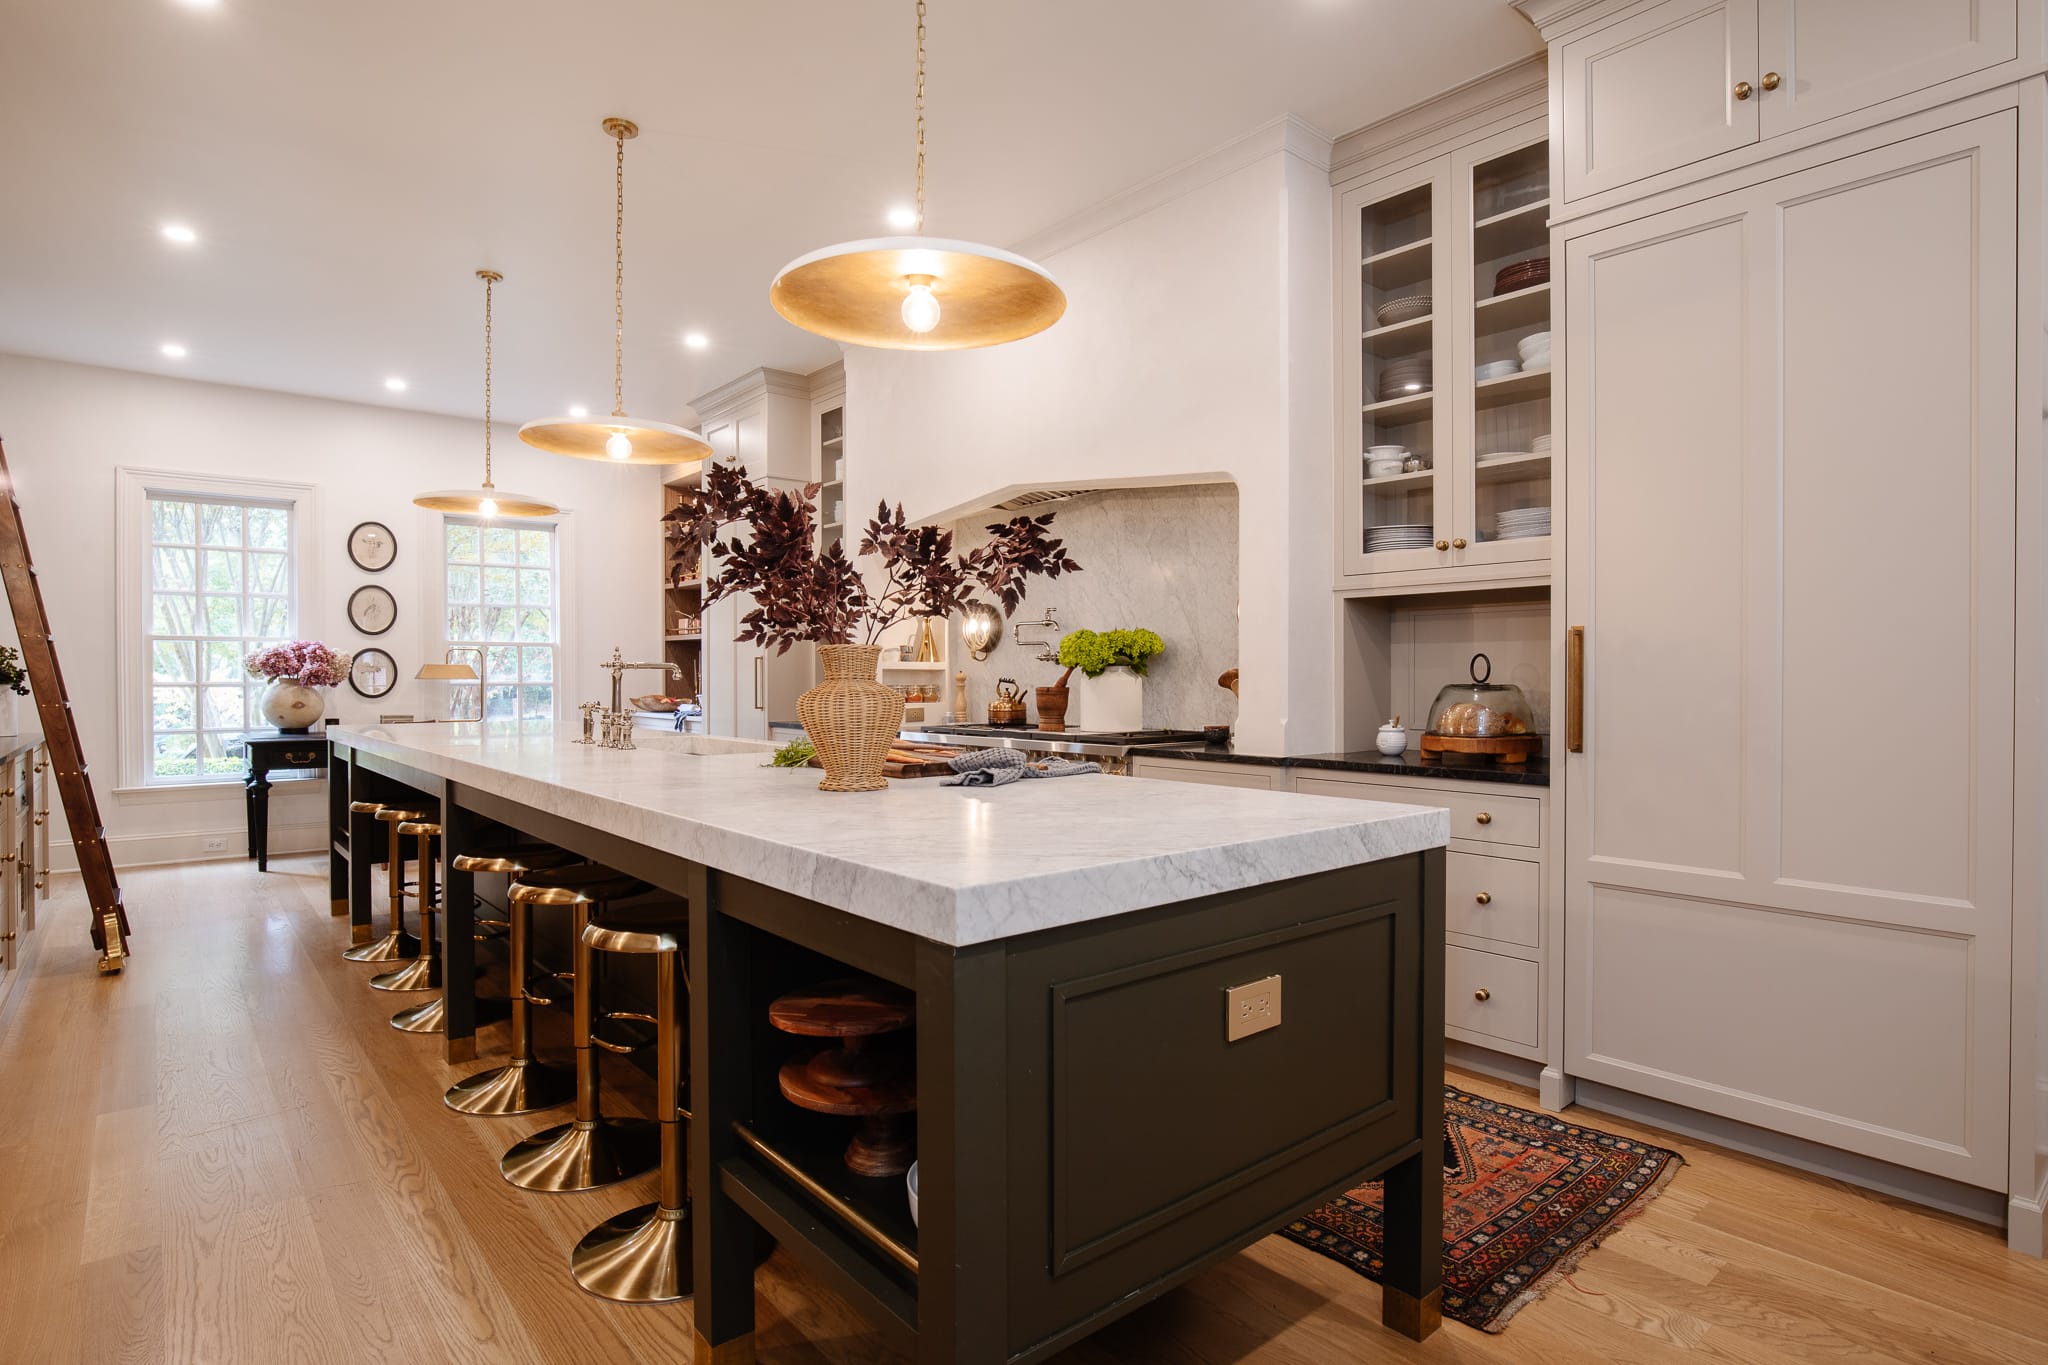
Okay, it’s impossible for me to choose a favorite part of my kitchen, but right now? This is it. This is the thing I’m most excited to show and tell our guests because it’s just so brilliant. And it’s officially done! Now that our long awaited refrigerator drawers arrived, and the mirrored tile backsplash is installed, I’m resting easy. It’s just nice to cross something off your list that’s been in the works for over a year ya know? Introducing our beverage station and hidden appliance garage!
Cutting Board Gallery Wall | Pendant | Sconce | Cabinet Hardware | Faucet | Mirror Tile
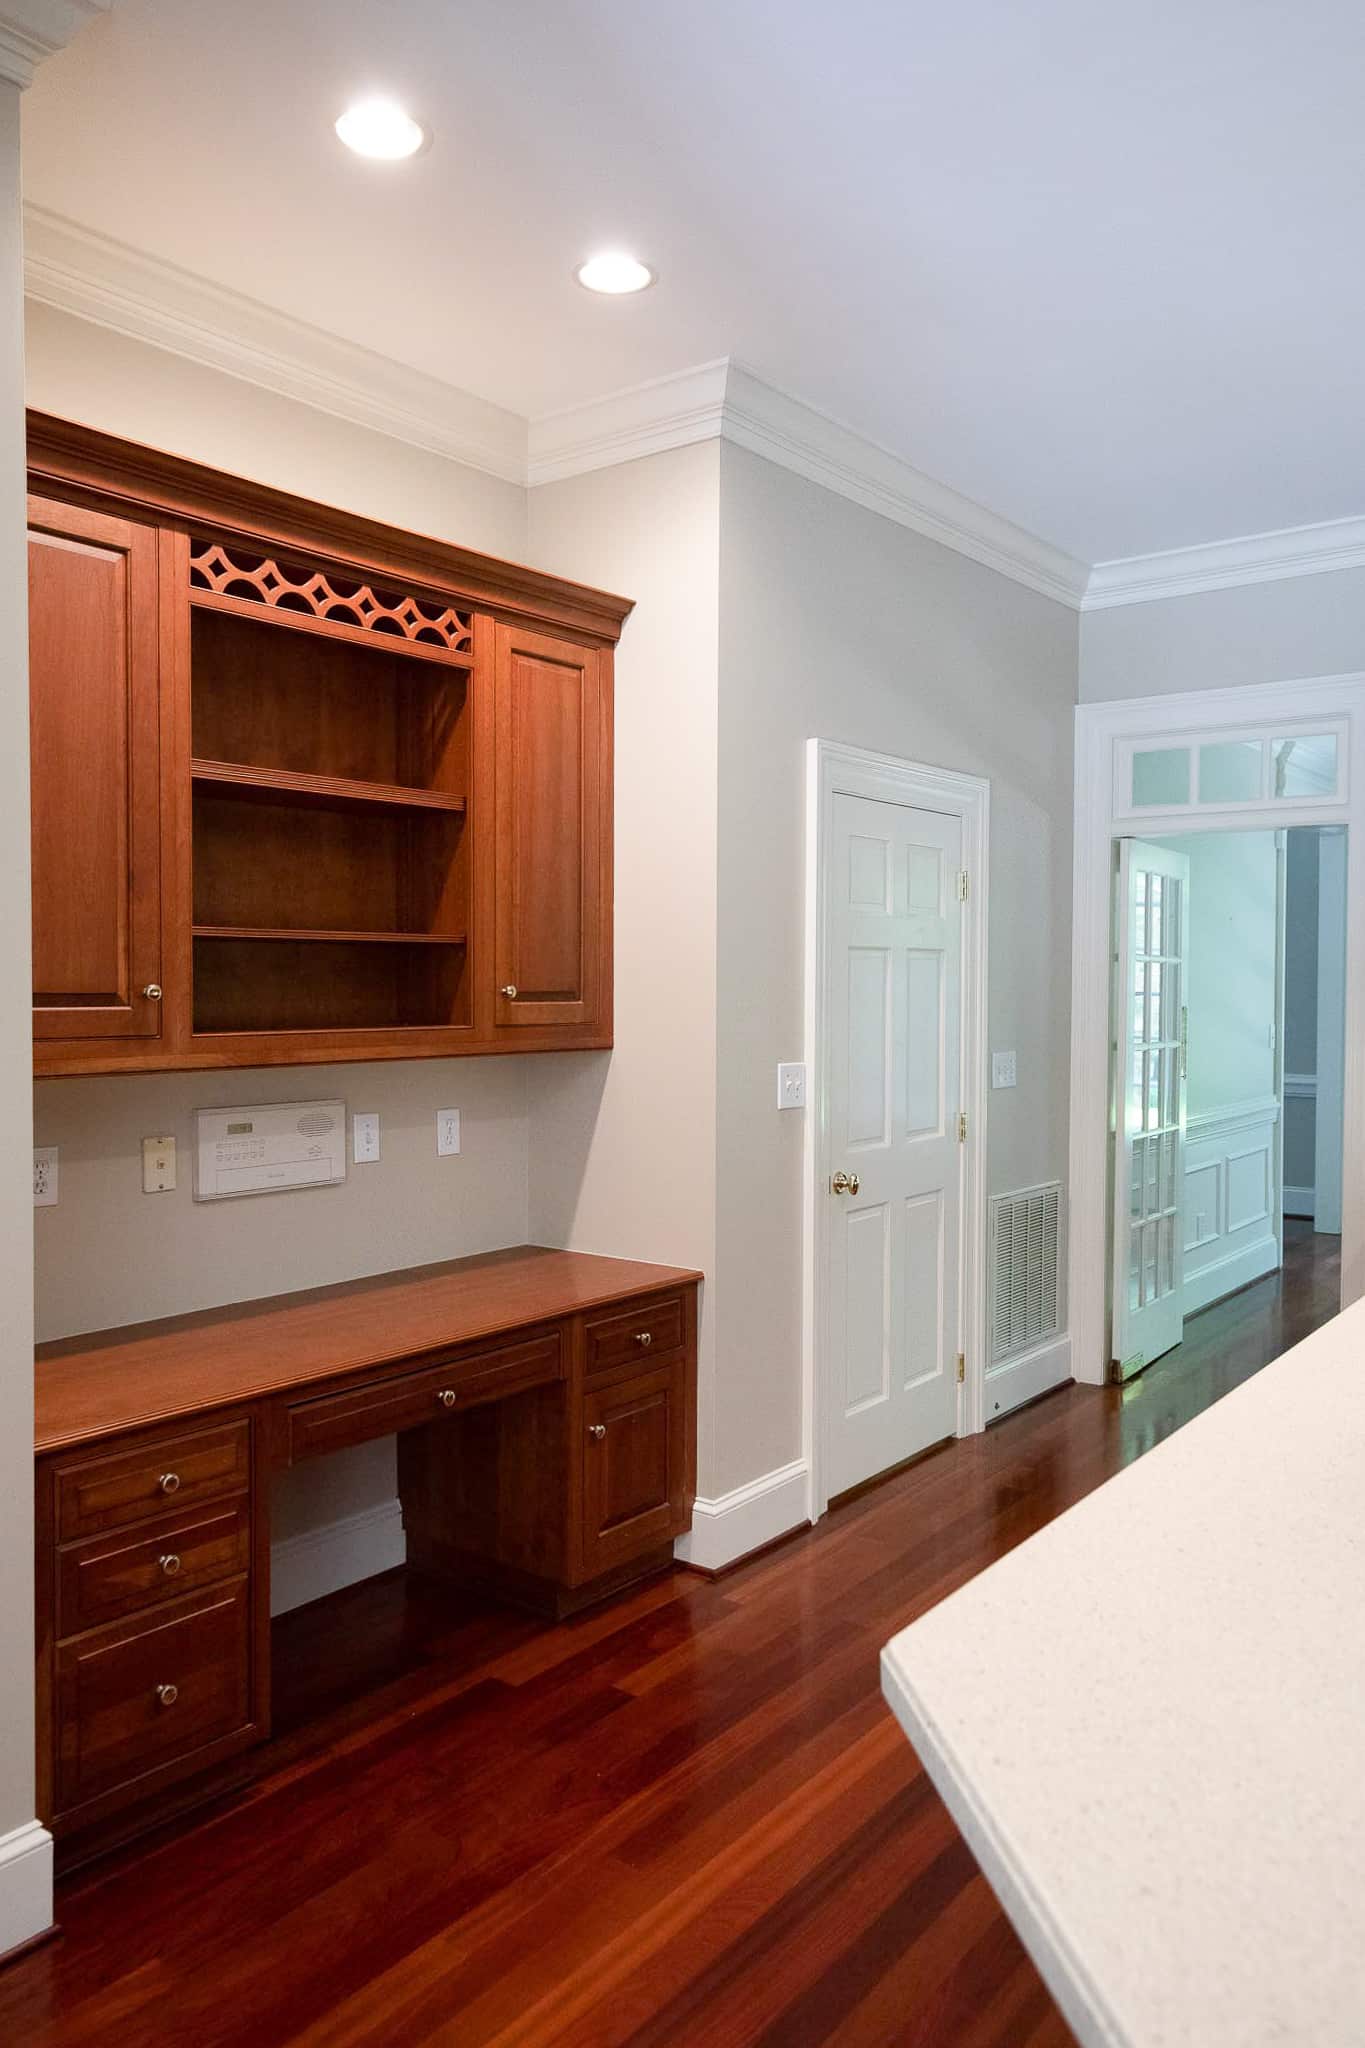
This used to be a kitchen desk area, so it was a very deep-set part of the kitchen. We had no need for a desk area in the kitchen, so Stoffer came up with the most genius use of this space. A beverage station.
Before
After

We don’t drink alcohol but that doesn’t stop us from having fun with our beverages. We love making fun drinks, plus we’re daily smoothie, protein, and supplement drinkers. Stoffer made sure to design a designated place for our beverage lifestyle and that’s just one of the reasons why Jean is the best.
Beverage Station Components
Our beverage station would not be complete without a nugget ice maker over on the left. Ours is the Scotsman Nugget Ice Machine and it works like a dream. For some reason some people were DM-ing me, warning me that their nugget ice machine is super loud, but this one is has hardly made a peep–really quiet and discreet.
The refrigerator drawers took a hot minute to get here, and we actually hung a temporary cafe curtain for a few months to curb the long wait. The day they arrived felt like Christmas, probably because it’s also when our freezer arrived. We went with the Subzero Wolf brand, along with the rest of our appliances and they live up to their name–top notch quality. The drawers hold all our favorite drinks including almond milk and coconut water for making smoothies. The last appliance we are waiting on is the Fridge. September cannot come soon enough!
We had to go all the way and make this “bar” a “wet-bar” with a sink! We chose the Strive Undermount bar sink because of how well it paired with the sink at the island. Clean lines, premium stainless steel, plus it includes a bottom rack to help prevent scratching. I especially love the small size of it, while still being deep enough for me to set my Stanley in it for a fill-up. The faucet itself is a work of art.
Beneath the sink is of course some plumbing, but also where we keep a discreet little trash can for convenience!
Appliance Garage: Movable Backsplash
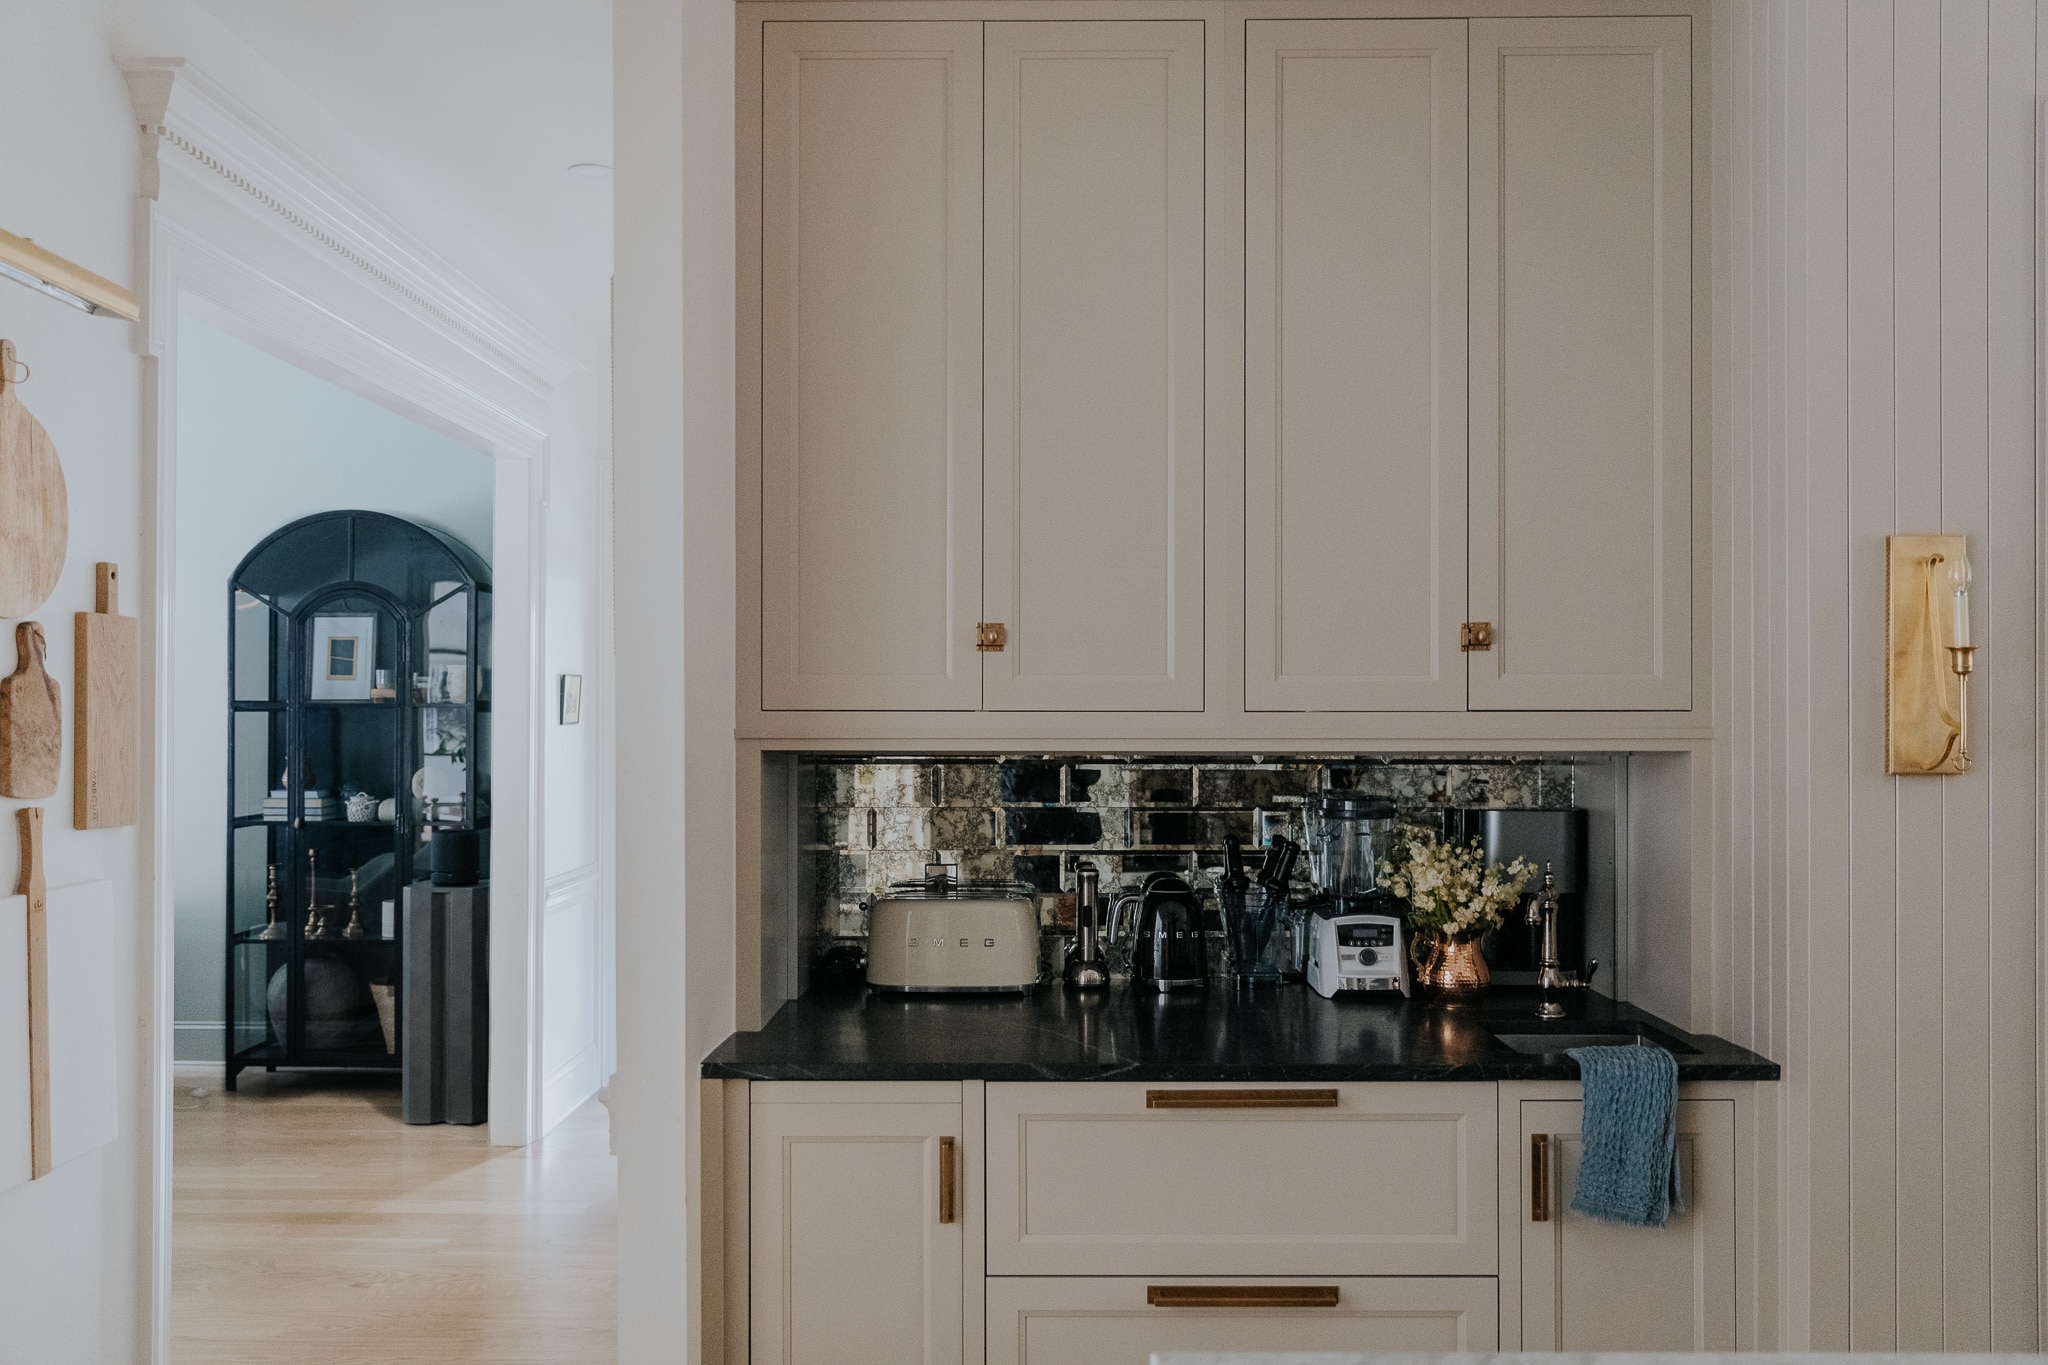
I never tire of showing this appliance garage over on Instagram. It’s a genius way to store those commonly used appliances without taking up precious countertop space. But I always get so many questions on exactly how it works. It feels like an illusion when you look at it. Like where is does that gliding backsplash go? Tbh, I didn’t understand exactly how it was going to come together until it actually came together.
You can see more photos demonstrating how it was built, but here’s basically how it works!

First, let’s get some dimensions straight.
The depth of the full countertop slab from the edge to the mirrored backsplash is 38-in. A standard countertop is 26-in so this leaves plenty of space for storing the appliances.
The depth of the actual garage space where the small appliances live is 12-in.
And the depth of the upper cabinets that are mounted in front of the garage door is 13-in.
So basically, the upper cabinets are deep enough to fit all of our glasses and drink mixes and such, but shallow enough that the appliance garage can glide up behind.
The frame that was built for the upper cabinets to mount on to is not actually the full height of the cabinets. It starts up at the ceiling and only goes down about halfway to leave room for the garage door to glide up behind the cabinets. Here’s the exact gliding hardware we used.
At first it was incredibly hard to open, and easy to close. We played with the tension a bit so that it’s much easier to open, and a hard to close, but it has gotten easier! The tension needs to be tight enough that when you lift the panel up, it stays put, rather than sliding back down. The heavy-duty brass pull was’t actually in the original design but (with Jean’s approval of course) we added it to make it easier to lift!
Mirrored Tile Backsplash

Speaking of things not included in the original design… this mirrored tile backsplash! When you opened up the garage “backsplash” before, all of our appliances were against a white wall and it felt a little lackluster in contrast to the magic of the gliding backsplash. Now when you open it, it’s like opening a little jewel box, rather than a bread box ya know?
We DIY’d the antique mirror backsplash and in only 3 hours time, we now have this beautiful camouflage backdrop to our small appliances. I love it so much I want to use this tile somewhere else in my house.
Upper Cabinet Storage

The open cabinet really demonstrates that the upper cabinets don’t go all the way back to the tile backsplash. Again, they had to be shallow enough so that the garage door could slide up behind it. This is where we store all of our mugs and glasses, both for daily use and hosting.
In the other cabinet we have protein powder, supplement powders, pre-workout, and all of our Stanley cups and shaker bottles. It’s quite possible this corner of the kitchen gets the most use!
What other questions do you have?


Gorgeous! What material is on the wall that the pantry door is on? Thanks so much!
It’s painted wood paneling!
Where are the double doors from? They’re beautiful!
They’re solid walnut doors we ordered through Milgard. You can find out more in this post!
What color are the cabinets?
They’re Stoffer Home Cabinetry in Bromley Taupe.
What color is the island?
It’s Stoffer Home Cabinetry in Plymouth Green.
Thank you for posting the hardware you used! It was the final piece I needed to realize my vision for a rather unique appliance garage in our new kitchen. Ours is situated against the wall at the end of a standalone peninsula, and we used the space above to house two hidden, upper pullout cabinets that are back-to-back and open to the sides. https://photos.app.goo.gl/1dg6ebwh3NDHr1E97
I would like to know the exact measurements of the depth of the counter please. How did you manage to keep the original space the same without having to extend the walls of that area. I’m not sure if I’m explaining my question correctly.
The depth of the full countertop slab from the edge to the mirrored backsplash is 38 inches. The depth of the actual garage space where the small appliances live is 12 inches. And the depth of the upper cabinets that are mounted in front of the garage door is 13 inches.