Designing our main staircase was something that crept up suddenly, but I am so honored and happy I am able to do! The original plan was just to swap out the treads and handrail for oak to match our new floors that will be going in, but when our contractor said, “anything else? now is the time to do it.” Well, that was Pandora’s box.
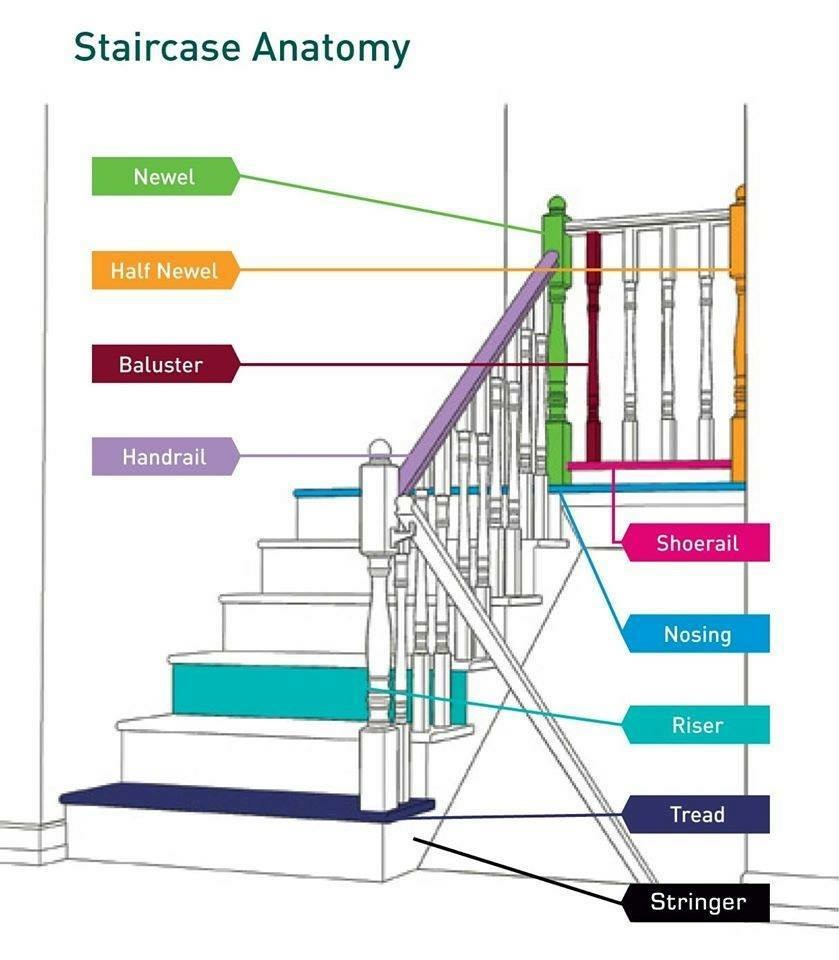
The first thing you gotta do when you start any design project, but especially something as technical as STAIRS is to learn the lingo. Staircase anatomy is in depth and I had so many inspiration photos saved (a whole board here!) but I needed to learn how to put what I wanted into words and direction. This chart helps! I’ll also be referencing a lot of these terms in the post.
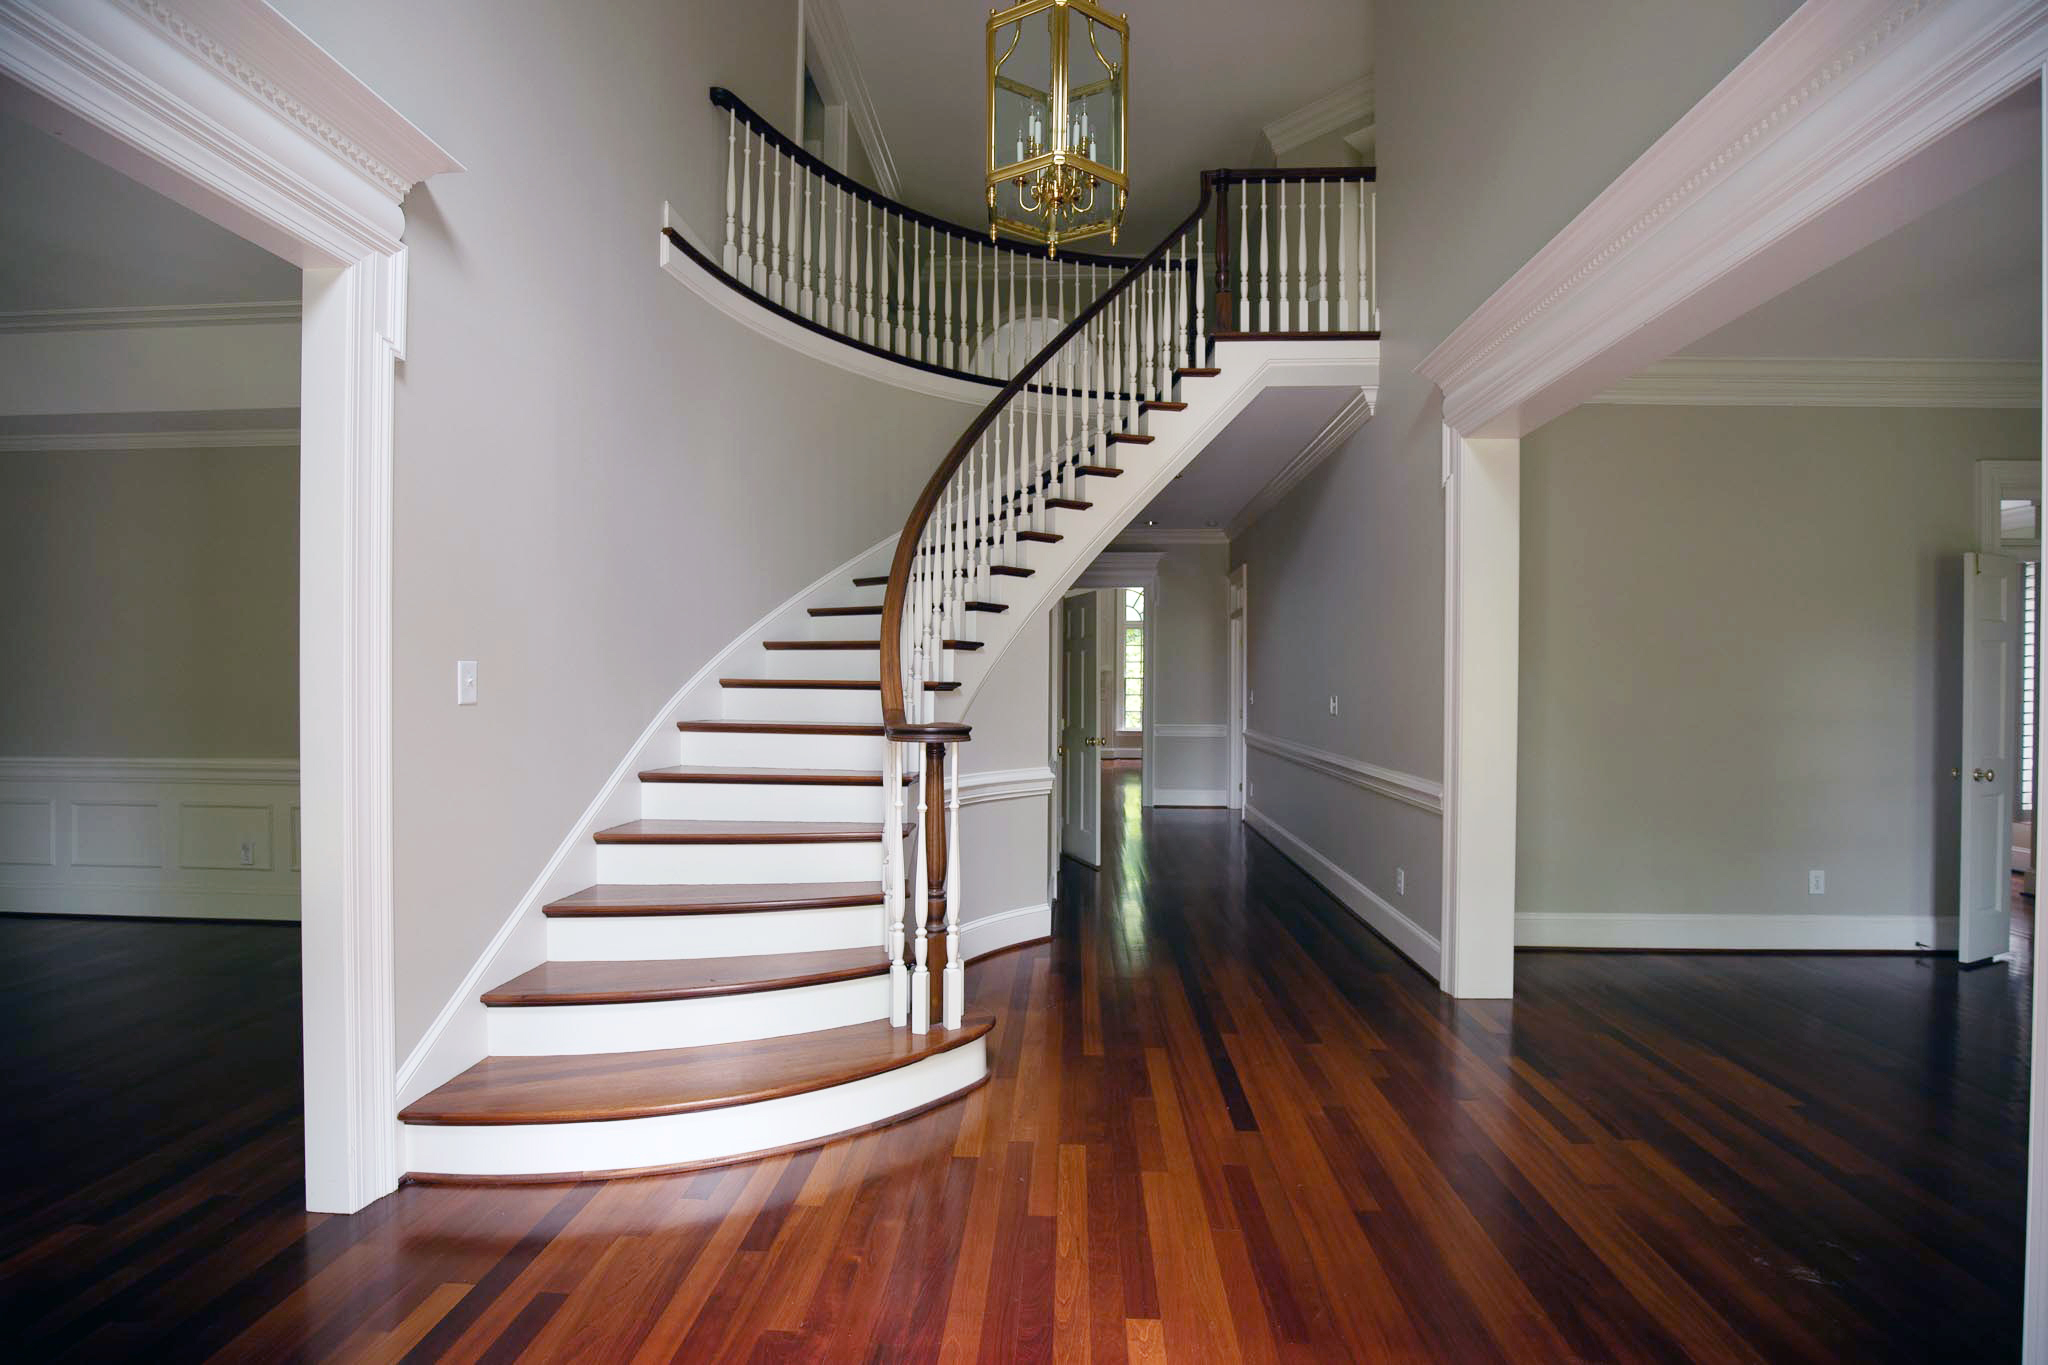
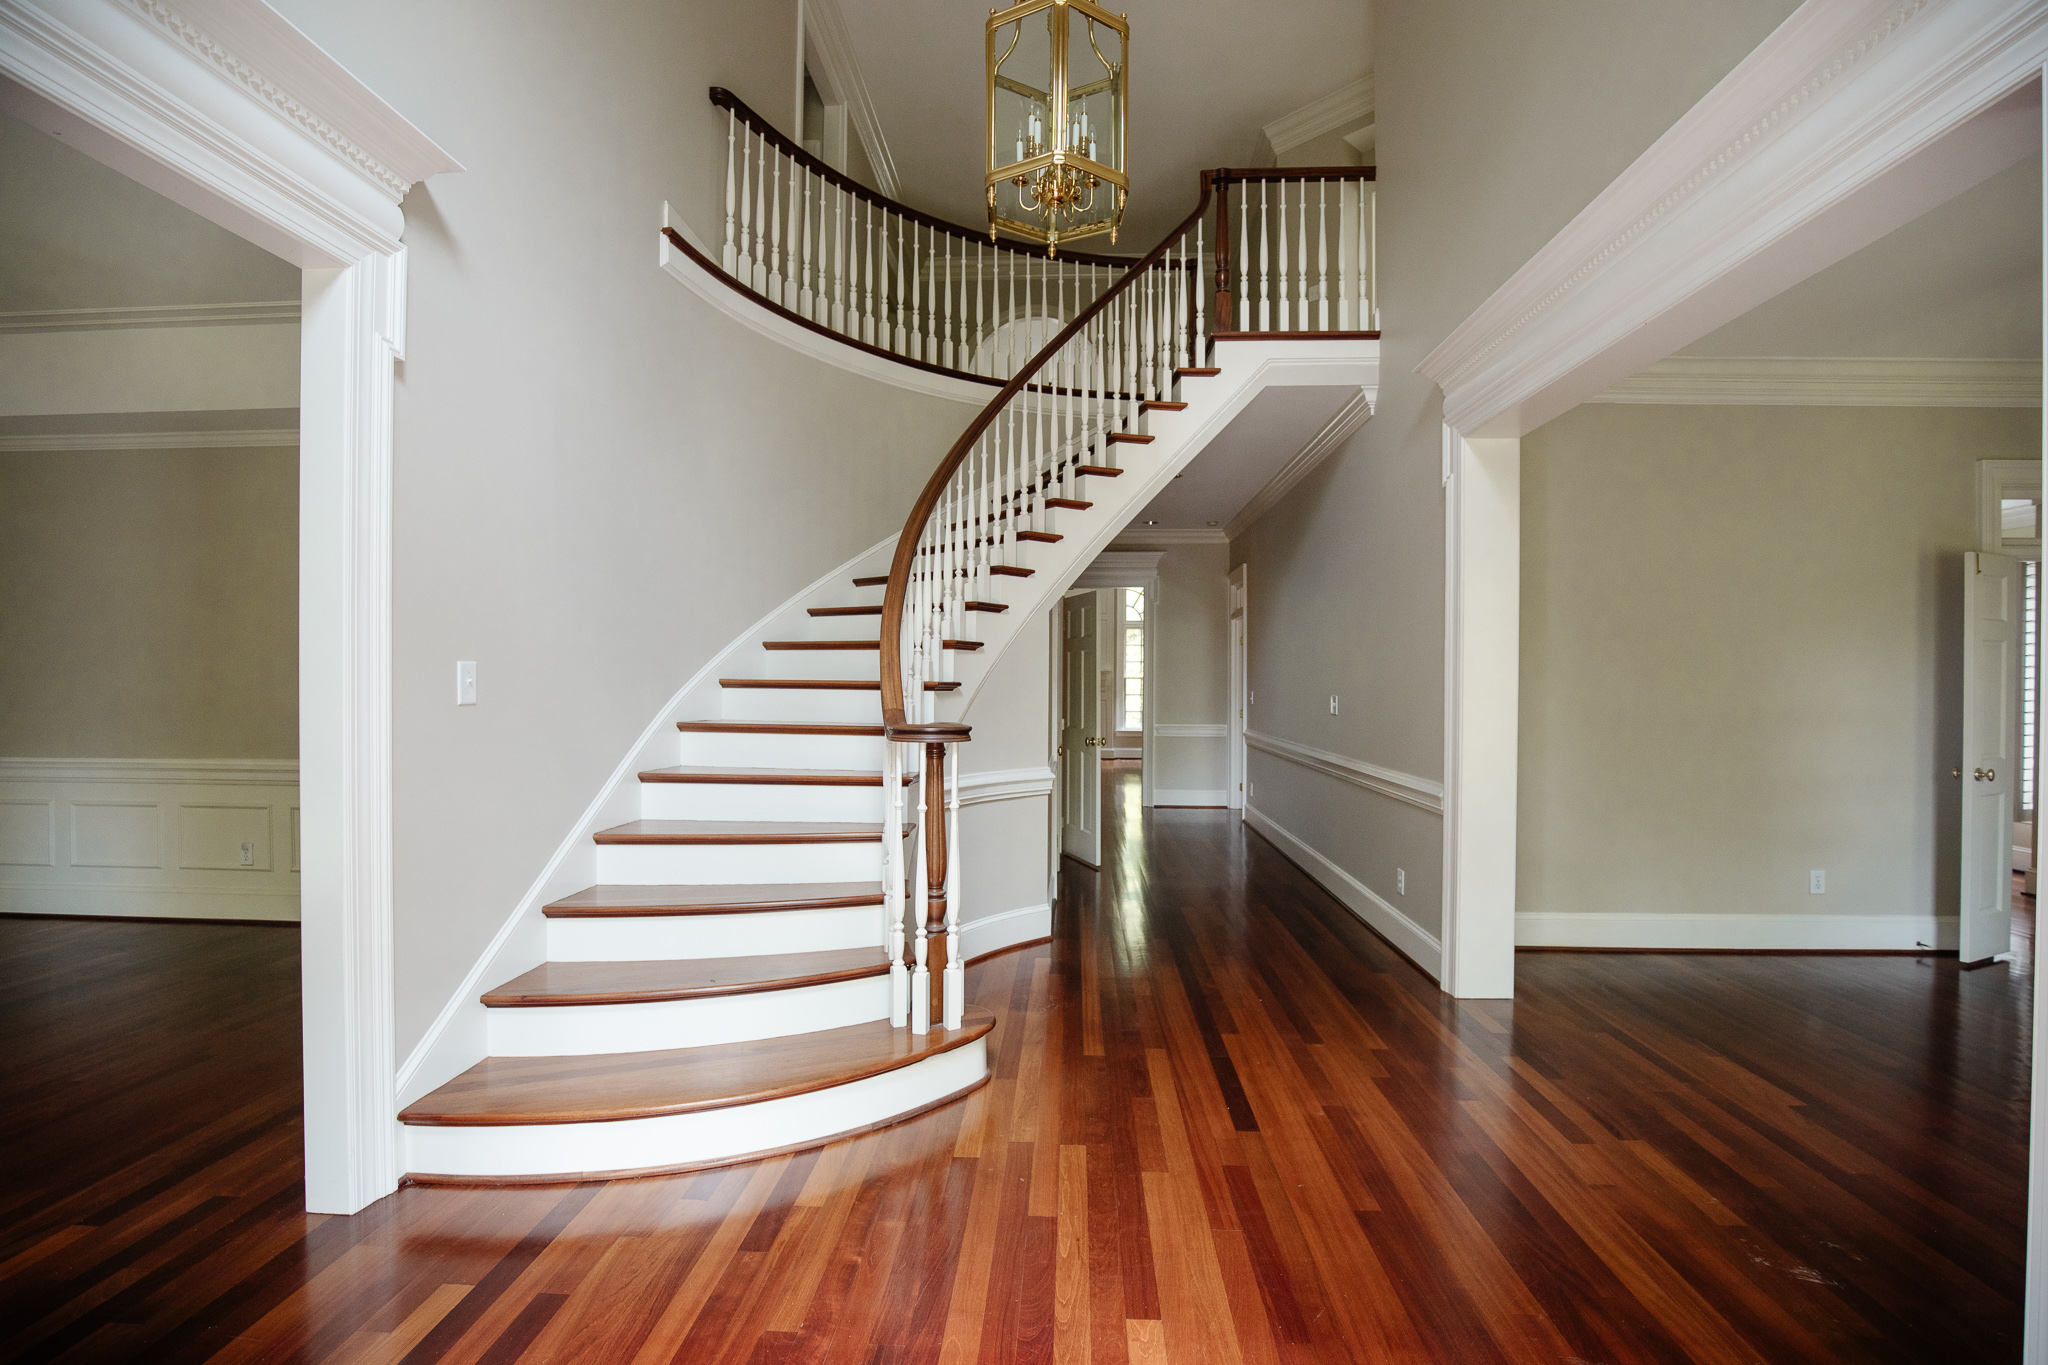
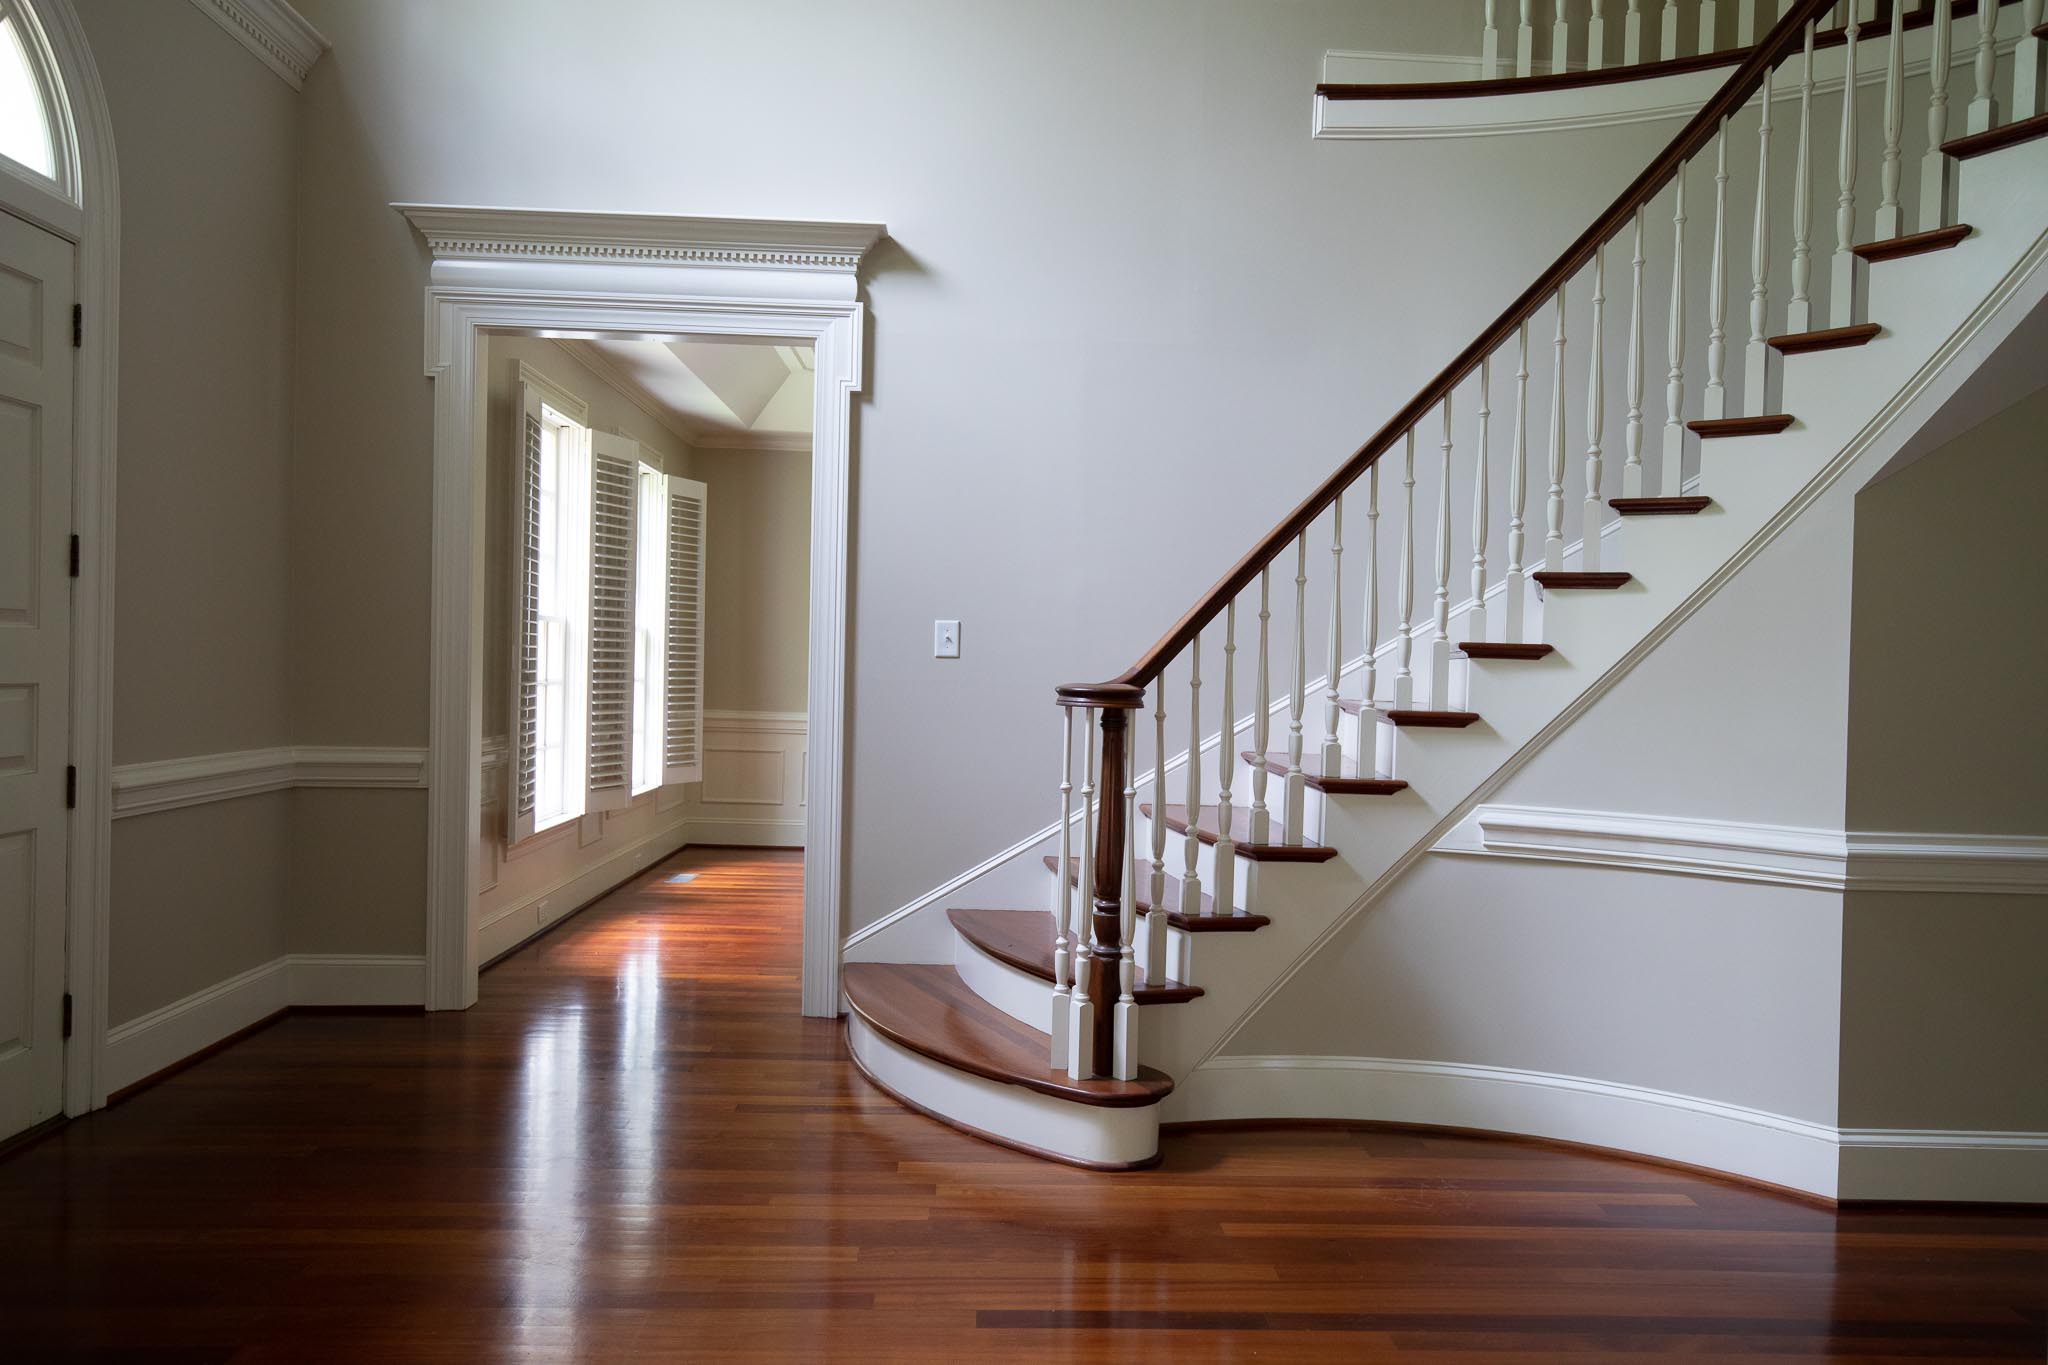
Because these stairs are the FIRST thing you see when you walk in our front door, I wanted them to feel designed and intentional and a little less busy. I wanted to walk you through ALL of the decisions I went through when designing a staircase.
1. Cut (Sawtooth) Stringer vs. Closed Stringer
This chart below is really helpful to see the differences!
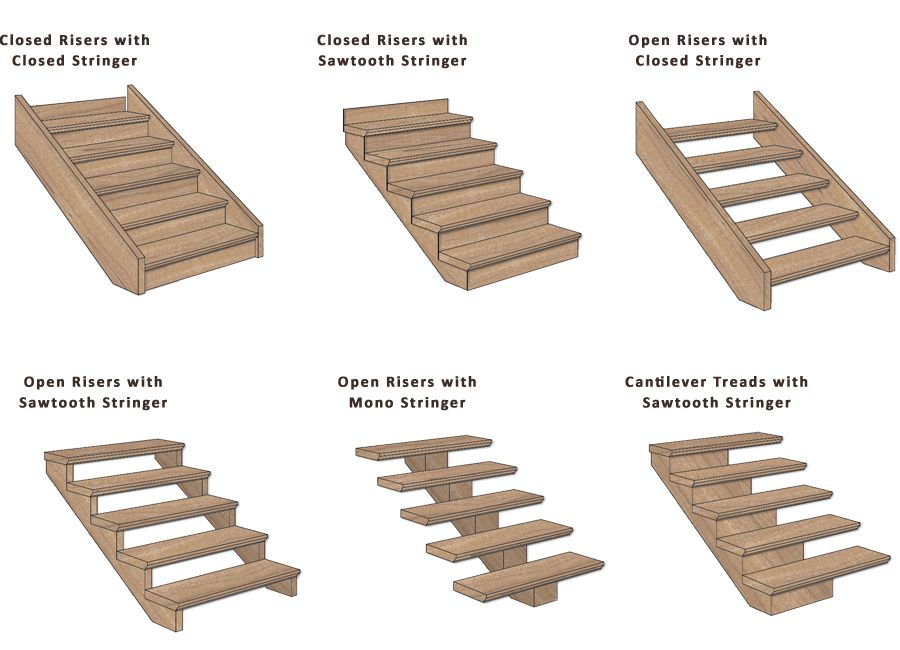
Our current stairs had a “cut” or “sawtooth” stringer. Meaning you could see every stair down the side. As I started looking at inspiration, I noticed that there was a little more visual rest when I was looking at stairs with a closed stringer. I knew that implementing a closed stringer in our staircase would go a long way in making it feel a little less busy.

So we’ll be doing a closed stringer on our stairs!
2. Newel Post
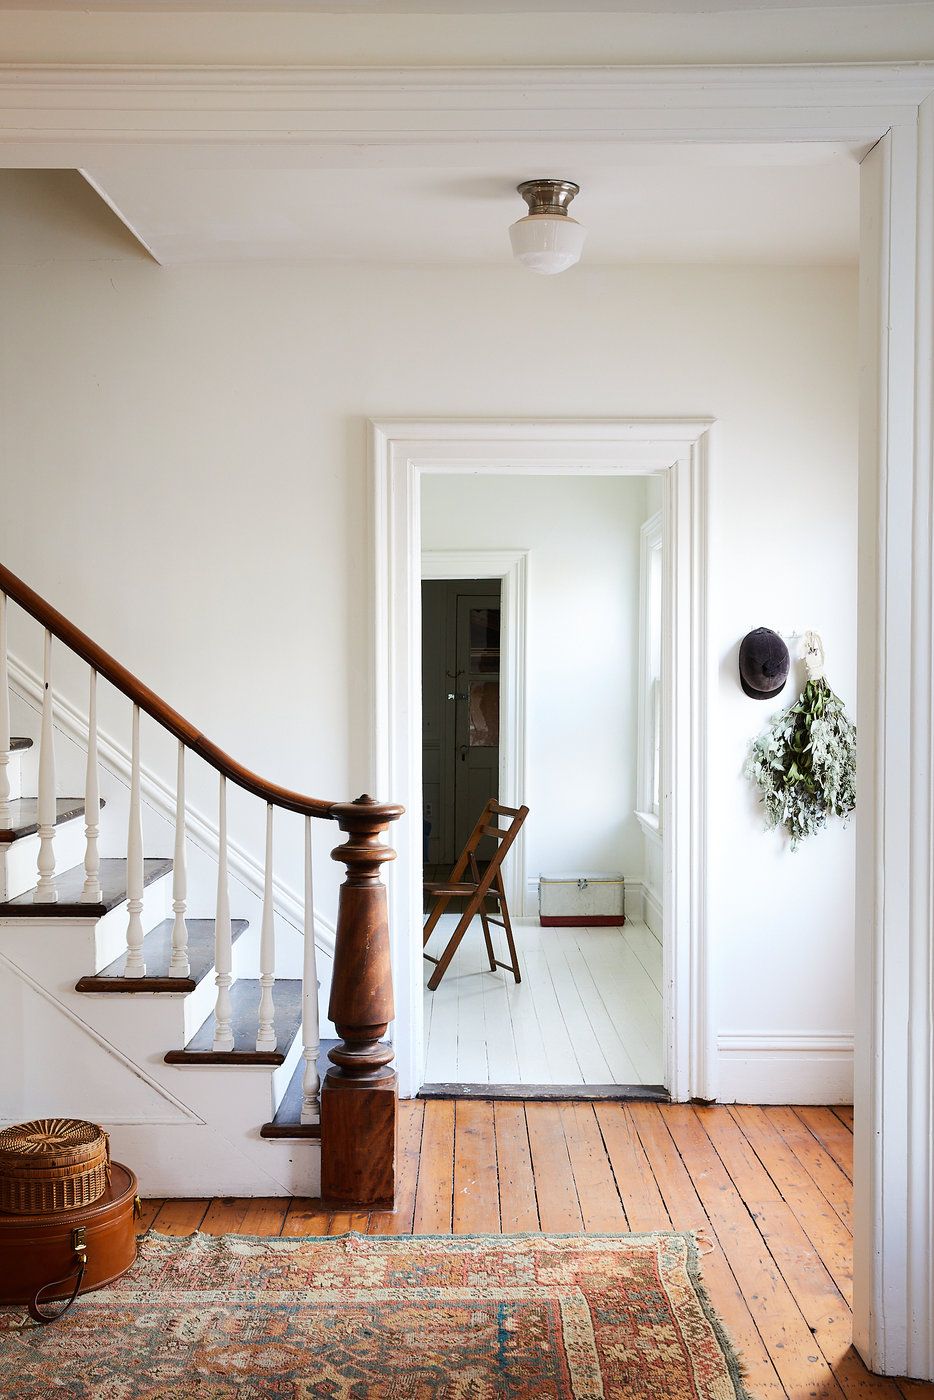
Our current staircase has a newel post surrounded by smaller balusters. (see vocab guide above! ha!) And then a secondary newel post at the top of the stairs. The secondary newel post is there for support and is sometimes smaller than the main one at the bottom of the stairs.
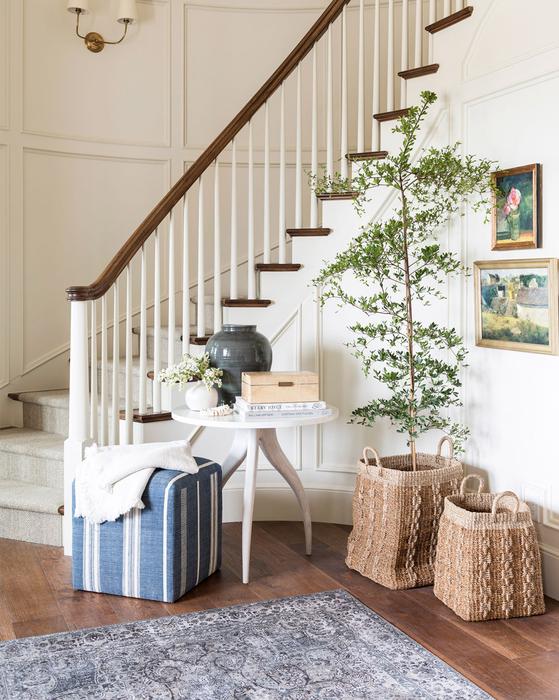
I think that a lot of the visual clutter from our current situation comes from the wrapped newel post and a second newel post at the top of the stairs. Instead, I wanted one chunky newel post at the bottom of the stairs (using the photo below as our inspiration) with the secondary newel post needed for structure at the top to look just like the other balusters in shape and color, but just a little thicker for support. I think a lot of character comes from a newel post, so we wanted ours to feel more historical and substantial.
3. Balusters + Railing
A substantial newel post allows the balusters to be a little more simple. Similar to our current home, I knew that swapping out the balusters for a simple tapered looked would be classic and beautiful. But I went through every option before landing on a white taper. There will be a supportive taper on the landing that’s about 2 inches wider than the others but I think it will all blend really beautifully. The railing capping the balusters will be stained the same color as the floors and treads and risers…which brings us to the last thing I decided.
4. Risers + Treads
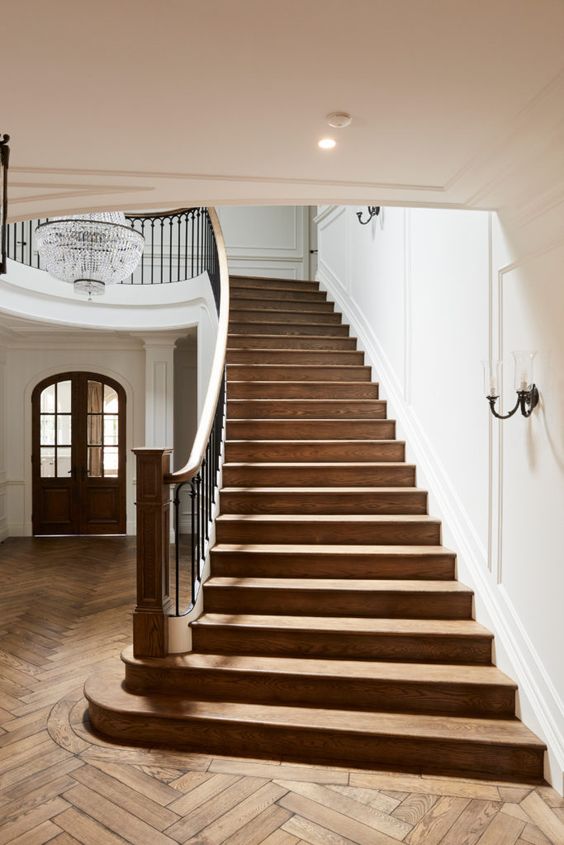
Currently we have white risers and wood treads which means when you’re looking at it, there are horizontal lines going all the way up the stairs as you see a peek at every tread. Don’t get me wrong, I love a white riser! The stairs in our current home have white risers, but when I sat down to design this staircase and I thought about the future wall molding we want to add, I realized–I don’t need nor want the riser to contrast and draw attention. Instead, a nice solid warm block of wood leading up the stairs appealed to me.
So we are going to be doing white oak risers and tread! I think it will be stunning sandwiched between a closed stringer and clean white spindles.
This is the Inspo board and notes I ended up sending our contractor and stair engineer:
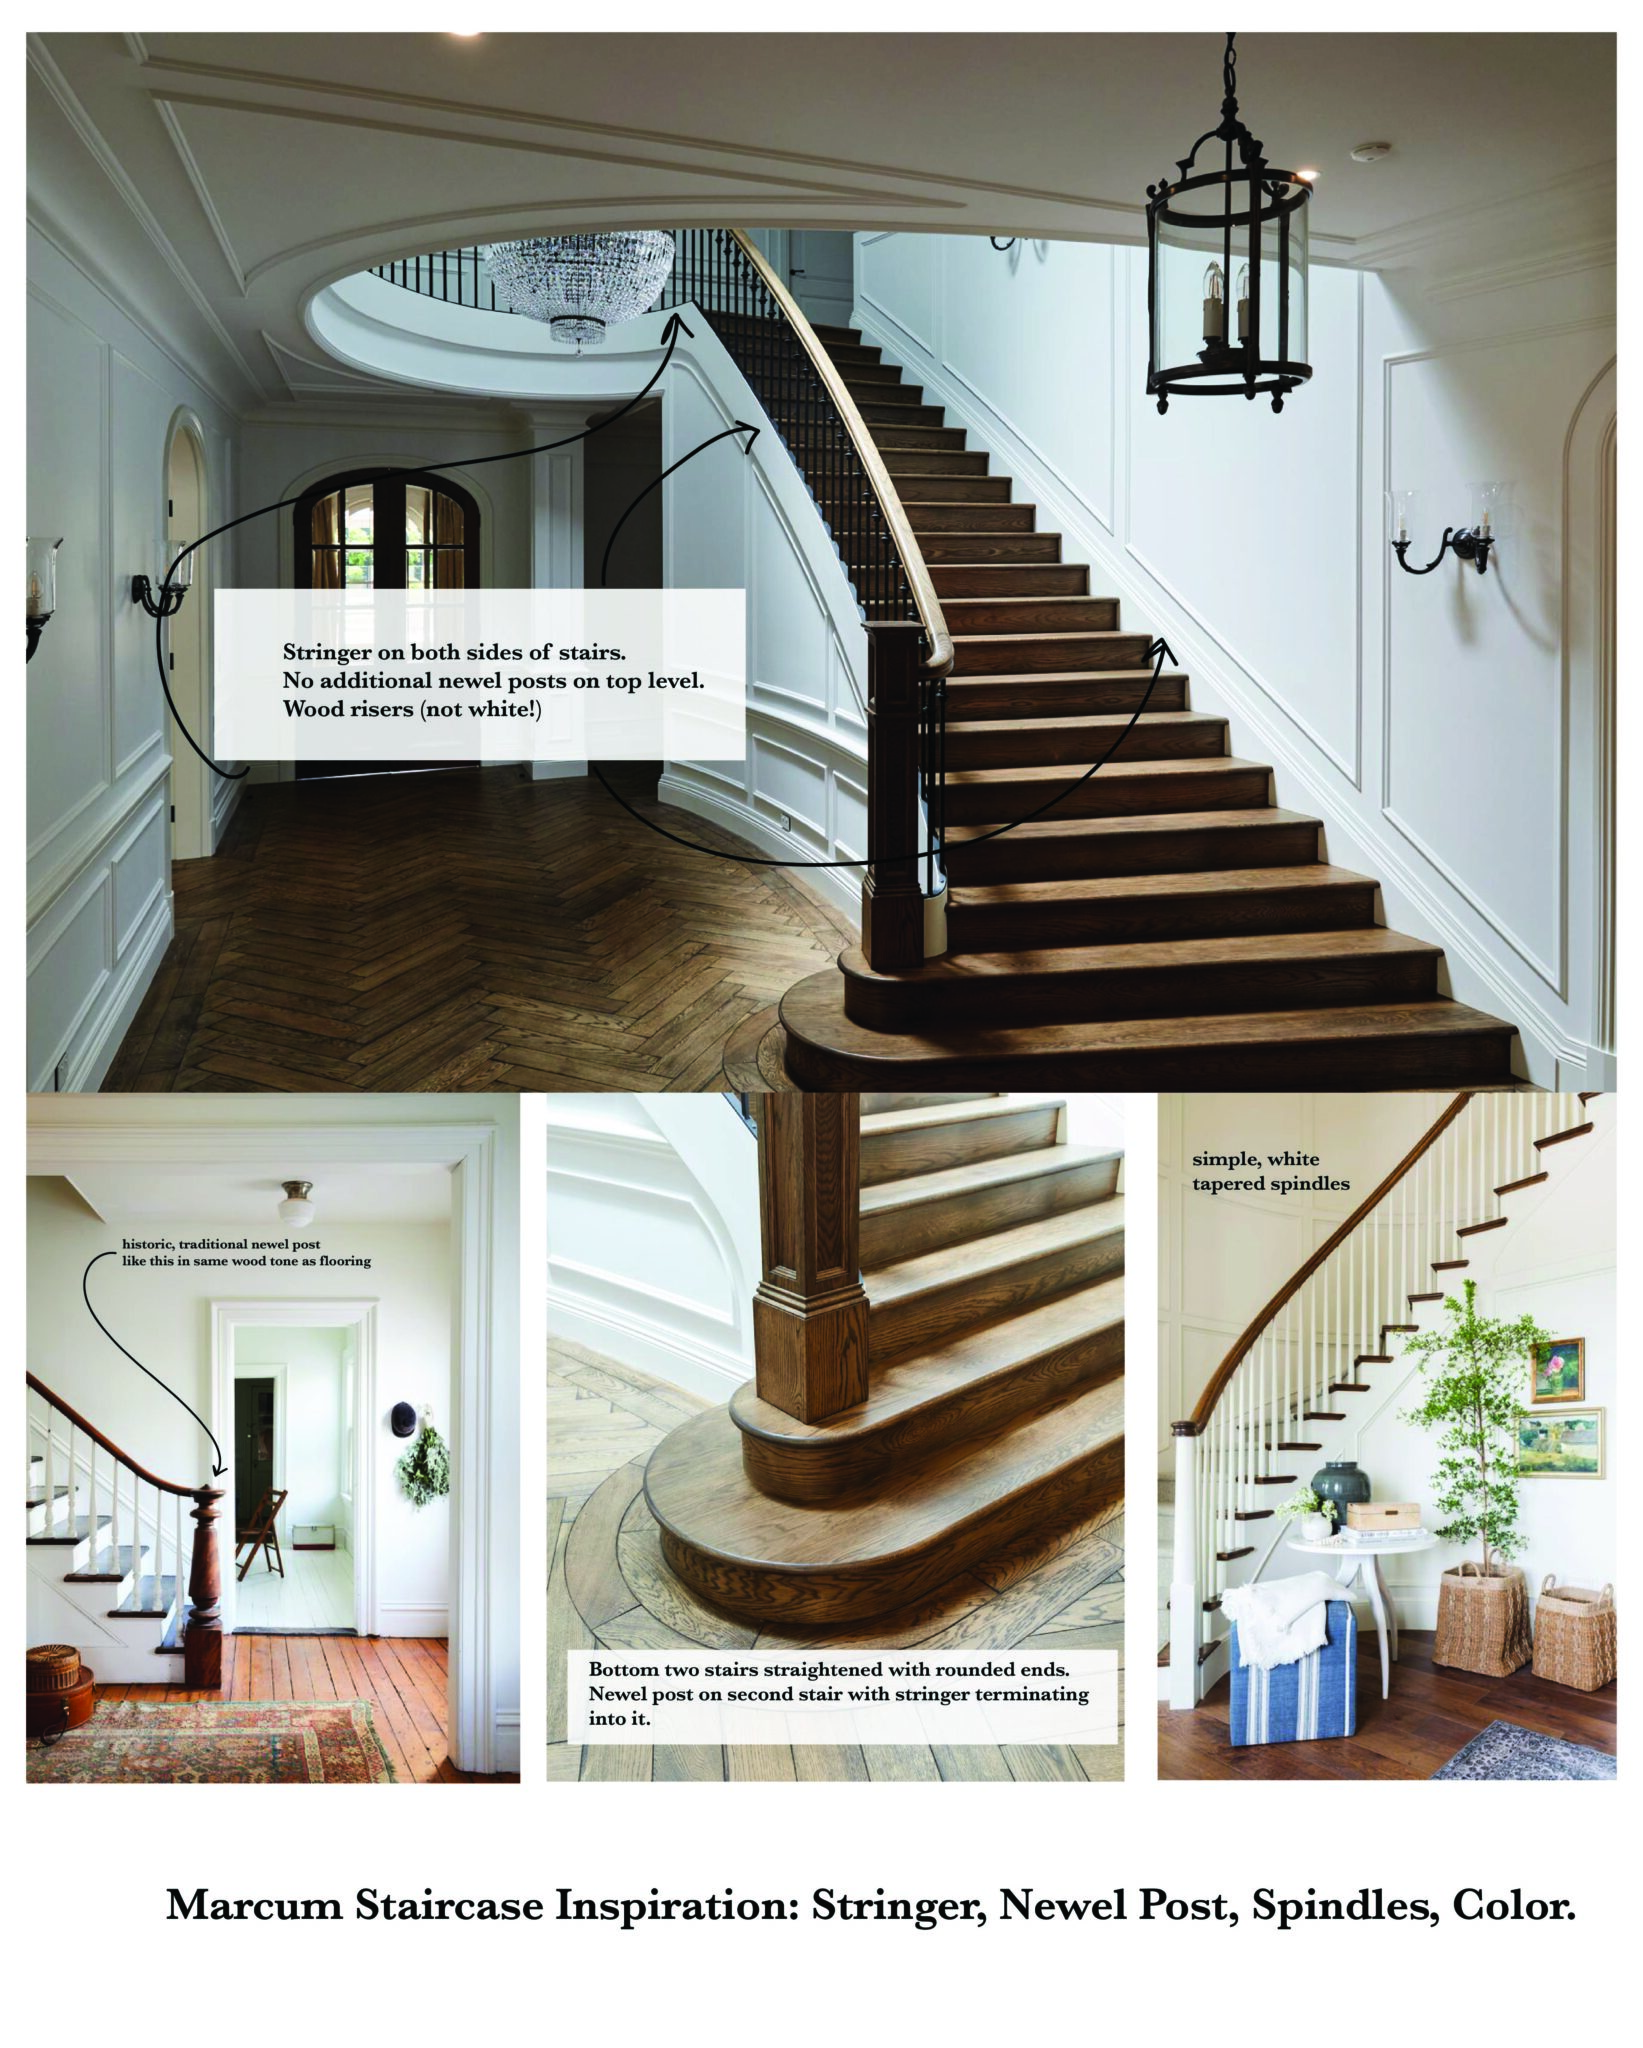
The only thing we WON’T be able to do is have the newel post on the second stair, instead of the first. That is against code, so we’ll have to have it on the first stair, which is fine! Other than that–we’re so so so excited for these somewhat simple but IMPACTFUL changes. I can’t wait to see how it turns out!


Absolutely IMPECCABLE post! I cannot thank you enough! I have a very similar staircase that one day I want to redesign and this post was SO incredibly helpful!!! You are extremely talented!! Thank you ENDLESSLY for this post which has really helped me!! I cannot WAIT to see the end result!
Love what you have decided to do! Re the Newell post terminating on the first stair – I am actually glad this is code for your state 😊 Thinking in terms of accessibility for those of us who need to hold on to the rail (especially when descending) there is more chance of not being able to safely get to the main floor if there was a gap between the end of the rail (as there is when the Newell is on the second step). My mobility challenged friends and I would be able to navigate much more securely when the Newell is on the first floor. 🙏🏾
Gorgeous! Love all these choices. Getting so excited to see the new house. In Australia, majority of homes are single story but I feel like I still needed to know the staircase anatomy 😂
I absolutely love your choices, especially the wood risers, treads and newel post! I was drooling over the herringbone floors in your inspiration board photo.
I cannot WAIT to see how it all comes together! It’s going to be gorgeous, I’m sure!
One quick question. I’m curious as to what the purpose of having the newel post on the second stair would have been? I get the code part and all, but I’m curious about what made that your preference. Just aesthetics? Or was there more to it? (Like, we’d love to put a small tree on the first step for Christmas! I don’t know, that’s why I’m asking!) 😂
I’ve never noticed a staircase with the bottom newel post on anything but the first step. Now, I’ll keep an eye out!
I wanted to see more of the bottom curved stair is all. Hahaha
See? I knew you had to have some reason! Thank you!