
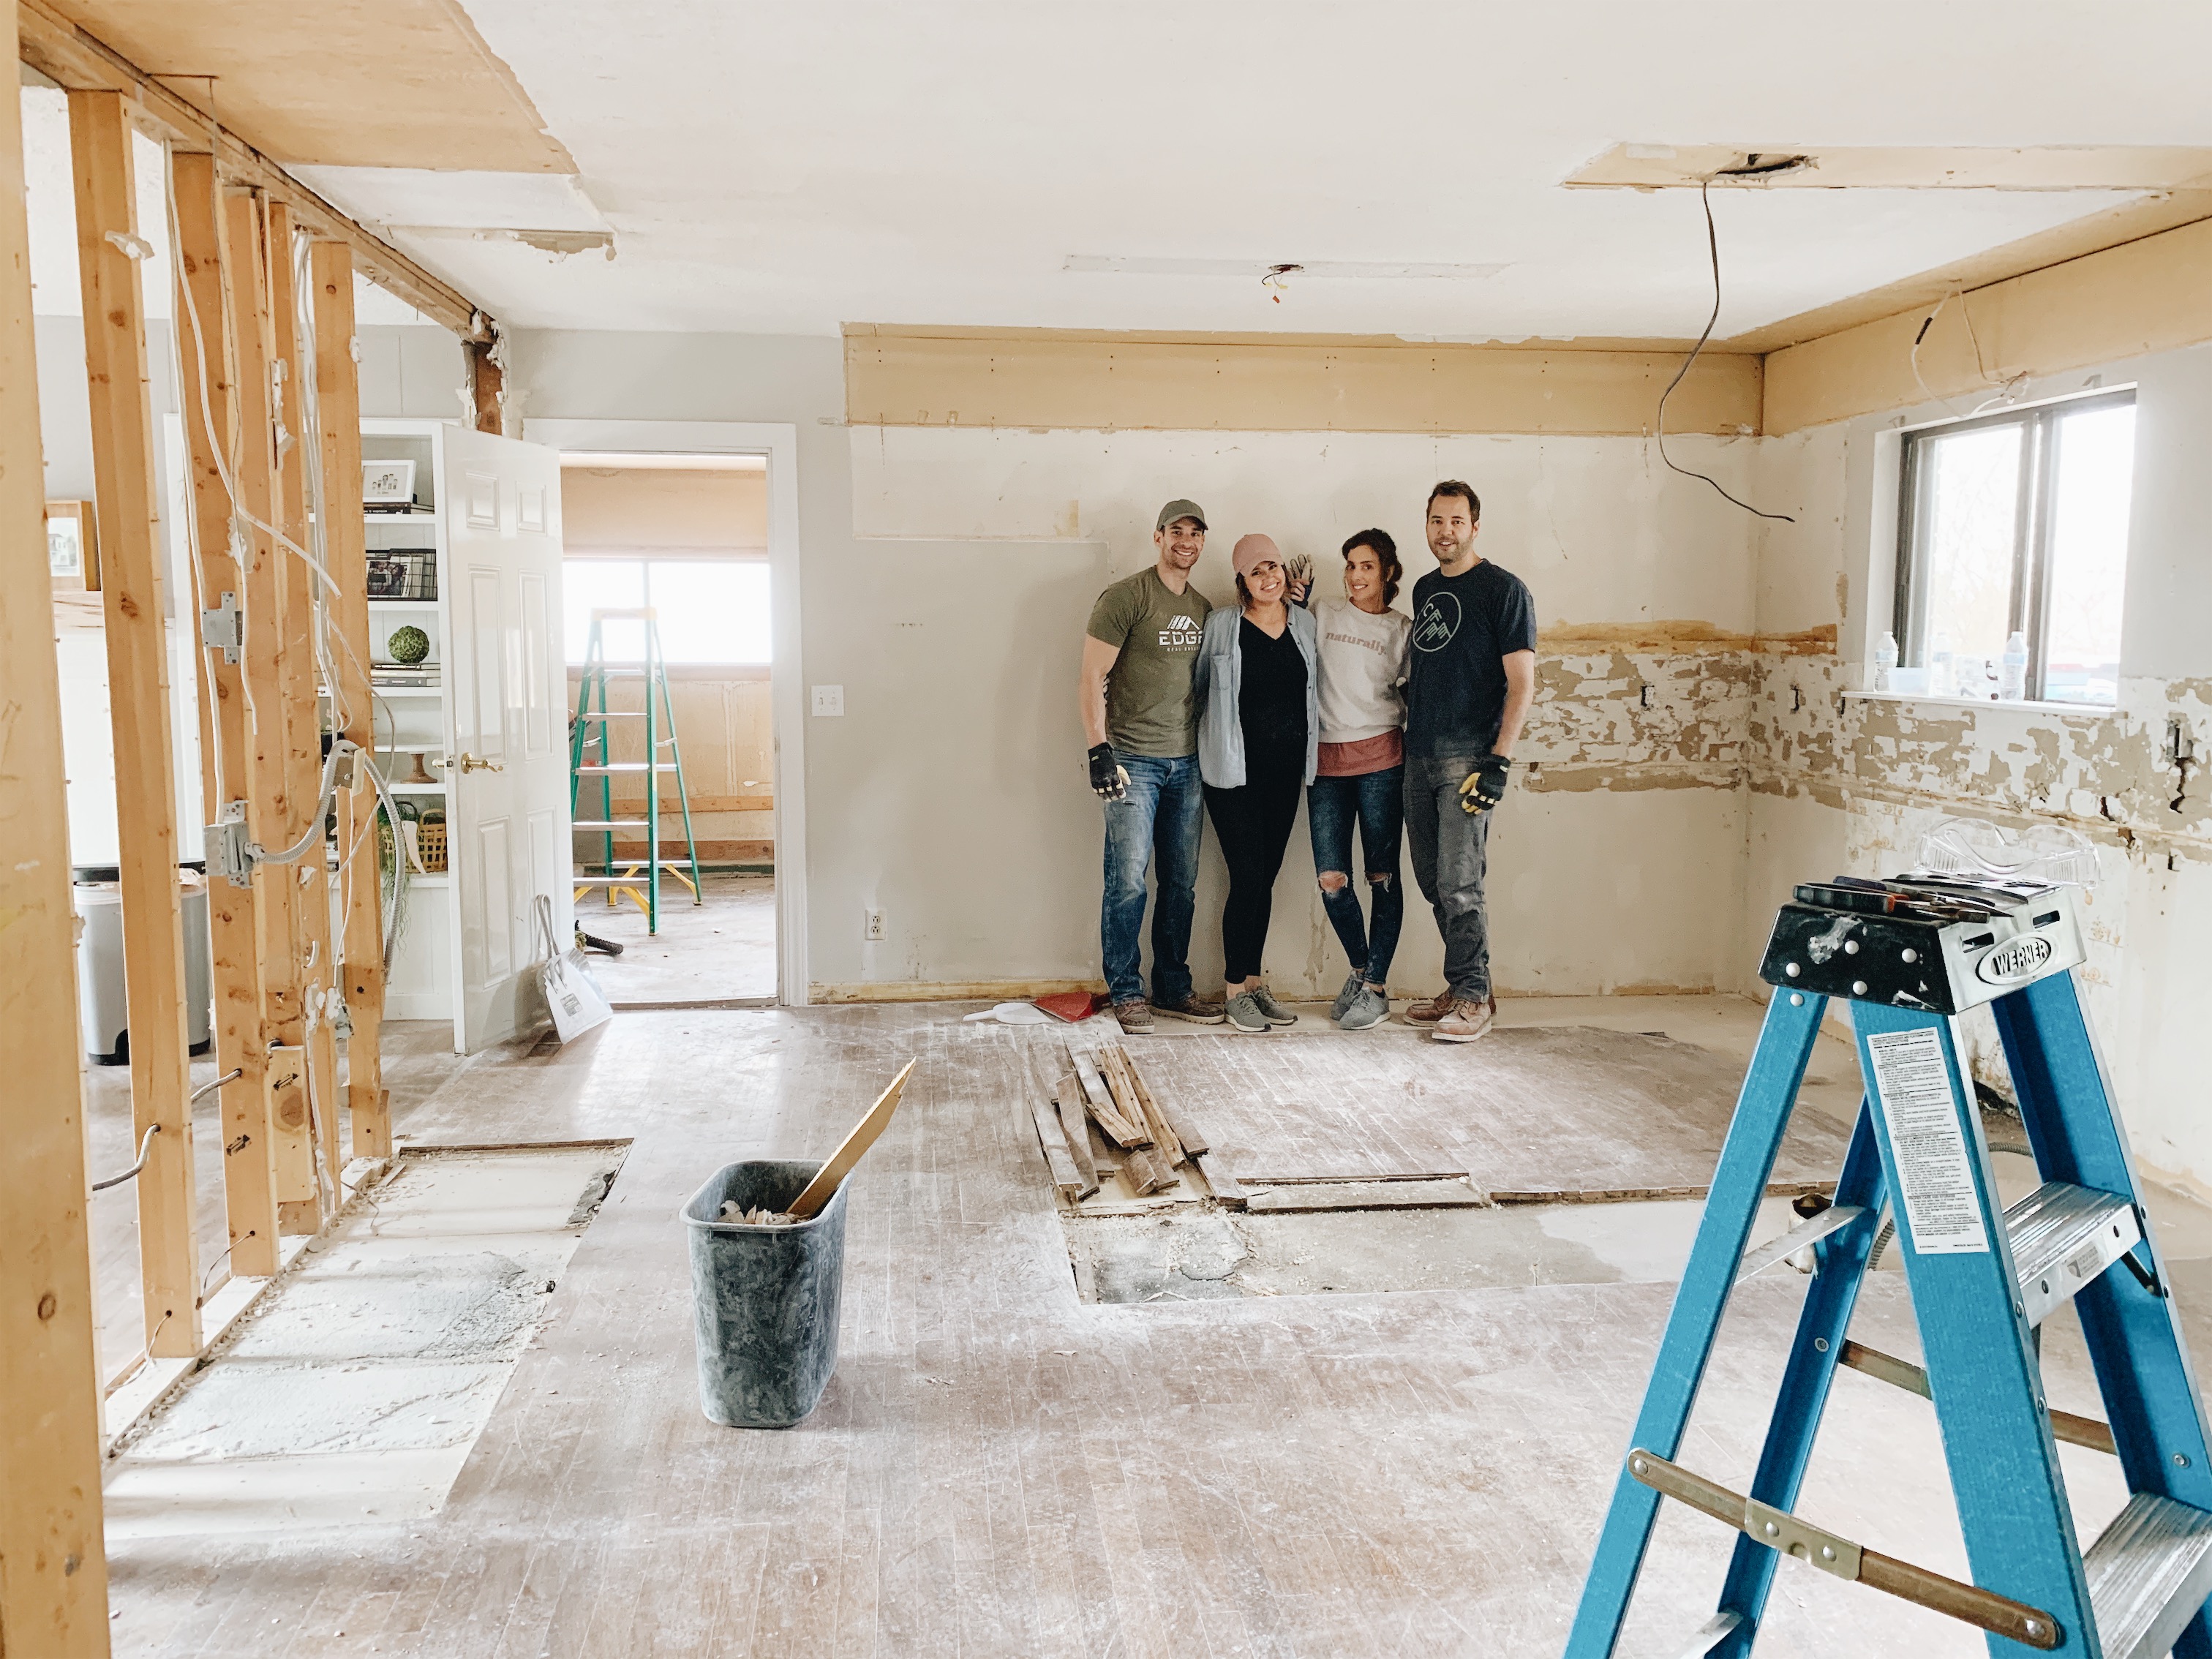
Saturday, we got the Fullmer kitchen project started and demoed it nearly completely. We are introducing a completely new layout, opening up a wall, moving a doorway, resizing a window–there’s a lot that’s going to happen over the next month and Saturday was a great kickstart. This week’s Vlog sums it up (I’m actually exhausted watching this back) :

This photo was taken at the end of the day.
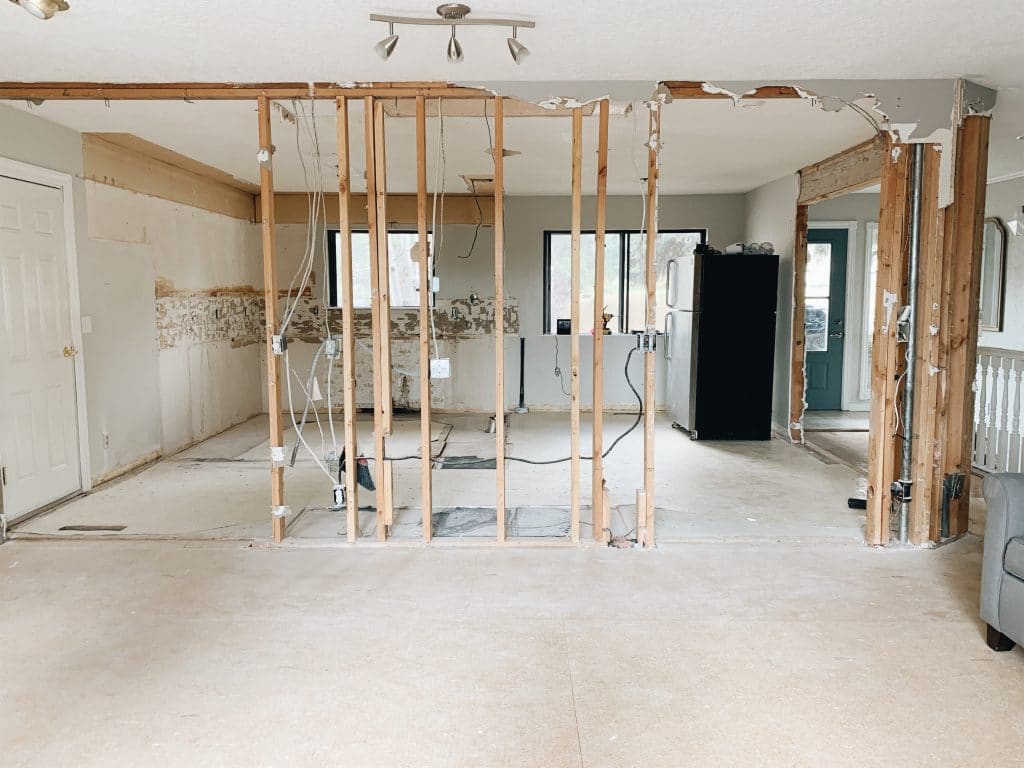
But at the beginning, the same view looked like this. As you saw in the video, EVERYTHING in the kitchen (besides the tile backsplash and plywood countertops) were given or sold to someone else for re-use.:

Not a bad kitchen to start with, but this is actually the result of their phase 1 kitchen efforts! They painted their cabinets (we actually swapped out the hardware for them last year), tiled the backsplash with inexpensive subway tile and made countertops out of plywood! They saved for a full overhaul and now we’re helping them execute it! Here was the OG kitchen when they moved in. This is Caleb’s childhood home so this is the kitchen he grew up in!:

Probably the number one question we had while sharing some real time progress on Instagram over the weekend was “What is a soffit for?!” A soffit (the boxed in area you see above the cabinets, sink and peninsula–basically everywhere you look–can be to disguise ductwork, pipes or wiring but they were also commonly used back in the day to just fill the space between upper cabinetry and the ceiling. I think to cut down on dusting? But these we’re empty besides the lights that were in them–that we are just going to put in the ceiling.
And here is the old and new layout for the space:
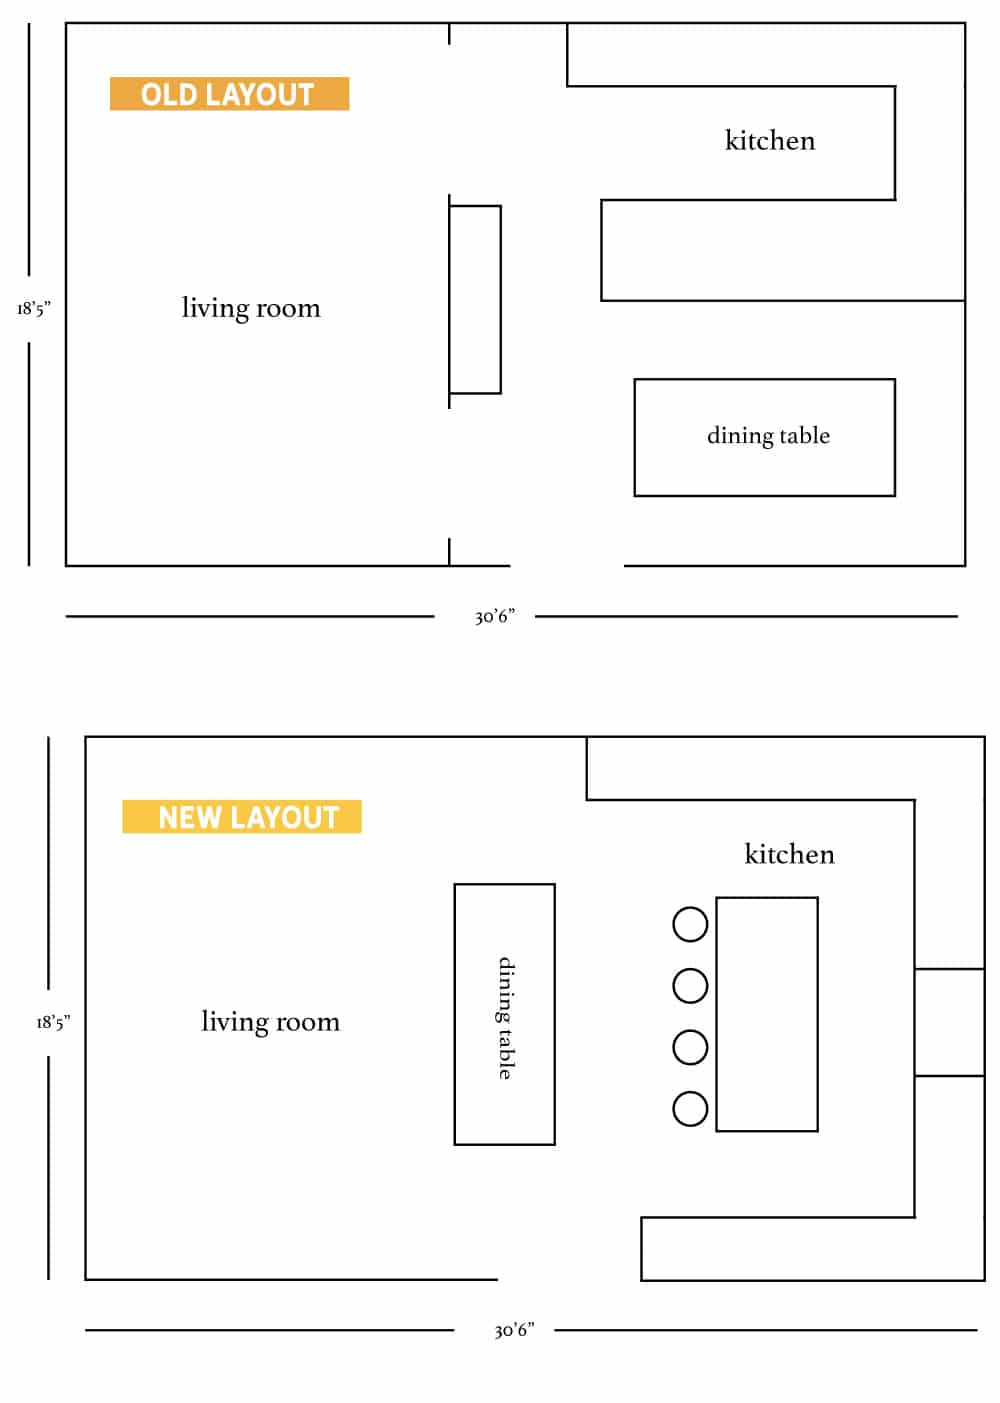
We are tearing the wall out completely between the former kitchen/dining and living room (we had three different professionals come and look at the structure to confirm this wasn’t a load bearing wall–always double check!) which will allow us to expand the kitchen cabinets to fill the entire kitchen side and the dining table will float between the two spaces now. We also had someone come in and identify the pipe in the studs on the right–it was for an old washer machine so we can cut and cap it!.
Here’s looking into the new kitchen–where the fridge is in the photo above will actually be where the new counter-depth fridge will go, which used to be where the dining room table was! We’re excited to give them a lot more space and maximize how everything flows. The right wall will close up quite a bit more (we had to remove an old pocket door frame so we could could frame the new wall out properly) so the whole corner can be opened up.
Here’s an overhead shot we mocked up in the Ikea kitchen planner. A couple things are missing. Okay, a lot of things are missing. But you don’t see the dishwasher that will be in the island (so it will expand a little more to the left) or any countertops, which will also expand the footprint of the island.

The range will now be in the center of the back wall (in between two identical windows) with countertops spanning either side. On the left side of the kitchen, we’re stocking them with more storage. A row of uppers (they appear with glass inserts here, but the Fullmers requested solid–so we’re doing that instead!) and base cabinets with a built in microwave integrated. In the corner, we’re adding two open shelves connecting the cabinetry to the window wall that will match the wood of the island and pantry wall!


As a reminder, we’ll be using Semihandmade cabinet fronts–our own line with them in Cove (a really beautiful light wood) for the pantry wall and island and their supermatte white doors for the other cabinetry.
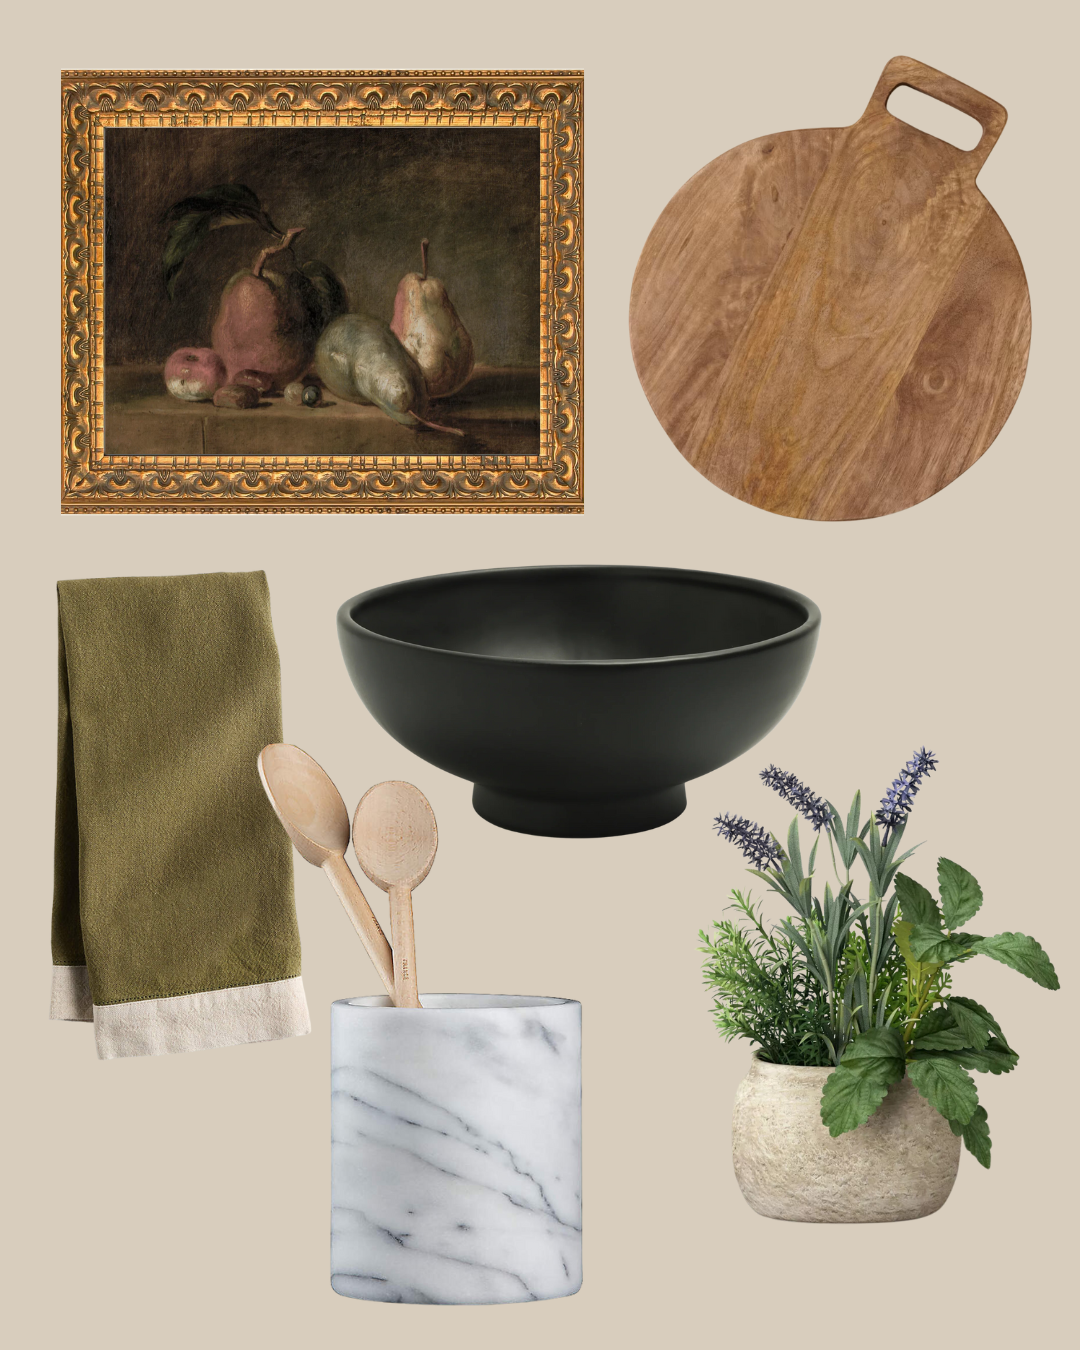
Here’s a reminder of the mood board:
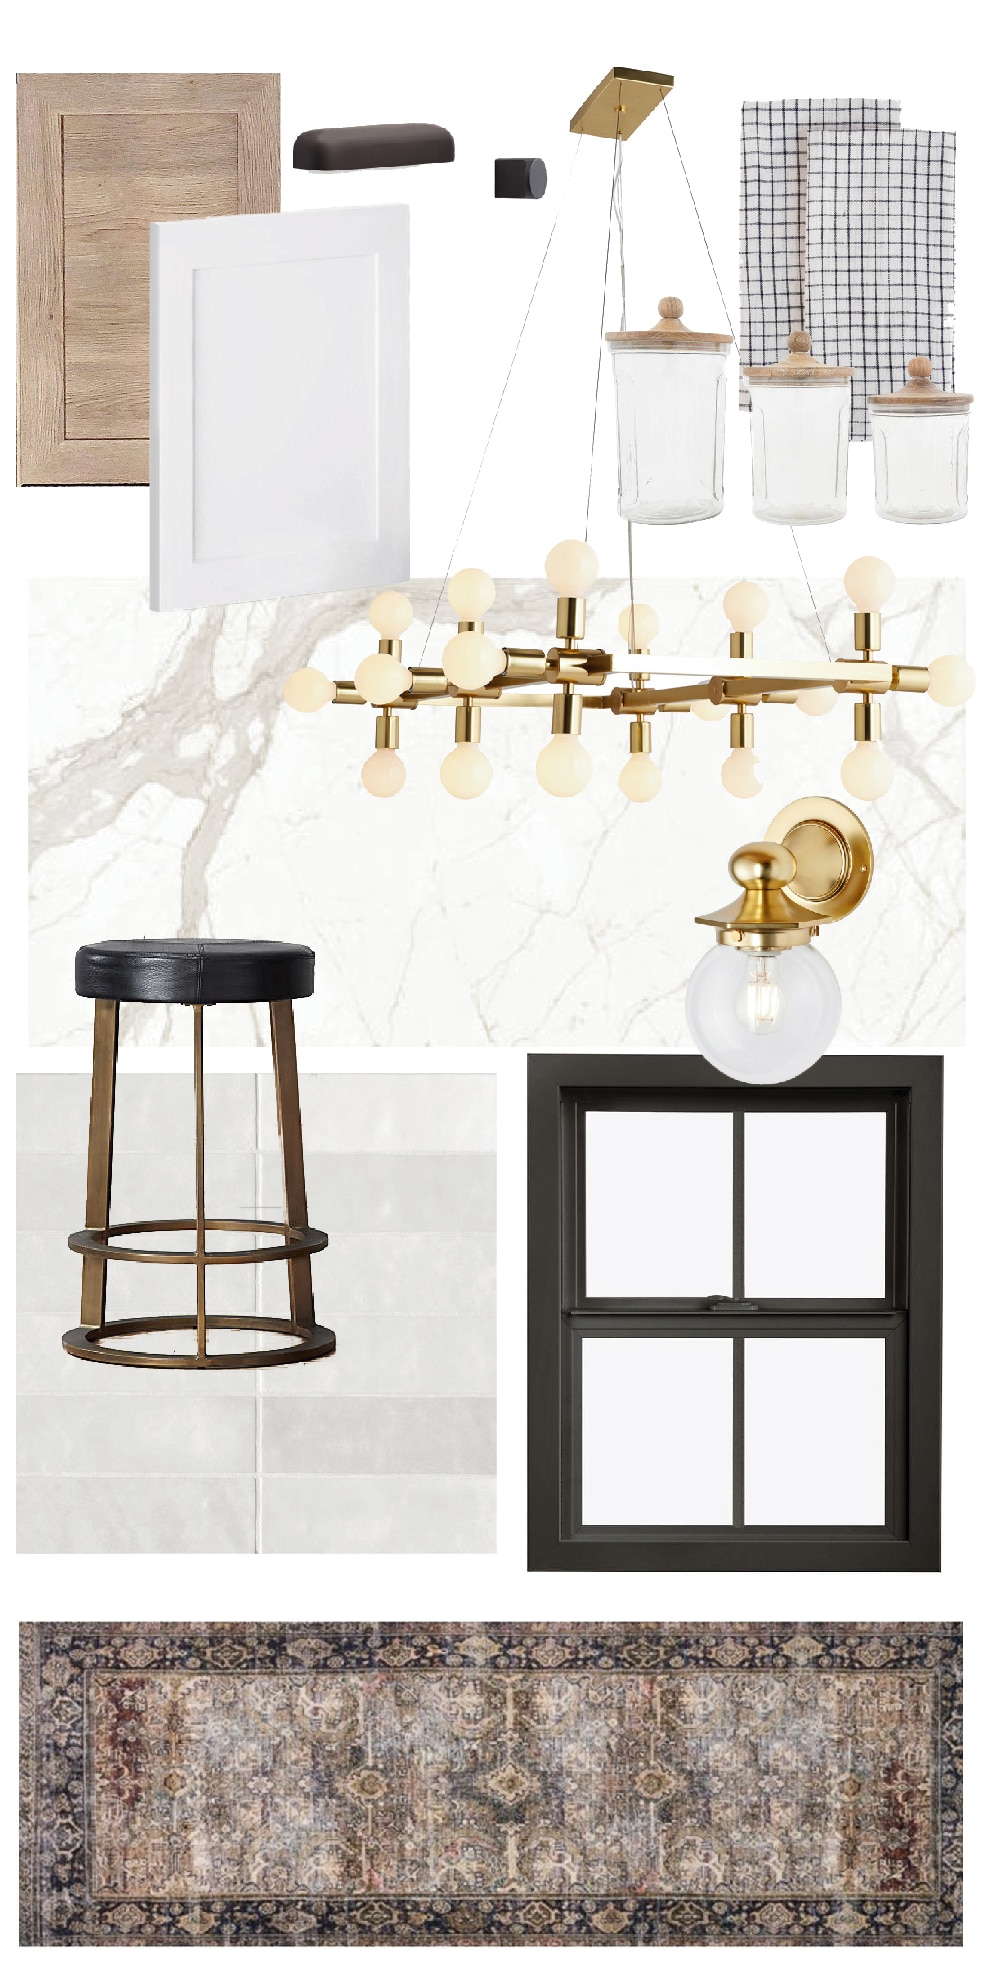
1. CLJxSemihandmade Cove Cabinetry for Island and Pantry wall
2. Semihandmade supermatte white cabinetry for the rest of the cabinets
3. Bin pulls for drawers and knobs for doors from Rejuvenation
4. Dish towels and wood-topped glass canisters
5. Behind the Range Slab Backsplash
6. Cloe Tile in White from Bedrosians (this is the same tile we were planning on using in the cabin kitchen and it’s too gorgeous not to.
10. Kitchen Runner
With a clean slate, we’re ready to roll! We have a plumber, electrician and contractor coming in this week to move some things around and frame in a new window and we’re taking it from there. Can’t wait to take you along!


Hi Julie,
This is Paula Sonderegger and this is the house that my parents built in 1965-66 and I grew up in! It looks way different from when I grew up. The washer and dryer were behind bi-fold doors in the kitchen and there was a solid wall separating the kitchen and living room. The living room only had a giant window (no door and deck) and we loved watching the sunset every night. After I was married, my parents had the cabinets built (that you removed) and moved the laundry downstairs. They had orange formica, kitchen carpet, and wallpaper! It was very busy but they loved it! I remember scrubbing that “old linoleum” on my hands and knees and I also remember my mother scrubbing it on her hands and knees, wearing a house dress! I loved living there! Many great memories.
It is always so exciting to watch you. I can’t wait to see what you are doing with this kitchen. ????
Hi Julia! I love the renovations that you are doing for your friends. They are usually my favorites that you share! I just had a thought – if you are still looking for content ideas I would love to see more outdoor space renovations. Even if it is just styling and furniture. I live in Reno which has a similar climate to you and it’s super windy at times. I’m struggling finding furniture that looks great but is heavy enough so I’m not constantly fetching the sofa and coffee table out of our bushes. Not sure if Rexburg has the same issues.
Anyway looking forward to following this kitchen renovation!
We did a fun one last year! Check it out here.
Love everything you do, but having grown up in a house with a similar sink/dw arrangement, I would strongly suggest tweaking the dw placement. It was so annoying!
We just don’t have the option and this is actually a huge upgrade for them. They used to walk across the kitchen to load the dishwasher! Haha
Do you know what material/color countertop you will be using? Could you tell me the color/brand of the countertop shown w/ Cove on Semihandmade’s website. The picture is also shown on your Instagram page when you launched the line. It’s shown w/ white subway tile and shelving. Thanks!
We’re countertop shopping this week!
Can’t wait to see what you choose. Any comment on what the color/brand is on the countertop you used w/ Cove in the picture on Semihandmade’s website (it was a lighter color). Thanks