This post is part of a paid partnership with Lowe’s.
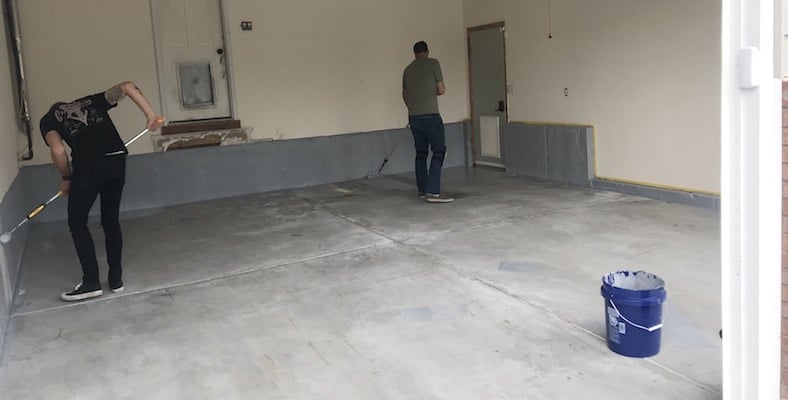
Our garage has been a bit neglected over the past few years. It has served as a catch-all for everything project related, with random clean times here and there where we were actually able to park our cars inside it. But now that we’ve finished almost all of our home projects, we’re turning our attention to the garage.
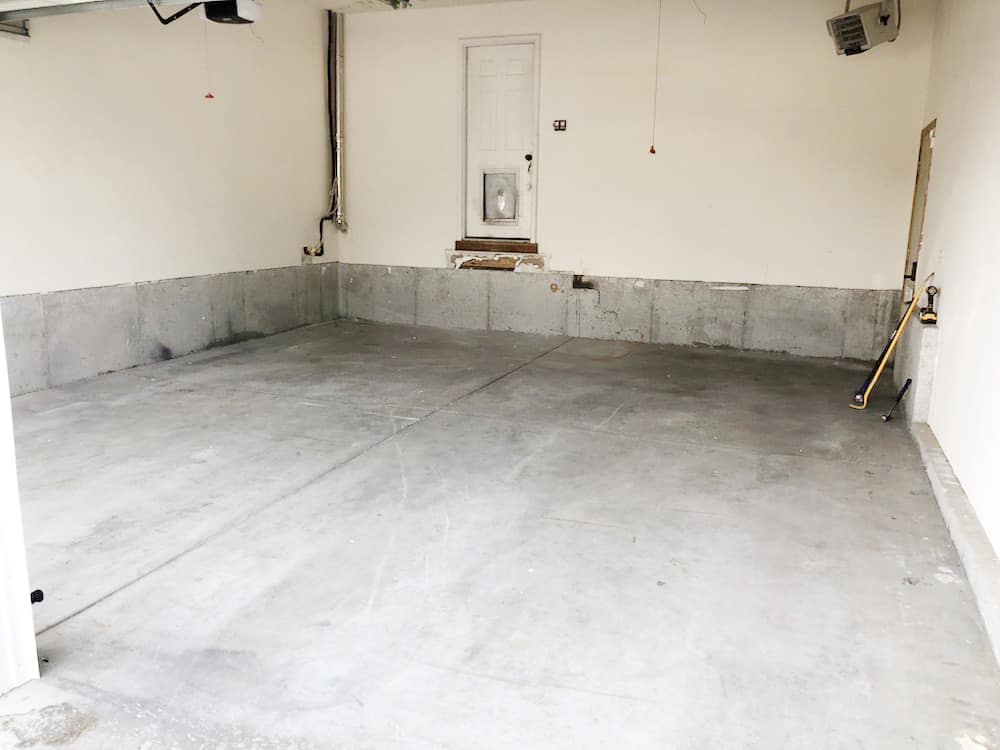
The stairs leading from the house were in pretty rough shape, so we ripped those out before starting this project. Since they needed replacing anyway, it was good to get them out of the way so we could epoxy the entire surface. We’ll outline the steps in this post, as well as provide a full list of materials used at the bottom. If you’d like, you can also watch the full process in this video:
1. Scrape & wash

Using a floor scraper, scrape away all of the paint, glue, tape or other stuck on things that you can. You want the floor to be as clean as possible to ensure good adhesion of the epoxy, so take your time on this and do it right. Once you’ve scraped up everything, use a pressure washer (or just a hose if you don’t have a pressure washer) to wash everything out of the garage.
2. Degrease & wash

While the floor is wet, you can see areas where any oils or grease repel the water. Spray some heavy duty degreaser on those spots and scrub with a stiff bristle floor scrubber. Rinse again with the pressure washer.
3. Etch & wash

If you buy an epoxy floor kit, most of them come with the floor etching mix. Follow the instructions to create the solution and sprinkle on the garage floor using a plastic garden watering can (not metal!), working in small sections.

NOTE: though the acid mix is generally mild, there can still be fumes as the etch reacts with the concrete. Maintain proper ventilation and, if needed, use eye protection and a proper mask.
Scrub the etch around the floor with the stiff, nylon bristle floor scrubber. You’ll see the liquid start to appear muddy, which means it is breaking up the finish of the concrete, making it more porous. That’s exactly what you want.

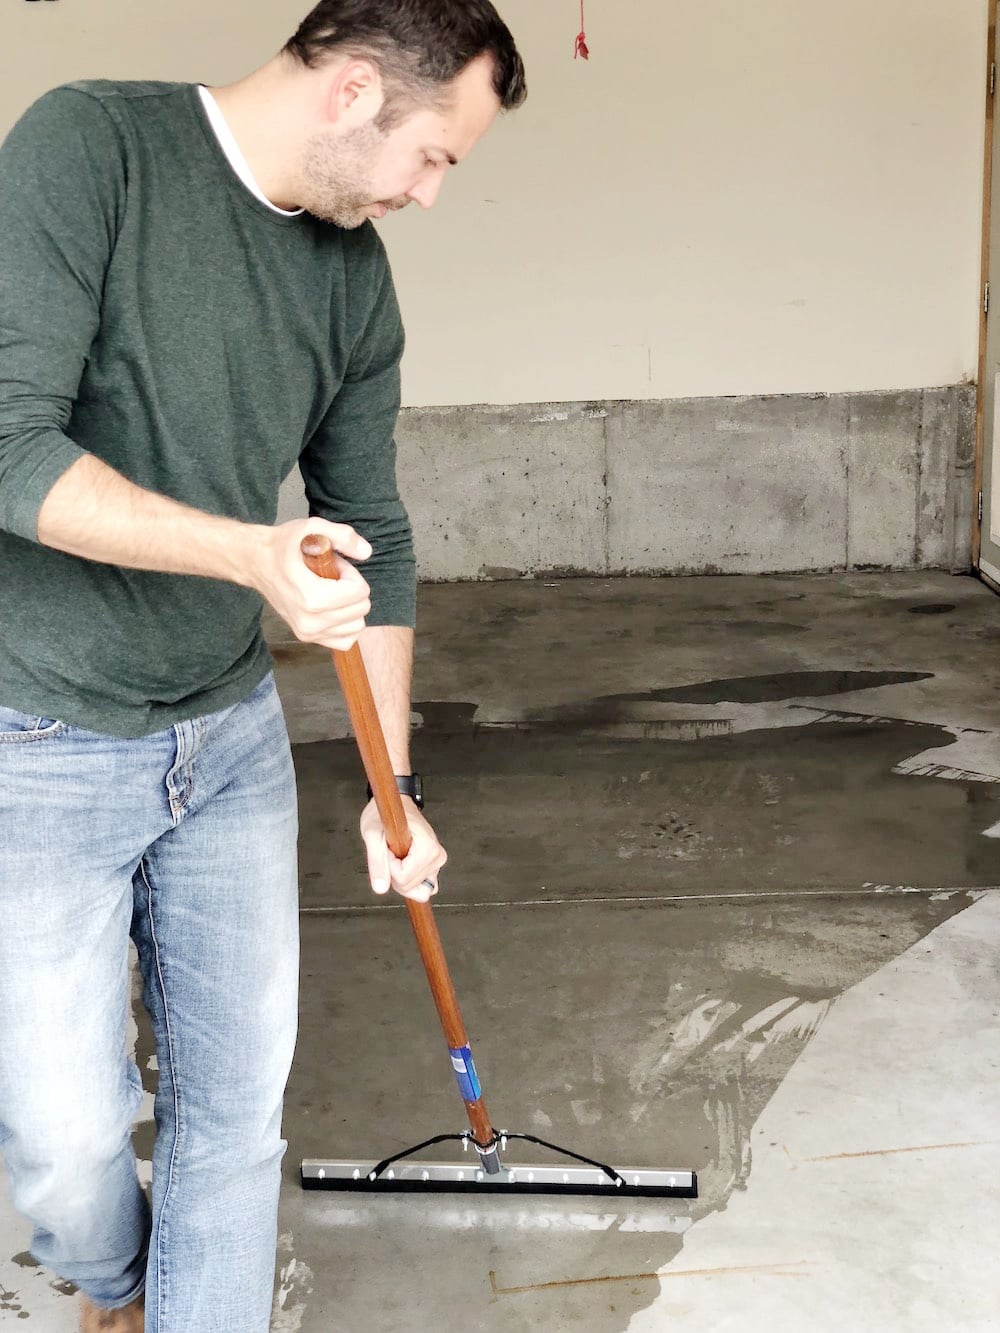
Once the section has been scrubbed well, rinse it off with the pressure washer and move onto the next section.

Once completed, use a floor squeegee to move all of the pooling water out of the garage, and allow to dry completely. This may take several hours, depending on weather and other factors.
4. Fill gaps

Using an expandable, self-leveling caulk, fill the gaps between concrete slabs. It doesn’t need to be flush with the face of the concrete, you’re just wanting to close up areas of expansion and minimize imperfections. If your concrete has large cracks and gaps, you may consider a self-leveling concrete mix to pour over the surface. Whatever you do, allow it to cure at least over night.
5. Tape off walls & mix the epoxy

Once the epoxy is mixed, you have 2 hours to use it. And 30 minutes of those two hours you have to let the epoxy rest before use, so you really only have 90 minutes of working time. Taping off the edges allows you to paint quicker and not waste time.

The kit comes with a Part A can and a Part B can (or two cans of each when using a 2.5 car garage kit). Mix the two parts together and allow to sit for the required amount of time. We had this kit mixed in the available Castle Rock Gloss color.
6. Apply the epoxy

Once the epoxy has set, immediately get to work! Start by brushing along the edges and in the corners, as you will not be able to reach these areas once the floor is rolled (you have to stay off the floors for 24 hours). Once the edging is done, roll the epoxy onto the main areas.
7. Allow to cure
Curing time varies, but you should plan to not walk on the floors for 24 hours, and don’t drive on them for 72. Some epoxies are longer, so be sure to read the instructions.

All-in-all, this project took 2 days (plus a day of clearing out the garage). The success of the floor all depends on the cleaning, degreasing, and etching work done on the first day, so definitely be sure to put in the work and do that part right. For us, we honestly couldn’t be happier with how fresh the floor looks now, and we can’t wait to tackle all of the organization in here as well over the coming weeks.


I’m seeing more and more people start to incorporate the degreasing step, especially on DIY jobs. I think it’s a great idea and well worth it in the end. Good job!
Hey Chris, thanks for the great tutorial. I followed it step by step and feeling pretty good about the prep work, however, I was speaking with someone who use to do epoxy flooring professionally and he said that caulking (with the heat in Southern California) will dry up eventually and pop up through your epoxy floor. Do you know if this would be an issue with the DAP product? Do you think I should just go for laying down the epoxy or should I remove the caulking? PS: My parents live in Idaho–beautiful place to live.
Hey Phillip! It may definitely be more of an issue in the intense heat of California, but I don’t know that I could speak to that. It’s holding up great in our Idaho garage!
This is really attention-grabbing, You’re an overly
professional blogger. I have joined your rss feed and sit up for in search of extra of your magnificent post.
Also, I’ve shared your web site in my social networks
Hi! Love your blog! Question…..can I reapply over a previous treatment like this? The coating was already there when I bought the house and they didn’t do a very good job and it looks bad. Was thinking of redoing it but not sure if I should or could. Thanks.
The epoxy is only as good as what you put it over, so if the current floor is peeling up then that means anything you put over top of it will also peel up. If you’re wanting to do it again, I would hire someone to come sand blast the floor and give you a fresh start.
This looks great! Weird question, but do you think that prep kit would be suitable for recovering gross old laminate kitchen counters?
They actually have countertop epoxy. We used it in our last house!