The best way to make a steak is indoors. That’s not a concession! It’s done in all of the best steakhouses. They don’t tend to use a grill, even though that is where most of us start when it comes to cooking a steak. This time of year? I’d rather be indoors than freezing outside, but I love to cook a great steak for a special occasion (looking at you, Valentine’s Day).
I promise that if you cook your steak using my method, you will enjoy a dinner that’s better than most fine-dining steakhouses—at a fraction of the cost.
What Kind of Steak to Buy?
I’m not too picky about the quality of the steaks. Grass-fed will have a better nutrient profile and more favorable fatty acids, so if I see that, I’ll get it. As far as cuts of meat, the tastiest steak, in my opinion, is the ribeye. It also has the most fat.
If you don’t want as much fat but still want that melt-in-your-mouth texture, go for a tenderloin (filet mignon is a section of the tenderloin). However, that cut is more expensive.
If you’re looking for something slightly leaner than the ribeye and less expensive than the tenderloin, try the New York Strip. You can’t go wrong with any of these—it’s really up to personal preference and budget!
What Kind of Meat Thermometer to Use
To ensure you’re getting the “doneness” that you’d like when it comes to cooking steak, I use a meat thermometer. This one is very accurate. Plus, the temperature readout is quick for a probe thermometer, which means less time with your hand over the heat source.
I also like that it rotates the display depending on which side is “up” and it has a light that senses how dark it is in here and will light the display if needed. The thermometer automatically shuts off when you close it. It’s battery-powered, and I’ve had it for a while now. I’ve never had to replace it. It’s just a very helpful tool for under $50.
How to Cook a Steak Indoors
I want to treat Jules, so I’m going to cook up her favorite steak: filet mignon. Now, the thicker the steak, the longer it will take to cook. But! You don’t want to cook it in the pan for that long, or else the exterior is going to burn.
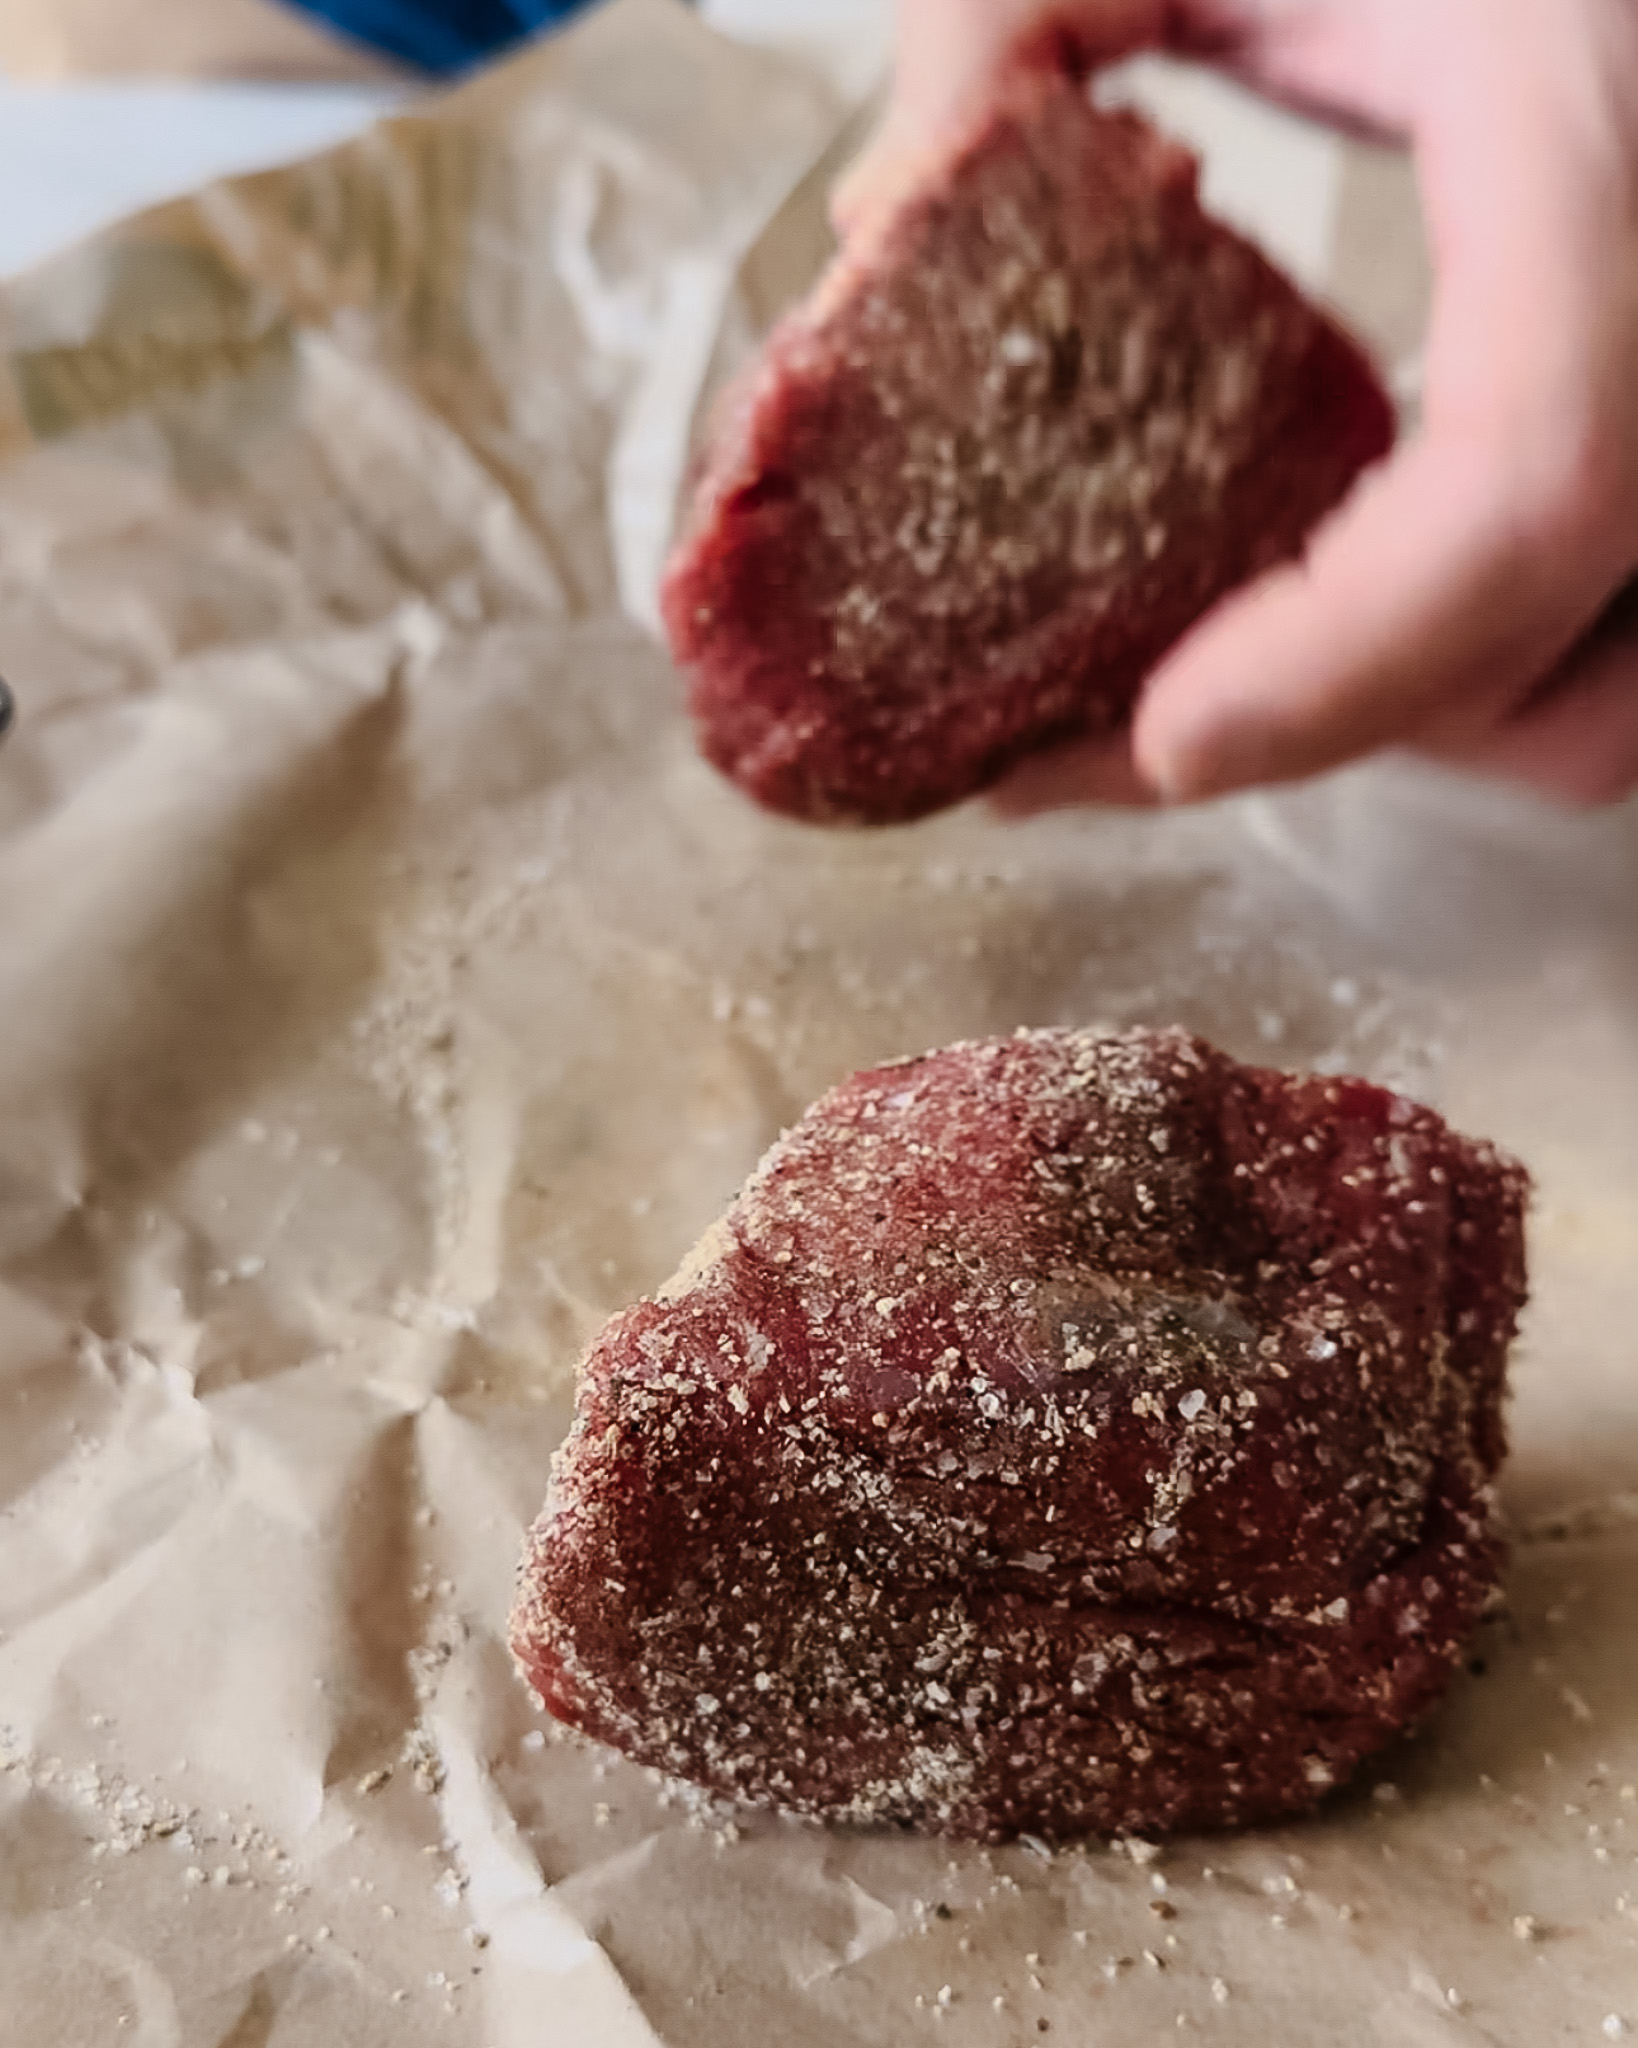
My method? I preheat the oven to 400 degrees, season the steak well on either side (I used my signature spice blend) , and sear both sides of the steak on the stove. Once you have a good sear, you cook it in the oven. And for the final touch, you put it back on the stovetop and braise it with a little butter or ghee for that over-the-top taste experience. Trust me on this one.

Overachiever Seasoning
I add my signature spice blend to almost every savory dish I create. Now available to purchase!
shop nowInstructions
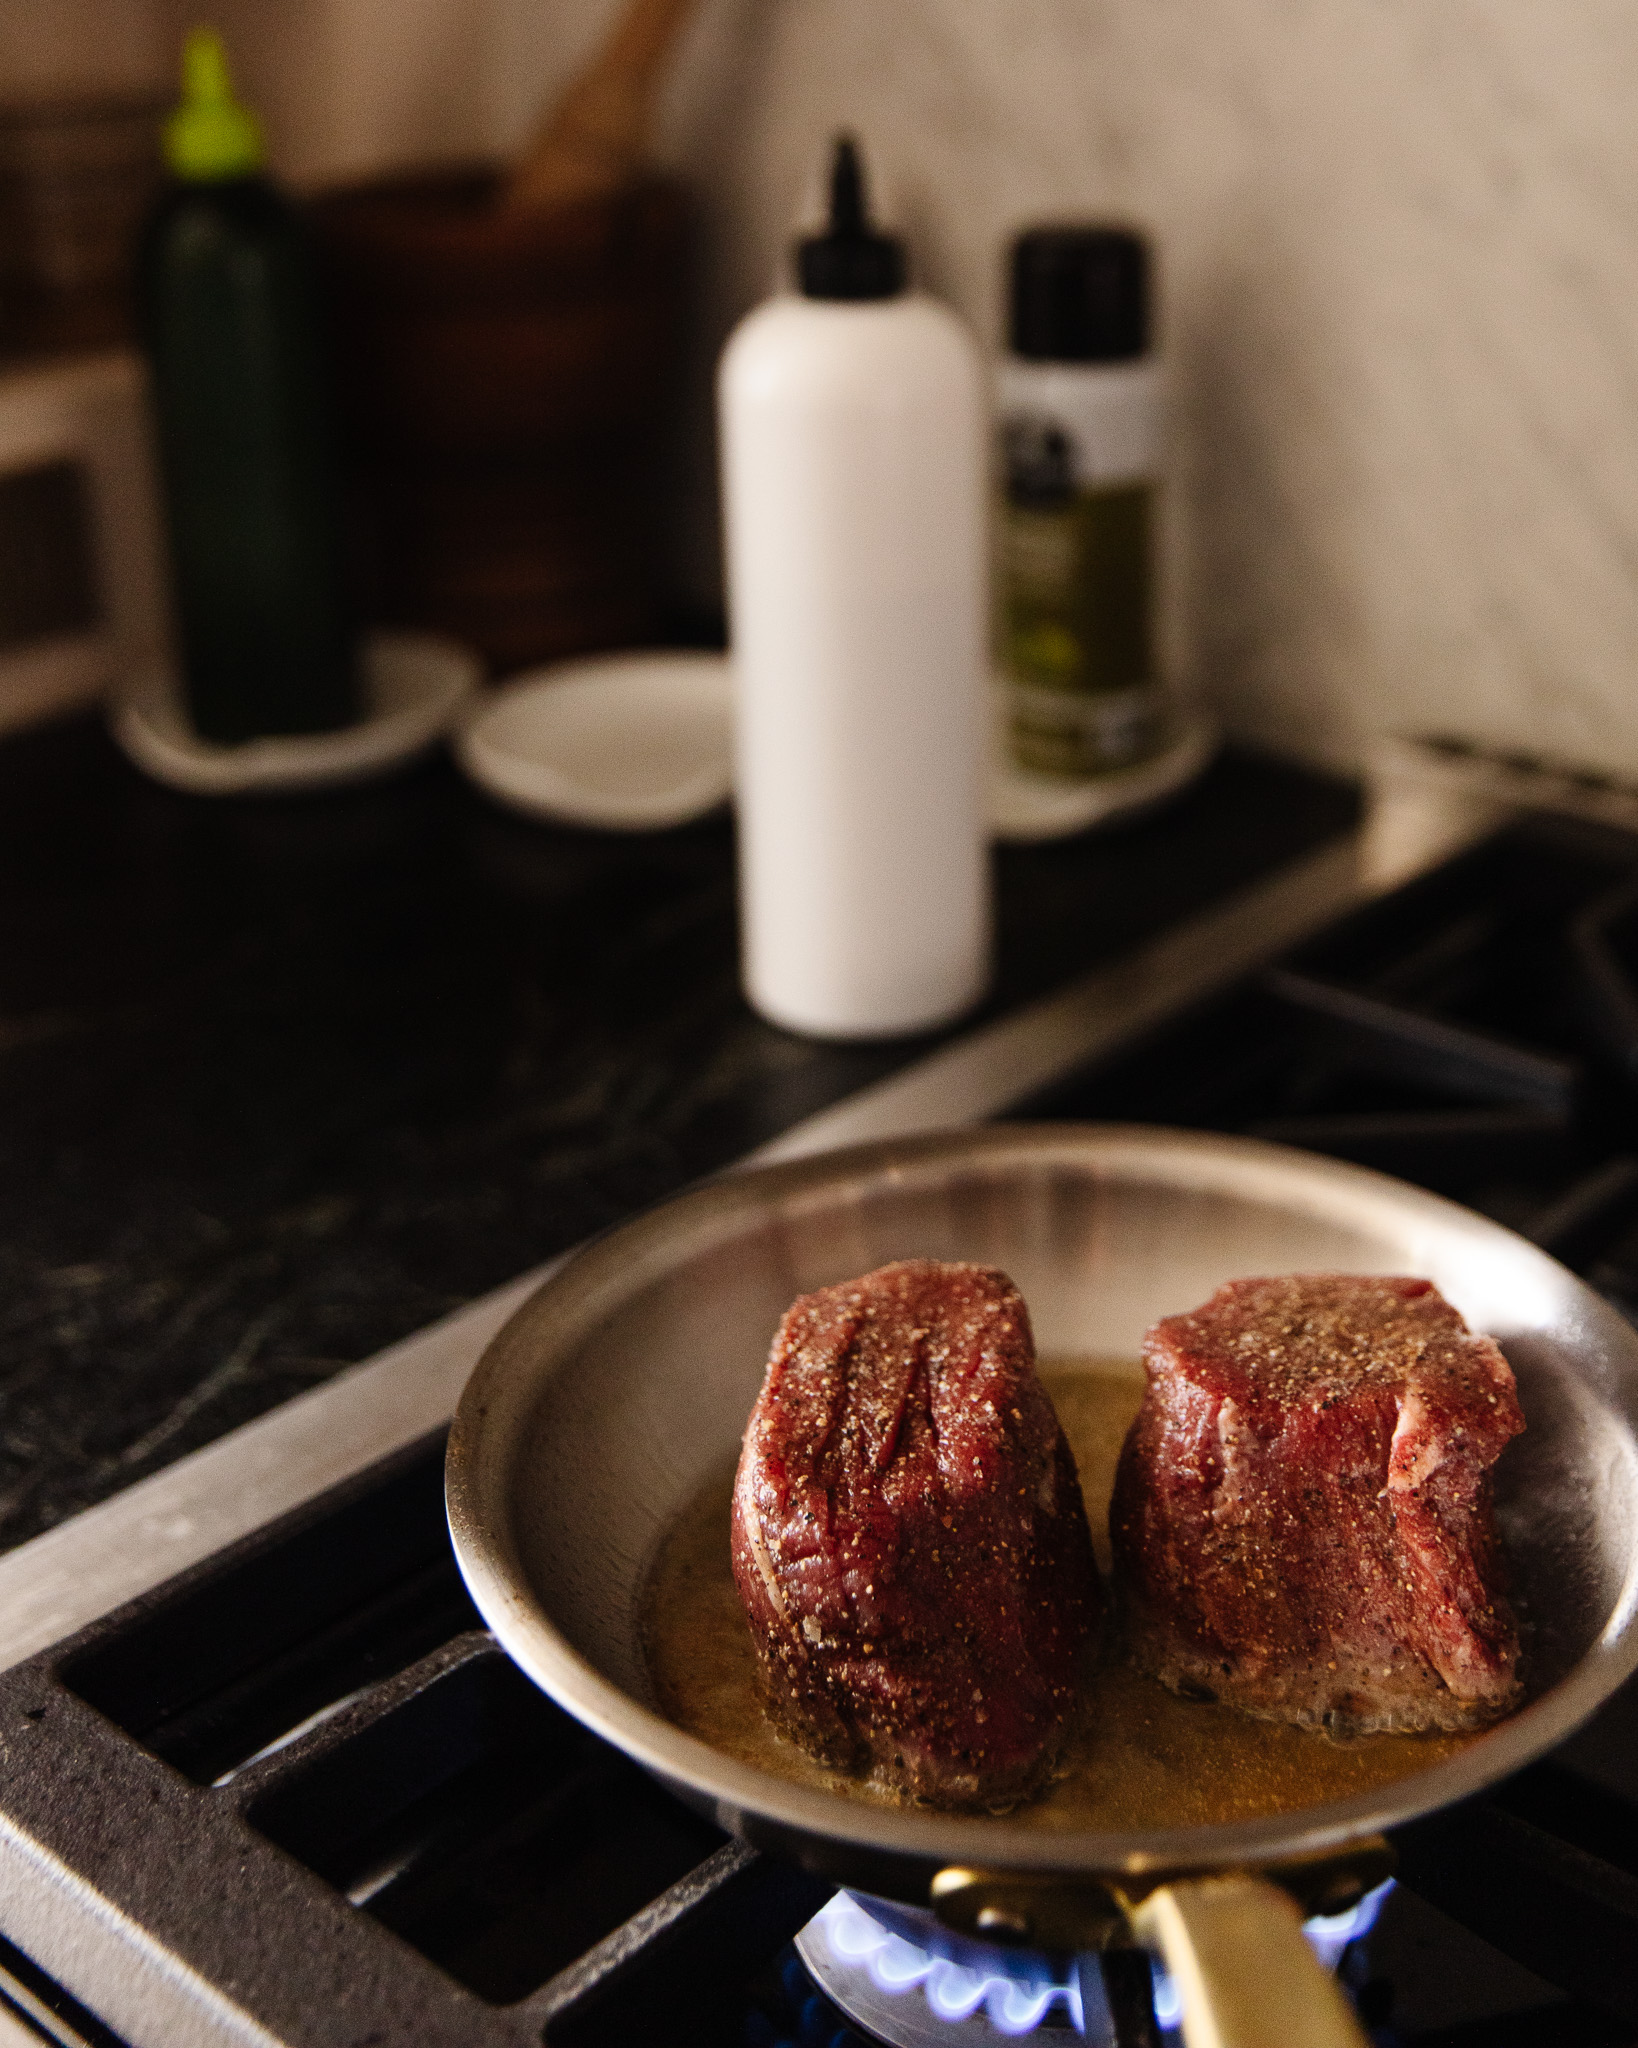
Heat a stainless steel saucepan over medium to medium-high heat. You should let it heat for at least a few minutes. (You could use a cast iron pan with low sides, but you’ll want to let it preheat for even longer, like 5-7 minutes). Either way, it should be oven-proof. Add some avocado oil (it has a higher smoke point) and a little beef tallow for added flavor if you like. Take this time to season your steak well on both sides. I use an all-purpose seasoning (coming soon!) or you can use steak seasoning or salt & pepper.
Add the avocado oil and put the steak down on one of the wide sides. Throw in some fresh sage leaves or rosemary or both, and start basting your steak with the oil as it takes on the herb flavor. Some people will add fresh garlic. I skip it because there’s a good chance it’ll burn by the time the steak is ready. Sear the steak on both sides for around 3-4 minutes until you see some nice browning.
Next, I put the pan with the steaks into the oven and set a timer. Depending on how thick your steak is and your desired cooked level, you can adjust this time up or down. But for a filet that’s approximately 2″-2.5″ thick, I’ll set a timer for 5 minutes. For steaks that are thinner—anything under 1.5 inches—you can skip the oven unless you prefer your steak well-done.
Once the timer is done and I’ve reached the desired temperature (see my chart below!), I put the pan back on the stove. Make sure you keep a pot holder over the handle so you don’t accidentally reach for it. Turn the heat back on to medium and scoop a tablespoon of ghee or unsalted butter into the pan. Baste a couple more times when the fat turns liquid. If you’re not into dairy, go ahead and skip this step.
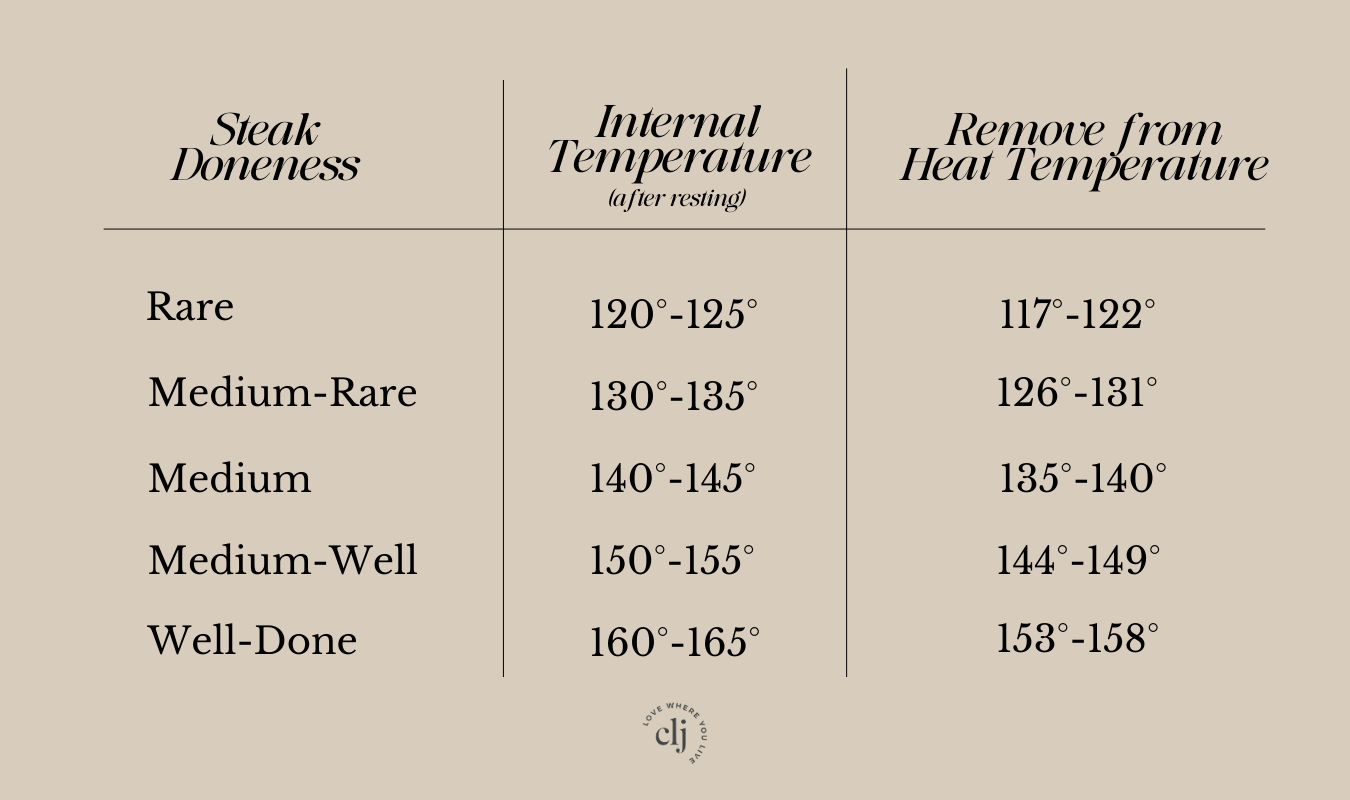
Steak Doneness Chart
Steaks continue to cook slightly after being removed from the heat. This is often called carryover cooking, and it’s essential to be aware of it so you don’t overcook your steaks!
How to Serve the Steaks
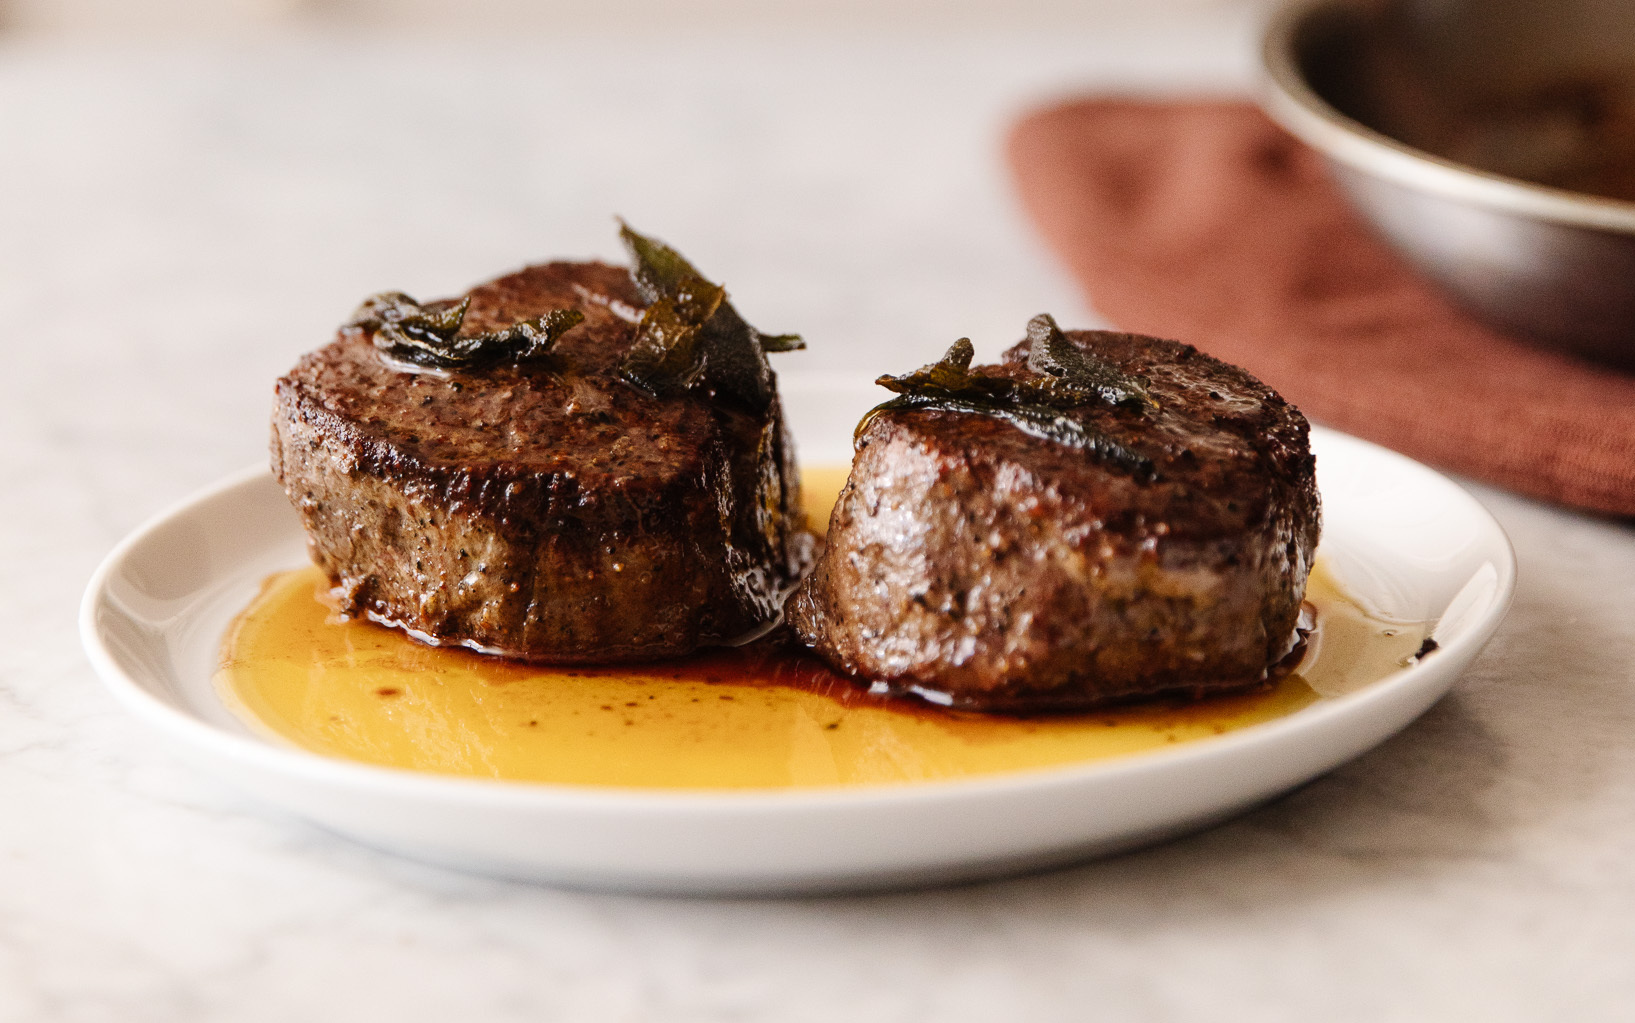
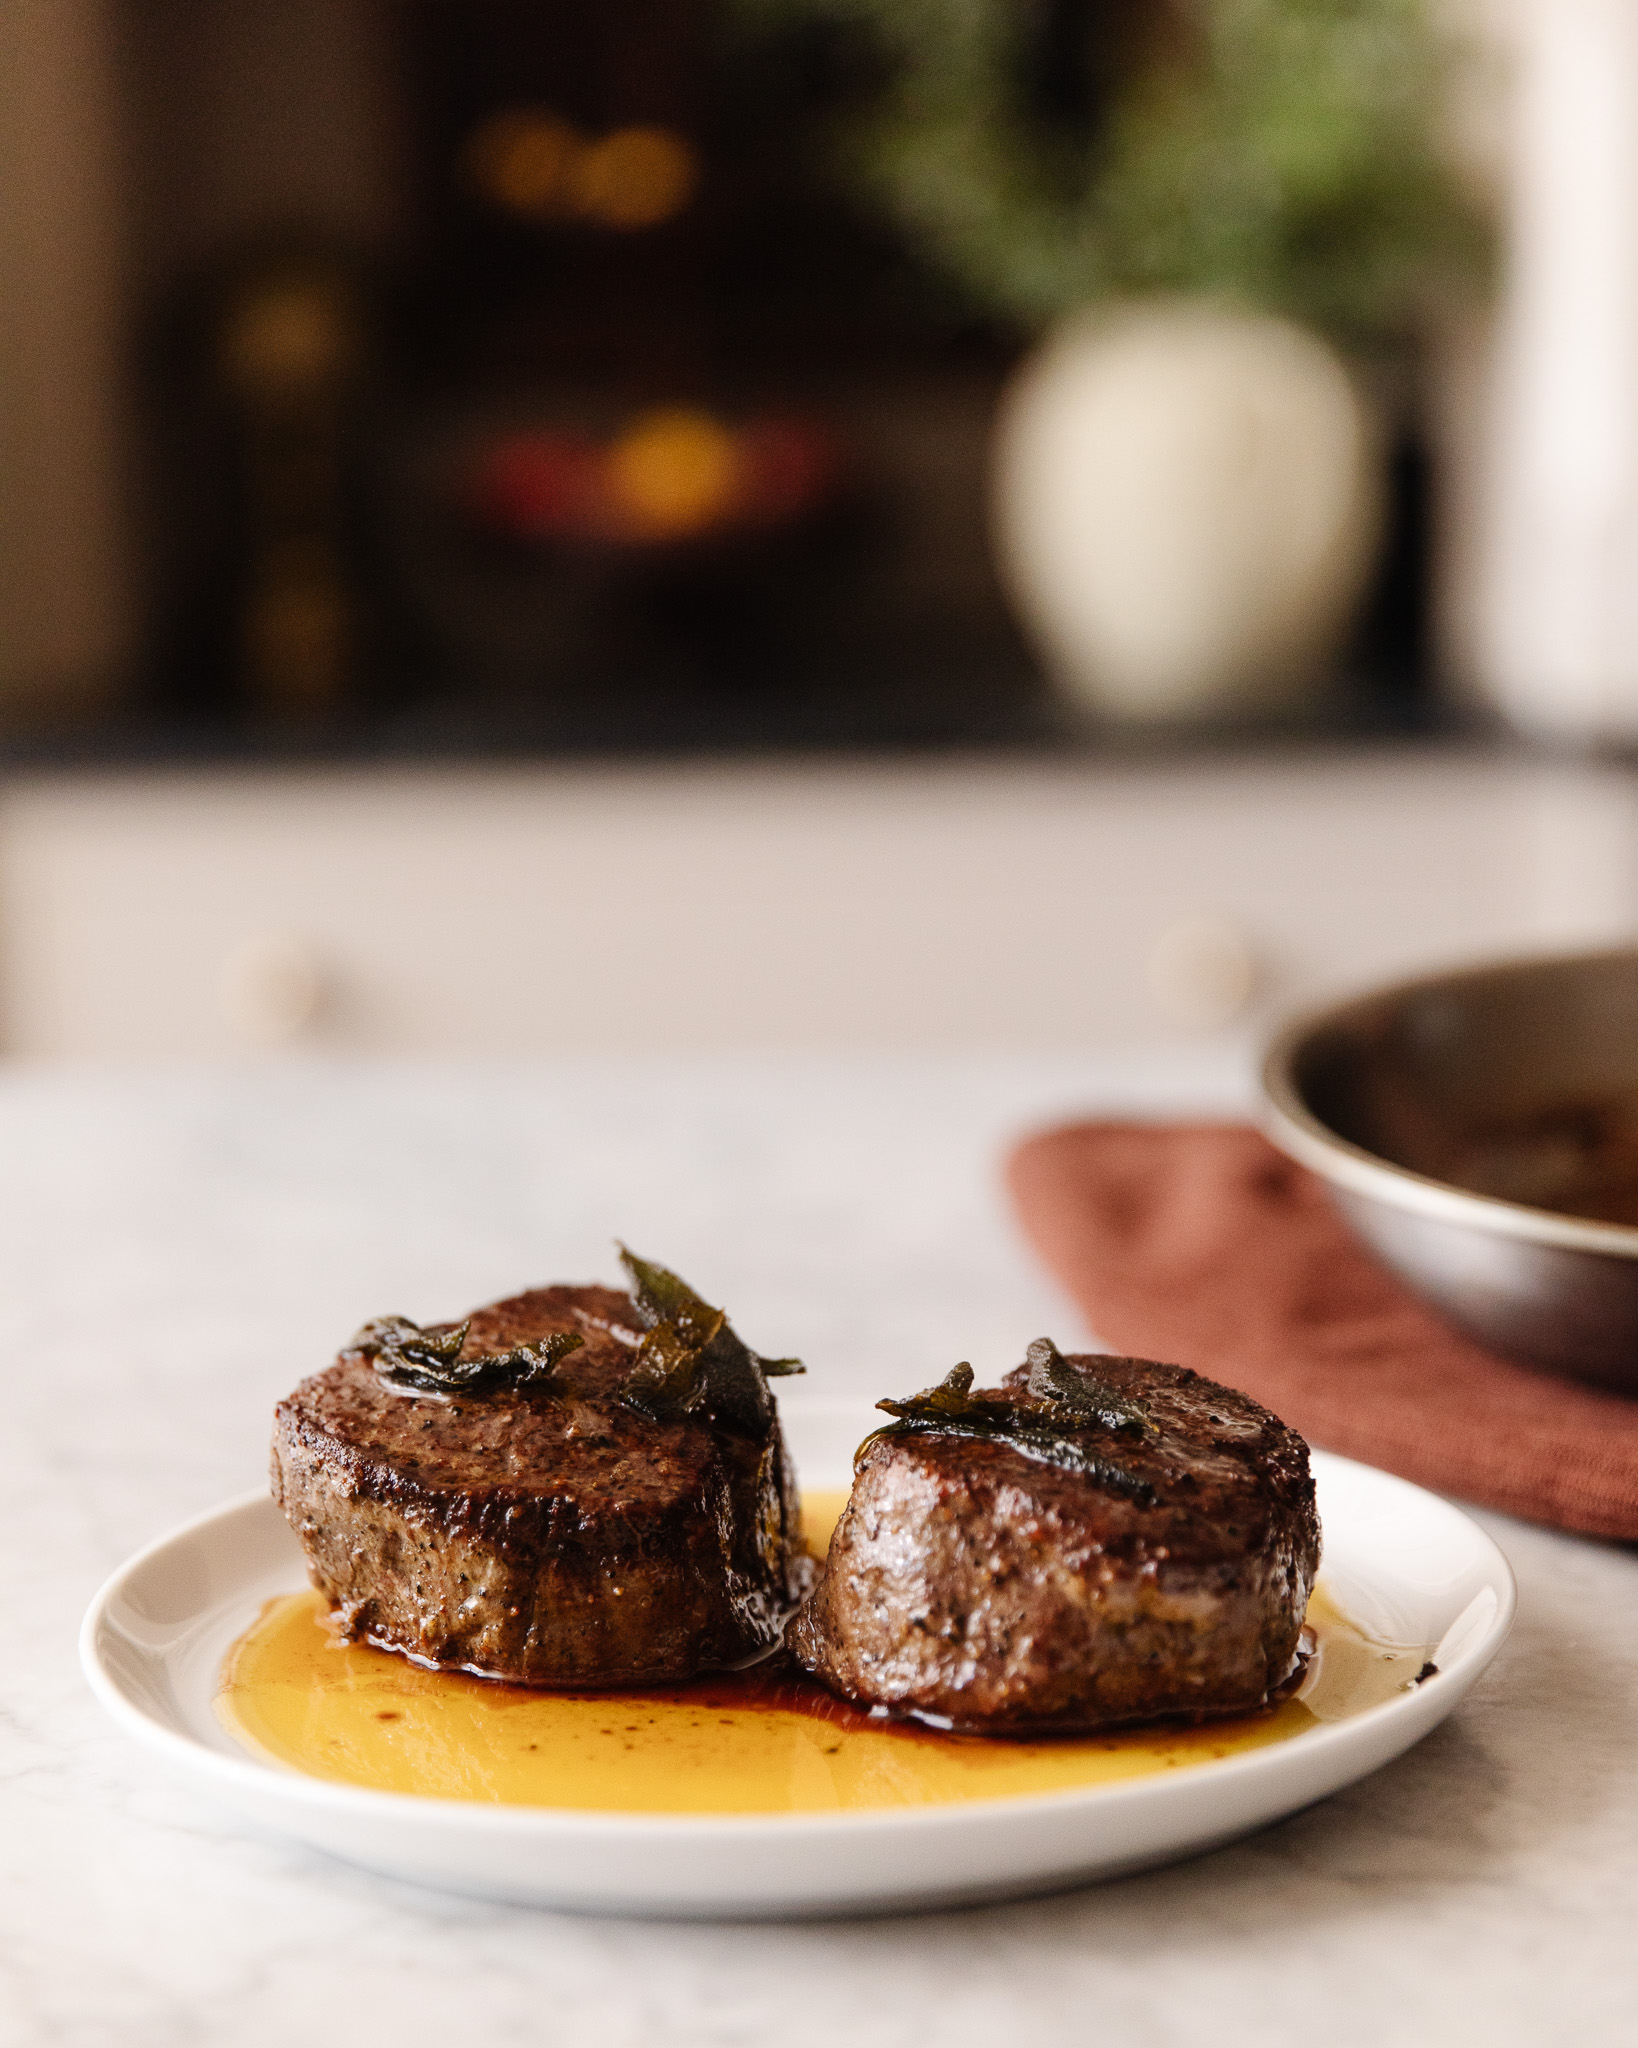
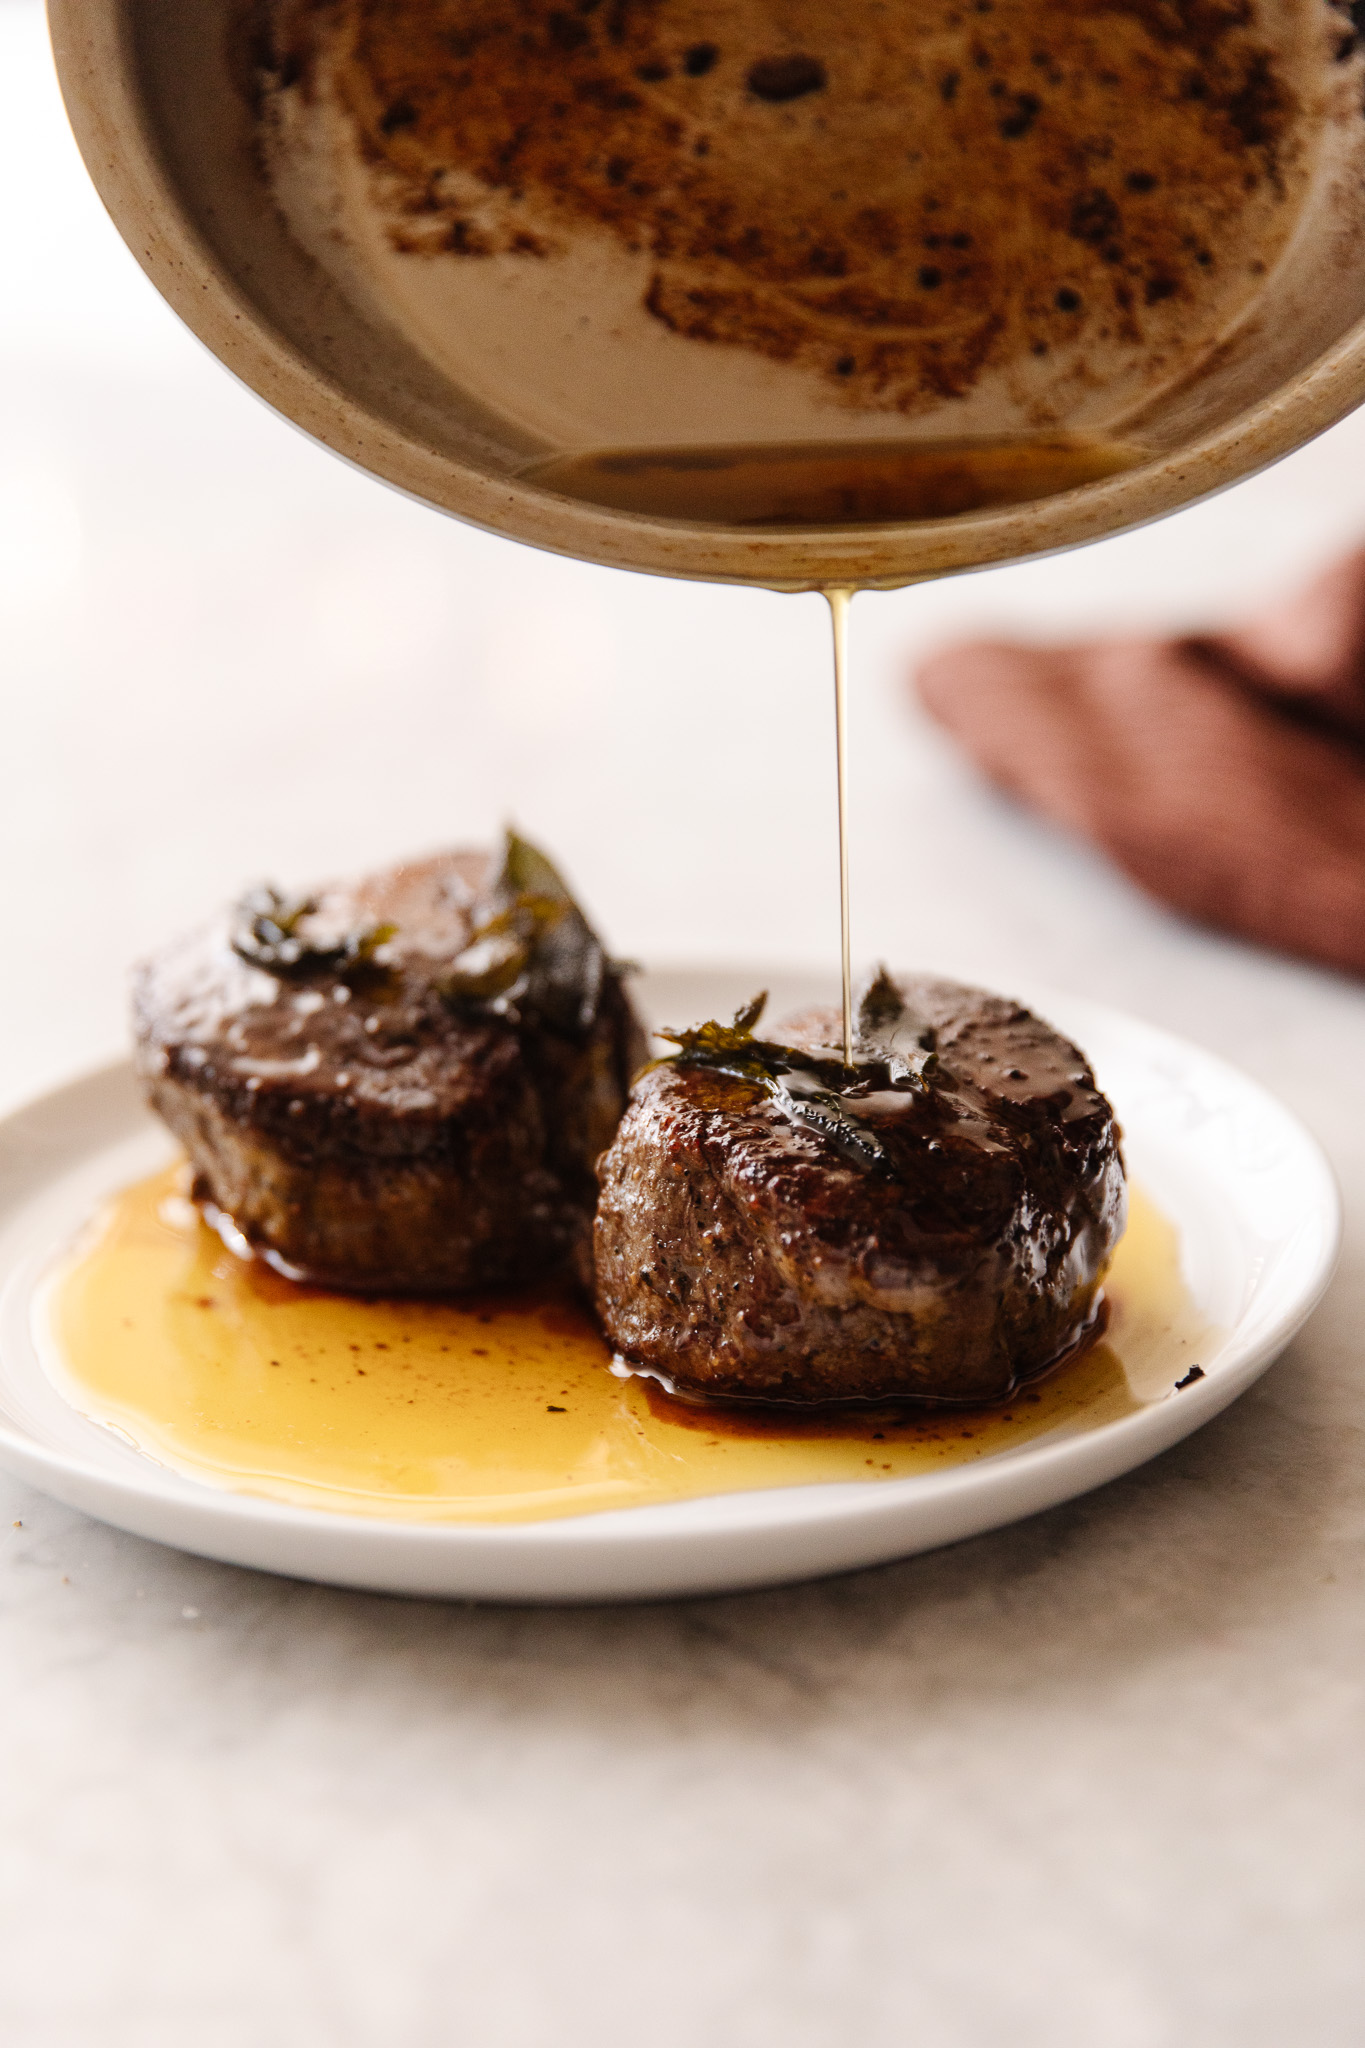
Put the steaks on a serving platter and pour some of the ghee or butter overtop, put a sage leaf or rosemary sprig from the pan on top of each steak. Fried sage is one of the best treats in life.
Now you have to let it rest. Resting time is at least 10-20 minutes, depending on how thick the steak is. This step is crucial for keeping the moisture in the steak instead of letting all the hot juices run out. I skip tenting the steak or wrapping it with foil—you want to keep the crust!
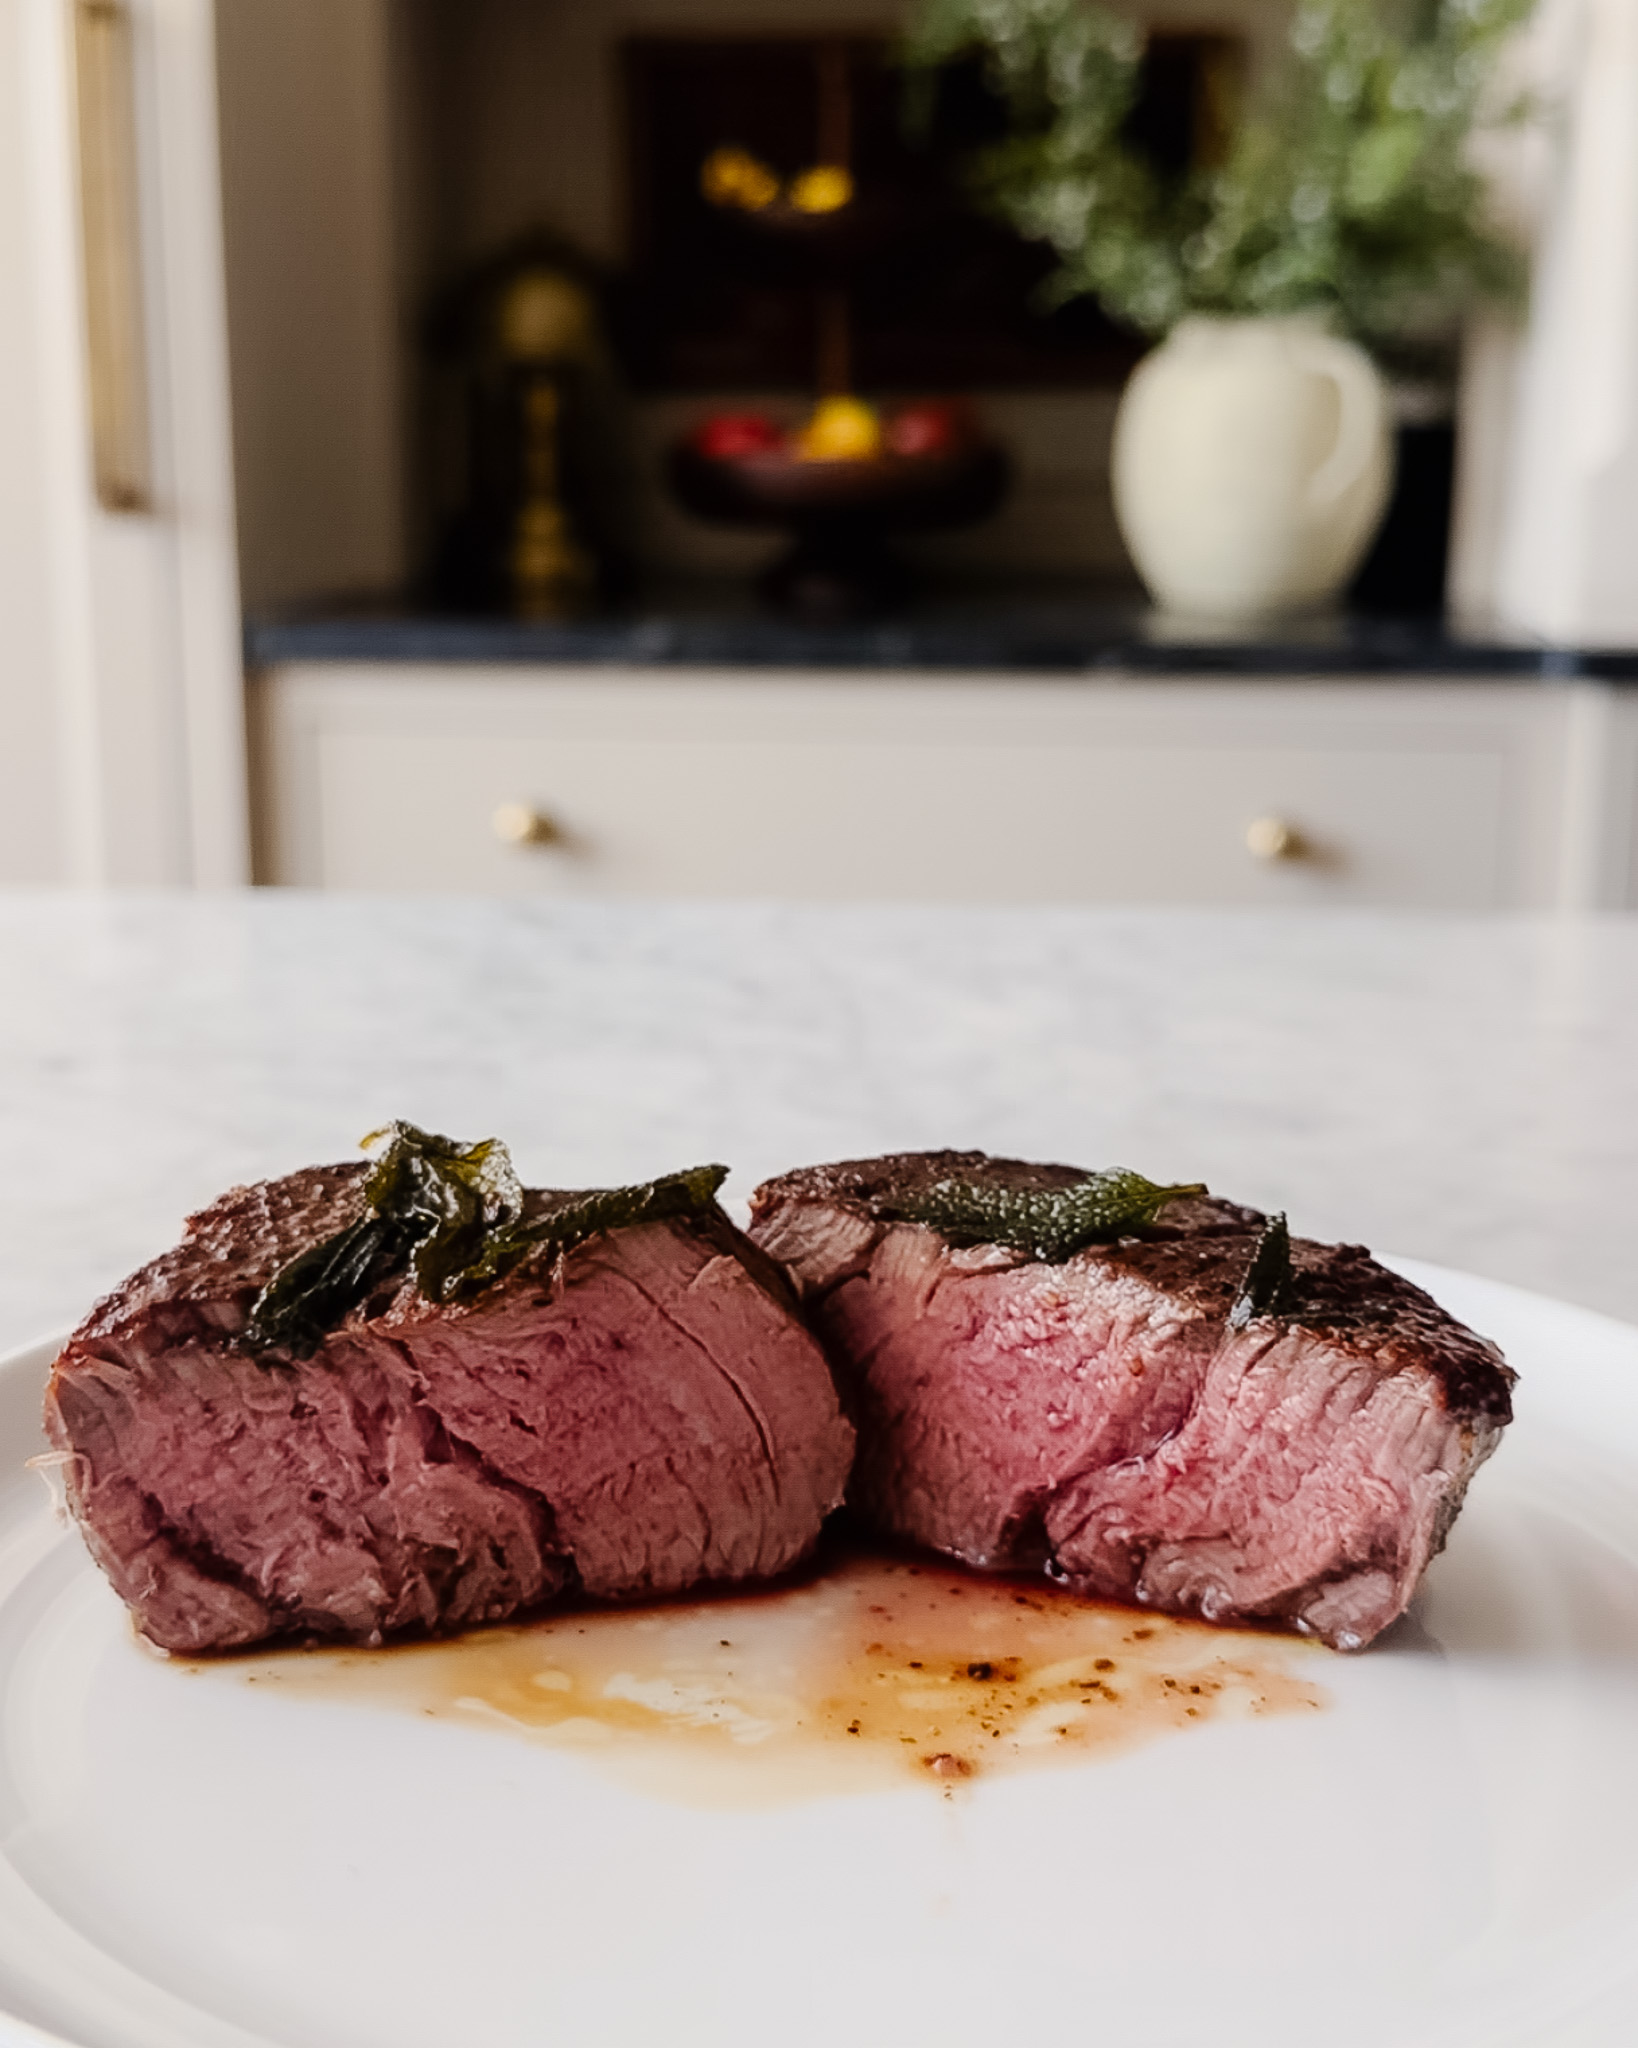
After the resting time is up, go ahead and dive in, slicing the steak against the grain (meaning perpendicular to the way the muscle fibers run.) That ensures the meat is even more tender and pleasant to chew.
Someone out there is inevitably going to say, “But have you tried making sous vide steak?” Sous vide is a top-of-the-line way to cook a steak, but not everyone has one of those devices. This is just the best way that most of us can easily do!
My Favorite Sides for Steak
I like to serve steak with one of the sides below, but it’s really great to slice up and add on salads and sandwiches too. Don’t be intimidated by steak—it’s really something that anyone can put on the table!
Choose Your Potato
- Roasted Potatoes and Brussels Sprouts with Red Pepper Sauce
- Baked potato (the only method you’ll ever need!)
- Rosemary & Chili Smashed Potatoes
- Roasted Potato Salad
- Roasted Sweet Potatoes with Maple and Bacon Vinaigrette
Add a Vegetable (or a Different Starch)
- Sweet Chili-Glazed Carrots
- Roasted Cauliflower with Homemade Dairy Free Caesar Dressing
- Gnocchi With Harvest Vegetables
- Scratch-Made Asparagus Casserole
How to Perfectly Cook a Steak in Any Kitchen
Ingredients:
- 2 steaks
- TT Hey Old Sport Overachiever seasoning, your favorite steak seasoning, or just salt and pepper
- avocado oil
- 8-10 fresh sage leaves
- ghee (or duck fat to keep it dairy-free)
Directions:
- If your steak is thicker than 1 1/2 inches, preheat the oven to 400 degrees.
- Heat a medium stainless steel pan on the stove over medium high heat. While heating, season all sides of the steaks with Overachiever seasoning.
- Once the pan is heated, add 2-3 Tbsp avocado oil and immediately add the steaks, ensuring they are not touching one another. Sear on the first side for 3-4 minutes, until a crust begins to form. Flip the steak.
- Add the sage leaves and gently baste some of the oil over the steaks.
- IF STEAKS ARE THICK: place the pan with the steaks in the preheated oven, checking the temperature every 4-5 minutes until you reach 7-10 degrees below desired temperature. Remove from the oven and put back on medium high heat. IF STEAKS ARE THIN: sear on both sides and cook in the pan until 7-10 degrees below desired temperature.
- Add the ghee or duck fat to the pan, allow it to melt, and then begin basting the steaks for 2-3 minutes. Remove from the heat and place on a plate to rest. Pour the hot butter over and allow to cool for 10-20 minutes, depending on how thick the steak is. Serve warm with your favorite sides.


Hello! How does the steak not get too cold during the resting phase? This is always my concern, so I end up rushing it.
Steak should be eaten warm, not hot. The truth is, a rare steak you can cut into pretty immediately, while a medium well steak will need to rest for awhile to come down. But ideally the steak would be between 100-120 degrees before cutting into it.
All that said, it’s preference. There’s not a “wrong” way. If you like your steak hot, enjoy it hot!
Love how this guide makes it easy to get a perfect steak no matter what kitchen setup you have! Great tips for achieving that ideal sear and flavor. Can’t wait to try this method!
Thank you for this simple tutorial! I’ve always had trouble making a good steak. Luckily I have couple of ribeye in the freezer so I’ll be making them this week.
This is really helpful! Thanks.
Thanks for this recipe! It’s simple but perfect!