
This post is sponsored by Lowe’s.
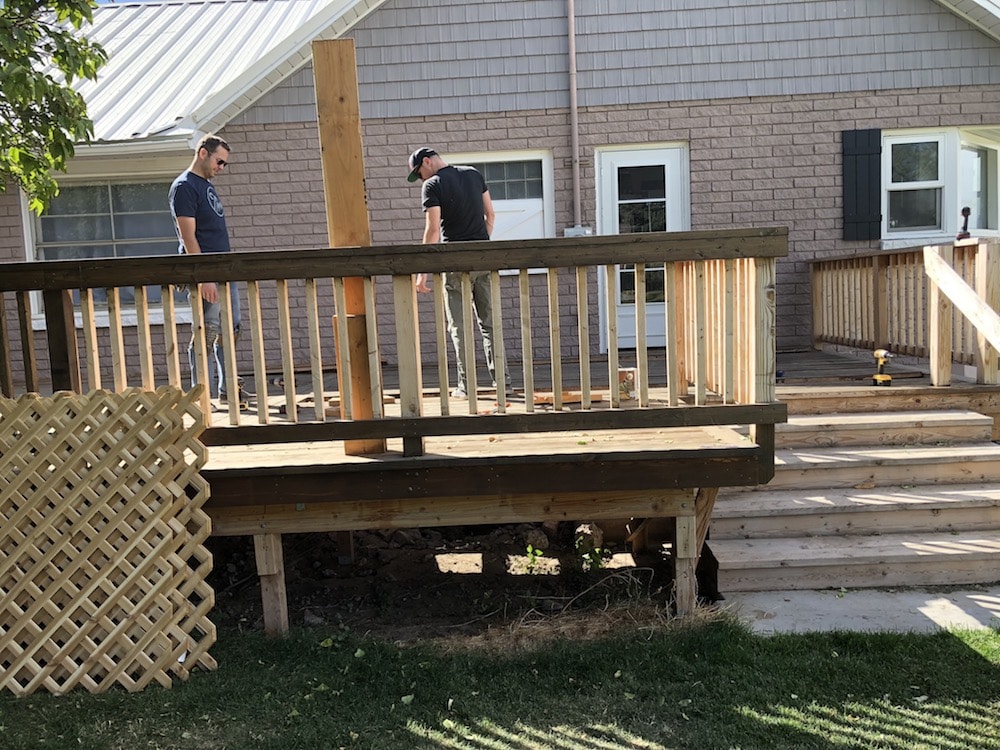
Decks built using dimensional lumber are super affordable, but they can also take quite a beating. If you have a deck that is due for a new coat of stain or has fallen out of repair, like our friends’, here are some tips for fixing, prepping and staining that may come in handy. And with the cold weather coming in fast, now is the perfect time to tackle this project and ensure your deck is ready for the harsh elements of winter.
Materials Used for This Project
If repair is necessary
| lumber | decking screws | IRWIN wood clamps |
|---|
Other materials
Repair Decking
The key to a lasting coat of stain having the deck in good condition. Any rotting or warped boards need to be replaced or refastened.

Remove any weak, rotten, or damaged boards, as well as those that are too warped to fasten back down. It helps to build a couple of forms to maintain consistent spacing.

These were just a few scrap pieces of wood with nails driven through them. We’d set the nails down in the gaps between boars and clamp the boards tightly together. The nails would maintain a consistent 1/8in space between boards.

We also used clamps to hold the boards down to the deck while we screwed them in. This helped take some of the warp out and allowed us to pull the boards in flush and even.

Prep & Wash the Deck
Once the structure is repaired, you want to prepare the wood to accept the stain properly. First, scrape and sand all of the wood to remove splinters.

After sanding, give the deck a good pressure wash (we used this Crafstman pressure washer from Lowe’s) to remove dirt and grime that might be present. Be careful not to put the washer nozzle too close to the wood, as it can damage it.


Using a good deck cleaner, scrub the decking with a stiff nylon brush to break up the dirt even more, then pressure wash again.

Allow the deck to dry for several hours or overnight before staining.
Lay Down Drop Cloths & Apply Stain
There are a couple ways you can stain – using a sprayer, or a brush. In many cases you’ll do a combination of the two. If using a sprayer, be sure to cover everything nearby that you don’t want to get stain on.

We used the Graco Magnum Project Painter Plus from Lowe’s and it was a total dream. Very even spray with no globs. For this deck we used Cabot Semi-Transparent Deck Stain, so the Graco 313 and 413 tips worked perfect. If you want a little slower of a spray, you can opt for the 311 or 411 (the 300’s spray 6-8in and the 400’s spray 8-10). I used the 313 on the rails since it had a more narrow spray pattern and the 413 on the deck to give wider coverage and cut down on time.

I also used a nozzle extension for the main areas of the deck to save my back.

With a sprayer, plan on multiple coats. You don’t want to spray too much at once or get it too heavy, otherwise it starts to puddle in areas and you need to wipe it up and redo it. Take your time, apply thin layers, and you’ll be so happy with the end result.

Though projects like this can seem daunting, having the right tools and planning your prep out over a few days helps in making it feel more approachable. Do it right and this is a project that will keep your deck looking fresh for years.


What are your thoughts on using a composite material like Trex when replacing a wood deck? We currently are in the middle of a deck tear out and thinking about investing in Trex to avoid the maintenance of wood again.
I second that! We have a trex deck and it’s been awesome. Had it painted this past week by a company called DeckMaster and it looks brand new.
We have a Trex deck and absolutely love it!
I started staining my deck in the spring, and then it decided to rain for 40 days, so I haven’t been able to finish the railings. Luckily the main deck is complete. I sprayed my deck, two boards at a time, and then with a small 4″ roller on an extension pole, went back over it. This gave it even coverage and really pushed the stain into the boards.
How is the process different for staining and sealing wood on a house? Vertical siding in my case. Thanks!!