We’re back with pictures of our staircase railings actually painted and not just photoshopped. We could not believe how divided the vote on this post was! Nearly 50/50. And the comment section was brimming with ideas that we hadn’t even thought of. Here’s a reminder of what the railing looked like beforehand. This photo was actually taken when we got the keys to the house.
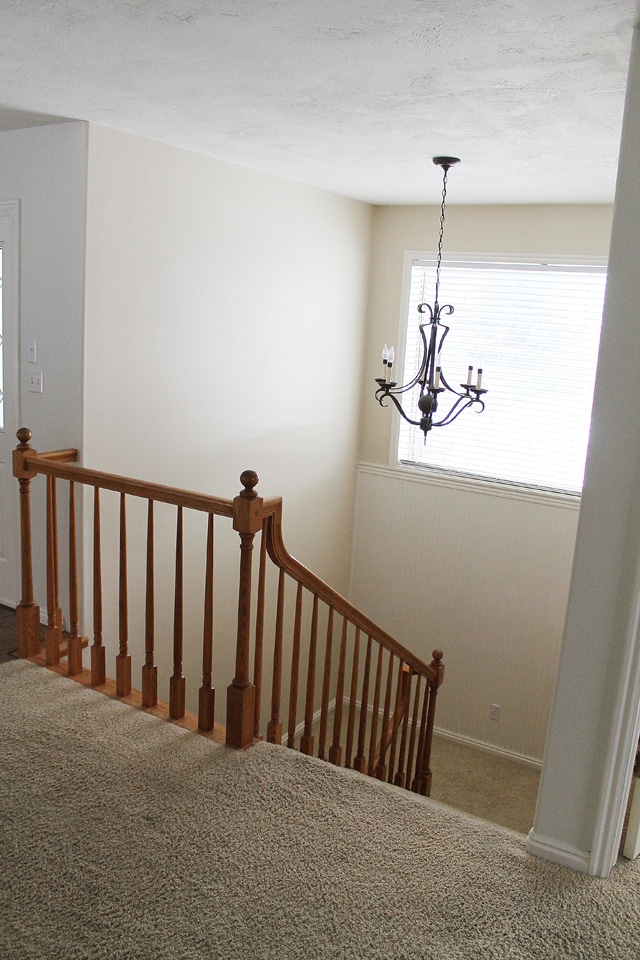
We can never please everyone, but sadly, this time only 49.28% of you might like the outcome. Haha!

We went with all black!

The color we decided on is Clark+Kensington’s Tomcat. It’s actually a really soft black, almost a dark charcoal. Someone mentioned a high gloss black in the comments and we loved that idea. Pretty shortly after we put out the poll, I knew in my gut all black was where I wanted to go with the staircase. Does that every happen to you? As soon as you ask, you know the answer you’re hoping for? I started envisioning white or natural wood picture frames plastered all over the stairwell walls with family photos inside. The stairs will eventually be the same wood that our floors are in with a runner going down. It seemed like black was the missing element.

For extra durability, we used Clark+Kensington’s exterior line of High Gloss paint. I’ve had trouble using high gloss in the past, but I’ve learned it’s all about brushing it on and moving along. Messing with it or brushing over the same spot when it is only partially dry will ruin the glossy finish.

We rubbed the whole staircase down with TSP to prep it for painting and taped off the carpet. I actually started removing the carpet on the stairs, and then we thought wait! we’re not ready to tackle that just yet! Once everything was taped off and clean, Chris took the backside of the spindles using a ladder and I knocked out the other sides. Our first coat took 2 hours and the next day we finished the second coat in about an hour.


I love the viscosity of this exterior paint. It was thick and went on smooth. The brushstrokes disappeared in that ever-important don’t-mess-with-it phase of drying. In daylight the color reads as mostly black, but there are angles–especially coming up the stairs with the light pouring in–that it’s definitely charcoal. We love it all the time.

^^Evidence of my jumpstart in carpet removal. Oops. Initially we thought that we might replace the banister and spindles, but we’re not sure anymore. Down the road, likely when we tear up the carpet, I can see us boxing out the newel posts a bit–but it is a wonderful feeling to see how something as simple as paint can change your whole outlook on something. Half a quart of paint saved this banister for us!


I think this banister would have looked worlds better no matter which option we went with–can only go up from orange oak, really! But all black definitely felt like the best fit for us. Hope we convinced a few more of you!


Long shot on an old post but ill give it a shot! I prepped my banister in the same method as your recent kitchen cabinet upgrade. My problem is the black Behr paint I’m using isn’t seeming to get ‘hard’ and is easlliy scratching right off! Any advice? I can switch to a high gloss exterior but I’m afraid layering it over whats already there will lead to more lifting?
Thanks,
Morgan
I love this, I also have the 90’s oak balcony and I HATE IT. I bought black and have been scared to actually do it. After seeing your before and after photos I going to take the plunge but I know there is not turning back after….uggg
Thanks for sharing
What do you think of using exterior paint on interior trim & doors?
How does the deglosser work, and is that for the stain on the oak? Thanks Carole
I think it’s a great idea. It’s generally a lot more durable.
How is the paint holding up? I am super tempted to start taping off my bannister today! I have deglosser and primer and paint (Benjamin Advanced that I used on the kitchen cabinets). I don’t want to sand from the dust. What do you think? My bannister is nothing fancy- 60s oak.
Love!