The post is sponsored by Lowe’s
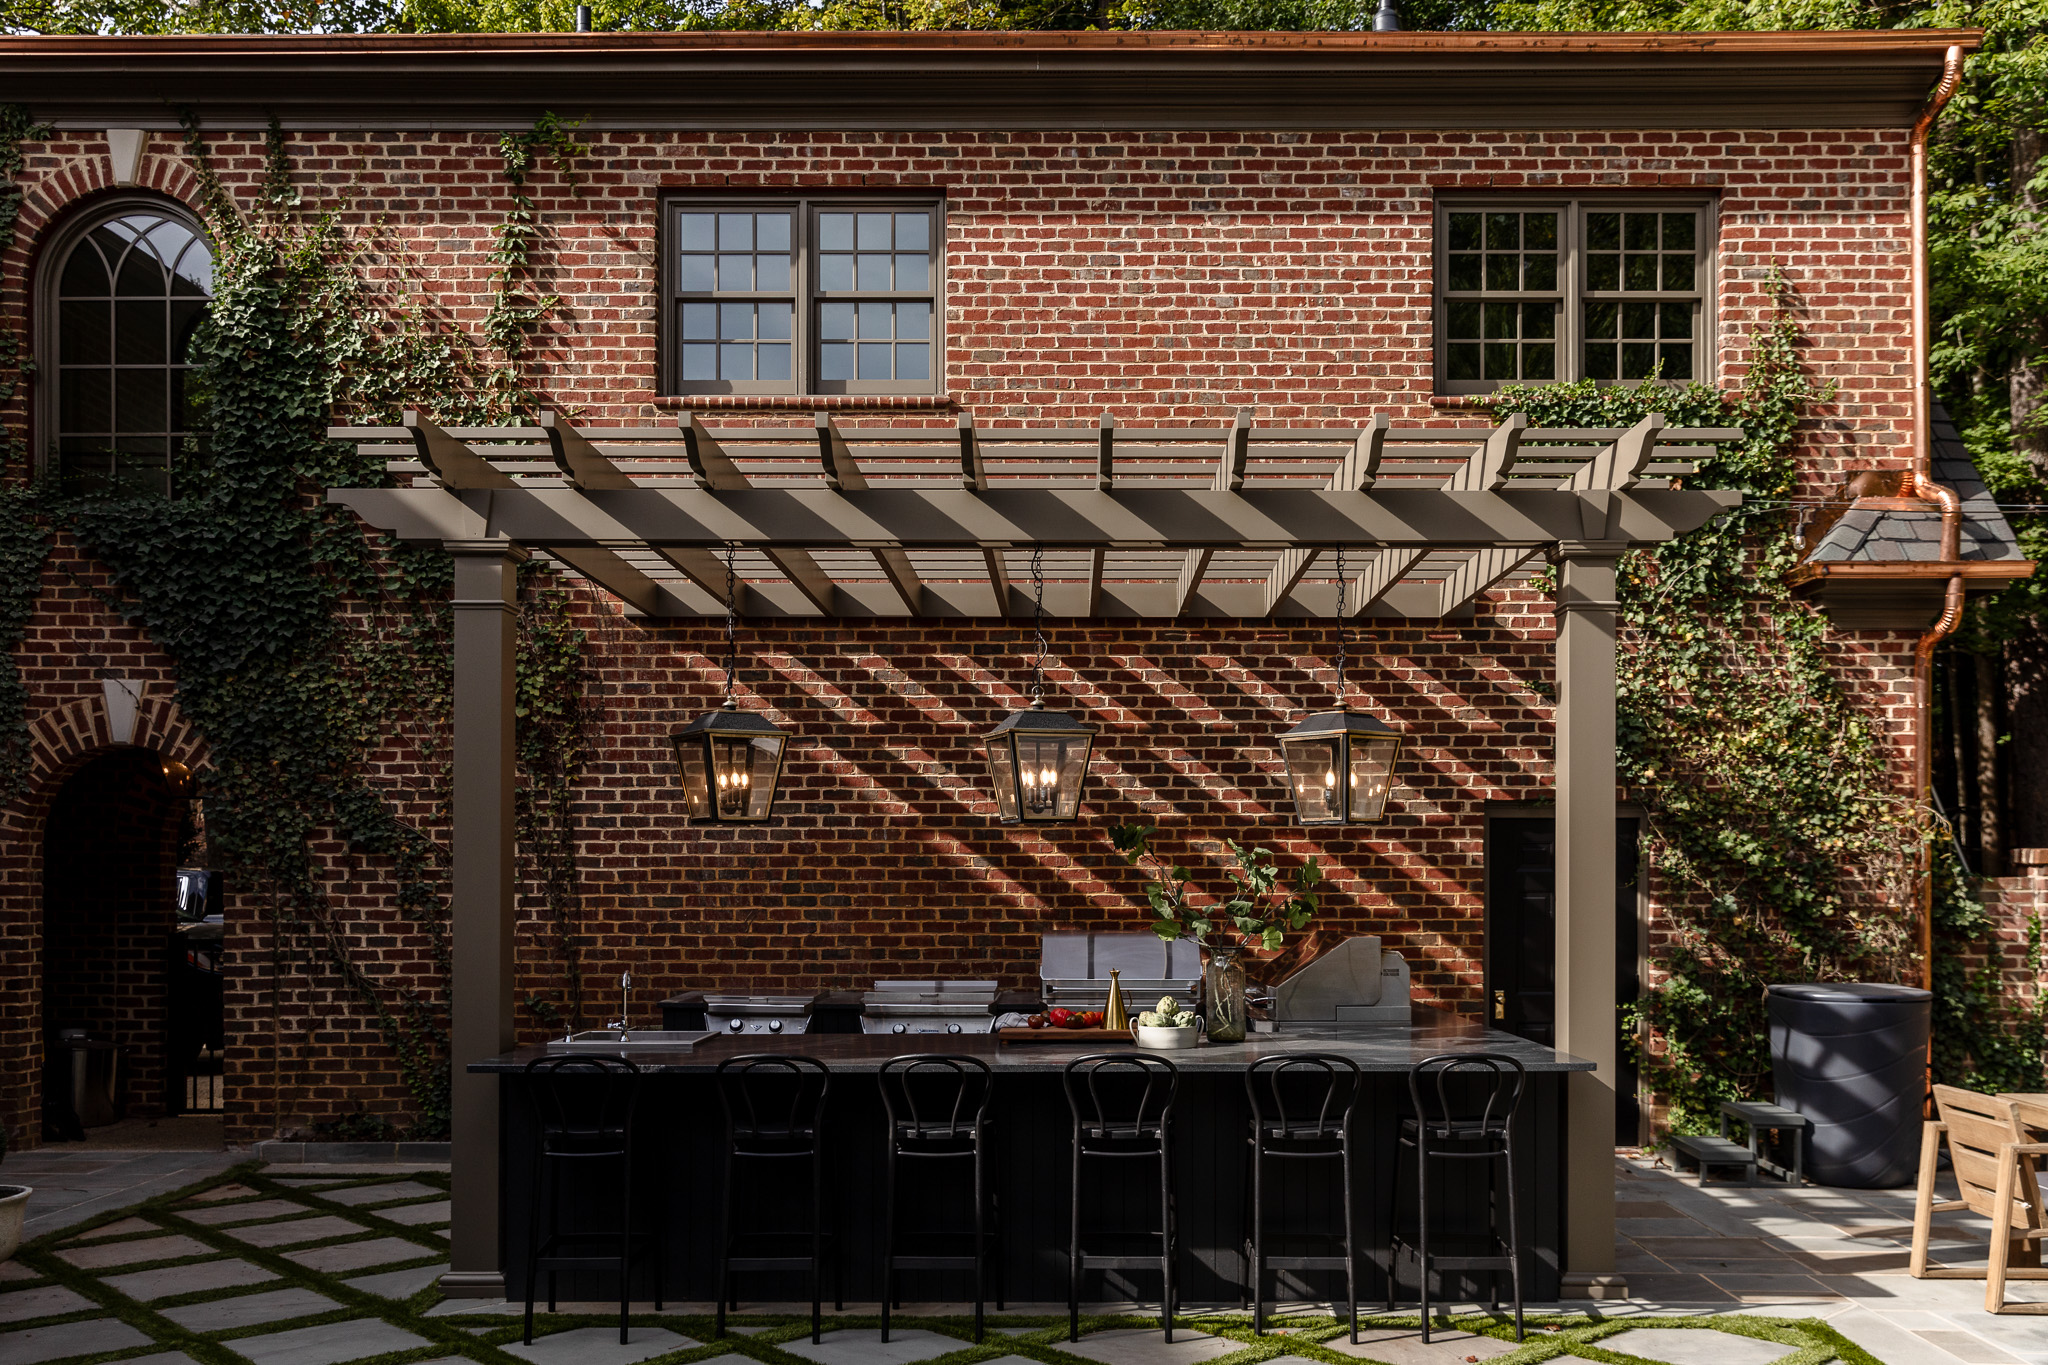
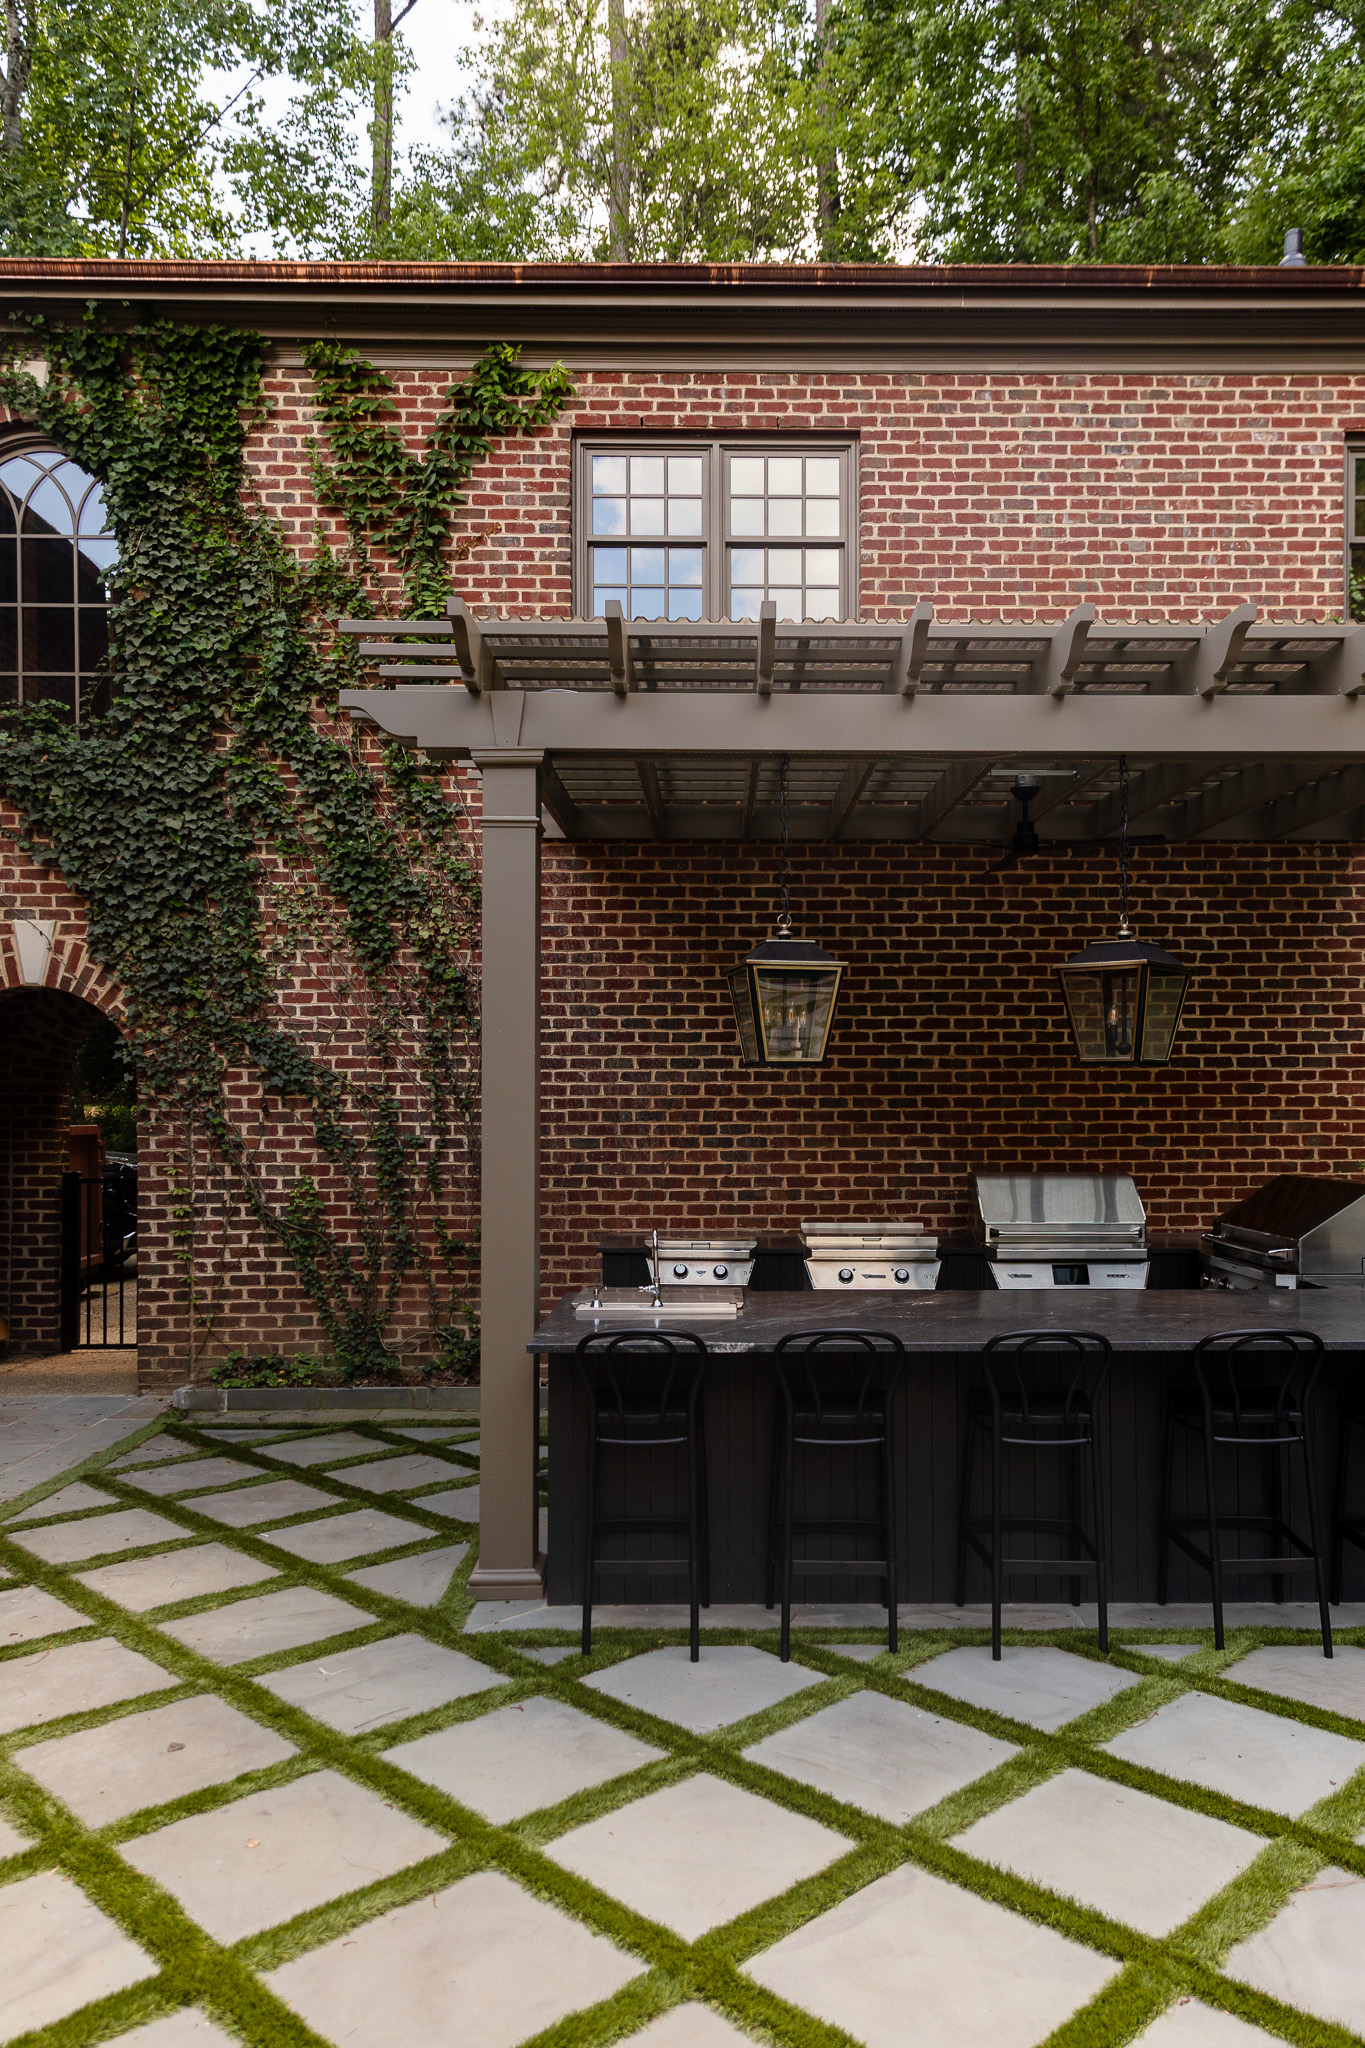
When we built the pergola, we loved how airy and open it felt for the outdoor kitchen. However, after about a year, I (Chris) had a few small regrets. As much as I love cooking outside, it was toasty under that pergola in the summer, when the sun was beating down. And then there’s the rain. I don’t mind cooking when it’s raining, I just don’t want to it to be raining ON me. So I was on a mission to find a solution.
What to consider in a pergola cover
There are several options for covering a pergola, from natural, to temporary to permanent. It all depends on the aesthetics you want and your tolerance for maintenance or other issues.
Shade Cloth Curtains: One option is cloth curtains that slide between the pergola supports, which is a great option for providing shade with a more natural, look. The downside is that these will weather faster and potentially not do well in wet, humid climates.
Climbing Plants: We considered ivy or jasmine but decided against it due to snakes. (We found a snake in our ivy early on when we moved into the house…that will not leave Julia’s memory anytime soon.) Plus, we wanted more light with a sealed, weatherproof solution.
Polycarbonate Roof Panels: These offer a combination of strength, reliability, and relatively easy installation. Some panels offer UV protection. These permanent panels will be a little noisier in the rain, but they come at a great price.
Louvered Roof System: We discussed adding a metal slat system that opens like a pergola but can close to create a waterproof roof. This would be much more expensive than the other options, but is handy that it can be open or closed. Even if we did a pre-built DIY kit, we’d be looking at $3,000-$15,000.
Drainage Considerations: When selecting a covering, it’s important to consider drainage and potential runoff. Manufacturers often provide recommendations. Our pergola was initially installed without a slope, so we had professionals add a slight incline. This was a worthwhile adjustment, as we didn’t want to significantly alter the pergola’s appearance. Additionally, since the pergola is directly beneath two playroom windows, we can easily open them.
Light Control: Consider how much light you want to pass through. Clear panels are available if you only need rain protection and desire full sunlight. For partial shade, there are various colors and transparency levels.
What we decided on to cover the pergola
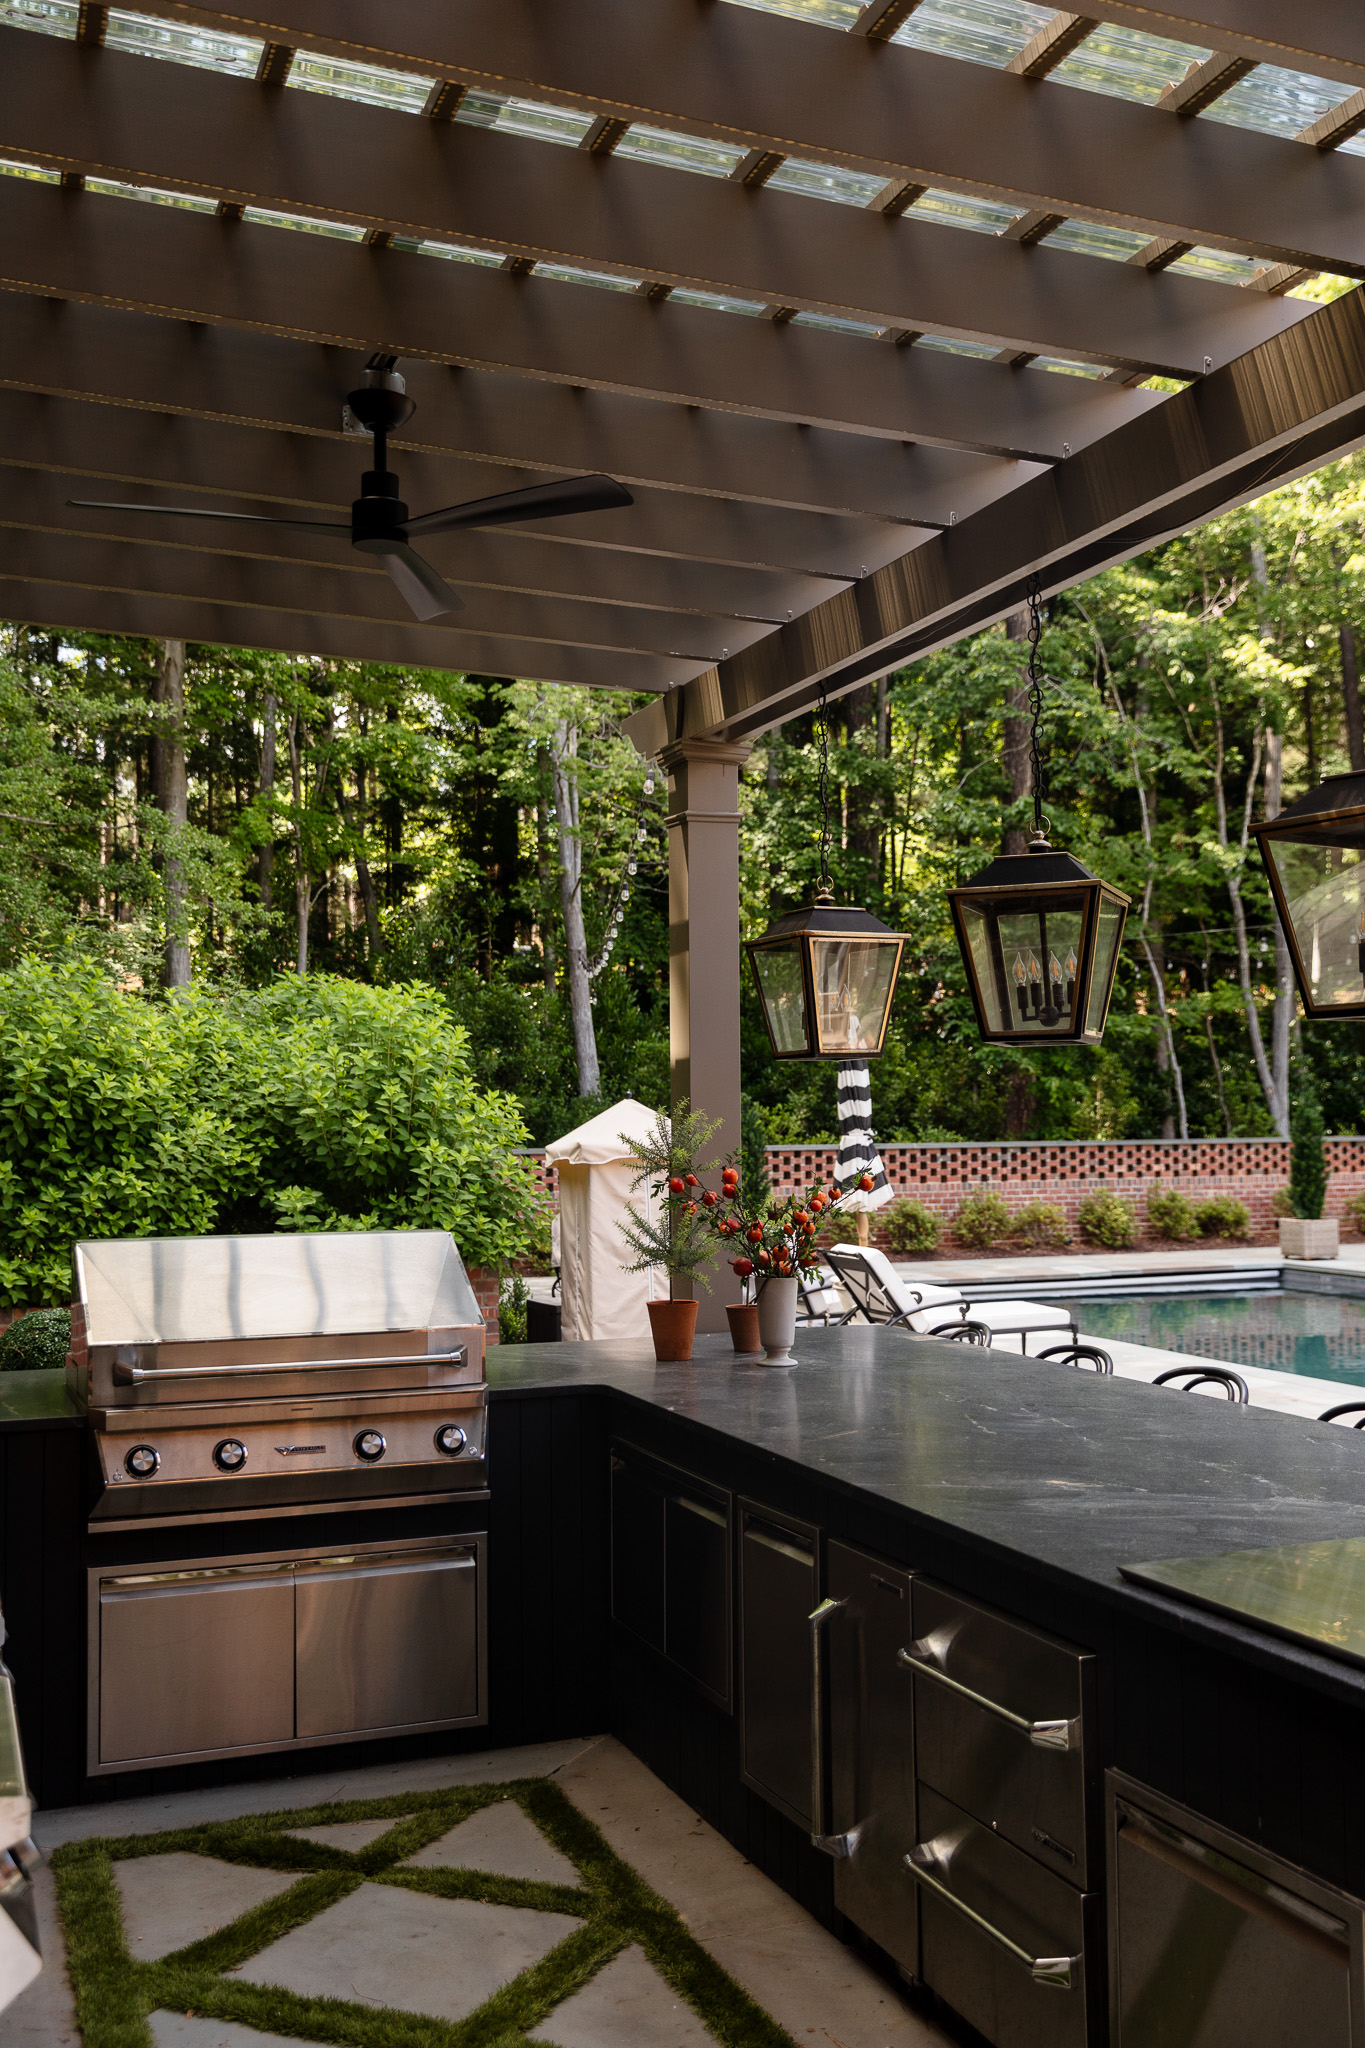
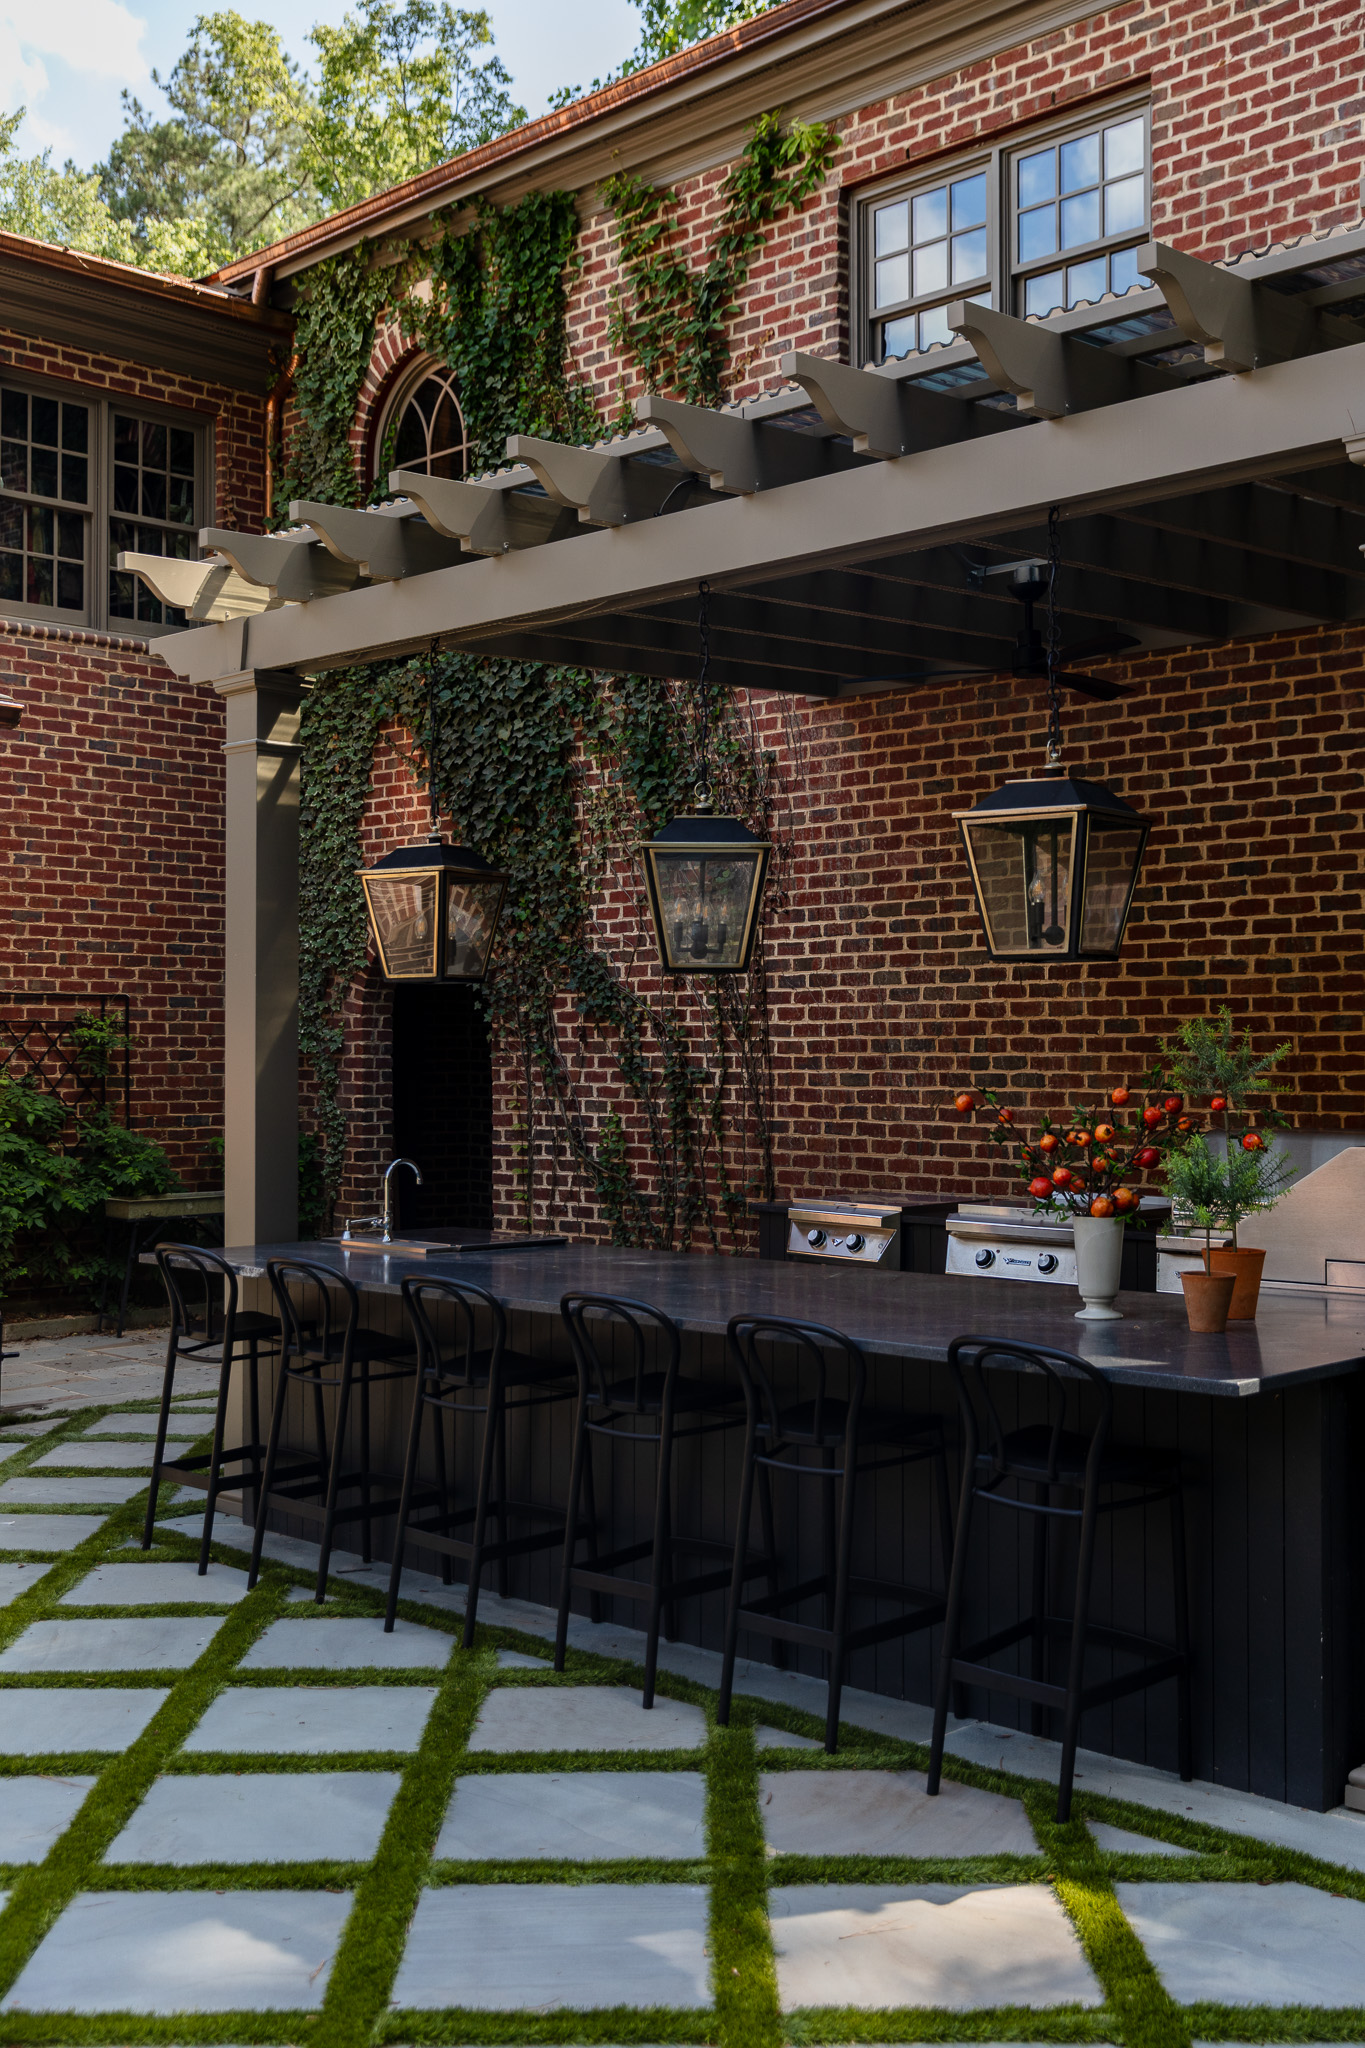
Our choice? We opted for Corrugated Solar Polycarbonate Plastic Roof Panels from Lowe’s in a solid gray that blocks almost all UV rays while allowing a little light through, creating a light shadow effect. It’s subtle, but effective. I like the corrugated look because it gives a little more texture and looks more traditional.
While colored panels (red and green) do exist, the idea of constant colored light wasn’t appealing to us! I could see that working for some commercial applications though.
How I installed the pergola covers

Installing these panels was straightforward. Due to our pergola’s construction, we used the top stringers, attached closure strips along them, and then placed the roofing panels on top. This provided all the necessary support. Side closure pieces are available if needed, but we didn’t require them. On every other stringer, I put the egg crates on to have a place for the panels. This took approximately three hours one day, using a few ladders I kept moving and a scaffolding plank.
The panels are adjustable in length with a significant overlap, minimizing the need for cutting. Ensure the initial length is correct, and you might only need to trim one end!
When installing the screws, avoid over-tightening. This prevents buckling due to expansion and contraction in varying weather conditions, which could lead to cracking. Tighten them enough to be snug but not too tight. Installing the panels took another three hours, so in sum it was probably about six hours. And a lot of that was me moving the ladders to get between the stringers.
I decided against installing the panel that connects to the wall to prevent water runoff. This piece only comes in a clear finish. Since we picked gray panels and want to maintain a consistent color scheme, we’ll monitor the situation and add it later if necessary.
What will we need to do to maintain the panels?
Maintenance primarily involves keeping the panels clear of debris. In snowy climates, be mindful of potential weight overload. Our location doesn’t experience significant snow accumulation, so keeping the top clean is mainly for aesthetic purposes. I may just put the leaf blower out the second-story windows to get the leaves and debris off throughout the year.
The material seems durable and should last a long time, even with potential storm damage like falling tree branches. I’ll keep you posted on how the maintenance is over time.
How much did the pergola cover cost?
The total cost for the pergola cover was $624.90. I did the install myself, but we did pay the contractors to adjust the slope of our pergola for drainage, since it was originally installed flat.
Here’s what I ordered at Lowe’s to cover our 12-foot by 20-foot pergola:
- 2 packs of 2-ft x 6-ft Corrugated Solar grey Polycarbonate plastic Roof Panel 10-Pack = $499.98
- 2 packs of 10-Pack Cross Link Polyethylene Solid Roof Panel Closure Strips = $100.98
- 3 packs of #10 x 2-in Galvanized Galvanized Self-drilling Roofing Screws 50-Count = $23.94
- TOTAL: $624.90
The ceiling fan dilemma…

We also added this $400 ceiling fan from Lowe’s to improve airflow and comfort on hot days. It also will help disperse vent smoke from grilling. Since our pendant lights and grill also have integrated lighting, we skipped a fan with lights.
At first, Julia was worried that the fan was too small. We polled our audience on Instagram, and a lot of people said to add another fan. However, we decided that we really don’t want them to stand out as a feature. In fact, when Julia’s sister, Andi, was doing a photoshoot in the backyard, she mentioned that she couldn’t even see the fan from where she was standing. You know what? Good!
The one fan blows so much air around, I can’t imagine having two fans…it would be hurricane level while trying to cook out. Does it function? Yes. Do we want it to be something larger that catches your eye? No. So is it ok as is? Yes. That’s how we came to the decision to keep it. The ceiling fan is the production assistant to the outdoor kitchen & pergola’s main character energy.
My thoughts on the new pergola cover

These roof panels are described as a pair of sunglasses for the pergola. They don’t make it super dark. So far, I love them! They take the edge off of the heat, they block the sharpest sun rays, and they shield from rain. They’re kind of like semi-clear shingles. This is the right solution for our needs, and it was such an affordable and easy DIY project.
The only thing I would do differently is have someone helping me move ladders next time, which would speed up the process of getting in between the stringers. Jules would have jumped in, but she was really sick that week. Just a tip for anyone looking to do this themselves!


Hi,
It’s a beautiful setup! We have the same scenario at our home. We had a pergola installed on our deck and didn’t plan for possibly covering it. I actually purchased the polycarbonate panels already but we are still stumped as to how to best get the grade it needs for water to flow off. Can you send me details on what the contractor did to help with your scenario? Much appreciated!!
I was thinking about doing this very same thing. I have 2 questions for you (I hope you still respond to comments/questions!)
1. Did you add any flashing or any type of seal where the corrugated cover meets the house? If not, how do you keep water from seeping between the cover and the brick on your house?
2. Have you experienced any storms with strong winds? How do your panels hold up in strong winds? And what type of fasteners did you use to attach them to the purlins?
It looks great by the way!
TIA!
We did not add flashing. Water sometimes runs down the brick, but it’s very little and isn’t an issue. On your second question, our backyard is pretty shielded from the wind so that’s not been an issue for us. I just used the screws that the Lowe’s website suggested for them. They’re self-sealing so water doesn’t leak through.
Love the look w/the added panels. I’ve thought of doing this to our pergola but I think it’ll be OK once the Virginia creeper vine covers more of it. Plus snow accumulation would be an issue for our area. But I truly loved reading your detailed post. 🥰
Hi! I’m thinking of doing this for my pergola but mine is galvanized metal that has a hollow center. Is yours the same or wooden?
Such a great idea and a simple solution! Is there a gutter system to catch the rain fall?
We didn’t add a gutter system to divert because it would change the look of the pergola itself and the design of the front profile. We wanted a minimal look!