
When I say, “quick,” I mean it. This one took me twenty minutes, but I think it only took that long because it was my first time. I can see how this whole process, from measuring for cuts to final stuffing taking 10-12 minutes. I followed this tutorial, tweaking it just a bit. Here’s how the process breaks down:
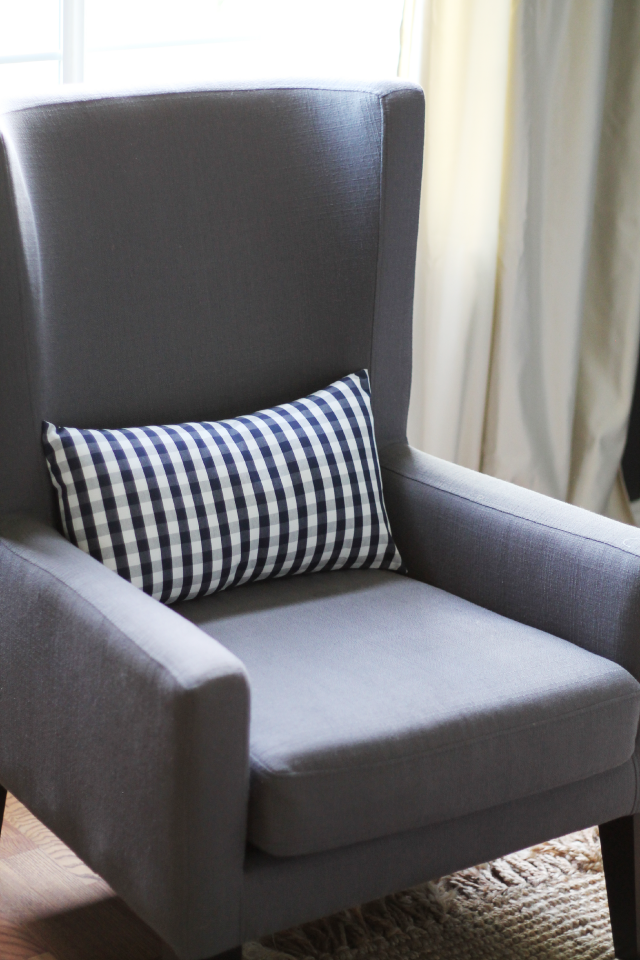
1. Measure your pillow by stretching a tape measure across the center and measure from seam to seam. My pillow is 12″ x 21″.
2. Determine the amount of fabric to cut. This is what makes this envelope pillow so easy. Instead of cutting two pieces for the back, you basically just wrap one long piece around the whole thing. So easy. So fast. For my 12″x21″ pillow, I cut my fabric 12.5″ in one direction and 46″ in the other direction. I calculated this by multiplying the length of the long side (21″) by 2 (to wrap around the front and back), and adding 4″ (for seam allowance and overlap). So I cut my fabric 12.5″ by (21″x 2 + 4″) or 12″ x 46″.
3. Hem the two short sides. Lay the fabric right side down with a short side towards you. For my pillow this was the 12.5″ side. Measure a 1/4 ” hem on each short side and iron them flat. On one short side hem another 1/2″ and iron–this thicker hem is the side that will show on the back of the pillow. Sew both hems.
4. Sew the other side two seams. With the fabric right side up, fold the side with the 1/2″ hem over a little more than half-way and fold the other side over so it overlaps the first side (you’ll be looking at the back of your fabric now). Make sure your fabric measures from fold to fold the same as your pillow. I just tweaked it until it measured correctly. So scientific. Pin each side seam, and sew with a 1/2″ seam allowance. Trim the seam allowance at each corner so there won’t be extra fabric in your corners keeping you from a crisp corner.

This is easy and fast, and maybe most importantly–empowering. I suddenly feel like, “I can sew a pillow cover!” You can. Quickly–like 5 in an hour! With kids running around! Even if you’ve never sewn one before. Let me know how it goes?


Hello people if you can’t earn any money online try – bluehand roulette
system – it earns me extra money everyday, just
google it
If you can learn to do it! I can learn to do it! Put our heads together and we’ll get through it!
~Song from Anastasia… I think.
Hahahahahaha!!!!!!!
I love these! I’ve been avoiding using our sewing machine but maybe it’s time to bite the bullet
I hear you. Pulling out my machine is the most intimidating thing.
Looks good! Envelope pillows are definitely the way to go!
I just keep buying new pillows from Etsy but this makes it seem like I really could make my own! Pinning now . . .
Right!?