Last week, we had a fun video shoot in our dining room with a large brand that will be coming out soon-ish (we’ll be sure to share when it does!) and against all odds, we were able to get the dining room in working order before then. So today I wanted to share a big update of where we are, where we’ve been and what still needs to be done!
By the end of the shoot, we had a beautiful, decorated dining table:

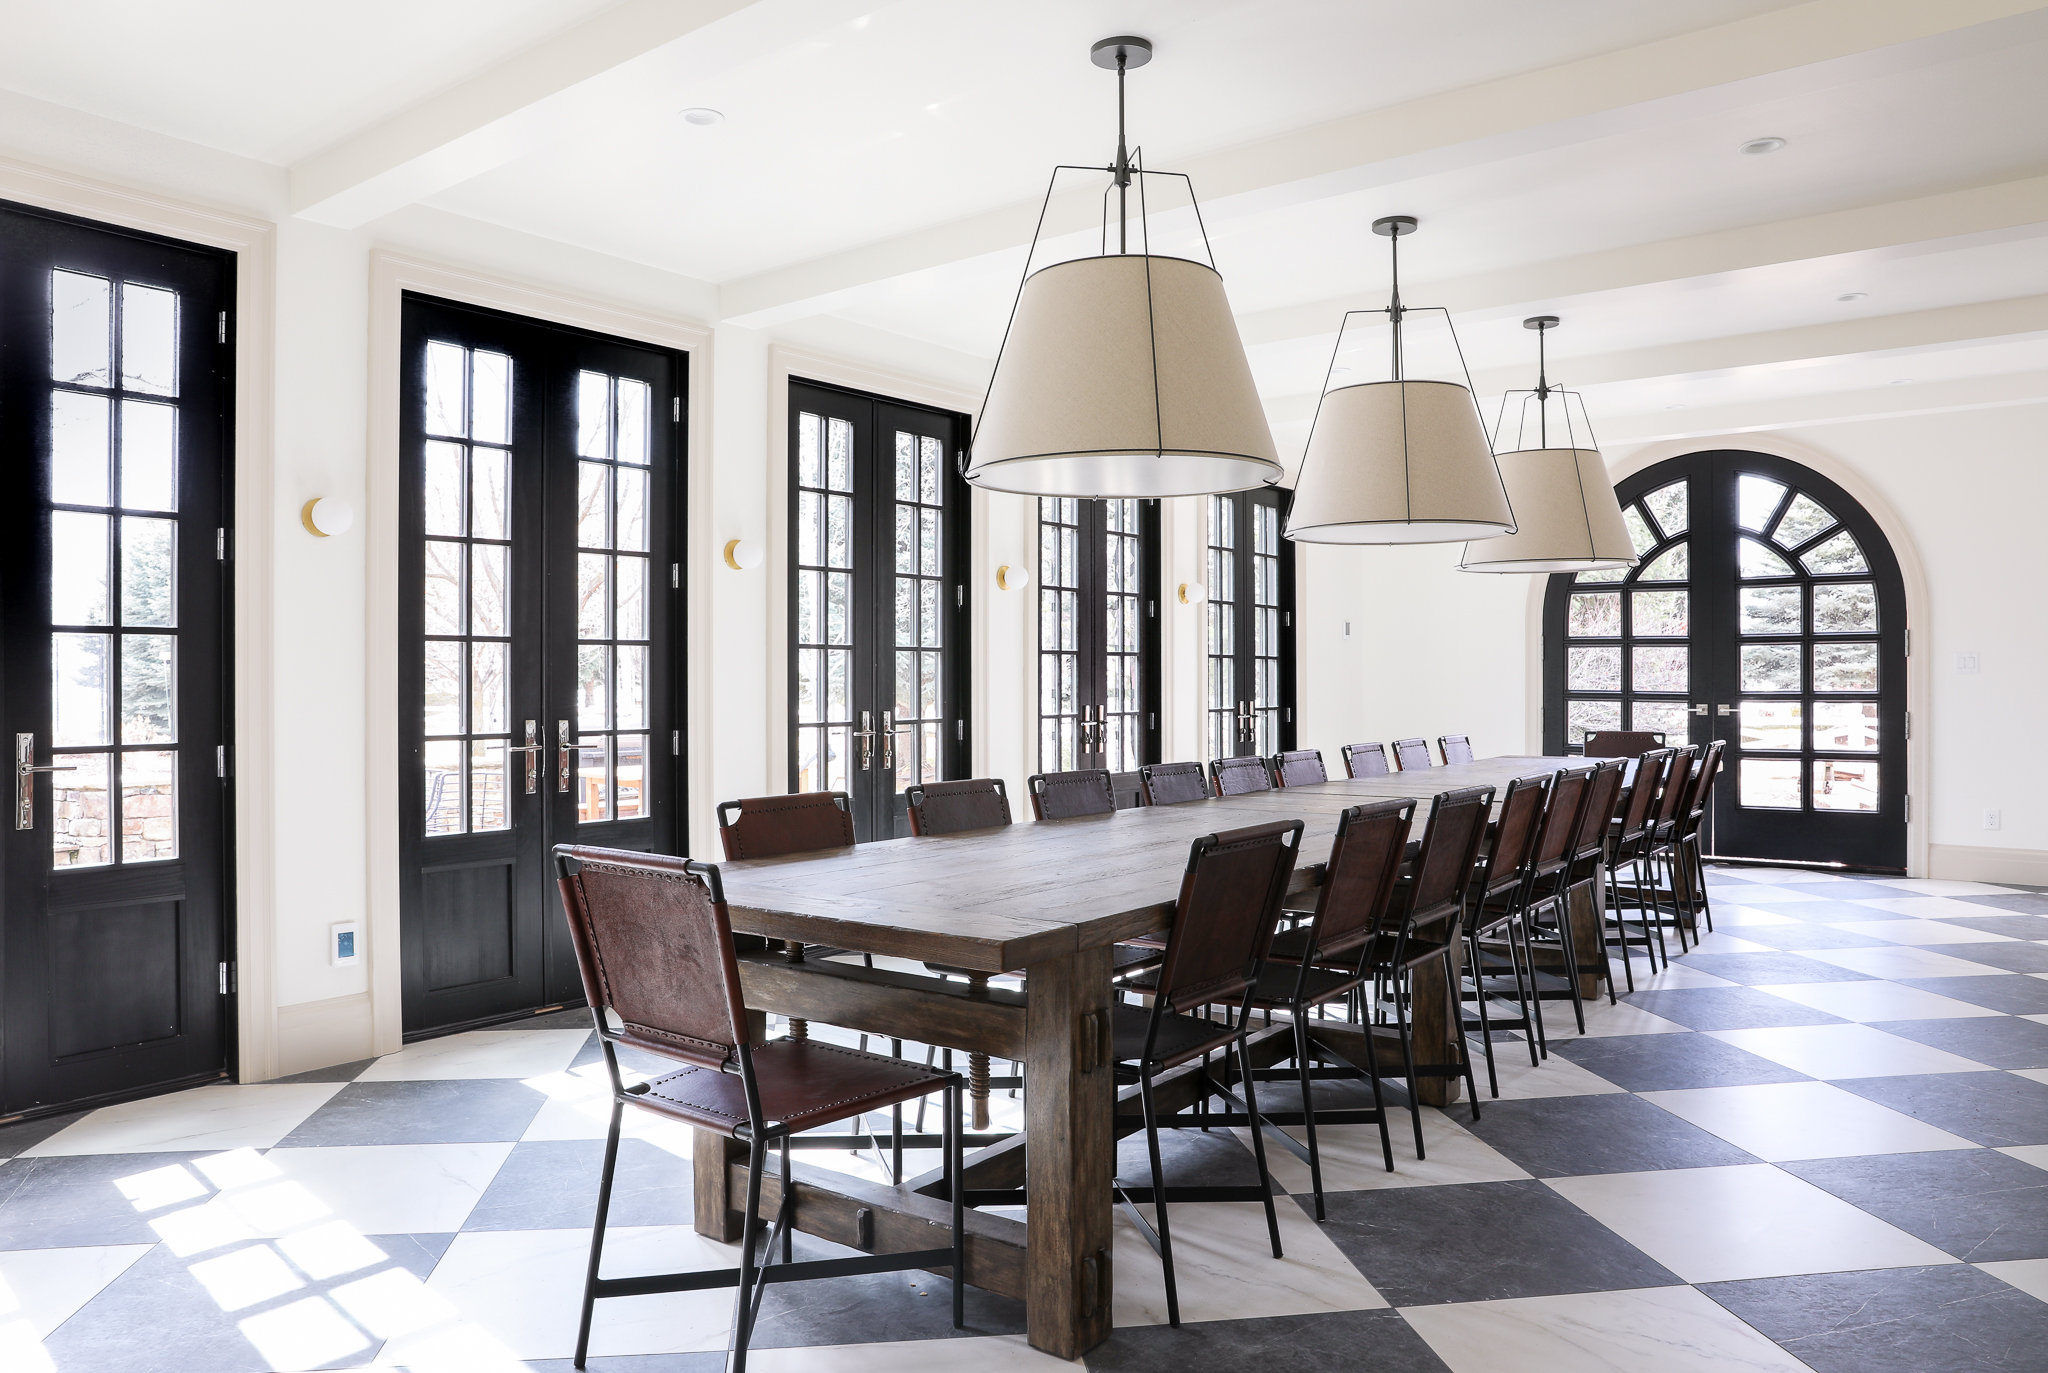
Floors (Dark one: Neuro, Light one: Magnifica Calacatta Oro) | Table | Chairs | Pendant Lights | Sconces | Vases | Flowers | Candlesticks | Plates | Appetizer Plates | Bowls | Silverware | Glasses | Napkins
When we first saw this space when we toured this home last summer, we envisioned a large gathering space for our family and friends to all have dinner together. But it started out as an enclosed porch.

We’ve come SO far from where we started, but let’s strip it down for just a minute to see how it looks without the styling so you can really gauge the progress that has been made and we’ll go through each point.
The Paint
Originally I imagined this room painted a warm gray but struggled how to make the transition since opening up a second arched doorway leading into the living room (that’s flush with the wall so there’s no clear breaking point). We discussed adding trim, but in the end my love for the simplicity of the arched doorways dictated carrying the same white paint (Sherwin Williams Alabaster) and trim color (Sherwin Williams Accessible Beige) into the dining room. I’m relieved and thrilled to say this was absolutely the right choice for us! Because the flooring is different in the dining room, I love that the flow of the wall and trim colors are the same. It really connects it to the rest of the house. Also because there are a lot of other show-stoppers in this room, it’s nice that the paint feels soft and secondary but ties into the rest of the house.
The Lighting
The large 30″ drum pendants (these, from Rejuvenation) add so much to the room. The size and scale are truly breathtaking in person, but they also say, “Hey, no rush, this dinner is with friends.” or “This is a comfortable place to chat for hours.” Also as soon as we put them up the acoustics in the space really balanced and it feels like home.
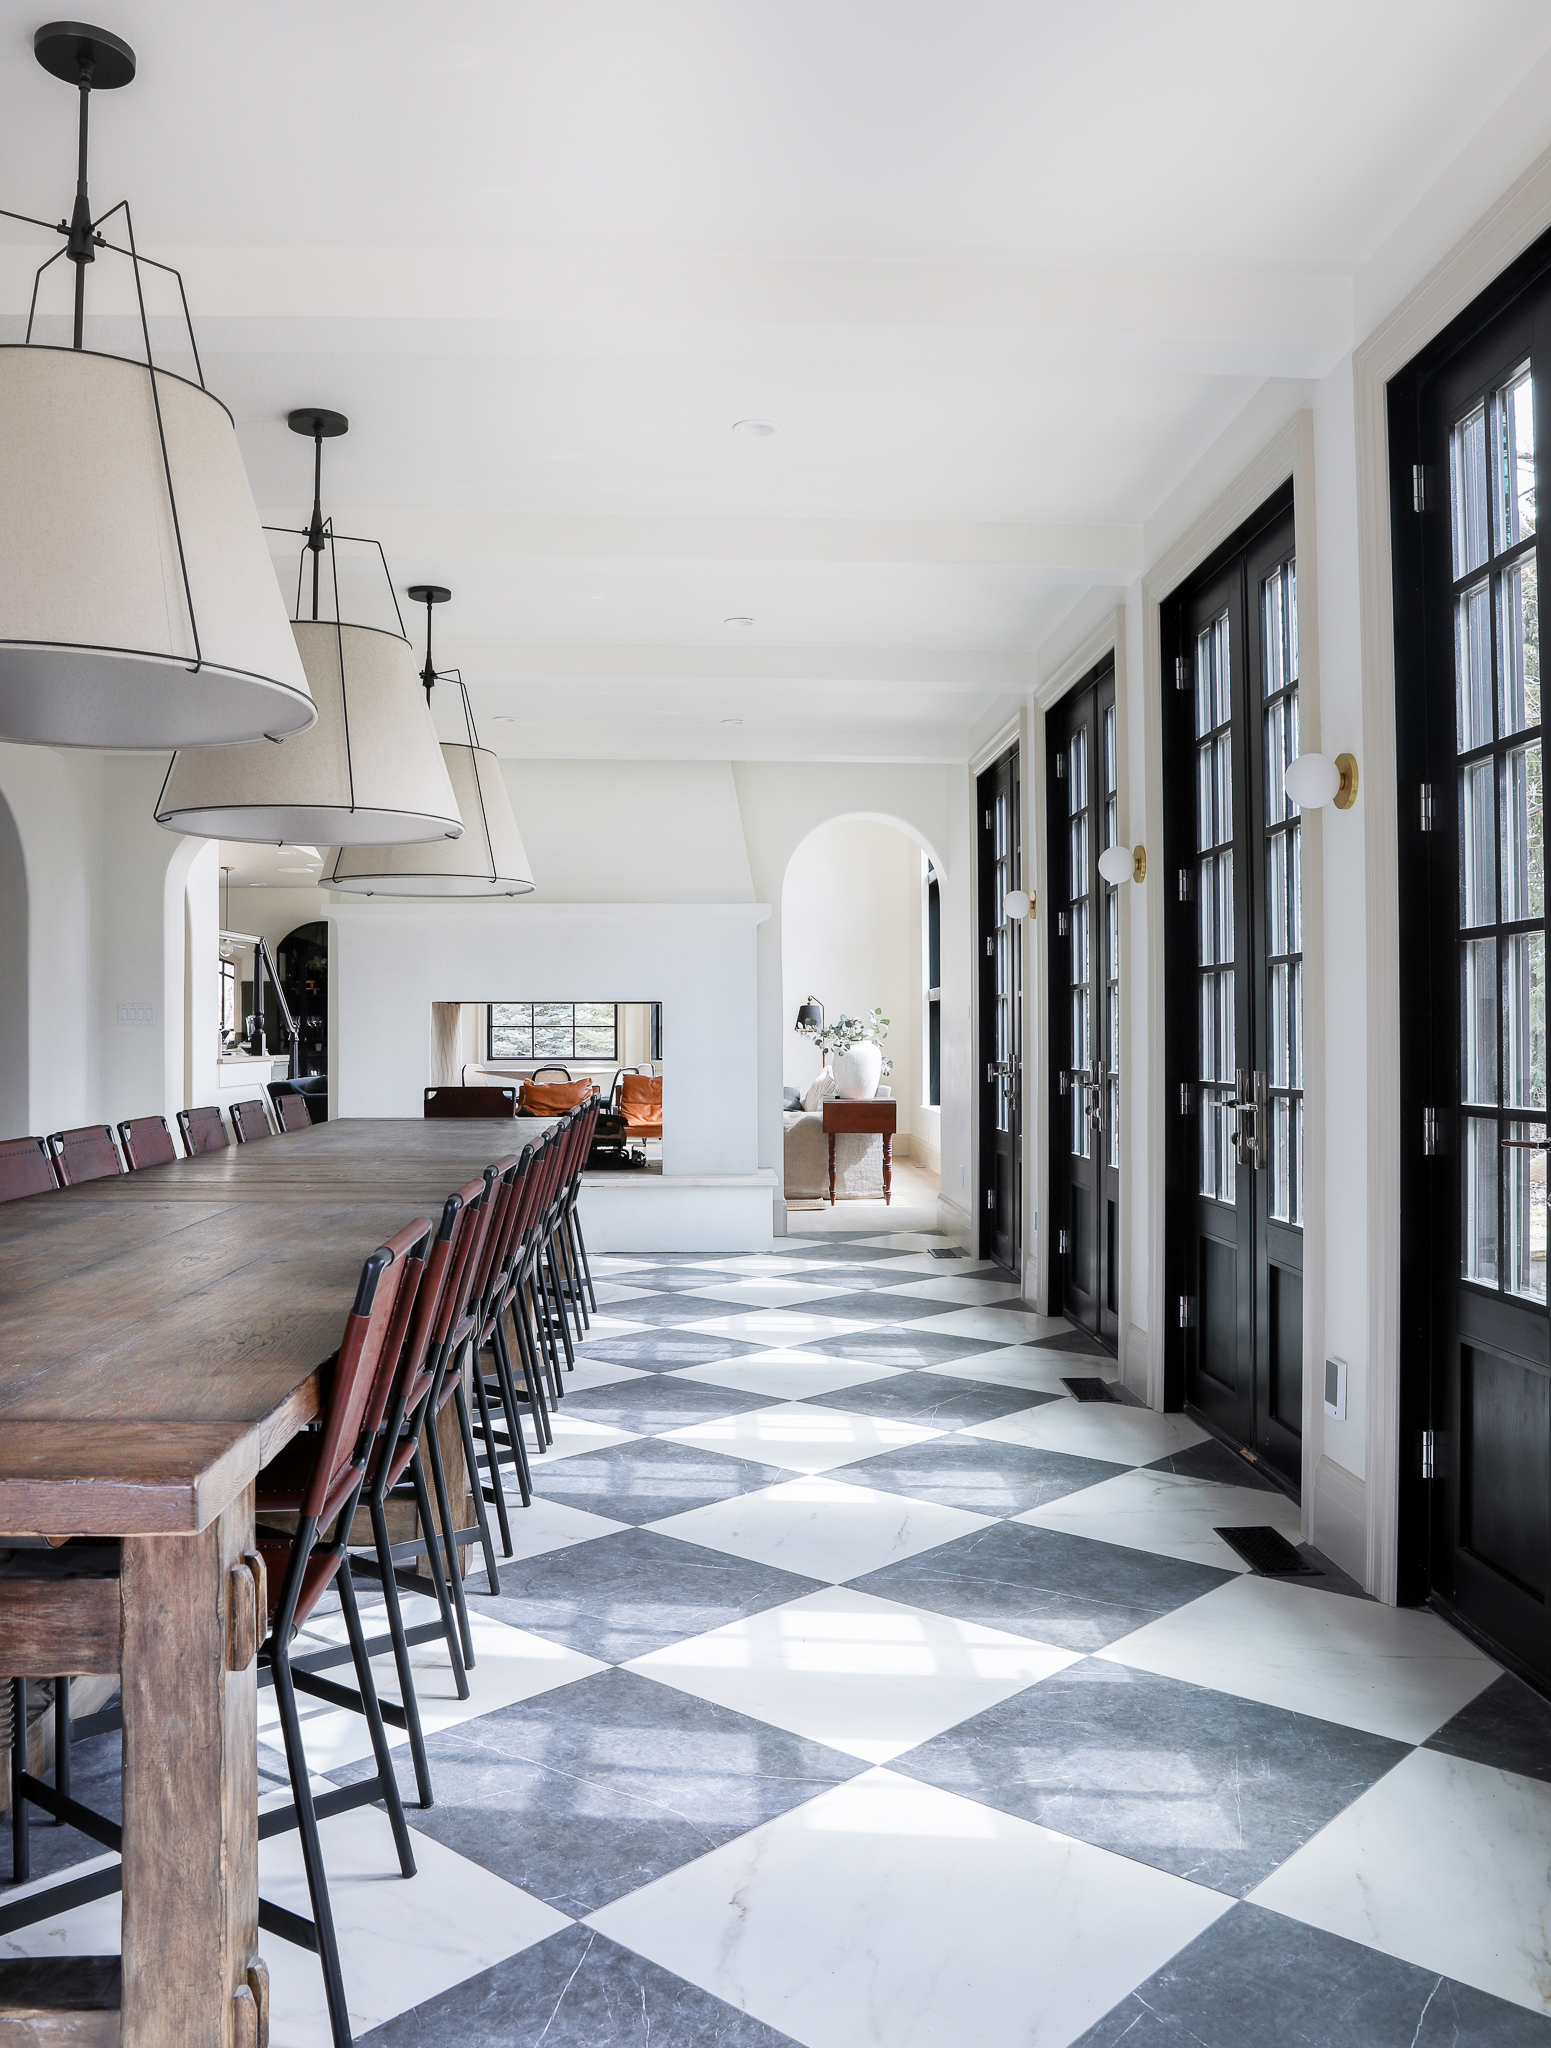
We originally got these candlestick sconces for the walls, but we held them up just a few days before the shoot and realized the backplate was too narrow for the electrical that was installed! We didn’t have time to get the electrical fixed so we overnighted these round globe sconces and it was the happiest accident. I love them even more than the original! They are a little modern and quirky (and tie into a lot of the other round fixtures we have in our home) and this room definitely needed that element.

The Fireplace
Having a large double sided fireplace has always been our dream, but now that it’s in place, we love it even more. It separates the living room and dining room, but still allows the space to feel connected visually and even audibly. We shared how the construction of the fireplace went down here, but since then we added a local honed ivory travertine hearth on either side that really finishes it off.
We aren’t 100% of the fire itself yet. We’ve had issues getting the logs we want in the size we need (36″) and the current logs don’t let a large enough fire through. (In fact, it’s barely visible) so there’s tweaking to be done there still and then I’ll focus on what to hang on the mantle!

The Beams
Probably the number 1 question I get asked about the beams in the dining room is why we painted them white instead of doing wood like the living room. We knew with a large wood dining table running down the center of the room, and large lights hanging above it and large checkerboard floors below, the last thing this room needed was another layer of contrast. But I still wanted to bring in the layered element, texture and architectural interest that beams add. Keeping them tonal (white on white) allowed us to get the look and interest without the high contrast.
Each of the 6 beams are about 5.5″ tall and 8.5″ wide, but there was just one little (big) oops. Apparently that height doesn’t clear the large double doors at the end! We opened them and they wouldn’t clear the beam by maybe a quarter-half inch.
I was feeling guilty because I was originally the one that said there needed to be two extra beams added at the edges so that the beams were evenly space throughout the room, instead of just floating in the middle. And although I stand by that decision, I took full responsibility for assuming the door wouldn’t hit (the beams were installed before the door.) But it was one of those perfect storm scenarios where apparently, the door opening was roughed in a little too tall and so the door was installed ever so slightly too high causing the collision.
Because it’s so minuscule, (it actually looks like it’s going to clear in person!) we’ll just trim off the beam on the end half an inch and if we can avoid doing that to all of them…we will.

The Doors
Permitting, heating and entirely reconstructing this room as part of our home as opposed to the step-down, walled-in porch it once was added valuable living space and square footage to our home that we are excited to use year round, but we definitely see summer dinner parties, with all the doors open to the patio and the flow from inside to out being magical. The five doors we added lining the left wall are all Pella with Baldwin hardware. I love the traditional look of them and we have already gotten used to opening one door (the others remained locked) during the winter/spring.
The original double arched door at the far end of the dining room was in rough shape when we bought the house. It wouldn’t open, would lock, had broken glass, but when we got a bid for a new one it came in at $17K!!! So we looked around for someone that could restore the original. It required a lot of wood filler and new glass and time, but I’m so happy we were able to save the original.
The inside wood was past repair, which was fine because we wanted to paint it black to correspond with the other doors anyway, but the exterior will remain wood which we’re excited to see come to life when we do our exterior. You can still see light poking in from underneath (remember how it was hung just a smidge too high) and in the center which is easily fixed with weather-stripping. Still work to do on the door!

The Furnishings
At the very beginning, Chris and I were going to BUILD a table for the space but back in November, in this post, we explained our reasonings for buying two tables instead. Part of it was because they were on clearance, but also, they are a lot more versatile. These two table together look like one large table but they can expand even further or condense down if needed, too. And if we ever want to clear the room for, I don’t know, A DANCE PARTY, it’s a lot easier to move and store two smaller tables, as well.
When pushing two tables together, especially two that you order online!, you definitely worry about how the seating will fit around it. We were anal about measuring and spacing and I’m so happy with how it all came together. Right now, we have two center leafs in (so one end of each table that touch) and three chairs fit perfectly in each section–fitting 20 total around the room.
Happy to report the leather chairs are very comfortable too! We had several guest that were here for the shoot even compliment them which made us feel even more confident in our choice.
We’d love to have two substantial captains chairs at either end of the table eventually, but for now, the extra smaller leather chairs are serving as place holders.

The Fauxdenza
On the right side of the dining room, across from the wall of doors, we always imagined a long storage solution. Turns out, a 12 foot credenza is both, very very hard to find and also extremely expensive! We decided to build a fauxdenza (which is just a floating credenza/sideboard made of upper cabinets mounted together and attached to the wall) for now and we’re already loving the extensive storage close by. All of the plates, glasses, silverware, napkins, vases, candlesticks, bowls, etc. for this table fit in it. We topped it with painted plywood temporarily, but I’m looking into a stone remnant for the top and I still need to find knobs, too!
Also, lamps and art for above it!!!
For us, this is a dream space. And it represents a lot of what we value in our life and why this house spoke to us. It’s ironic that it’s usable right when we’re all social distancing, but the future is bright and we can already envision the dinner parties, gatherings and conversations we’ll have here.


Can you share the name of the company you used for the subtile heating? Thank you!
Love this room so much! Question on the floor tiles… one is 24×24 and the other 30×30… also, thickness is different. Did you have the larger tile cut down and use grout to level them?
The thickness was the same, but we did have to cut down the larger ones!
This looks amazing. I am curious about adding the same floors in my kitchen. However it is much smaller. Do you think that it would work in a small kitchen?
It is simply stunning! Love it so much!
Would you mind sharing which doors you got? I am looking for those and cannot find them with two handles. The room looks beautiful!!
These are “Special Architect, Double Inswing Doors, Contemporary” custom doors from Pella — and we have a whole blog post on them coming up!