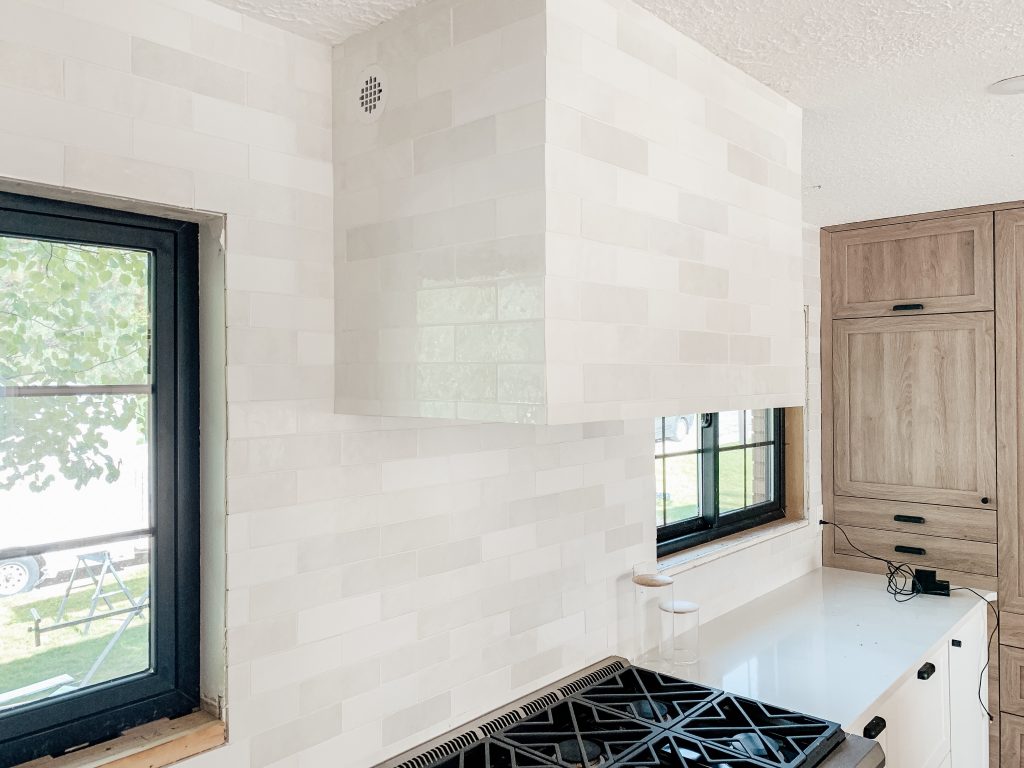
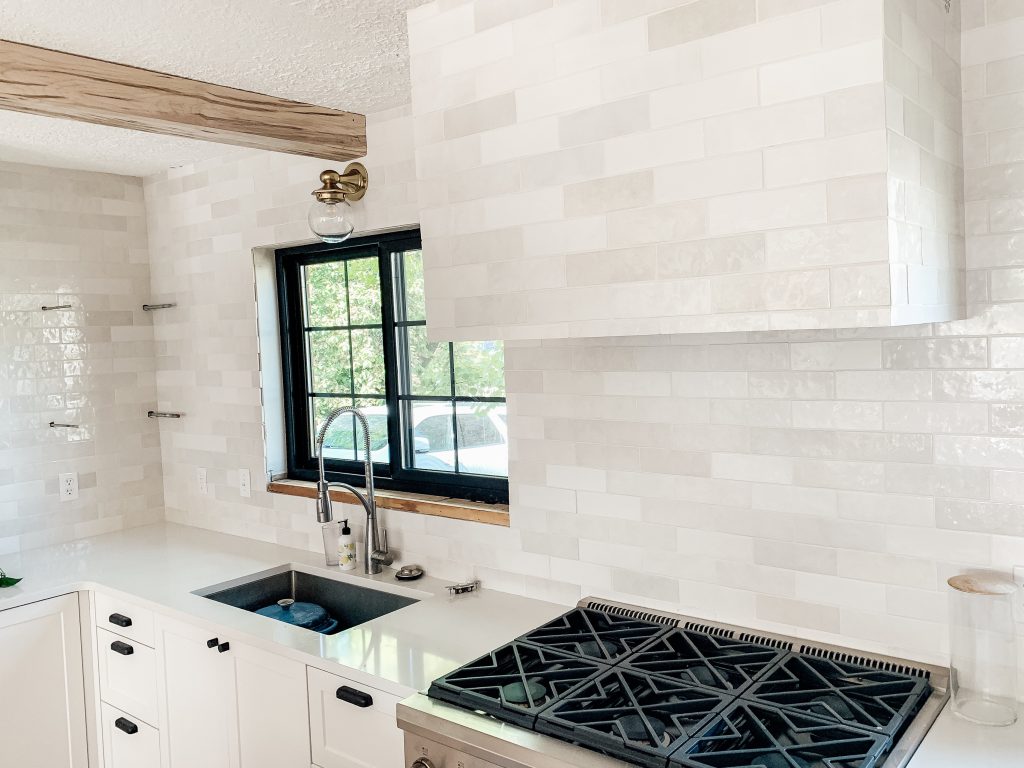
As we come to a close on the Fullmer’s kitchen (aiming to finish tomorrow, with the exception of some stying and pantry organization etc.), we’re so excited to pull together all of the little parts of this project to share. One of those parts we wanted to share today – building out their custom, tiled cover for their Cafe Appliances range hood insert.
There are, of course, several ways you can build a range hood cover. Most commonly you’d use cabinet-grade 3/4 plywood and cabinetry screws to form a box around the range hood, but we went a different route this time. Because we wanted to tile the entire cover, and the hood was going to be hanging from the ceiling, I wanted to keep bulk down while having a sturdy structure. Also, since we were doing a recirculating range hood (the insert we used can be either, but we went with recirculating because this is the front and center of their home and they didn’t want a vent sticking out) and I had to retrofit it a bit, I wanted easy access to connect the exhaust after the hood was in place. For those reasons, I went with 2×3 dimensional framing lumber for the skeleton.
1. Build the Skeleton
Whenever I’m building a custom range hood I prefer to build it directly around the hood itself, as opposed to taking measurements and hoping it ends up right. I first framed the front and sides, leaving the back open so the hood would sit flush against the back wall.

I then set that aside and repeated the process, but this time I removed the frame from the hood and added a back piece to close in the support. These pieces would be the bottom (front and sides framed) and top (all four sides framed) structure. I then added four vertical supports in the corners to create a box.

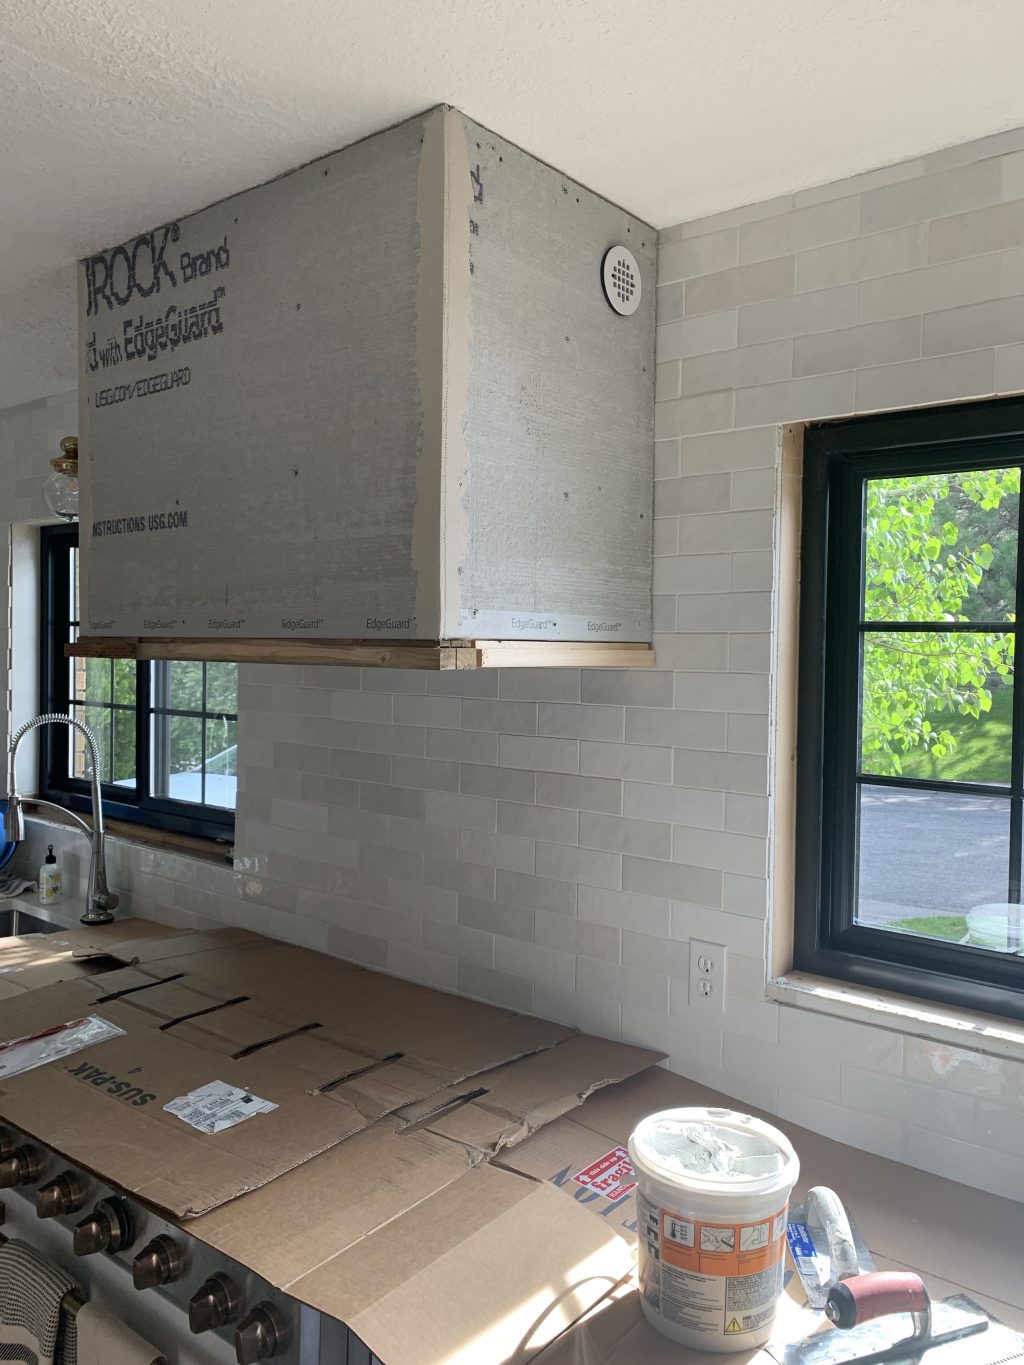
Since we wanted to tile the hood, I needed to add a layer of 1/4in Durarock on the outside. To keep this stable, I added vertical supports leaving gaps no larger than 10in.

2. Ensure Proper Ventilation
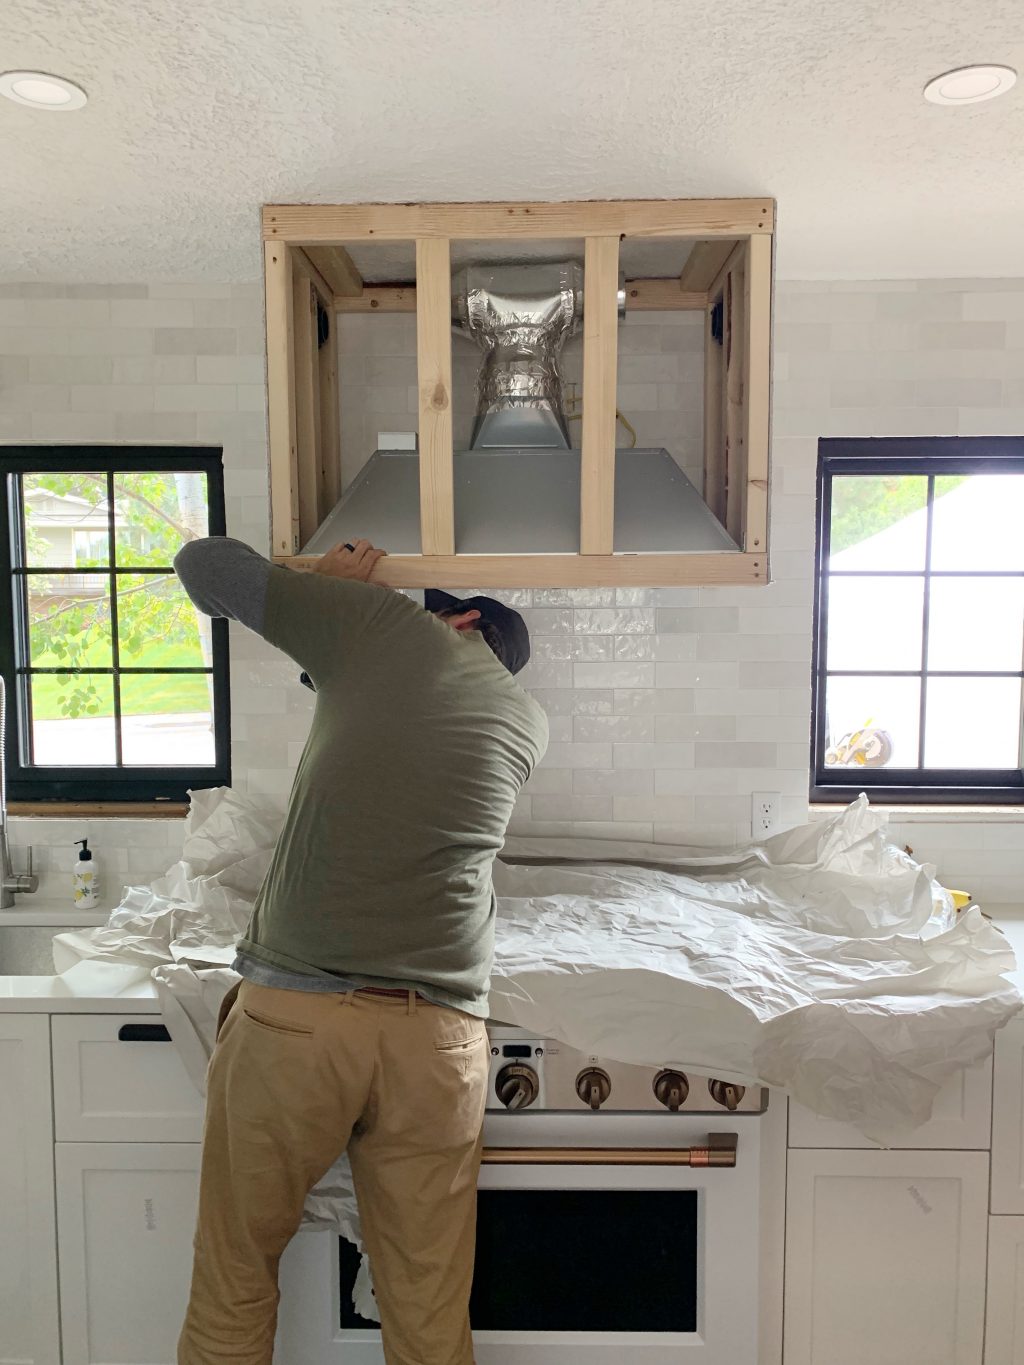
A vent hood is designed to move a specific amount of air, and when you plan your ventilation make sure you maintain adequate air flow. Our Cafe Appliances range hood came with an 8in duct, and suggested venting out the front of the hood, near the top. In visiting with the homeowners, we didn’t want a large, clearly visible vent on the front of our tiled range hood, so we opted to create custom duct work to split the air flow and taper to two 4in vents.
Note: This was a compromise with the understanding that we would have slightly louder wind noise due to the reduction of air flow, but we felt it wouldn’t be significant enough of a reduction to negatively impact the day-to-day function of the hood. Every homeowner should make that choice for themselves, of course.
Anybody who has ever tried to find a round, 4in vent register has likely found the same thing I did – they don’t really make them. Or at least they aren’t common enough to be in any of the major hardware stores. But what they do have is plumbing drains.

This is obviously a “hack,” but worked amazingly well. Not only was it white and would blend into the tile well, but it came with a nut and washers you could tighten over the Durarock so it would hold itself in place.


I kept the front of the cover open at this point so I could finish attaching all of the venting after it was hung and in place. But here’s a look at the final venting:

I opted for 4in flex tubing, typically used for dryer vents. Using this I could tuck the venting as close to the ceiling as possible while allowing flexibility on actual vent placement. I secured them using large hose clamps and foil tape.
3. Mount the Cover to the Ceiling
Mounting the cover is simple, but requires an extra set of hands. Cut two boards that fit inside the top of the cover on the sides (or the front, depending on the direction of your ceiling joists – supports should be perpendicular to the ceiling joists). Hold the cover in place where you want it to go and mark the ceiling all around the inside of the frame, then set the cover aside. Secure your mounting boards directly to your ceiling joists lined up to the inside edge of the line you marked when holding the cover in place.

Due to the weight, these supports MUST be secured directly to the joists. Hold the cover back in place so it slips around the mounting boards, then secure the cover to the boards with 3in wood screws spaced 6-8 inches apart.
4. Install the Range Hood
Lift the range hood into place and secure it to the cover. Attach your venting and finish enclosing it by adding the Durarock on the front and joining the corners with mesh tape and mortar. Allow to dry over night.

5. Tile the Cover
We decided to miter all the corners of the hood and carry the tile to the underlip as well since there was bare wood there. Alternatively, you could just used finished edge tile. Using a table saw, make a 1/2in square notch along the edge of some leftover 2×3 lumber. Use this to build a ledger for the tile and secure it to the base of the cover.
Start tiling from the bottom (we used the Cloe wall tile from Bedrosians), centering the first tile and going out from there. Be sure to trim the bottom row so the top grout line matches up with the grout lines on the wall. Also, there are a few ways you can handle the edges, but we mitered the tiles and that worked great. When mitering, be sure to plan your cuts to allow for grout along the corner.
We made a video talking through some of the considerations for the range hood cover, as well as showing the tiling process all the way to grout! which you can see below.

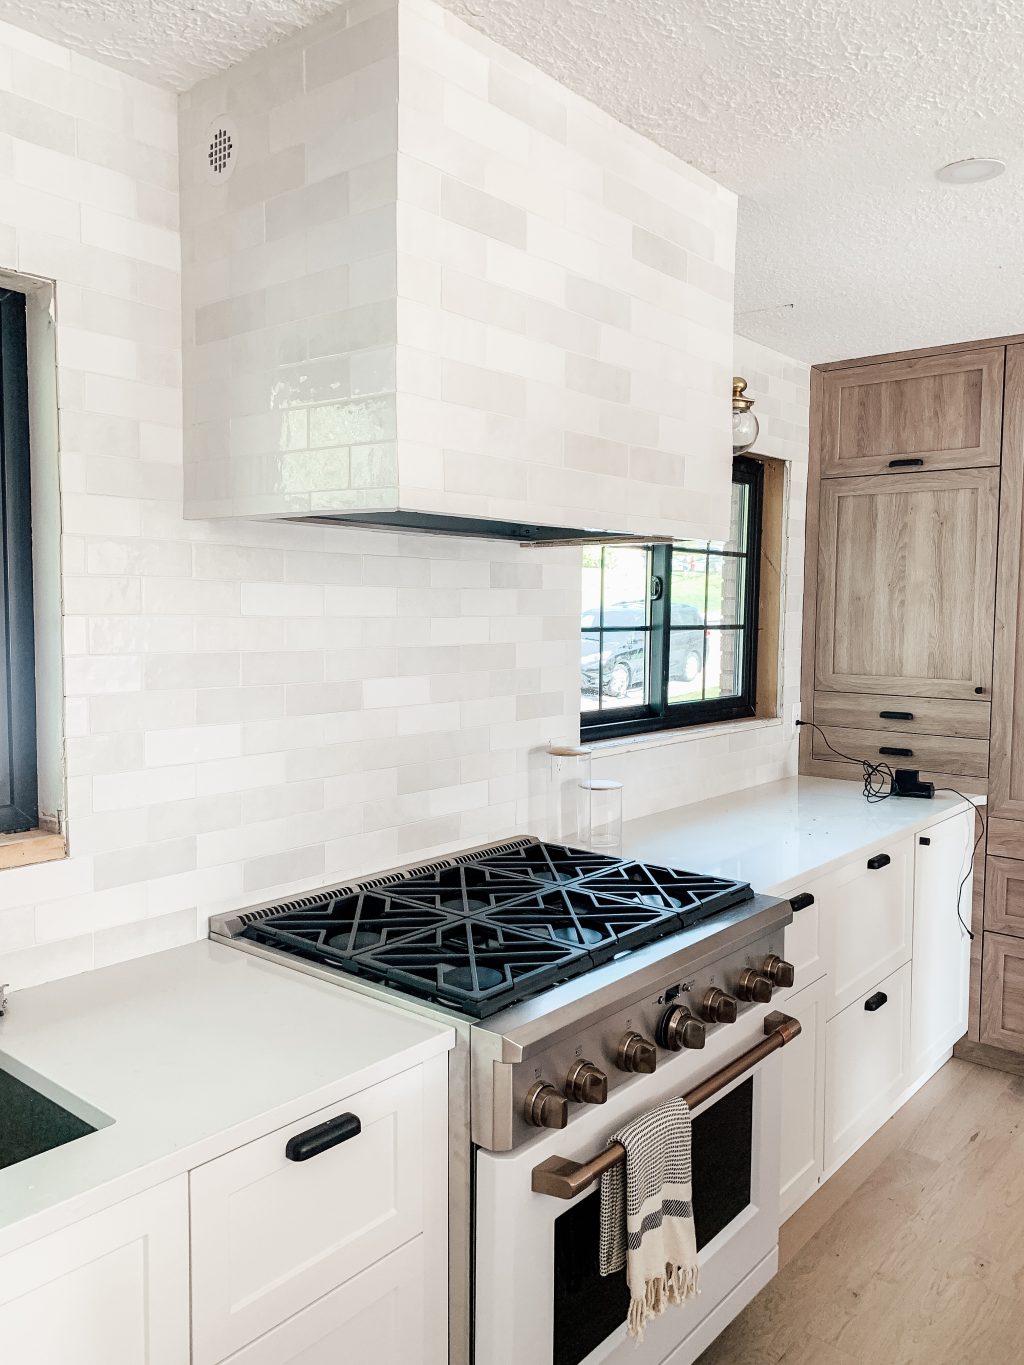
The entire process took place over 3 days. Building the cover was a full day, tiling took a few hours the second day, and grouting/caulking took about an hour the third day. All in all this was a very approachable project that gave this already special kitchen another element that’s interesting, but not stealing attention from the elements around it. Jules and I say all the time how this kitchen is definitely our favorite kitchen we’ve done (including our own), and every bit of progress just makes that more true.
Note: In this post I didn’t share dimensions of the range hood cover, because that’s likely not relevant to the cover you need to make for your space. Your range hood will be a different size and your ceilings a different height. Plan for 28-36in of space between the top of your range and the bottom of the hood cover (getting as close to 36in as you can), and implement the above steps to help you create something that fits perfectly in your own space.


I don’t get the point of venting into a room! I’m changing out my above stove microwave that does that!
Love this kitchen. Did you guys seal your grout? I’m wondering if I should put a sealant on the tile especially in back of the stove.
This may be the silliest question but when a vent hood is covered like this, how do you ever replace it if it breaks or do maintenance? I want to do something similar in my kitchen Reno, but don’t want to have to rip it out if my vent hood breaks.
Thanks this helps a lot in building our custom hood. Can you tell me where the kitchen cabinets are from? They look like a matte natural wood shaker.
They came with the house, so unfortunately we don’t have source notes on these.
Looks great! I’ve been told you need to be able to access it from the front to service the hood.. is that a concern? Or how do you access?