If you’ve been reading for the past few months, you’re probably at least a little familiar with the standing desk we’ve been working on for our office. Well today we’re gonna share how we did it, and it was actually pretty easy. Especially since IKEA did most of the hard stuff.

You may be wondering how we decided on customizing IKEA kitchen cabinets to create a standing desk. I mean, there are thousands of standing desk options out there, why not just go with something already built for that? For us it came down to the look and function. Standing desk height is as subjective as… well, how tall each individual person is. Jules and I are pretty tall (6′ and 6’4″ respectively) and after playing with some adjustable desks and measuring how tall it was once comfortable, we landed on 46 inches. We started with a 30″ tall 36″ wide base cabinet and made it ultimately 46 inches tall by stacking, to put it simply.
IKEA’s kitchen cabinet drawers are available in 5 inches, 10 inches and 15 inches. If we could get one 36inch wide base cabinet (the base cabinets are all 30 inches tall) and put in one 15in drawer, one 10in and one 5in, that would fill that up. And if we could stack two more 5in drawers on top of that somehow, that would get us the height we needed (4.5in toe kick + 30in tall cabinet + 10in tall cabinet +1.5in countertop = 46in). Bad news – IKEA doesn’t make a 10in tall kitchen cabinet with drawers. Good news – they do make a 15in “above the fridge” cabinet, and all the holes on all of their kitchen cabinetry are the same. So our plan was to cut it down to 10 inches and then the drawers should fit into it perfectly.

After thinking it through to make sure we weren’t overlooking any details, it actually was a fairly simply process. We set the boards on top of where they would sit to make sure we cut the top 5 inches off each side piece. We then drew arrows pointing to the edge that needed to be cut, so we didn’t mix them up.

We took the piece we cut and clamped it over top the new top edge of the board as a guide for drilling the assembly holes back into it.

We then checked our drill bits to make sure we used the correct size bits in each hole, and marked the bit itself so we knew how far down to drill so we wouldn’t go all the way through the new board.

Old holes and new holes, perfectly lined up. From there, you simply assemble per the instructions and stack the 10in box on the 30in box.

IKEA cabinets come with metals bars that have screw holes for attaching countertops. We just used those holes in the bottom cabinet to attach the top cabinet. worked perfectly.

You can also adjust IKEA cabinet drawer tracks to go up and down a little to minimize any gaps that may appear in between drawers and to make everything level.

We ordered these super classic white drawer fronts from Semihandmade, as well as matching cover panels for the sides, back and toe kick. The great thing about Semihandmade is we could give them the dimensions to this new standing desk we built and the cover panels on either side would cover the weird seams without leaving a trace that they ever existed. A toe kick or base is where you can really make the height work for you. I built a base for the cabinet using 2×6 boards that I ran through our table saw to make them 4.5 inches wide (the height of the toe kick) and attached the toe kicks all around the outside using screws from behind. With the toe kick in place and our countertop on, we couldn’t be happier about the completed desk.

Of course, nobody wants to stand all the time, so we found these great adjustable bar stools that get as high as 46″. You may notice they are different than the ones we shared a couple weeks ago. We talk about that pretty extensively in this week’s podcast, so you can listen to that for that full story (I think that segment starts at about 17:00). But the positive about these is they are height-adjustable which means Chris and I can both find a height that’s comfortable for us.

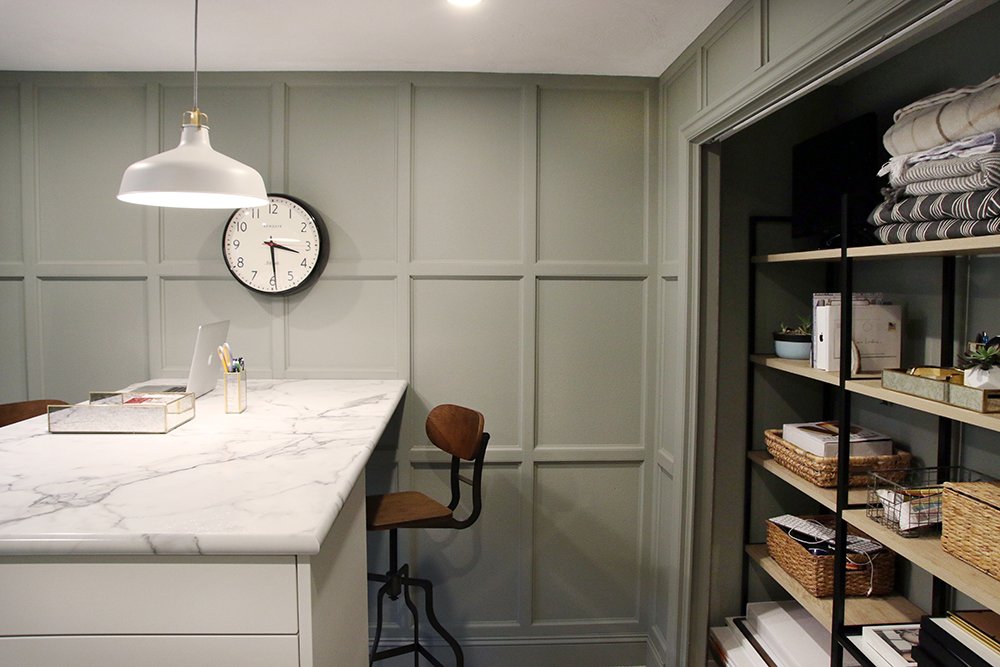
The office is still a work in progress–we’re still waiting on hardware to arrive for starters–but there is a lot of progress and it has provided us a place to work efficiently and quietly during the day. (Three cheers for being able to close a door!) We did finally settle on this simple pendant light from Ikea, no less, that we swagged over the center of the desk. We hung this clock that I originally ordered for the Pittsburgh kitchen (sadly, it didn’t fit above the doorway in there like I thought it would) and although we have the time staring at us from all devices, it’s actually motivating to have a real clock in here–and if nothing else, eye candy.
I don’t think these walls need art, but I couldn’t resist hanging this piece by Angela Simeone, a fabulous artist out of Nashville. I love the movement (and almost rebellion) in her abstracts and I thought it was a good juxtaposition with the formality of the wall treatment.

We’ll share a lot more pictures, before and afters, and full shots of the room as soon as we finish it up in the coming weeks. We had a really positive response to the Lowe’s Christmas post we did where the sources were tagged and shoppable on the image, so I included one below–we’re open to hearing your favorite way to get sources from us.


What is holding the desk up on the side opposite the drawers? Is it mounted into the wall?
I built a wooden support that screwed into the studs in the wall that the top of the desk sits on. We also drove some short screws through it into the desk to keep it stable.
Absolutely love the DIY aspect of this. Not sure if we are quite there yet :-) . Sharing an office with a MAC individual and a windows computer (honking CPU) is daunting. This could work!
Everything looks great! I’m wondering if I missed the final reveal, tho, since this post is from back in November..? I’ve tried searching your ‘Tour our House’ link as well as a Google search and haven’t had any luck.
I’m looking to get new drill bits. Do you use any that you really recommend?
The shoppable image is pretty cool. In Feedly, it just looks like an image, so if you are going to do it that way, just make a note so we know to click through.