This weekend, we finally paid some much needed attention to our island. Up to this point, it has been mostly covered with tools and supplies in photos bearing its bad, fake brown wood interior for all of you to see.

We had always planned to cover those sides with the coordinating Laxarby cover panels that match the drawers and doors, but we also wanted our island to have seating. Instead of having the typical right or left side dedicated to barstools (right in our former kitchen), we opted to extend the end of the island, opposite the range, 27 inches out to house some casual seating. We did this for a couple reasons; 1. With the fridge being on the right side, it seemed incredibly inconvenient for seating to be there, as well. 2. It allowed us to have drawers/storage on both sides of the island. 3. It allowed for workspace on 3 of 4 sides of the island, which is nice when you get something out or are working with the fridge/sink/range and you can put it right on the counter.
The first step to customizing our island was adding legs. We used 4x4s as our base and Chris screwed hanger bolts into both.


Because we have tile floors, he used a diamond drill bit (specifically for tile) to drill pilot holes and screwed the 4x4s into place until they were tight.

For our island top, we ordered a chunky 2 1/4″ slab of plank style Black Walnut from Craft Art. It arrived last Friday and it is breathtaking! It is also extremely heavy. My parents came over and helped us haul it into the kitchen.


To secure it, we drove screws through pocket holes in the 4×4 legs and Ikea base cabinets actually come equipped with support brackets for countertops that let us know exactly where the screws go.
At this point, we had our basic island shape, but it was looking very…rough.

In the morning, we started making the island shine by (finally!) adding the cover panels to the sides but also to the legs! We purchased a few extra panels in anticipation for this project.

We planned on adding trim, so we saved a little money by getting the shorter cover panels and dividing up the width on the legs, attaching each section with a nail gun (where we were also adding trim pieces).


We were inspired by this island when picking out the trim for our legs and found this slim pencil trim pictured above at Home Depot for a couple bucks for 48 inches. Chris cut each to size, mitering the edges, and I painted them before attaching each with Liquid Nails. If you’ve ever seen the Laxarby Ikea cabinets in person, you know they are a multi-tonal black, but I just took a whole door to the paint counter and had them color match it and it worked great for all the trim, including a chunky baseboard we attached to the base of either side of the island.

We are missing an important photo right here. A photo of all the trim attached pre-caulking and painting. It looked crazy. Not good at all. But! A little black caulk and color matched paint left us with a sleek finished island.


The moulding on the base of the legs was another Home Depot find and we wrapped the baseboard we attached around to the front to give it a finished edge.
We are still in the process of Waterlox-ing (a special kind of sealant and semi-gloss finish from tung oil that enriches the wood while protecting it from water or stains in the future) our black walnut. I put on two coats, about 12 hours apart, this weekend, but will probably do two more.

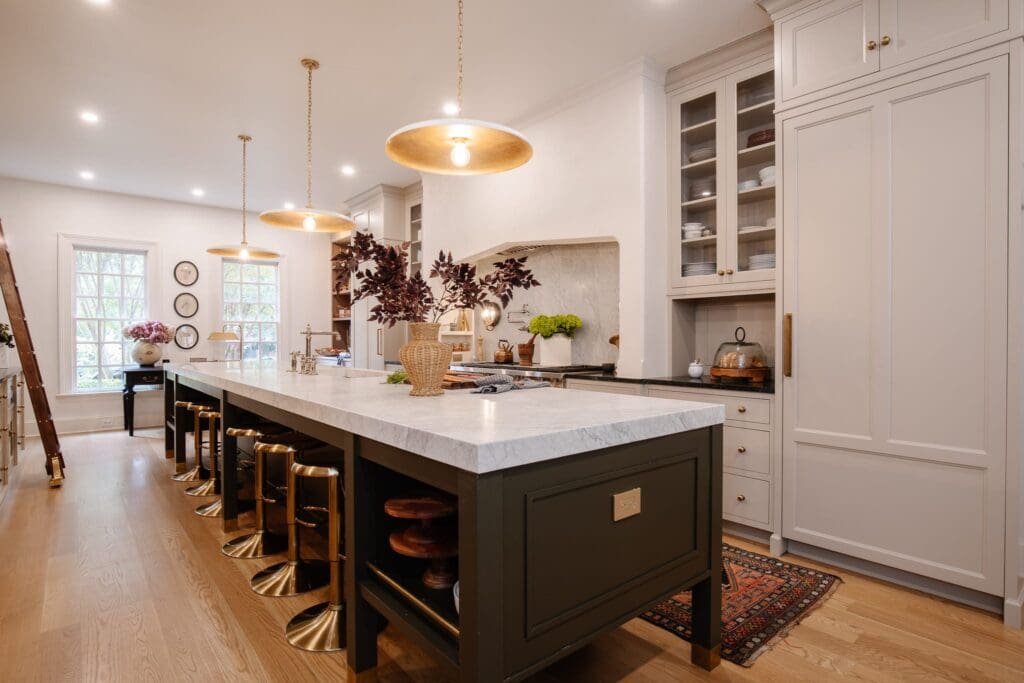
So while the wood hasn’t come to its full color yet (you may even see some areas of the countertop still absorbing the oil in these photos), I couldn’t resist giving you a peek.

It adds so much warmth and character and movement to the kitchen, we can’t imagine the kitchen without it now.

We plan on adding four backless stools to the setup once we’re finished, one to either side and two tucked in on the end which will be great for casual eating or chatting away while Chris cooks. The finished island is 50″x 70″, which feels massive to us! Can’t wait to put it to use!

I know you took a LAXARBY door in to have it color matched, but I haven’t had luck with that. Your match looks spot on! Would you be able to share: (1) the type of paint/stain you used (including the sheen – Stain, Semi-Gloss, etc.); (2) the “formula” on the attached sticker; and (3) the quantity (quart or gallon – this will impact the formula you share)? I’d like to try to purchase the same paint/stain base and have my local store duplicate your formula to see if they can get it to work.
Y’all have a bunch of broken picture links on this post. :(
You have no idea how happy I am to have stumbled across this post! We installed our own cabinets last year and are ready to do a peninsula with seating now. But I was overwhelmed trying to figure out how to do the legs. Thank you!! I almost fell off my chair reading this, I was so excited. :)
Such a beautiful island. The wood is lovely. Did you purchase the wood countertop unfinished? and then only used the Waterlox? Or did you stain then use Waterlox? The warm wood tone is lovely.
You’ve probably grown weary of all the compliments, but gosh you really did a good job.
Thanks Bridget! We only used Waterlox. It brought out the beautiful walnut all on its own.
If you wouldn’t totally mind me troubling you once more… What are the dimensions of the kitchen? If the island is 50×70, how much space do you have on either side of the island; the walking space between the island and the counter/base cabinets? I would like to have a huge island in lieu of a table and chairs (work space on one end and seating on the other end).
There’s about 44″ on all sides of the island. Hope that helps!
Totally! Thanks!!
Thanks so much! It is stunning and thanks to you, both Craft Art and Waterlox have a new customer!
Wondering about the size of your island… do you think it is the right size? Would you change anything?
Wouldn’t change anything with the island. Very happy with it.