When we bought our home, one of the things we were most excited about was the storage room. It was lined on either side with shelves and we had never had a room dedicated to storage before. What a great thing to have!
Fast forward to moving day and the issue became very obvious. Though the room had lots of shelves, they were only about 10 inches deep and 12 inches high. This puts a pretty tight limit on the things you can store on the shelves, and everything else ends up stacked on the floor in the middle of the room.

“Stacked” is a bit generous. More like tossed. But with some planning and basic construction know-how, we’ve turned the above, into this. We’re sharing the full tutorial on how we built the shelves on Homes.com today (right here!) but wanted to give some more back story here, too.
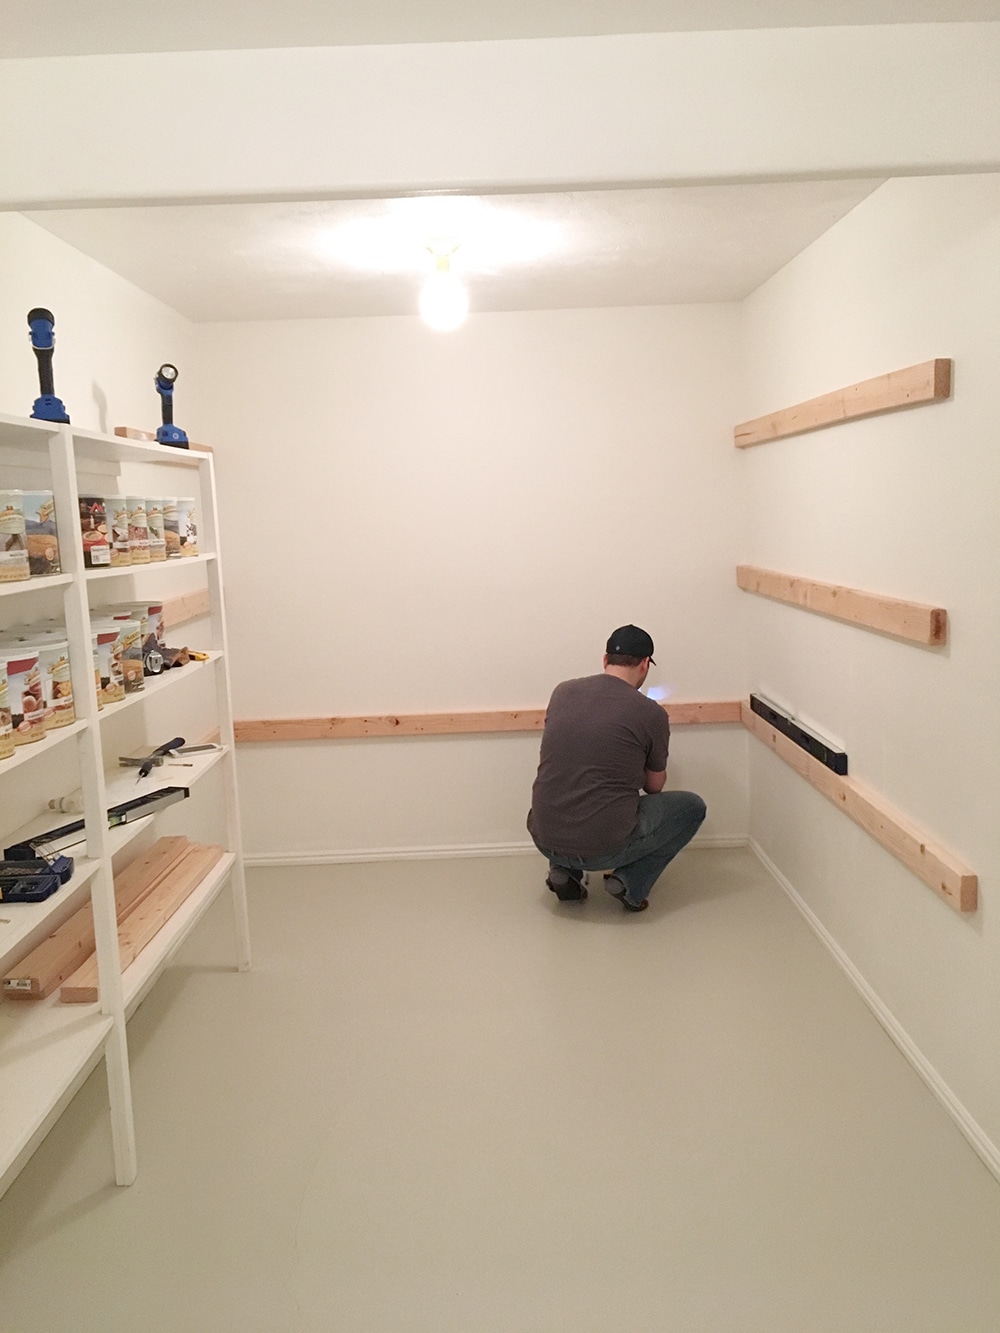
So, let’s rewind. After emptying the whole room out (oof!) we were left with a blank slate.

We decided to tear out all the shelving on the right side and 1/3 of it on the left so that we could build deep shelves back in.

While everything was torn out, we gave the walls and floor a fresh coat of paint. For the walls, we used Benjamin Moore White Dove and for the floor Benjamin Moore Ice Breakers (the prettiest light greige that really warmed things up). We also installed two of these pretty lights.

Chris wrote up an extensive tutorial on how he built the high capacity shelving for the space for Homes.com right here.
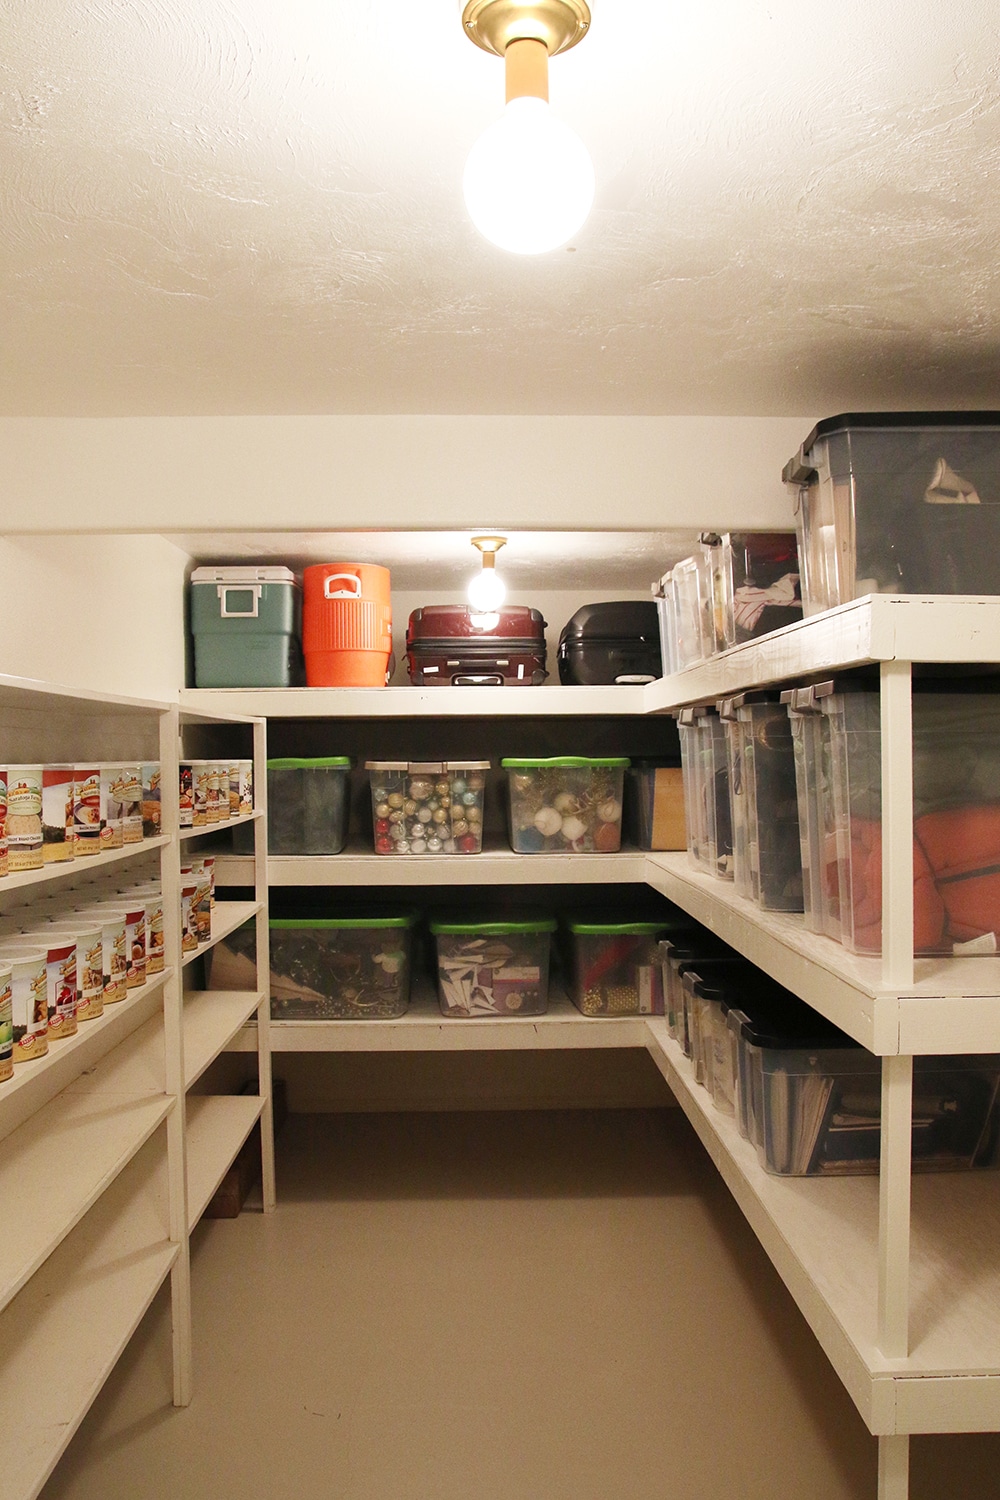
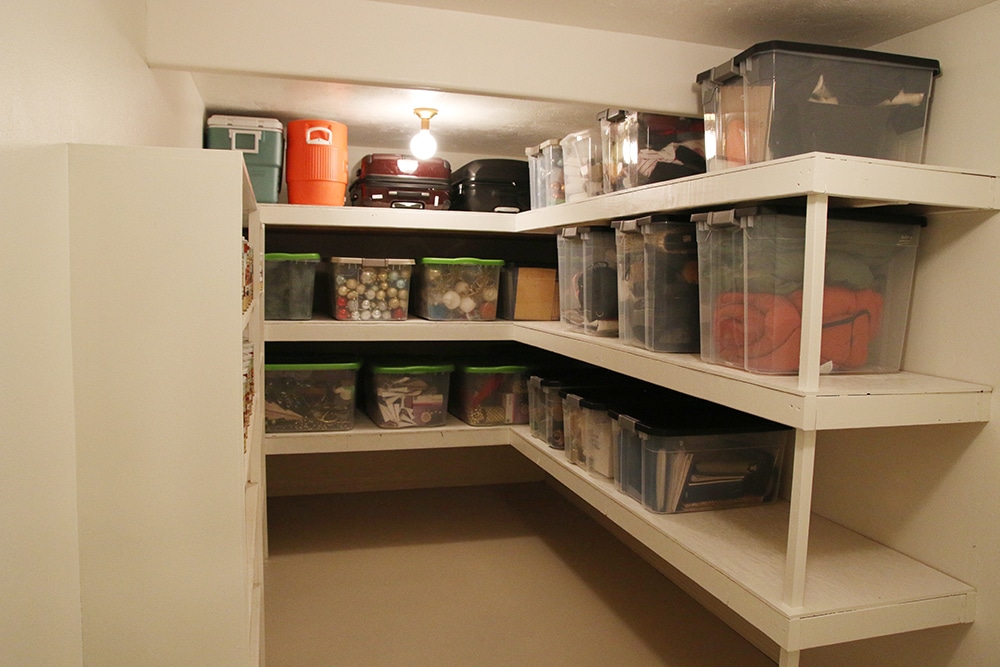
In the end, he made the back deeper, so we could fit our whole Christmas tree back there! And the right side shelves less deep so there is still room to move around in the space. And then stomped all over them to make sure they were strong enough.
Speaking of room, we were astonished how much room we still have in here! How is that possible?! It’s amazing where a little purging and organization will get you. There were so many suggestions for organization systems in the comments of this post, but for now, I just grouped holiday bins together and I can see what’s in every box–which is already a huge upgrade to what we had!
Now, go check out exactly how we built the shelves right here.


Wow! It looks like the planning paid off in the end….I truly like the way you remodeled the storage room. Thanks for sharing this post – it makes me think about my garage which needs a lot of work as well.
Hallelujah! Wow that’s a transformation! Amazing.
Really disappointed that your main how-to-build article was on homes.com, and not here. Their website never formats it’s HTML right, and it’s a mess to try and read. It also doesn’t display any pictures. I was really looking forward to your how to, as we have a room we wanted to do something similar with.
The formatting is a bit different, but the pictures are showing up for me. So sorry you aren’t seeing them! Sometimes trying a different browser can help.
I was wondering the type of paint you used on the floor. I’m considering painting some concrete floors at my house.
We live in a rental that has painted concrete floors. They were painted for the first time before we moved in (the last tenant had carpet), and 2 1/2 years in, it’s horrible! We have giant spots peeling up in places! The landlord said they used floor paint, but I’m not sure if the problem was inadequate prep or that the floors just weren’t a good fit for paint (some of the exposed parts look really shiny and some look really porous). I know not everyone has a bad experience, so maybe just make sure you have a good backup plan and are willing to redo the floors if it doesn’t work out. Ours started peeling about a year in and getting scratched by moving our couch.
We used Sherwin Williams’ Porch and Patio paint. Worked great!
After a few years of following and reading your blog I’ve determined I need a husband that’s able to build things. I love this closet. Love, LOVE your color choices.