This project is sponsored by HANDy Paint Products.
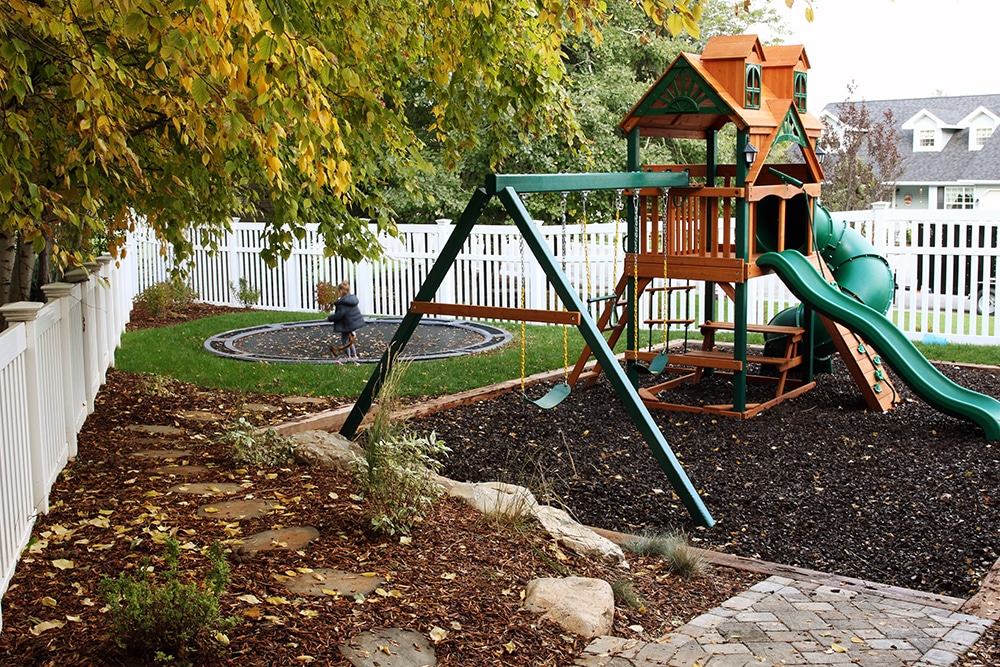
Our swingset is painted! At last! Last year we transformed our entire side yard with landscaping, an in-ground trampoline, and this Gorilla playset from Wayfair (read more about that transformation here!). The plan was always to paint over the orange-y cedar, but the project completed early fall, right after Polly arrived and we thought it would be best to wait until spring to paint it. I’m in love with the after, and it was 100% worth it, but (you knew there was going to be a “but” didn’t you?) it was not the fastest or simplest DIY. It took several days and there were a few moments where I actually regretted starting–mostly when it was just primed and looked a lot worse then when we started and I started questioning everything. But now? Now I can look back and say I’d do it again in a heartbeat. I love it.

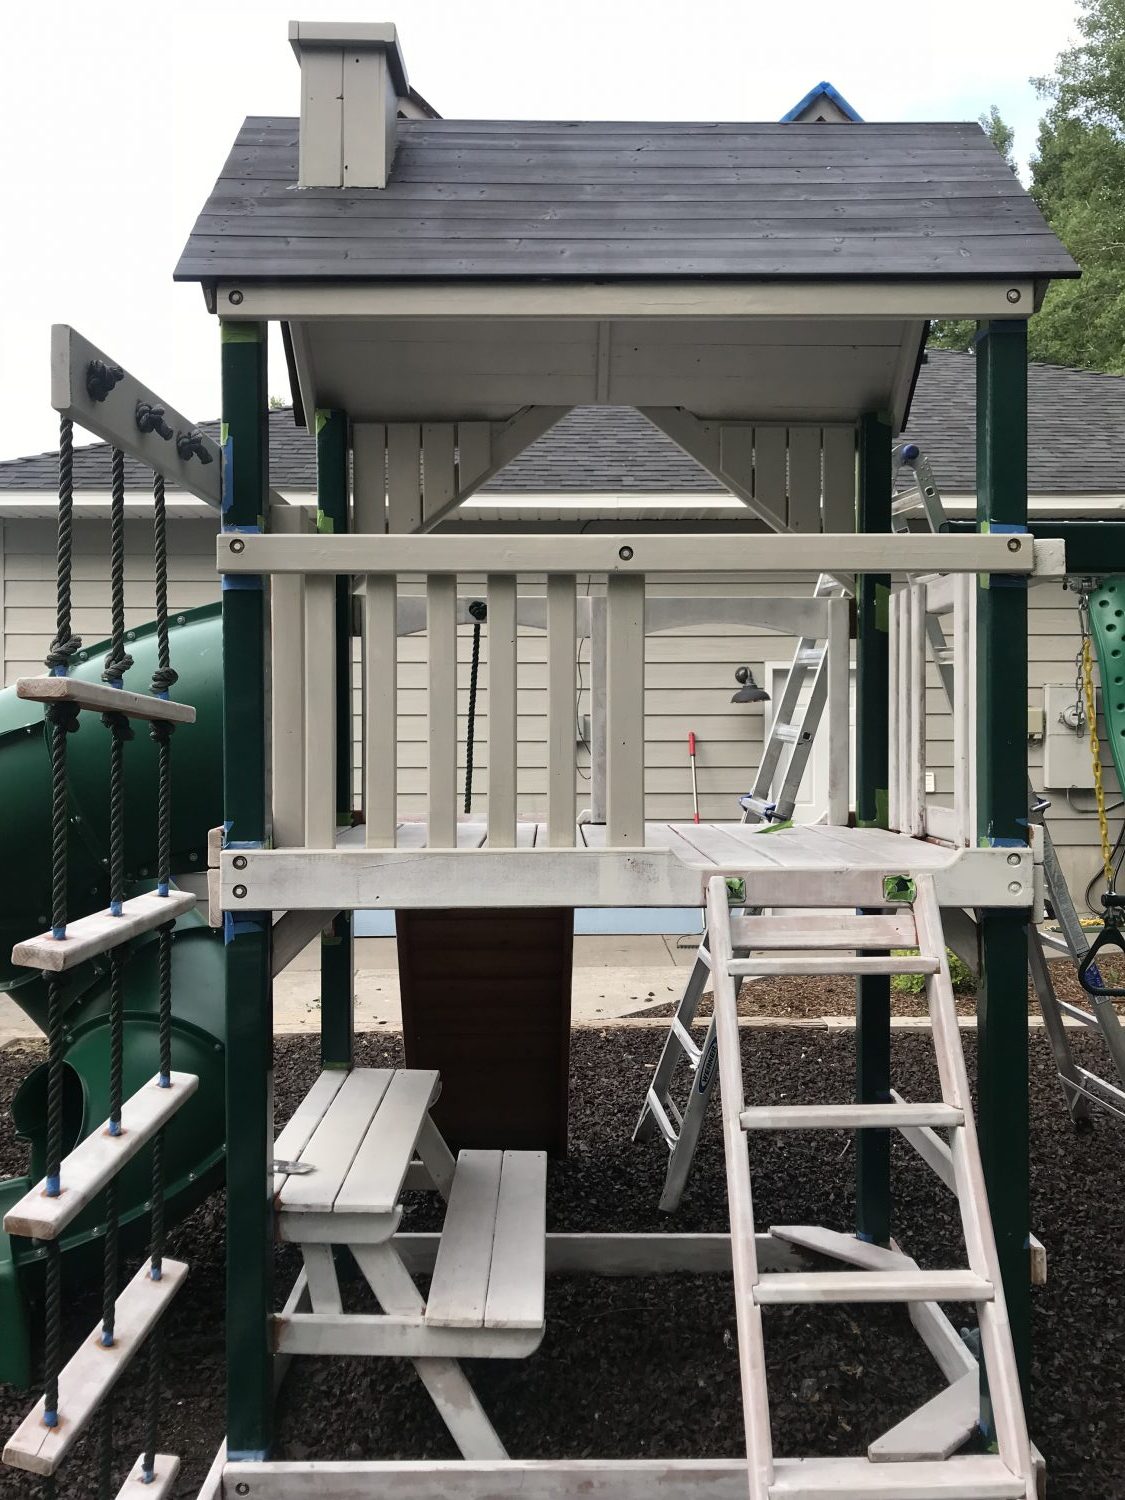
Here’s how it looked before (taken last fall):


Deciding on a paint color and overall color scheme took some time–I even polled our Instagram followers! But in the end, it felt right to paint the playset to match our own home. A warm black roof, griege base and bright white trim with black and gold accents, naturally. And although we spray painted the green window trim pieces, we decided to keep the slides and rock climbing pieces as-is since they will need to endure lots of little feet, and I don’t mind the green accents.

PREP
Our prep included taking off the smaller slide, all the window trim pieces, telescope and steering wheel, and taping off anywhere the wood met the structure that wasn’t getting painted. The large green tube slide was a beast to attach, so we just taped that off and didn’t bother removing it.
We went into our local paint store and asked an expert about what prep we needed to do and which paint was best to make this last! We were advised that there was no need to sand because it was still relatively new and has been through a season, but to give it a good wipe down to remove all dirt and to prime with a good oil-based primer before painting with a moisture-resistant exterior paint that he said will last at least 25 years on the swing set. (fingers crossed!)
PAINTING
Here are the paints and stains we used: Krylon Gold Meltallic Maxx Ultimate Coverage on the smaller accessories; Premium Semi-Transparent Black Wood Stain on the roof; Exterior Oil-based Wood Primer on everything else; Resilience Paint over the primed areas (color matched to Benjamin Moore’s Cumulus Cloud.) Not pictured–the Krylon White Gloss spray paint I used for the window trim pieces.

While I was busy spray painting, Chris started staining the roof first. After each coat, we’d step back and see if it looked dark enough and, in the end, we did 3 coats of stain. The MVP of this whole project was definitely our HANDy Ladder Pail. It has a patented bracket that securely attaches it to the side of most step and extension ladders. It easily holds over a gallon of paint or stain (and has liners so we could swap between stain and primer and paint), and has a built-in magnetic brush holder as well as a tool and rag holder.


It’s so much safer than trying to balance paint, or hold it in your hand while on a ladder.

I didn’t take a lot of pictures of the priming process, mostly because I was feeling all that regret I told you about earlier. But, below you can see half of it is just primed and the other half is starting to get painted Cumulus Cloud. I also took it in this direction so you can see how well it matches our home.
For painting, we used a 2″ angled brush and small 3/8″ nap purdy roller. We had a lot of questions about hand-painting vs. using a sprayer and for us, it just made more sense to hand-paint it because of the large tube slide that wasn’t going anywhere and we didn’t want to get any overspray on the rubber mulch that wasn’t cheap.

The project, from start to finish, took approximately 12 man hours to paint. I was worried that the griege we picked out to match the house was looking too white, until we added the bright white trim pieces back on and then it looked perfect!


Here’s one last before and after!:

I’m so happy we went for it. The playset looks so beautiful and goes with the aesthetics of the exterior and interior of our home now.
If you are planning on doing the same project, I’d recommend:
1. Blocking out a full weekend for the project.
2. Investing time and money in a high-quality primer and exterior paint with lifetime warranty (so you aren’t repeating the project every year.)
3. Definitely get the HANDy Ladder Pail. Half of the painting was done on a ladder and it was 100x easier with the Ladder Pail right there.


Love the look. I’ve been wanting to enclose our swingset for so long. What kind of wood did you use to enclose it? Did you stain it? It looks stained. Is the rubber mulch brown? Everyone keeps saying how rubber mulch is bad – for pets – but it’s the only thing I like the looks of. Have you had any issues? Thanks so much!
How’s the paint holding up? We had ours painted in September of 2018 And it already needs to be painted again.
So far so good over here
I just bought a new swing set and have not built it yet do you think it would be easier to paint before it is built or should I build it first and then paint?
I think build before you paint because it could get scratched in the building process.
Benjamin Moore’s Cumulus Cloud is it kind of grey color? I loved the color. Or is it white?
Amazing job looks great. I’m about to something like this for my kids. I have a few questions if you dont mind.
How is the paint holding up?
I assume you paint the floors as well…is it slick or did you add anything to the paint for ‘grip’?