This post is sponsored by our The Tile Shop. One of our earliest partners! See our very first kitchen remodel here and the wood tile floors from our last home here!
I’ve been showing a few updates here and there of our bathroom on Instagram and earlier this week, someone messaged me and said “I can’t believe how quickly this is coming together!” I laughed because we demo’d this bathroom in JULY so it doesn’t exactly feel fast to us, but I am glad it doesn’t feel like it’s dragging for all of you–hopefully. The good news is the finish line is in site with the completion of tile this week and I’m excited to show you a few progress photos today!
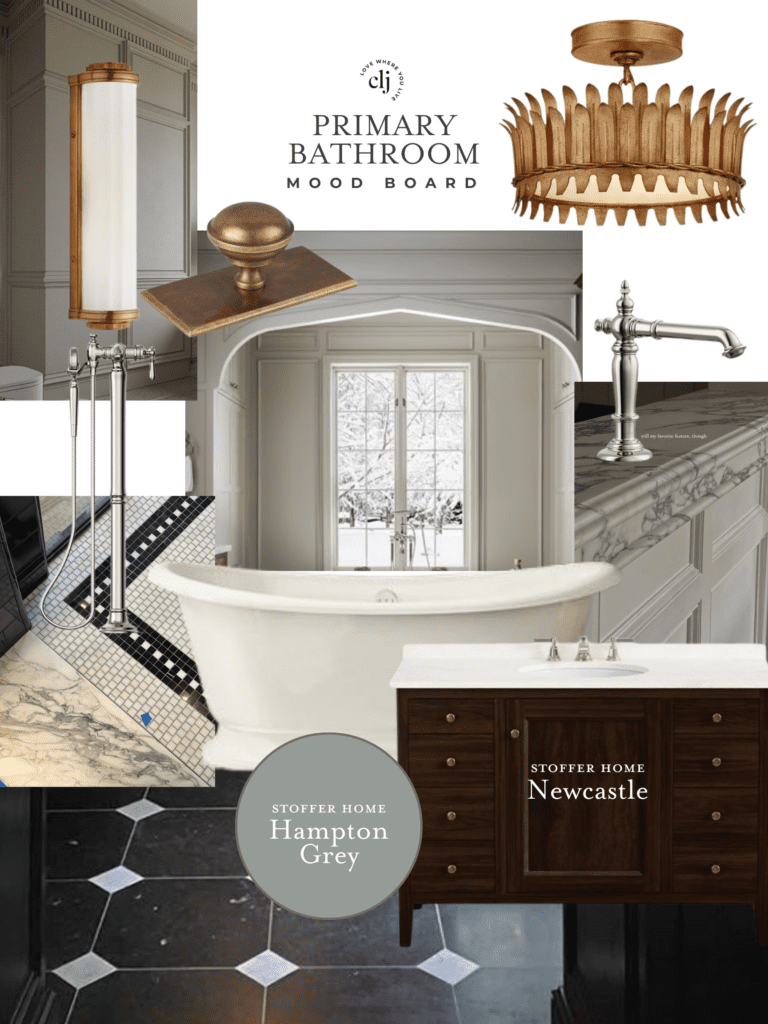
When I was choosing our tile, I really thought about our en suite as a whole. Our bedroom trim is a warm blue, gray paint color (Farrow & Ball Lamp Room Gray) and we painted the entire closet (ceiling, walls, trim and cabinets) the same gray with blue undertones. When it came to our bathroom, I really wanted the space to flow with the adjoining rooms so I was on the hunt for a warm, blue gray tile. I found thee perfect tile that matched the tone of our trim so well–The Tile Shop’s Silver Mist Honed Limestone.
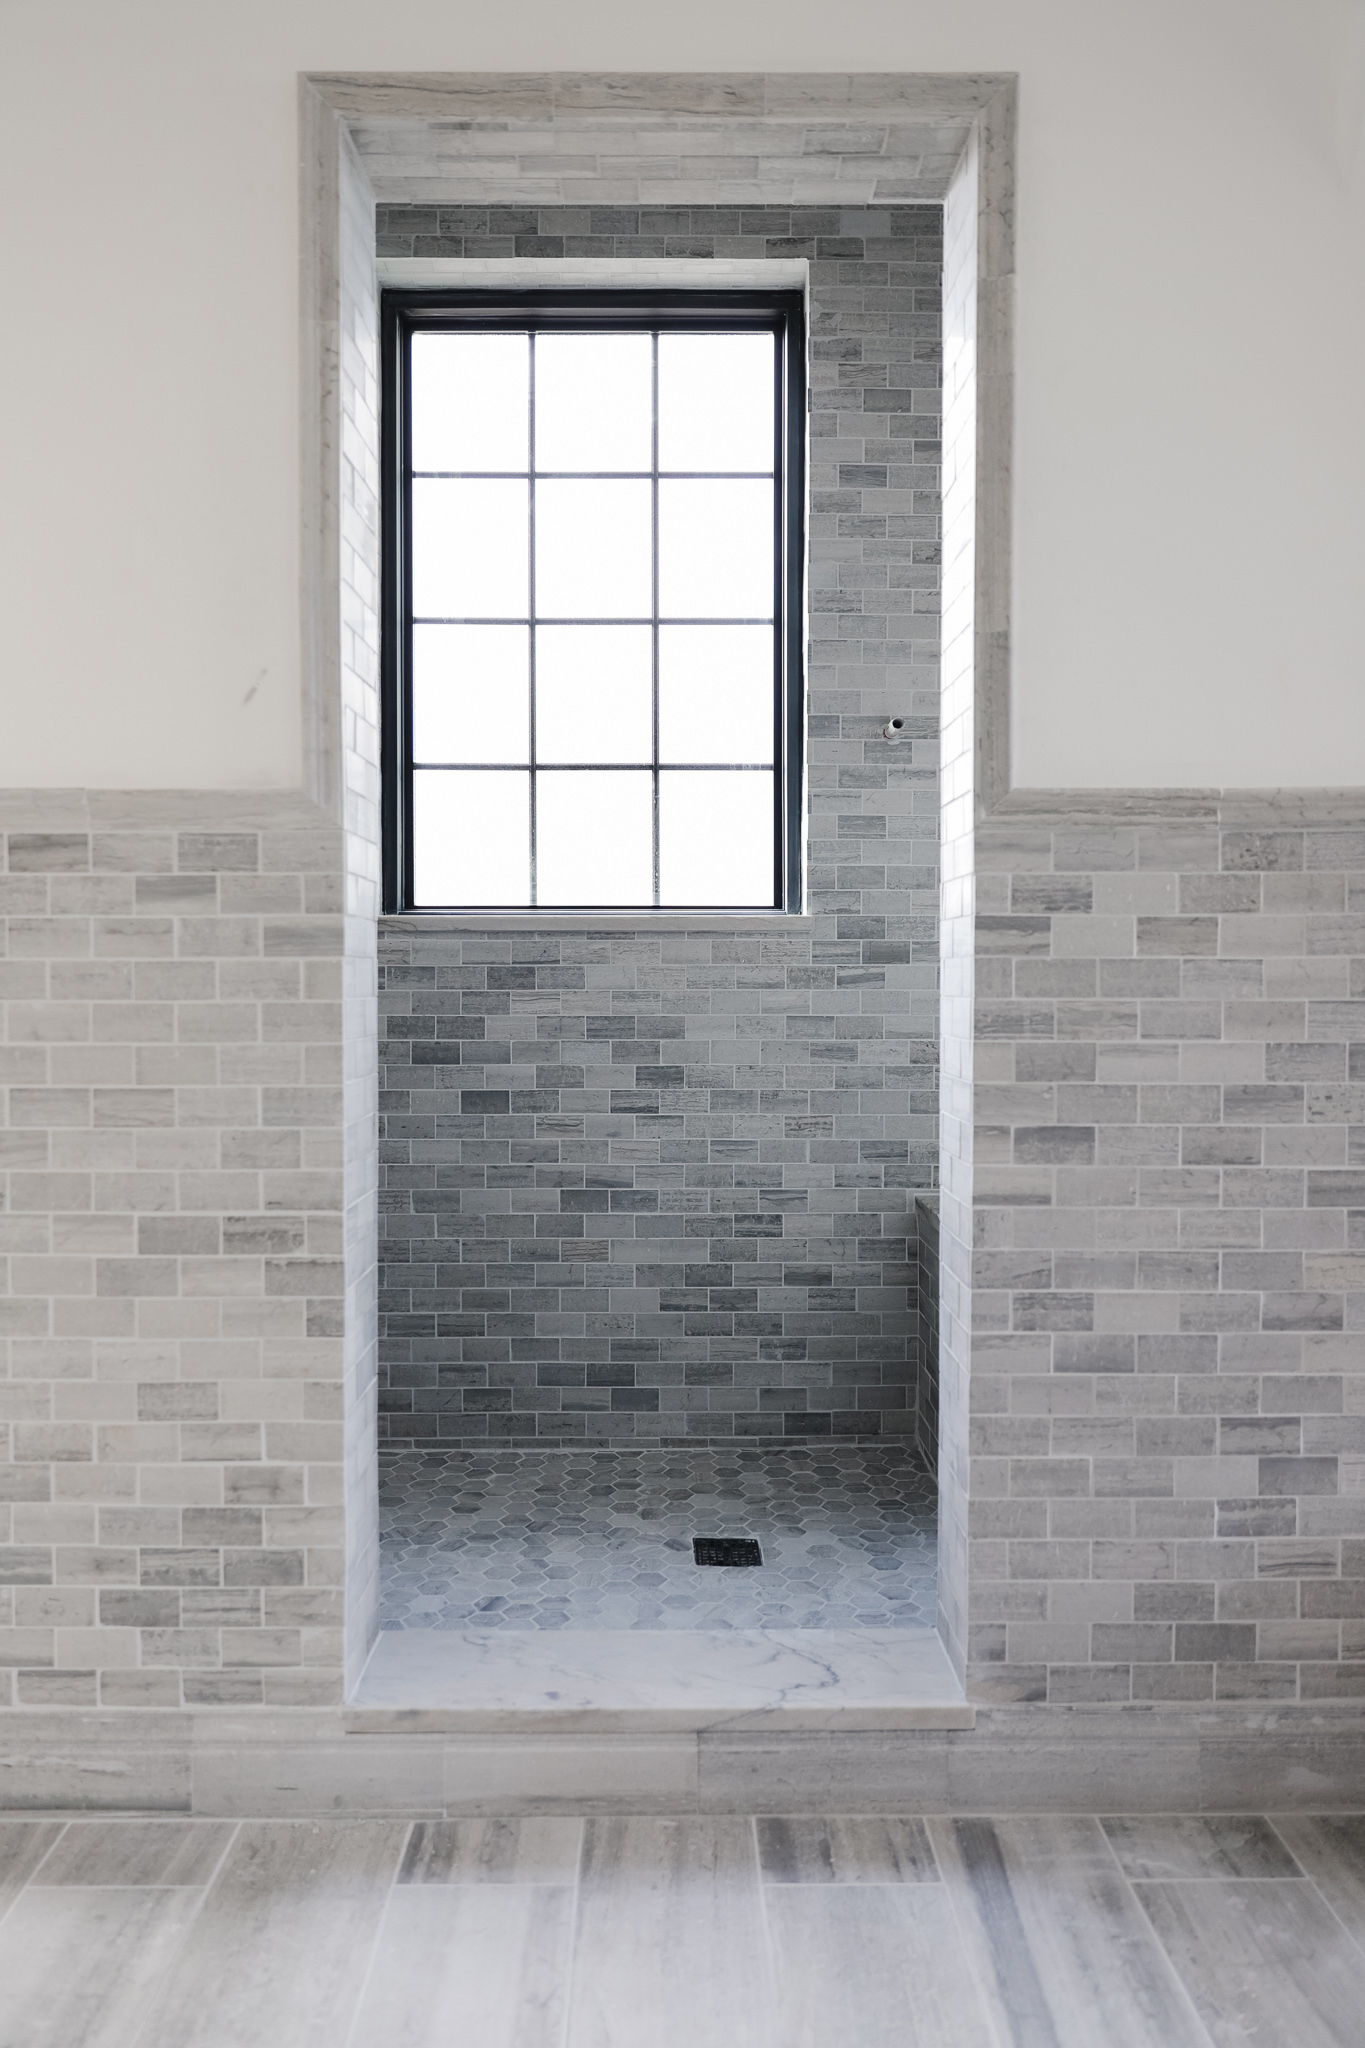
The collection comes in a bunch of different sizes and shapes that we mixed and matched–and even more that we didn’t use here! The Silver Mist Limestone collection has 17 different tiles in it, all made from the same stone, so the sky is really the limit when it comes to customizing. We used 5 different tiles to create the foundation of a classic space that is all the same stone, but in so many different shapes it feels really tone on tone and creates the coolest texture story when they are all paired together! Here’s what we used:

Countertop: Honed Calacatta White
I’m over the moon with how they all look together. When we were deciding which way to lay the floor tile, we ultimately decided to lay it parallel to our wood floors and since the tub and this window are kind of the focal point of the bathroom, I didn’t want the floor tile to run perpendicular to it.

Here’s a closer look at the tile so you can see all the tones and color. I love choosing neutrals that lean toward a color, in this case, a warm blue, because it’s just makes it so much more interesting. When it came time to choose a countertop stone, we chose a quartzite with blue-ish veining that complements the tile so beautifully.


In the shower, we have the same smaller scale wall tile in the shower (and on the ceiling in the shower). It comes on a mosaic sheet so it’s pretty fast to lay. On the window sill, the shower bench, and the shower threshold we used the same quartzite slab we used for the countertops.

A mosaic is best for shower floors so that they can easily slope toward the drain. We went with the Silver Mist hex tile and it’s just stunning!!
The limestone throughout the bathroom is a natural stone and needs to be cared for as such. The Tile Shop recommended a sealer to apply prior to use, and we’ll be resealing every year as well as using PH neutral based cleaners.
When sealing natural stone, for the wet spaces (shower, around tub or toilet) ensure the sealer penetrates enough until it no longer is accepted, or pools on the surface. Acidic or alkaline cleaners can strip the sealer (which is why a PH neutral cleaner is best). Products we use every day such as shampoos, body wash etc. have ingredients that strip sealer so that’s why re-sealing every year is recommended to maintain the beautiful look of the tile.


The photo below really shows how the chair rail and base trim elevate the whole bathroom. (Note: The walls, ceiling and remaining trim will be painted on Thursday!)

This is the grout we used throughout the bathroom. It’s a really pretty gray that softened everything once applied.


I really do think by the end of this week, we’ll be able to start moving back into our bathroom. Even not using it yet, it already feels like a dream come true, so I can barely believe we’ll be getting ready in here soon! Can’t wait to share more! Psst–The walls will be Alabaster like our bedroom, but do you think we should do the window trim white or lamp room gray?! Weigh in in the comments!
Sources
Countertop: Honed Calacatta White

How far up on the wall did you have the tile go? I see you went above the window. Is there a general rule for this measurement?
Each of the tiles you see are about 2×4, so about 10″ of tile with an additional chair rail tile on top!
Absolutely stunning. What is the window you used in the shower and does it have privacy glass? We are trying to find a solution for our shower and love this!
Yes! It’s a water rated privacy glass window from Pella
I must admit this has been a slow burn for me, initially I found the tone on tone too much but sure enough here I am loving it! I think white trim will provide some light contrast whilst still tying in with other white elements like the grout, and will allow the beautiful greys to shine.
Wow, the tiles look so soft and muted and pretty – love love!! I’ve been following on your insta stories and the room looks so much darker there – which is more true to life?
PS. Grey for the window trim :)
It gets a TON of natural light and we haven’t had electricity in there until recently, so it probably depends on the time of day
So beautiful! Love the warmth of the wood against the tile!