

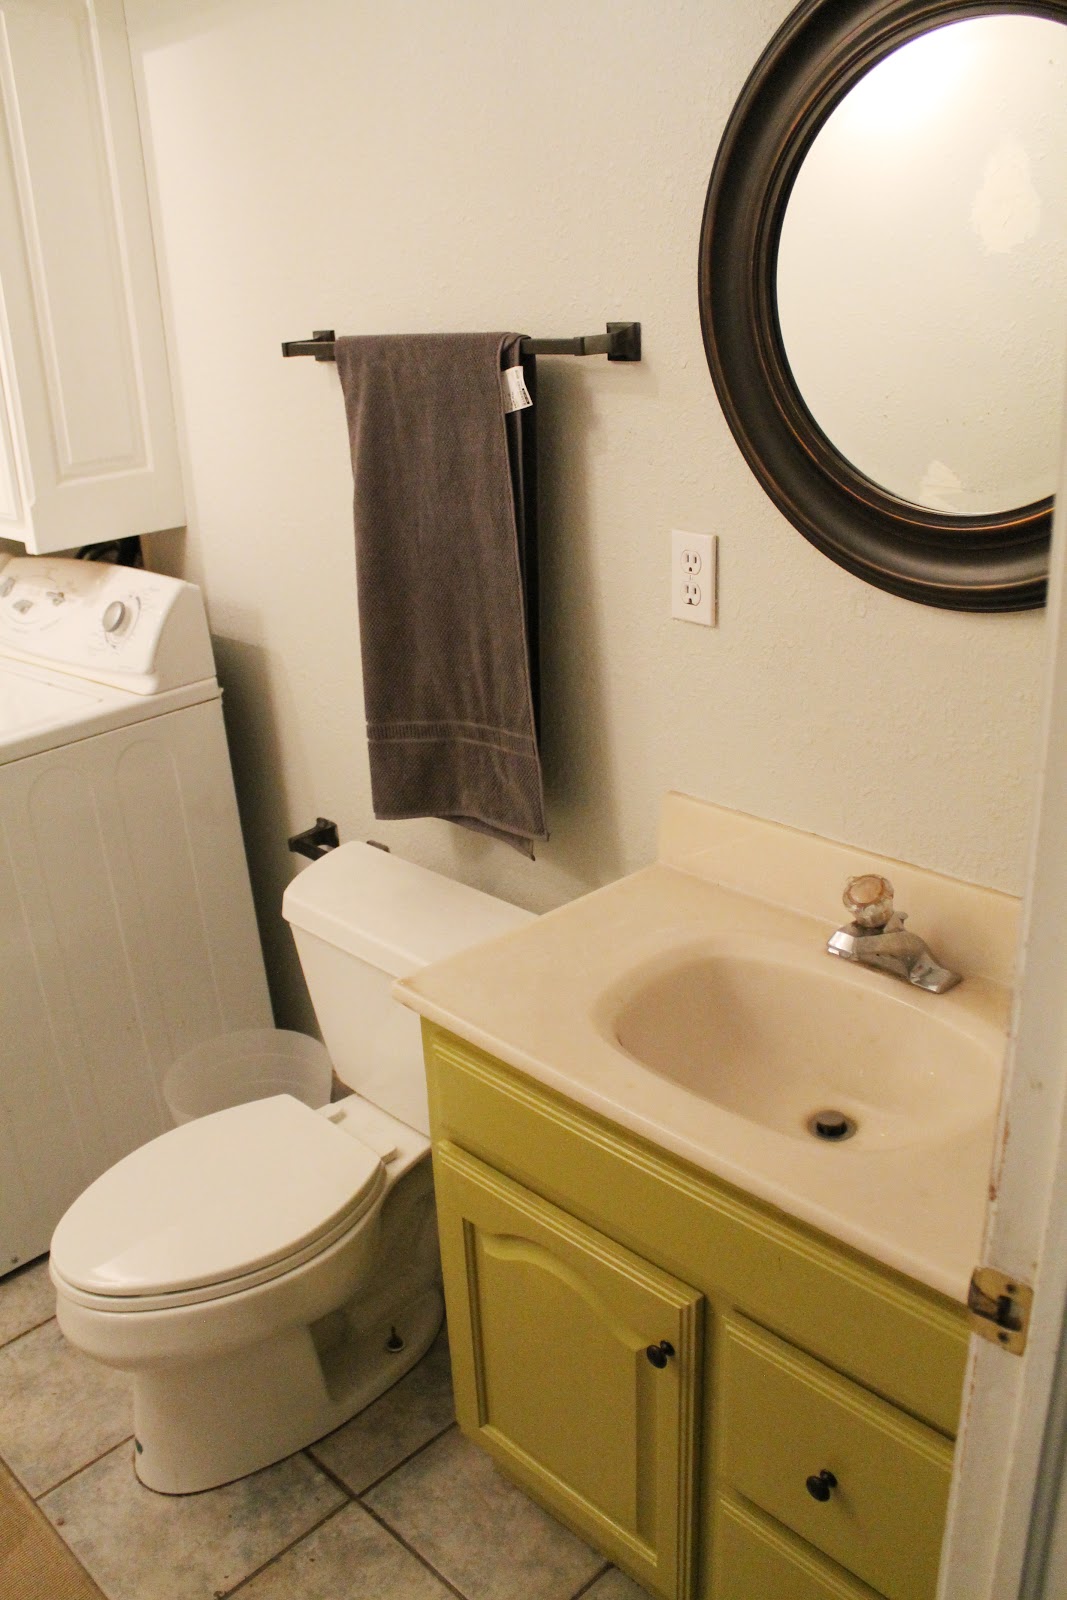
The one on the left (you already scrolled, I just know it) is how the room looked when we moved in the house. Although we did change the light fixture and remove the bright blue shaggy rugs before that picture was taken. The one on the right is the photo I snapped before we started this renovation last week. And here’s how the room looks now:

In the words of Greta, “NaNaaaa” (ta-da!). We had a really good time making over this room. It is small and narrow (and windowless–all of which makes it hard to photograph) which translates into a speedy one-week renovation, which is f-u-n. We also wanted to make it a really low-budget revamp, so we kept the same floor tiles and just refreshed the grout, added $12 trim and baseboards we already had and painted the space in a two-toned modern look. Where we spent all of our money was on the sink and new vanity.
Before we had a full-sized towel rack, a small-ish round mirror and a dingy, dingy, dingy sink and faucet atop a vanity I painted green. I don’t know why I painted it green, but I did and it makes for a horrendous before. :)
We took down the full-sized towel rack that, really, has no use in a half bath, and the too-small mirror and replaced them with a huge mirror we picked up at Ikea that doubles the size of our small room.

As for our last minute decision to upgrade the vanity, we couldn’t be happier about spending a couple hundred dollars for something like looks a hojillion times better. We easily decided on the Hemnes sink cabinet in white, because it felt the most classic to us. And drawers! Drawers make so much more sense for tall people (or do they make more sense to everyone, too?). The striped insides sealed the deal.
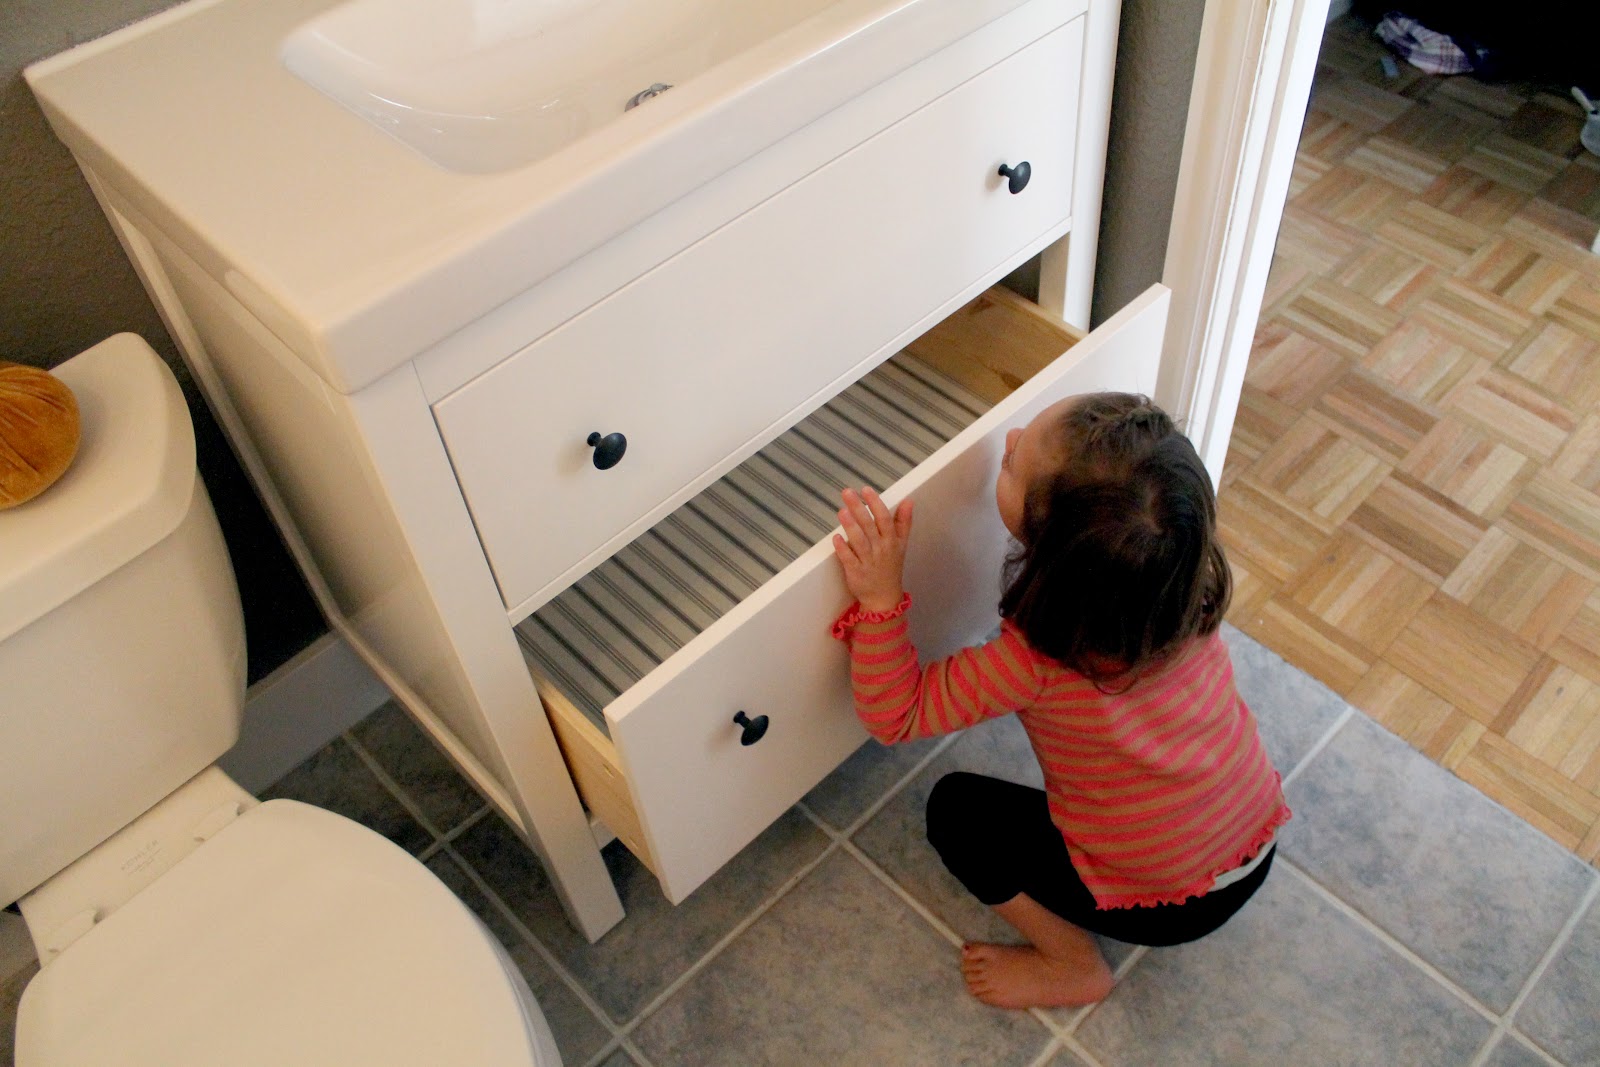
The sink got an upgrade, too. Because, uh…it was time.

We went with the Odensvik sink and the Apelskar faucet.

They both feel modern but also classic enough that they won’t be on their way out anytime soon–which we feel good about. Plus, I turning these little x-shaped knobs is so much more fun than trying to yank out the handle of our previous faucet.

Here’s one last look at this side of the room before:

And how she’s lookin’ now:


The before of this side is depressing.

Right? Adding a chair rail and painting the bottom half of the wall a dark grayish-brown (Martha Stewart’s Gray Squirrel) and the top a bright white really set the stage for a slew of art.


I guess this means it’s time to get started on actually doing the laundry–here’s hoping this room inspires me to stay caught up. Not likely, but there’s always hope. With the laundry room/half bath done, we are already moving on our next quicky project–and it’s one that we have been wanting to do for months! Spillin’ the beans about it mañana.


Good morning,
I’m trying to figure out the dimensions of this room you did. Please let me know.
Love your bathroom what are the dimensions of your room?
What are the dimensions of your laundry/half bath? I am thinking of doing something similar and would love to know for reference.
What are the dimensions of this half bath/laundry?
FYI… code says that outlet by the sink needs to be GFCI for safety, and there are good reasons for that… please consider looking into that :)
There just needs to be a GFCI on the same circuit, which we have. We’re covered. :)
looks great! question, now that you’ve used it for a while, do you find the vanity too close to the toilet? Would you have done a smaller vanity in retrospect? Also, do you find it gets dirty in the small area between wall and sink? Would you have done it differently?
Thanks!