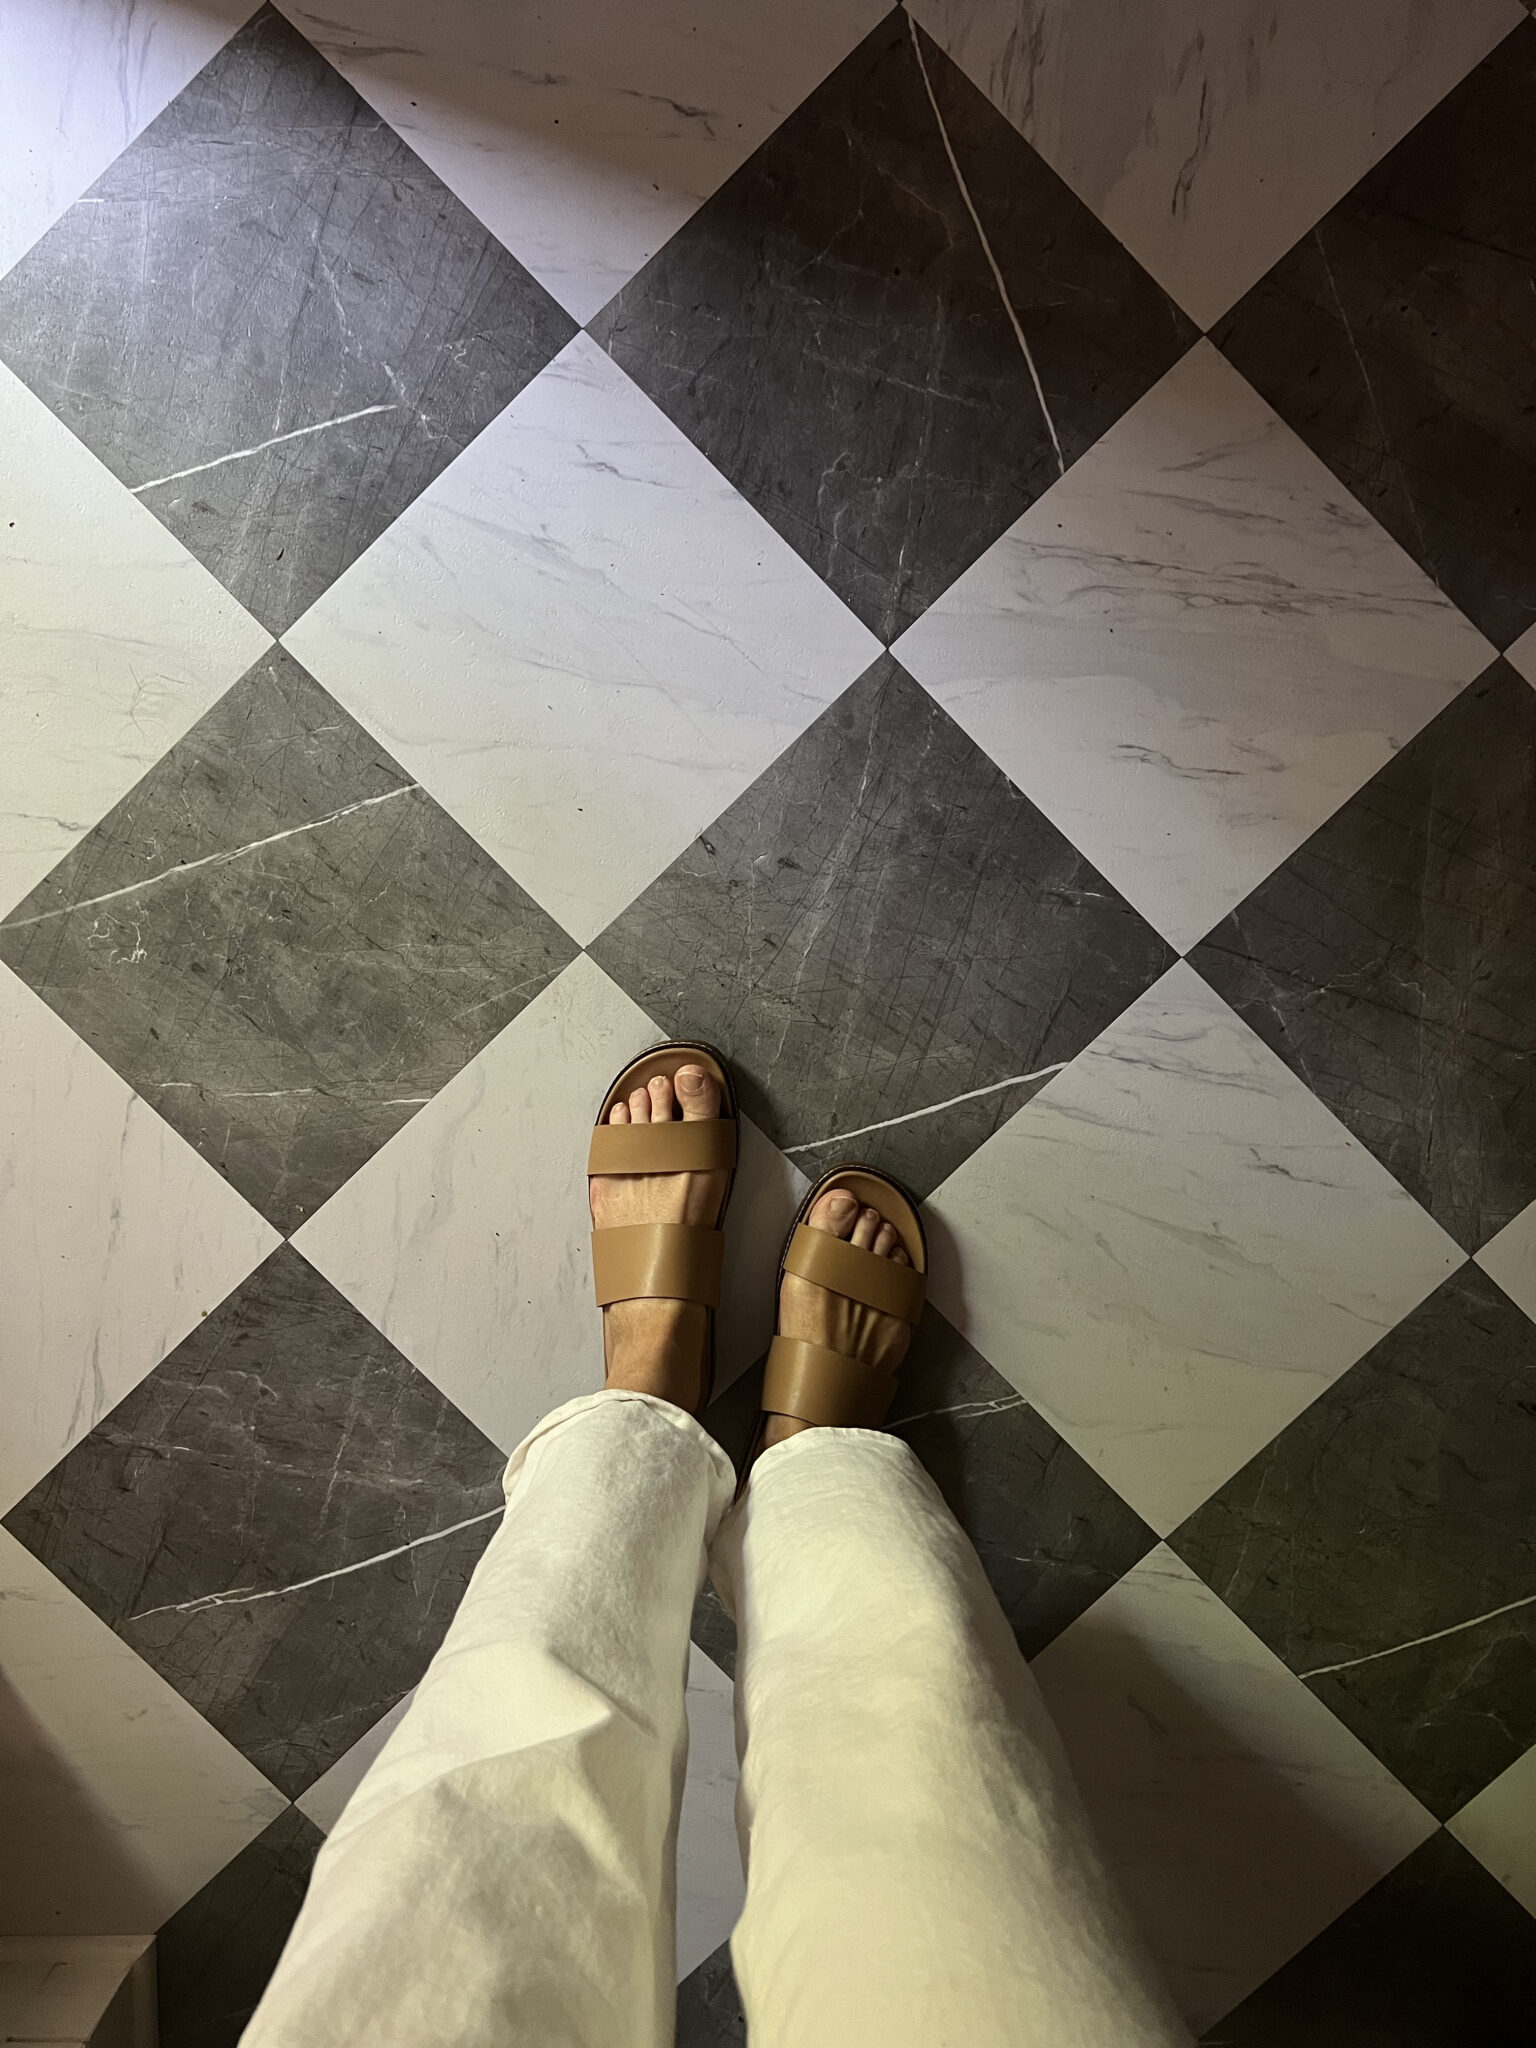
Today's a big day! It's FloorPops launch day! We've been hard at work for over a year to bring to you this collection of peel and stick floor tile that we laid in our home gym, and they're officially available for sale RIGHT HERE! (officially available for purchase at 10 est) Inspired by the checkered tile in our last dining room, we worked with FloorPops to make it possible to bring the look of luxury stone at a fraction of the cost and even less effort. See the full gym reveal here!
Our "Marble Bonneville Peel and Stick Floor Tiles" contains 10 pieces on 10 sheets that measure 12 x 12 inches. This product measures 60-in x 60-in when assembled.
- Peel and stick to apply
- Easy installation - no grout or special tools needed
- Water resistant and washable
- Virgin Vinyl material with a textured low lustre finish and permanent adhesive makes tiles durable
- One package contains 10 tiles that each measure .06-in in depth
- Each package contains 5 grey tiles and 5 white tiles.
- Each tile measures 12 x 12 inches
In designing these, it was really important to me to provide an easy to use, beautiful flooring option that’s budget friendly. Nailing the perfect soft gray and warm white was top priority to me and I’m so proud of where we landed. Each box comes with a set of 10, 12”x12” tiles (5 gray, 5 white), with varied veigning from box to box. It's even hard for me to find two look-a-like tiles which was the goal. Working with FloorPops to make this come alive has been incredible.
This peel and stick tile is easy to install (no tools required) and so thick and durable! Unlike the stickers we used for the girls’ bathroom floor that peeled up like a giant sticker, these are thick, rigid vinyl meant to be a permanent, budget flooring solution. Seriously, the quality is unreal, plus they’re water resistant and wipeable. Perfect for our home gym, but would also be great in a kitchen, dining room, bathroom, laundry room, mudroom, hallway… The possibilities are endless. Here's how we installed them in our home gym, and I would also recommend you look at FloorPops installation guide for step-by-step instructions, as well as a video!
Clean & Prep the Floor
We already had cork flooring in our home gym, besides one little square around the door where there used to be hardwood flooring. We had that torn out when we redid the rest of the flooring in the house and just left it bare. So! We laid some sub-flooring down just in that area to make it level with the cork.
After that we cleaned the flooring really well, just with a little bit of soap and warm water.
This isn't a necessary step, but we want these tiles to last a lifetime so we used a self-stick tile primer! This is what we had on hand, but FloorPops has their own product of Peel & Stick Primer that I would go with if you're looking for ultra-strength bond.
Peel & Stick
Before peeling any backing off, find the center of your room and draw two perpendicular lines to align your tiles to. We did a dry lay before sticking anything down to make sure we liked the tile placement.
And you're ready to peel the back off and stick it down! Getting that first center tile exactly right is going to make sure every other tile lines up perfectly. It's not essential but we did have fun using this roller to push them down extra secure.
And that's how easy it is! It gets a bit trickier around the edges, but we just used a razor blade and a straight edge to make the cuts. No tile saw needed for these!
Our gym is about 140 sq ft and we used 14 boxes and install took us one afternoon, start to finish. Amazing!
FAQ's
FloorPops has a really thorough FAQ section on their website to refer to, but here's some of the questions we've been getting!
How many come in one box?
10 total come in a box, 5 gray, 5 white.
Are they removable?
To be durable enough to withstand foot traffic, our FloorPops were designed with a strong adhesive. This means that they are NOT removable in the sense that some peel and stick wallpaper or wall decals are removable/temporary. They can, however, be removed should you choose to- we recommend using a scraper or an object with a thin, flat surface to wiggle under a seam and pop a corner of the tile up. From there you should be able to peel off the tile with your hands. Please note that as the adhesive is strong, if installed on a painted surface FloorPops™ are likely to lift the paint. It is also possible that some adhesive residue may be left behind when FloorPops™ are removed.
Can they be installed outside?
These are recommended for interior use only!
Can they withstand moisture from my bathroom or kitchen?
Absolutely yes! They are water resistant and wipeable.
Can I install them over tile?
If your tile has an uneven texture, I would say they're not going to stick as well. As far as dealing with the grout, FloorPops recommends filling all grout lines with thin-set tile mortar before installing to create a flat, smooth surface.
Head over to FloorPops website to purchase today! Stock is limited in this first batch so don't sit on it. Any other questions??
Leave a Reply

WE'RE CHRIS + JULIA

Portfolio

Projects












LOVE! Unfortunately I'm late to the game, however, and they're sold out. Do you know if they'll be restocking soon?
Hopefully!!!! I know that they will be in stores starting this weekend!
Absolutely loving this! I am trying to finish our basement and was thinking about staining the concrete or epoxying the floor and came across this page. When do you think you’ll be restocking these?? I desperately need them. Also, do you think it will do well in an unfinished basement?
Restock will be in August and they'd do great there!
Sold out - congrats, they are beautiful!
The link just takes me to Floor Pop’s website, and I don’t see these tiles on there. And when I search their site it comes up with no results. Out of stock already?
I'm sorry, they sold out so fast! Look for a restock soon!
Can these be installed in a garage?
Over concrete yes, although they aren't weatherproof, just water resistant.
Good morning! I'm so excited for this launch! I was wondering if they were going to be available on Amazon this morning? And I was also wondering if that includes Amazon Canada?
Not available on Amazon for this first release!
I'm confused on the product being 60in x 60 in when installed. Wouldn't 10 tiles equal 60in x 24in? Just making sure i'm doing my math correctly before ordering since their return policy includes a restocking fee. Also, the website doesn't mention how much overage to account for. What do you recommend? Thanks!
You're right it would be 60in x 24in! Account 10-20% for overage!