It’s been 2.5 years since we installed our black walnut countertop from CraftArt (more on that here) in our kitchen and this past weekend we took some time to refinish it. The wonderful thing about butcher block is it can be sanded down and made new over and over and over again and it’s a pretty painless process, too. Before we get into how we did it, here’s the wear and tear our countertop endured over the past 2+ years from daily life:
We never worried about our countertop or babied it (besides using hot pads when placing down pots and pans). The wood was scratched, worn, faded. Dinged. Marked with sharpie and nail polish, etc.


And that light spot was from when I used toothpaste to get out permanent marker…it took off the marker along with some of the finish. None of this really bothered us. We love the warmth of the walnut and even some of the character that’s been added over the years of use. But the sharpie, nail polish and super glue (yeah, super glue) I could do without, plus! the wood was looking tired and tired wood is susceptible to things that can be a bad thing, like water damage.
Here’s what we did:
1. Sand the whole thing down. We have this $99 palm sander and love it. It’s powerful and made quick work of the job, plus it has a dust collector/vacuum attached to it so the dust was really minimal (hence no coverings on other surfaces). If you don’t have a sander that has a dust collector attachment, you’ll definitely want to cover nearby surfaces for this step. We sanded, with the grain, until the unnatural imperfections were all gone. Kids, am I right?

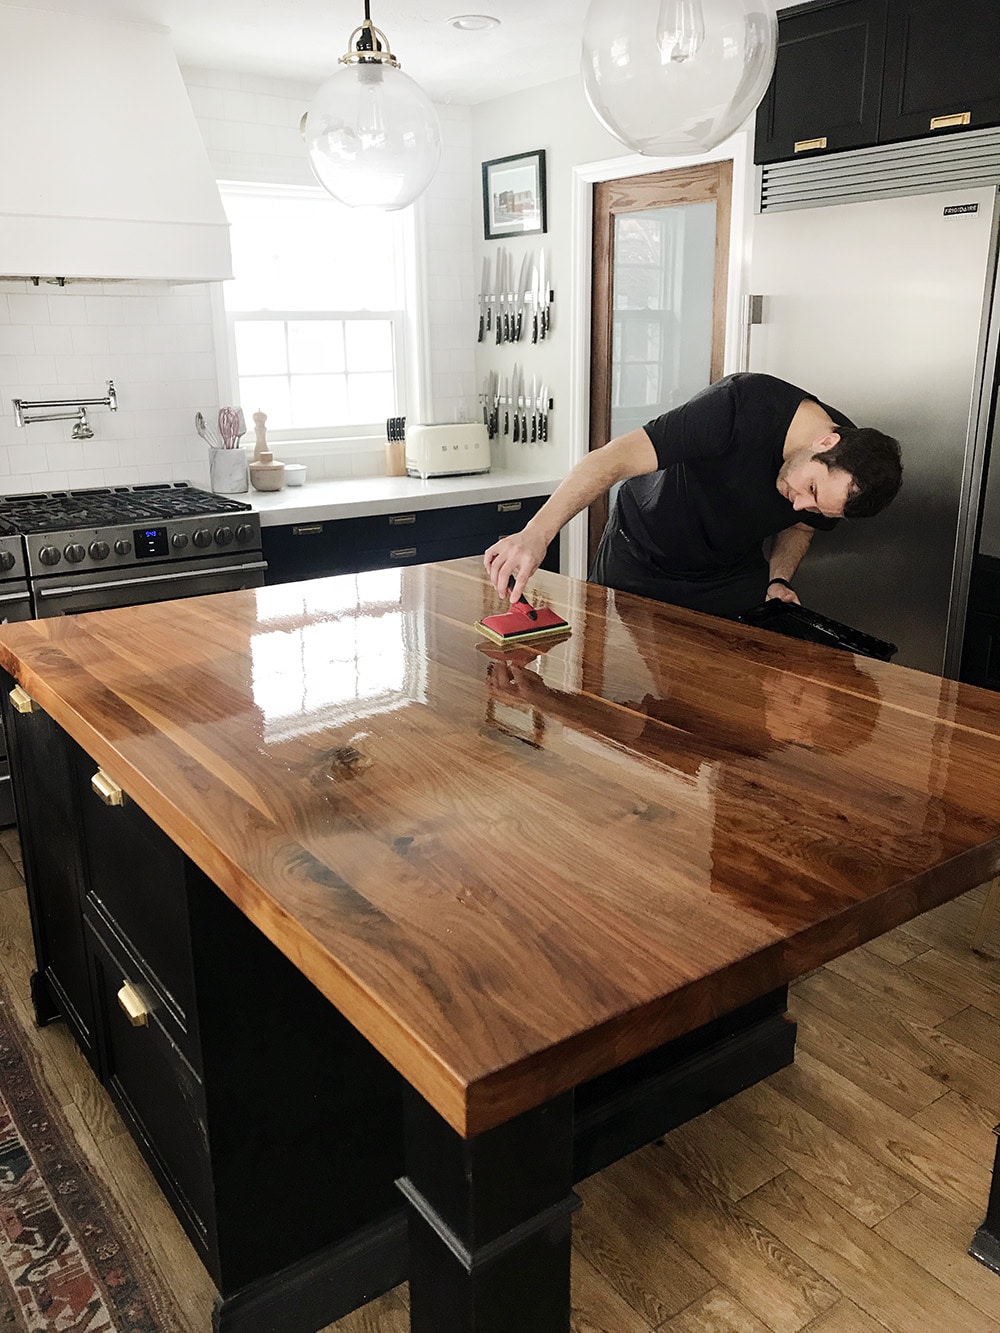
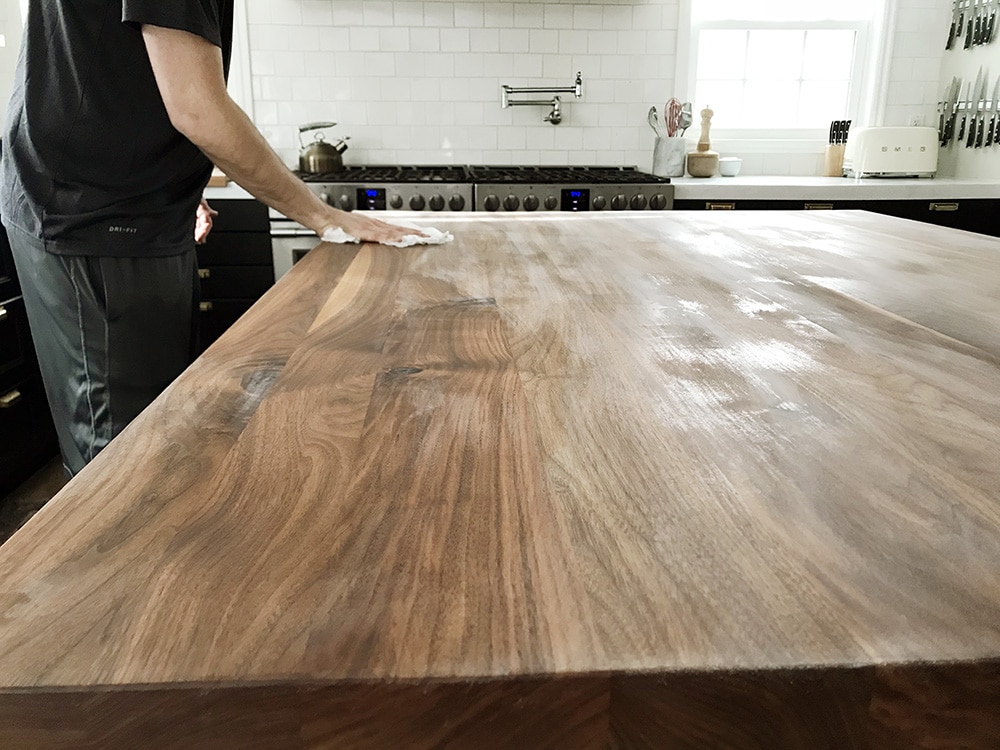
2. After giving it a good wipe down with a tack cloth, we were ready to start coating it with Waterlox. This is the same satin finish that we used originally and we couldn’t be happier with the protection it gave us. It’s Waterlox’s lowest sheen available which, I think, really allows the richness of the wood to be seen and is a lot more forgiving than a high gloss look. Besides the Waterlox, we’d recommend applying the sealer (also Waterlox) with a painting pad (we used this one) instead of a brush–it goes on a lot smoother with virtually no bubbles.

Just dip it in a small tray with Waterlox in it, and drag it across the countertop. You’ll see an instant change. Note: Waterlox is not a stain. It’s made from Tung Oil which brings out the wood’s natural richness, in our case, black walnut.
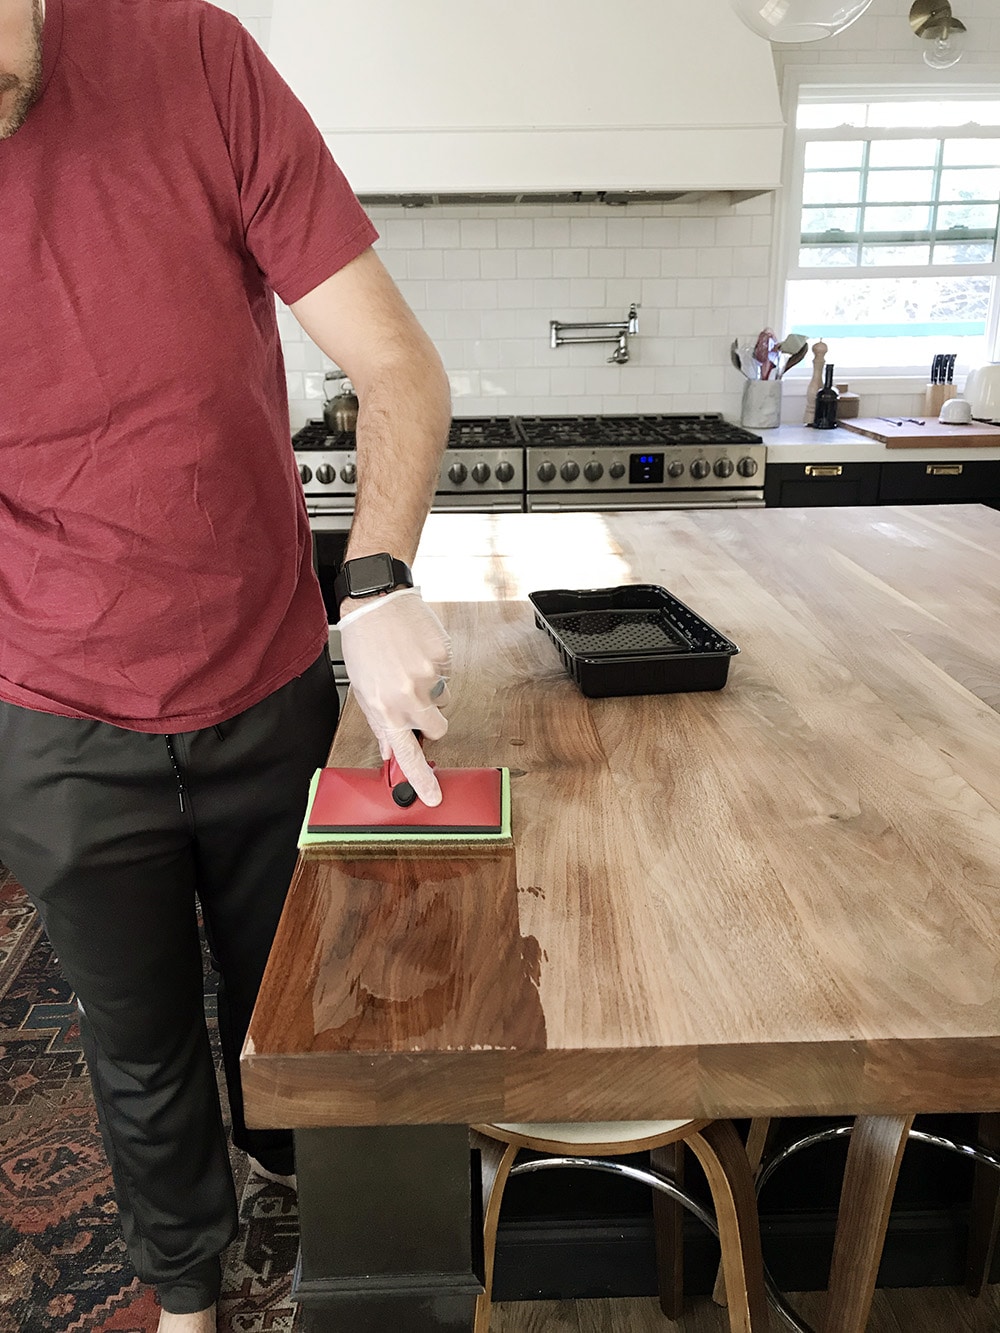
3. This is after the first coat. It looks great, but it’s not going to last. Prepare yourself for that.
4. Over the 24 hour drying time (the only downside about this project is the down time for sure!), the Waterlox will sink into the wood in some areas more than others. You are going to feel like you made a terrible mistake–you didn’t. It just needs another coat.

5. Before the second coat, we lightly sanded with a sanding block and repeated the tack cloth wipe down.

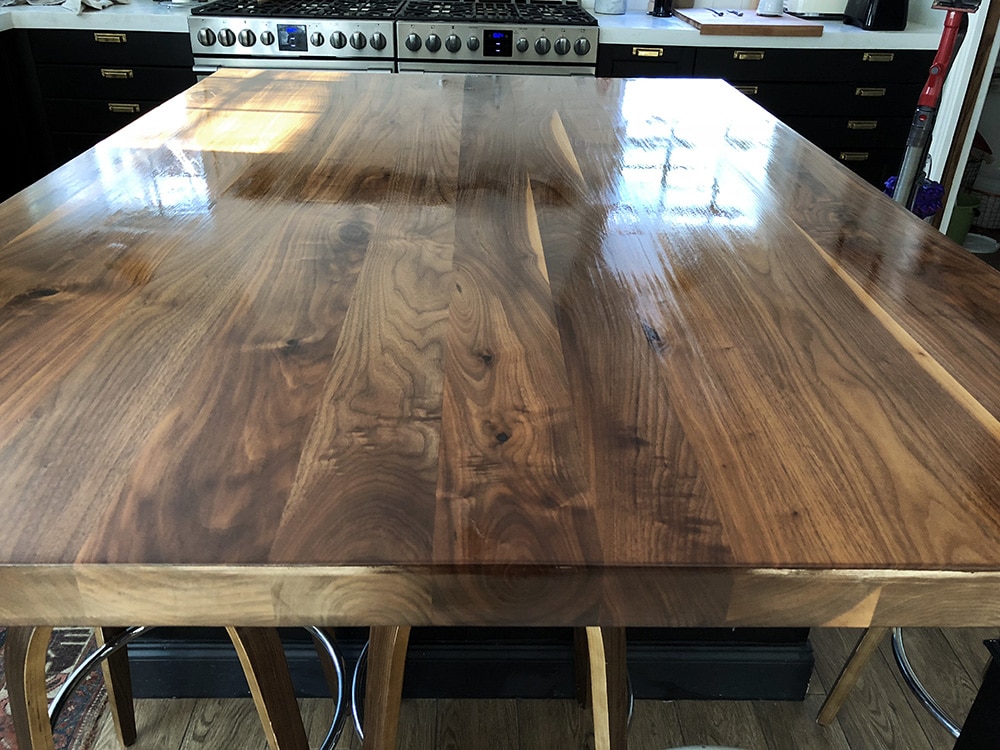
6. Then we added our second and, in our case, final coat of Waterlox. We knew it was our final coat because the finish after 24 hours was even. If this is your first time sealing your countertops, you may need to/want to do up to 4 coats.
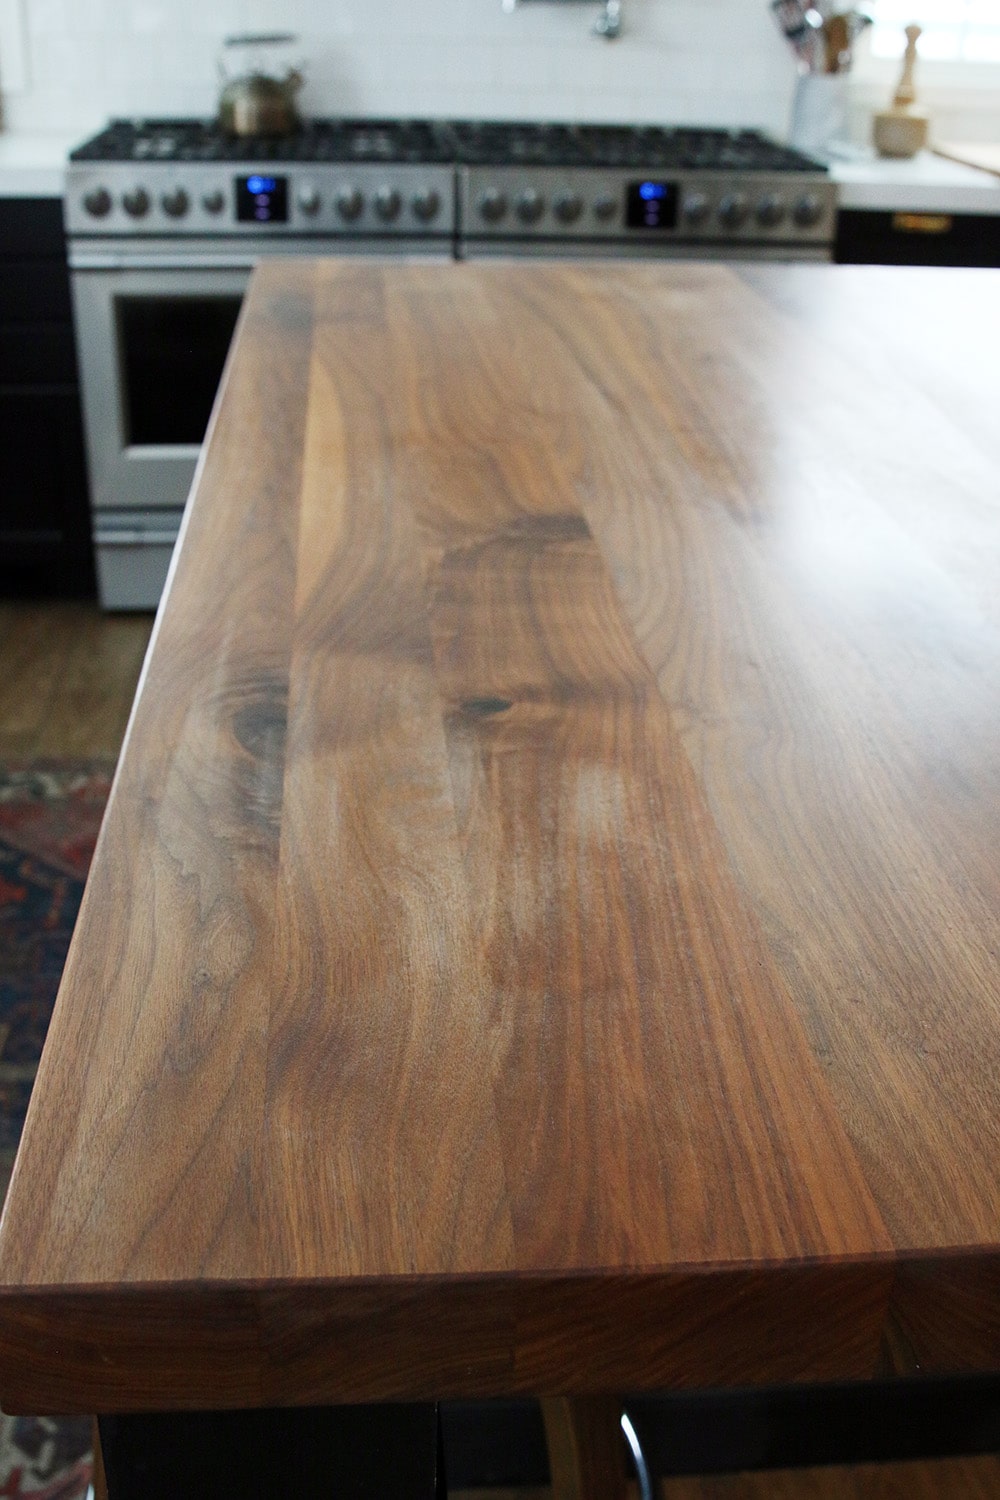
7. We’re left with, what looks like, a brand walnut countertop!


In my opinion, wood countertops are the easiest things to care for because you can either seal in all the scratches and dents and natural patina that occur over the years (which we’re really excited to get to one day when our kids are a little older) or sand away the blemishes and start fresh every few years for cheap! It’s a win win!


What sealer did you use?
We used Waterlox Sealer!
This butcher block came out gorgeous! We are getting butcher block for our new island, and this looks amazing. Can you please give me details of the color stain you used? Thanks so much!
The Walnut countertop looks great I’m looking for I’m trying to decide if I should do wood and what color would work the best.
I loved I great explanations step by step
Thank you
5. Before the second coat, we lightly sanded with a sanding block and repeated the tack cloth wipe down.
– morning, before the 2nd coat you sanded the entire thing and wiped it down or just the areas you weren’t satisfied with??
Thanks
A,