Ahh, all the kitchen demo is done! A week ago, we shared all the re-workings of the right side of kitchen that included recessing a wall where the fridge and surrounding cabinet with a built in-microwave will go. On either side of that recess, a walk-in pantry was framed in on one side with kitchen access, and a coat closet was built on the laundry room side. Even with all that, there was still a lot to do in the main kitchen area, too. That all went down over the last 7 days. It got messy, but we’re so happy to be on the other side of it.

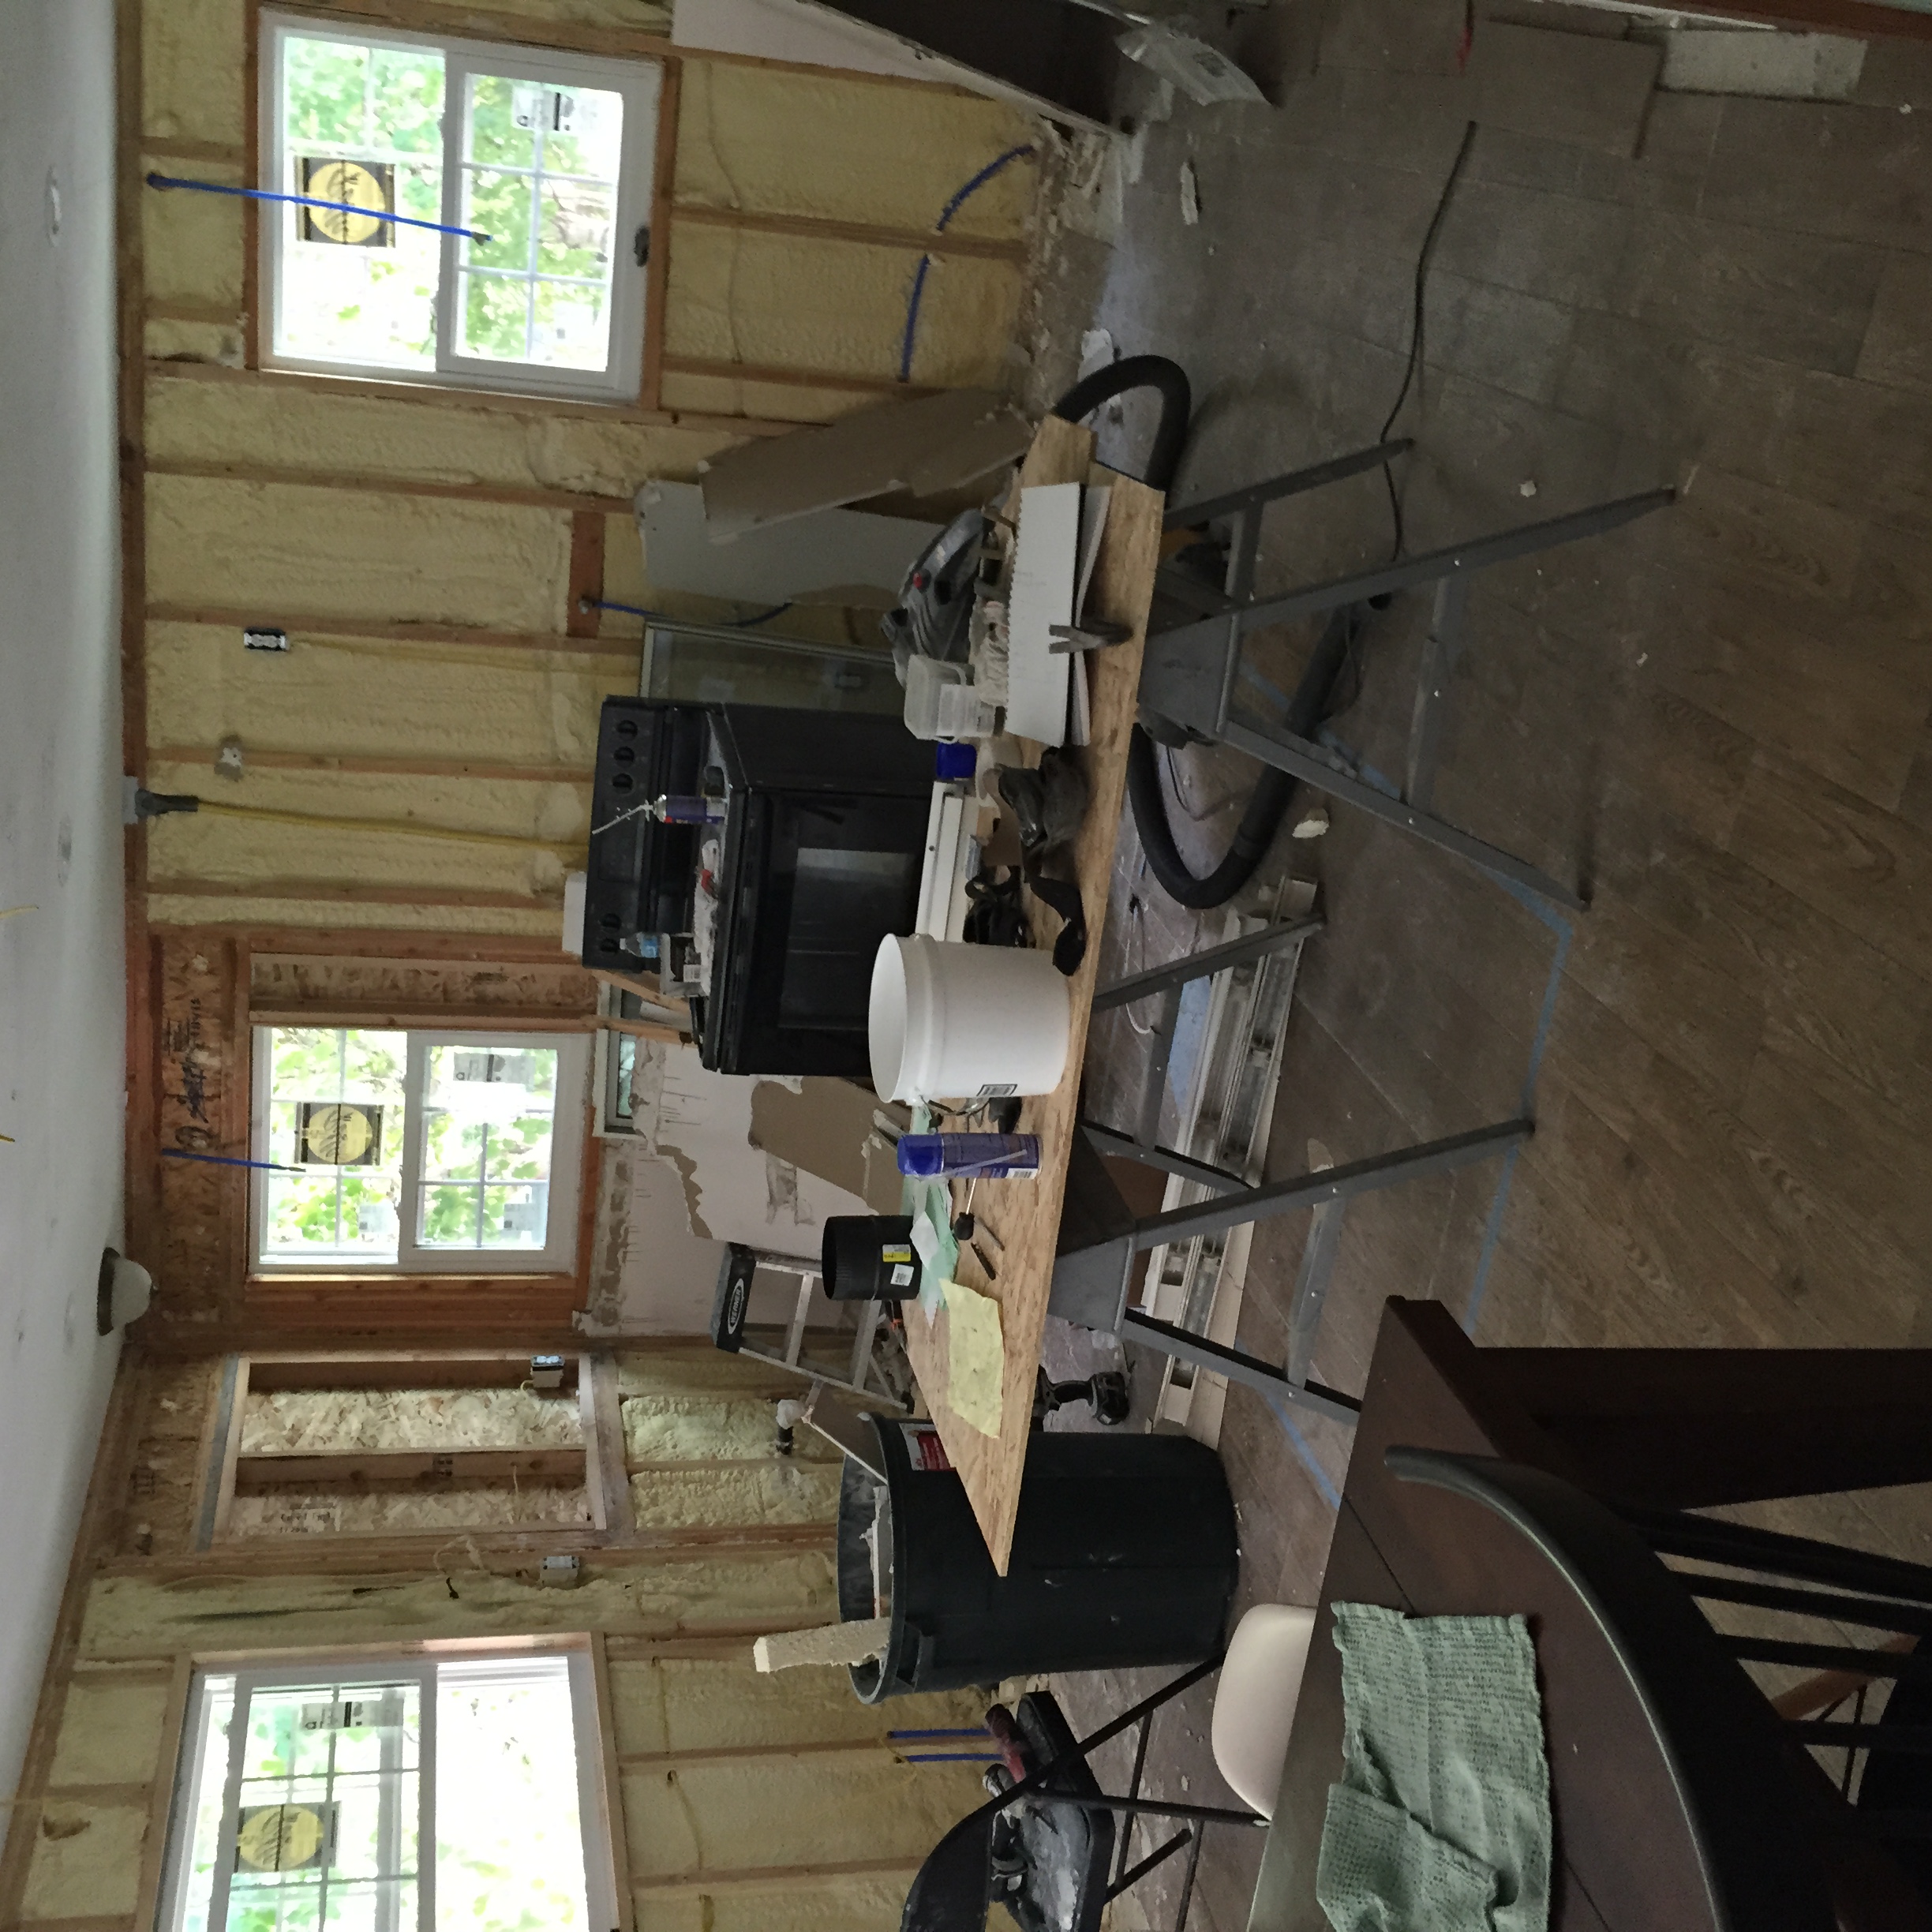
Here’s how the main part of the kitchen looked after we demo’d the cabinets, counters and backsplash. The right wall is where all the magic happened last week. Here’s how the same angle is looking today.

Hey, windows! We love you, windows!
We initially thought we’d do most of the work in here, but with all of our travel, Chris’s work and an ever-growing list of demo and construction needed, we decided to hire out most of this initial phase and save our energy for putting everything back together. We have a great guy we’ve mentioned before, Francisco, who is extremely fast and does quality work and since he recently went free-lance he is always up for a job. He did almost everything to take this space from that first picture to the second, including:
1. Reworking all the walls for the recess, pantry, coat closet talked about in this post.
2. Moving all the electrical including plugs where we needed them to go, light switches, disposal wiring, and recessed lights as well as wiring for the sconces above the windows and island pendants.
3. Moving all the plumbing for the new dishwasher, sink and freezer location. As well as adding piping for a pot filler above the (right) range.
4. Cutting and installing three new windows!! The kitchen had two windows in the left corner. (scroll up to the first photo to see those) We had him cover the one on the left wall completely and take out the one on the back wall, make the hole a little smaller and install (2) 35×40 windows on the back wall which will flank the ranges and hood, and a 45×40 window on the left wall above the new sink’s location.

We are no strangers to adding windows, we added a huge one in our living room earlier this year (Francisco installed that one, too!), but we will never get over what they add.

We’ve had a few questions about what windows we used and the cost. For the living room and kitchen windows, we special ordered them through Lowe’s. They are all triple pane, low-E, Pella 250 series windows. I recommend calling Lowe’s instead of trying to go through the online ordering system–it’s faster. All three of the kitchen windows together came to just over $900, which I think is a great price for what you’re getting–Natural light! Fresh Air! A clear view of your kids and nature! Ah, they’re my favorite and made such a big difference here.

Okay, back to what Francisco did:
5. He patched the tile flooring, running it all the way to the walls. Chris actually started this, but Francisco had to pull some of it up to move a water line he forgot about so he finished it up…in record time.
6. Lastly, he tore down all the drywall, since there was so little left and hung fresh pieces.
As I mentioned above, we have been getting a lot of questions on how much does all of this cost!? I’ll try to be more transparent about that. Francisco’s part cost us $1850 in labor and materials. I think that is a very low end price to what is normal for all six bullet points described above (please weigh in for your area!), but I think he gave us a deal since we keep referring all of our friends and family to him.
Some other things we had to hire out: gas lines for the two gas ranges we have planned for the back wall. We hired an HVAC pro to handle that. We were hoping they would be able to tie into the gas line running to our gas fireplace we have downstairs, but we needed more BTU’s than the current lines permitted. Our meter is on the opposite side of the house (of course, haha) and they ended up running new lines over to the kitchen under the soffit of our exterior (so they’re hidden) and down the back wall of the kitchen.

The product manuals, which we found through Frigidaire’s website, told us exactly where the lines needed to be placed so the ranges could sit as flush with the wall as possible, so that’s where the gas hookups came out. I believe they charge per foot, but running the gas lines cost us $800.

So this is where we are starting this week, and the rest is up to us. It still looks like a blank slate, but this blank slate is a lot more indicative of what’s just around the corner. We are priming and painting today and starting to install cabinetry tomorrow. By the end of the week, we’ll be ready for countertops–which I don’t think I’ve talked about, can’t wait to share what we decided on!–and tiling that whole back wall early next week is the plan. It’s all fun from here, guys.


I’ve tried this before but with printer paper and cutting it out and taping was a nightmare. Wrapping paper- How ridiculously simple. Even though your tips are great, I think you have a great eye for what looks good together. That sleeping print is amazing by the way!
Katy
http://www.alittledailyhappiness.com
Thanks so much Katy! I’ve tried it with every kind of paper and I felt it was such a waste because, yes!, it took so long to cut out. Wrapping paper makes it quick and painless.
Thanks for sharing this detailed tutorial with us! The kitchen looks amazing!
I can’t even get over how amazing it looks already. It is going to have a completely different feel! Just moving/adding windows completely changed the mood of this room..incredible.
Ahhh! This is making me so excited/nervous for our kitchen remodel that we’re planning on starting in February. I’m super jelly about the double ranges- I think that it’ll look amazing!!
Katy
http://www.alittledailyhappiness.com
Any chance you could take a pic of the exterior of the house after the windows have been moved/ added? I’m curious to see how Francisco finished off those details and how he repaired the hole where the window was moved.
Thanks!