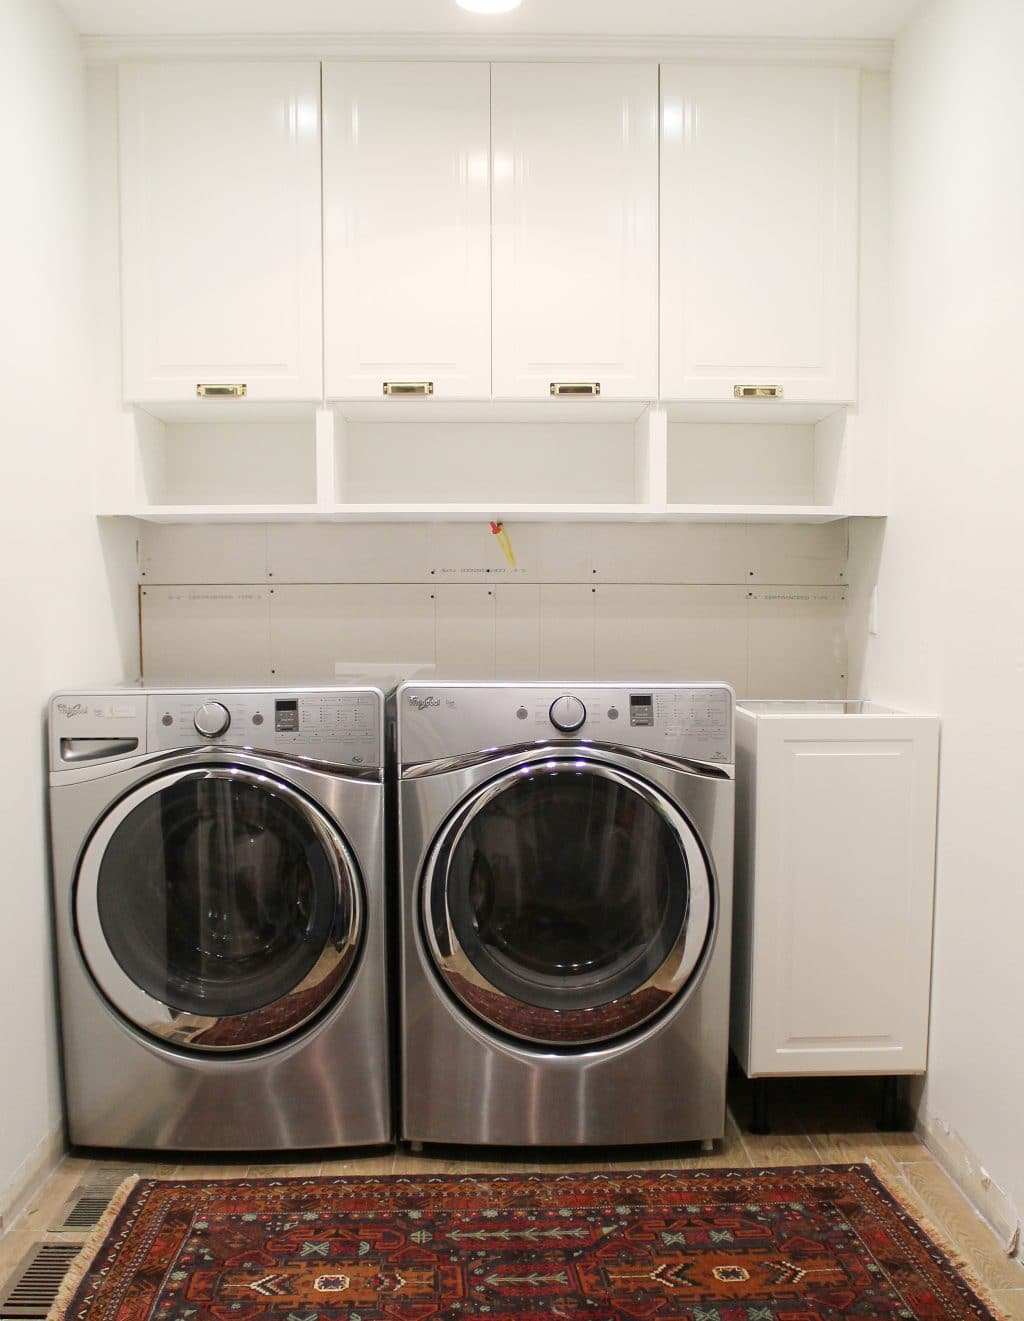
This laundry room is wrapping up quick. As in, I think (I hope!) this is the last post before the big before and afters of this used-to-be bathroom. Since we write all of our projects in real time as projects actually happen and progress, it’s easy for me to feel super pumped about each piece of progress. Like last time, I was so excited about how awesome everything looked once we got the cabinets trimmed out.
And, I mean, it was great progress. But man! The most recent progress changes everything. (Do I say that every time?) Last weekend, we installed a beautiful plank-style walnut countertop and backsplash in the laundry room.
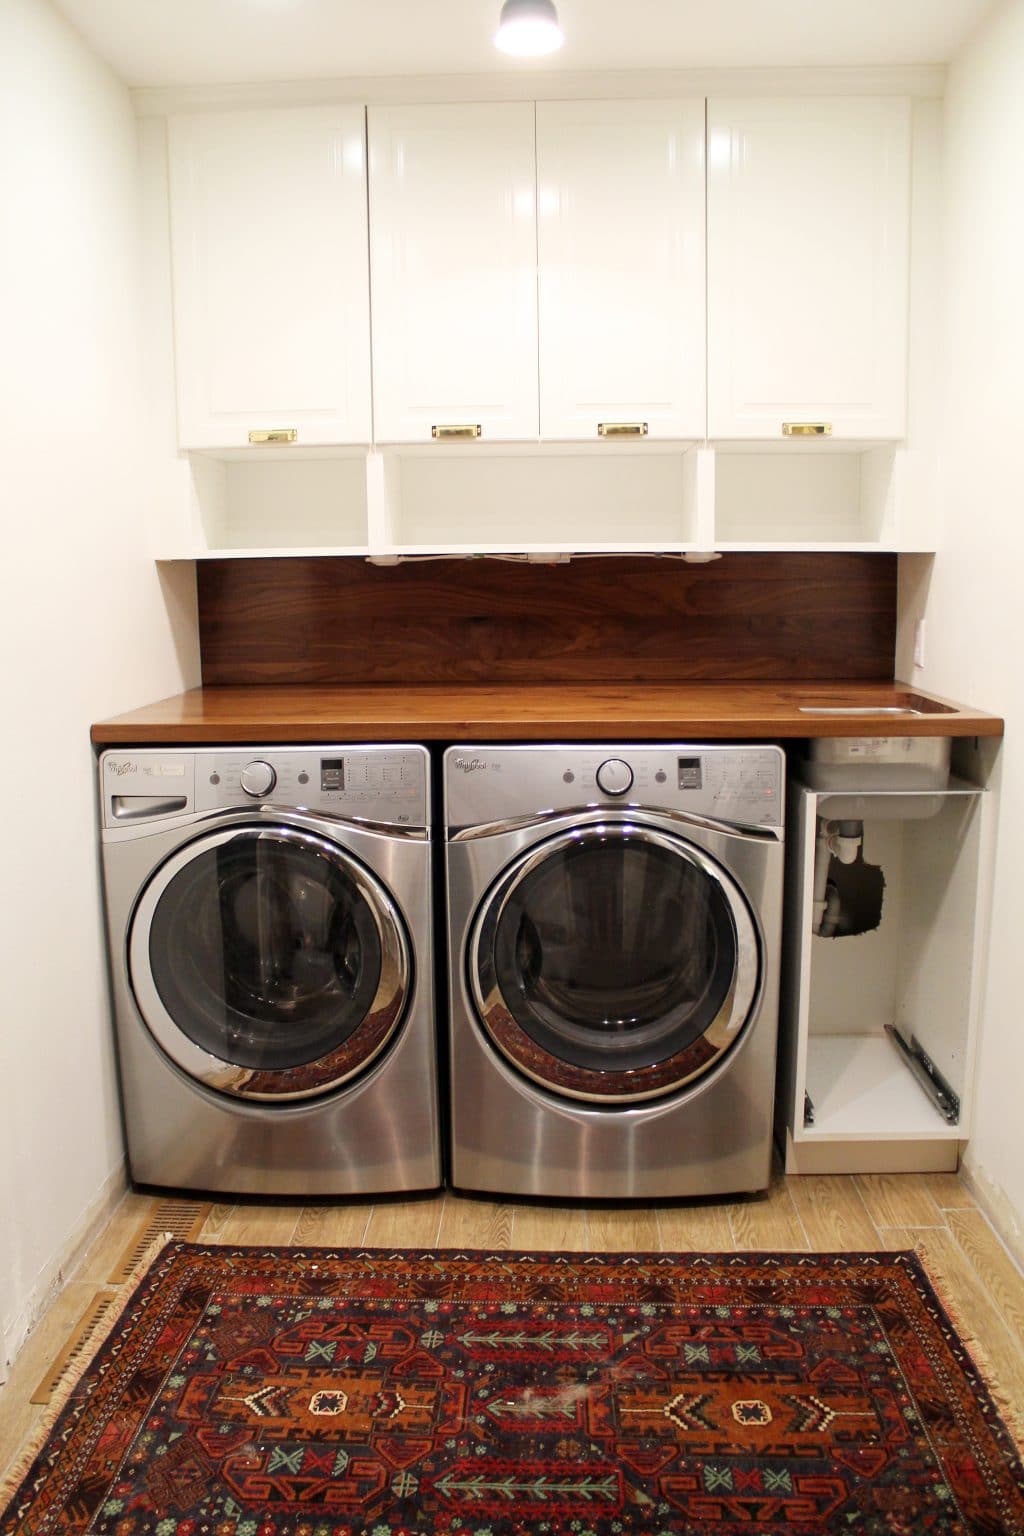
As I mentioned in this post, we ordered the wood from Craft Art unfinished, cut it down to the exact size we needed, cut the sink and faucet hole (and survived to tell the tale!!), and installed it before sealing it. For the install, we just fastened brackets into studs for the countertop to sit on, and then screwing the countertops to the brackets from underneath.


To secure the backsplash in place, we used heavy duty construction adhesive and it isn’t going anywhere.

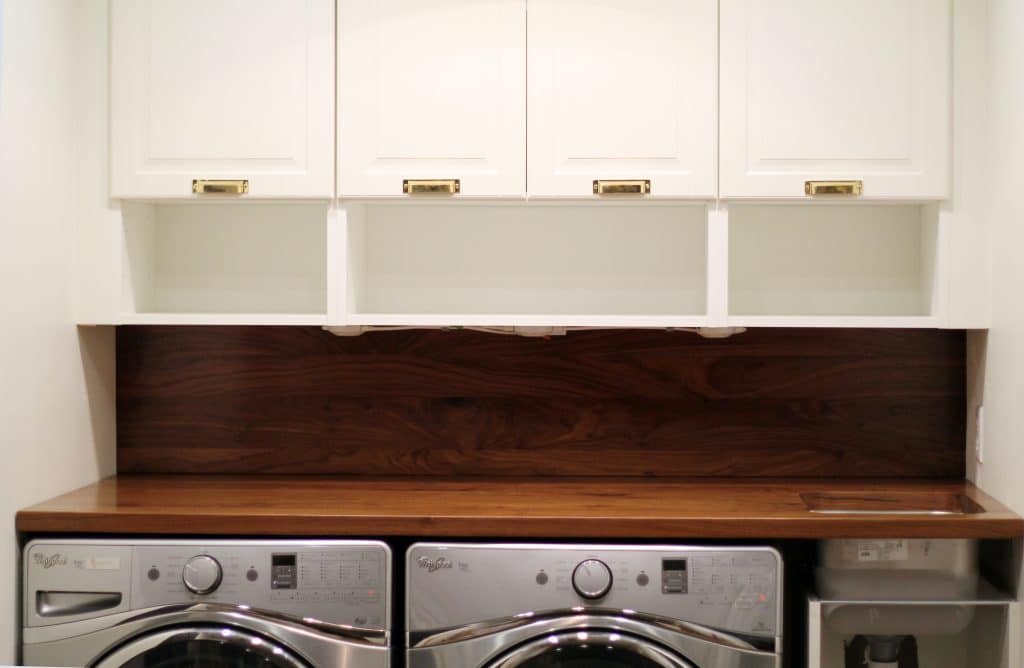
Once the countertop and backsplash were secured, it was time to seal everything. You can see in the photo above, the countertop was a little lackluster especially where we had cut the hole for the sink and faucet and sanded everything down.

We used Waterlox on our last kitchen’s counters with great results and knew we wanted to use it again. (Tip–unfortunately this is one of those products that is NOT cheaper on Amazon. It’s expensive regardless, but it’s cheaper to order it directly from Waterlox’s website and a little goes a long way.) I brushed a coat on and let it dry for 24 hours and then lightly sanded it with a high grit sanding block.

I wiped the dust away and brushed on one more coat.

The result is warm and rich and is really pulling the whole room together, don’t you think?

With that, to wrap this room up, our laundry list (ha!) is now looking like this:
Install baseboards (wtf. this is always on our list!)
Trim out sink in base cabinet
Install faucet
Fix (or nix?) the electrical for the under-cabinet lighting.
Bring in art, storage, decor, etc!

So close!!! Although getting any of that done requires us to stop staring at the new counters. Shoot. ;)


How many inches high is your backsplash? THANKS!
Beautiful room and home! How has the walnut top held up since you’ve installed it? Have you had any stains from cleaning supplies or detergent?
Has held up awesome! Still looks good as new.
Great, thank you! Good to know.
Hey there – we have undergone a laundry room project much inspired by you guys – I would actually love to send you a picture! Did new flooring, white cabinets, new appliances (no room for a sink though) but the one thing that I can’t figure out – how did you guys cut down your counter top? Is it just us that has wonky walls and we need to accommodate for 3/4″ difference in some places? Please share your secret to getting it to look so perfect!
We got lucky that our walls were pretty square in there, but that is definitely not always the case. Could you do a walnut backsplash to cover the gap?
I love your laundry room reno! Maybe I’m missing a post in this series, but, could you share how you got your washer and dryer to be flush against the back wall to install the countertop? We have the same washer and dryer, and are installing IKEA cabinets on both sides, but can’t figure out how you accounted for the dyer hose (which makes our Duet stick out almost 12″ from the wall?). Would love to know, if you don’t mind answering. Thank you!!
Jillian
Can you link me to the brackets you used to hold up the counter?
Hey Kevin, because part of it is on top of the base cabinet, and we’re able to support it on the sides, we just used these little guys: http://www.lowes.com/pd_315684-1277-DPB115_1z0vic7Z1z0yk8x__
We used as many as we could, screwed directly into the studs.