This post is sponsored by Lowe’s.
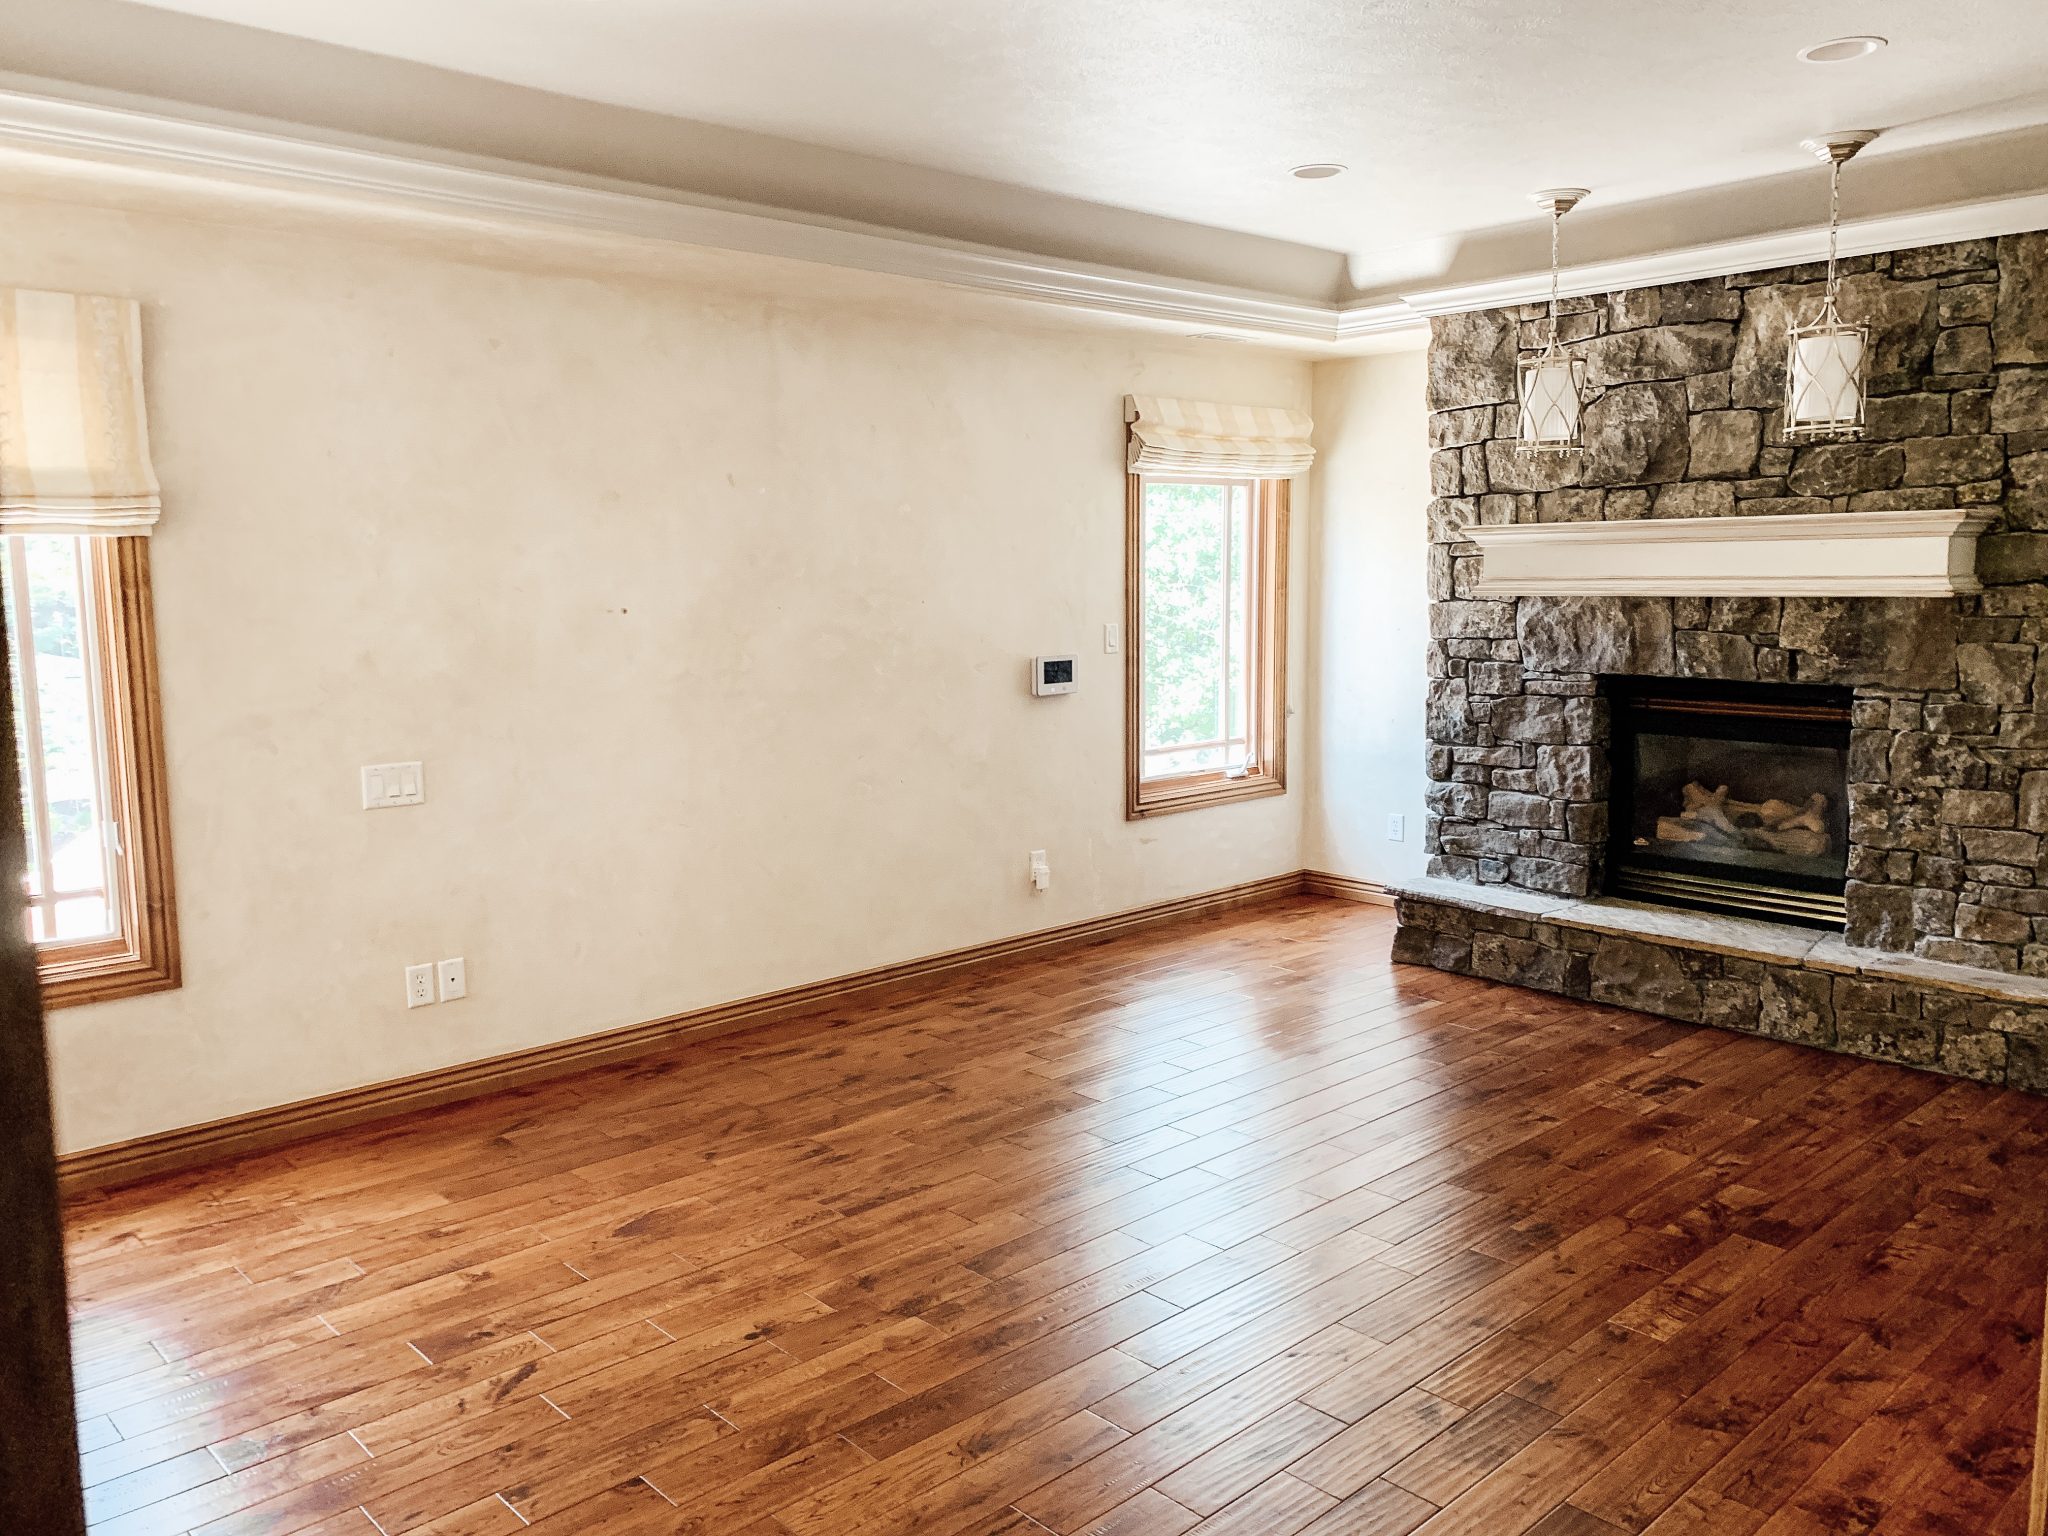
Our bedroom has undergone a lot of changes in the last six months, but I think our fireplace has gone through the most changes. We initially thought about tearing it out completely and re-doing it in a far simpler fashion, but against all odds–I’m attached to it. It’s real local Idaho stone (not a veneer) and a modern cottage seems like it should have some stone in it–yes? So I’ve been on a personal mission to make it shine. This is how it looked when we first moved in.
We took quick steps to simplify it by removing the mantle and the sconces right off the bat, but the real challenge came when we removed the tray ceiling in our bedroom and were left with over a foot of space between the stone and new ceiling height.
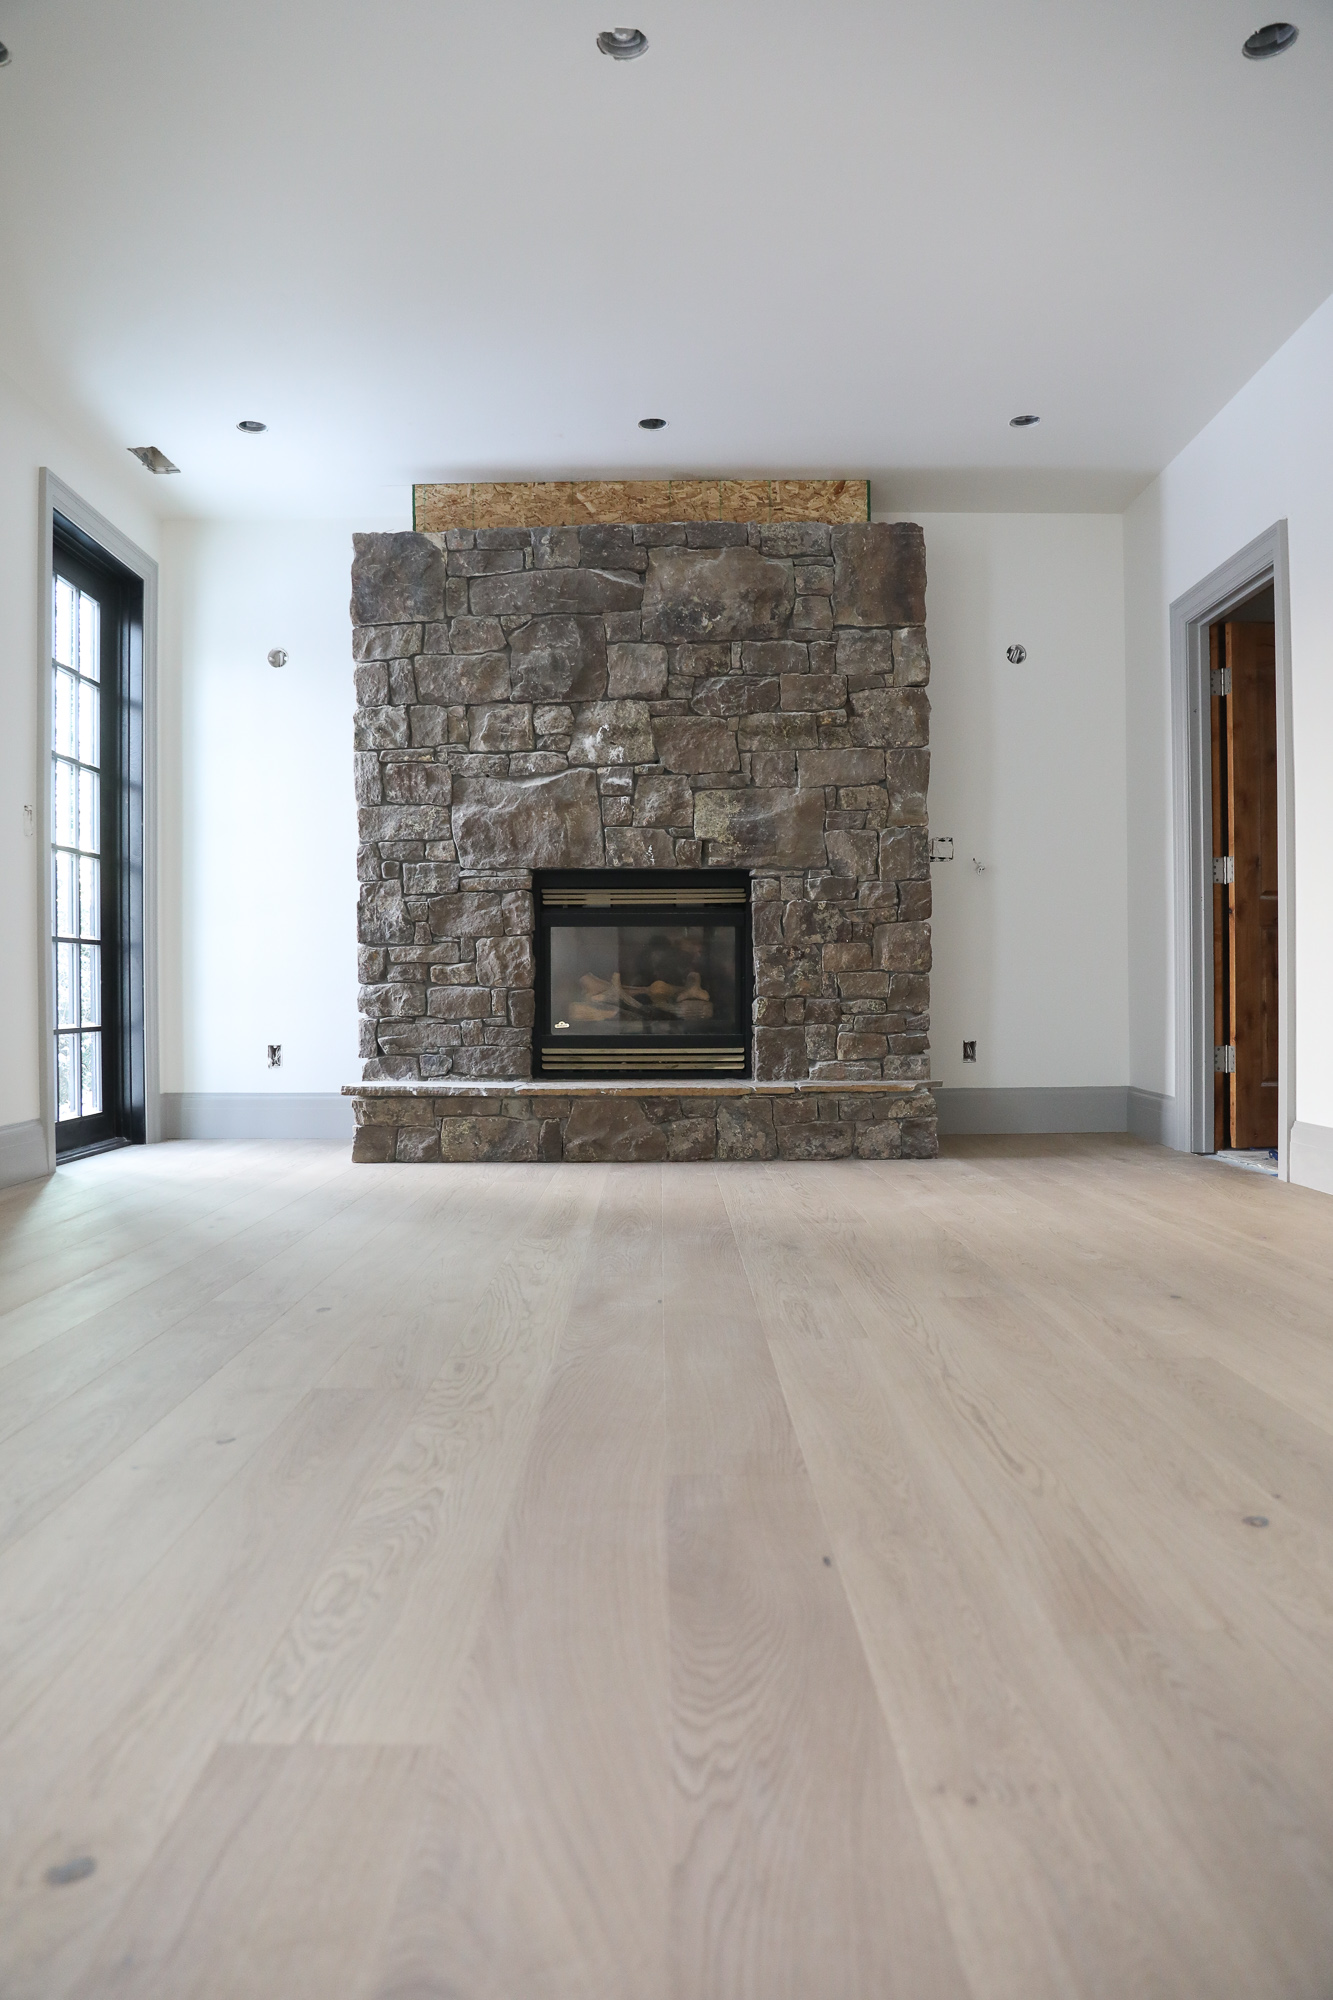
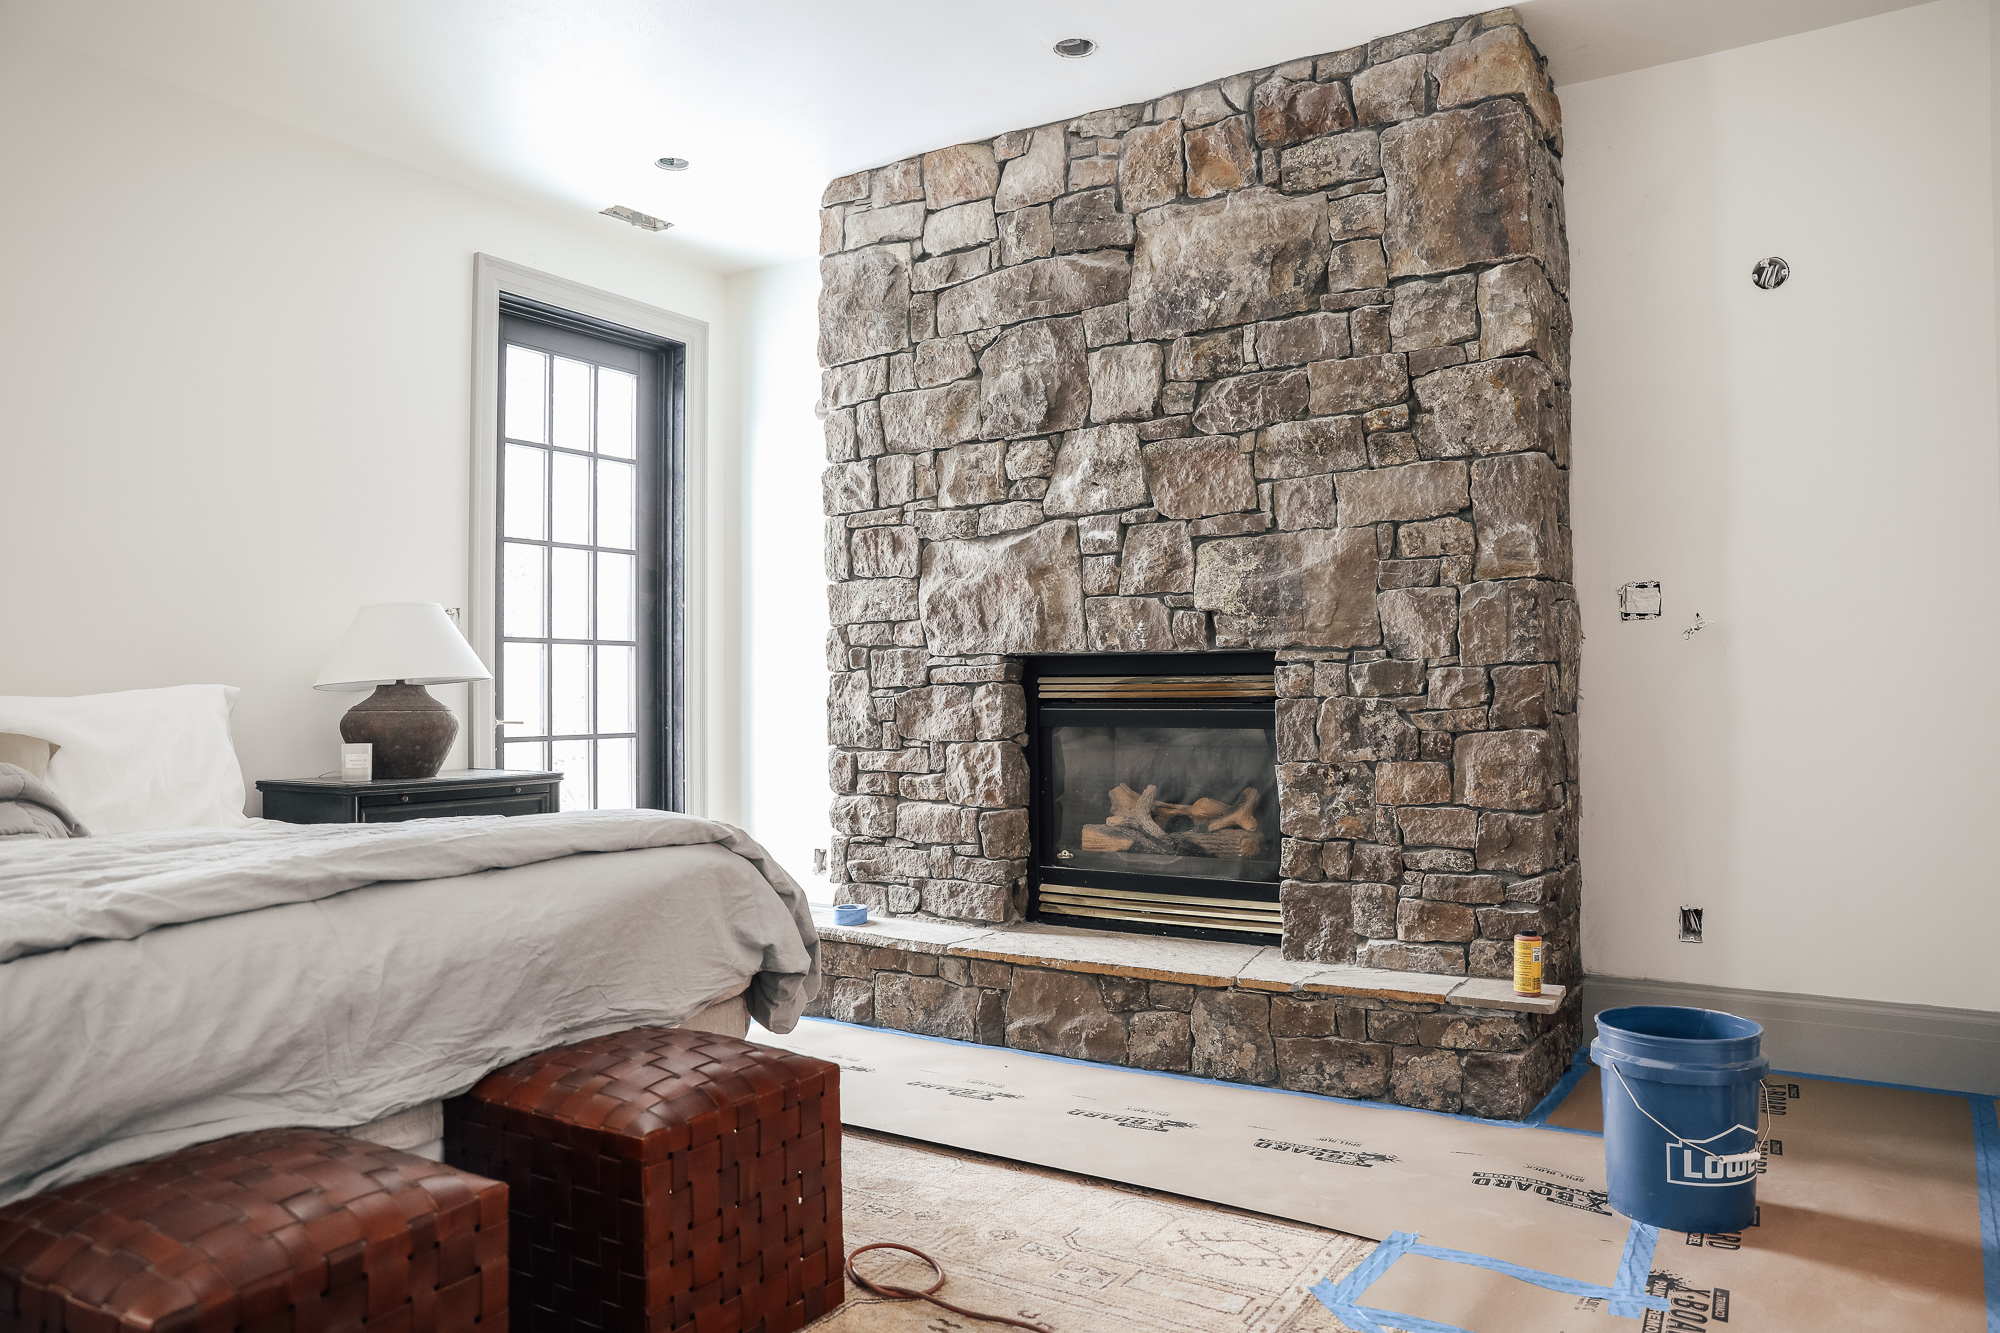
But! I planned ahead! During the demo phase of our new dining room, they removed a bunch of stone that matched our fireplace (I imagine they were put in at the same time), and we saved it to use here. A mason added the stone in under two hours and all was right in the fireplace world again…almost.
Besides the insert needing an update, I was so drawn to over-grouted stone fireplaces and had saved so many examples thinking our bedroom would be the perfect place to implement the look. The examples I had saved went from almost completely washed in mortar…

…with barely any stone showing…

To just mortar lining all the sones.
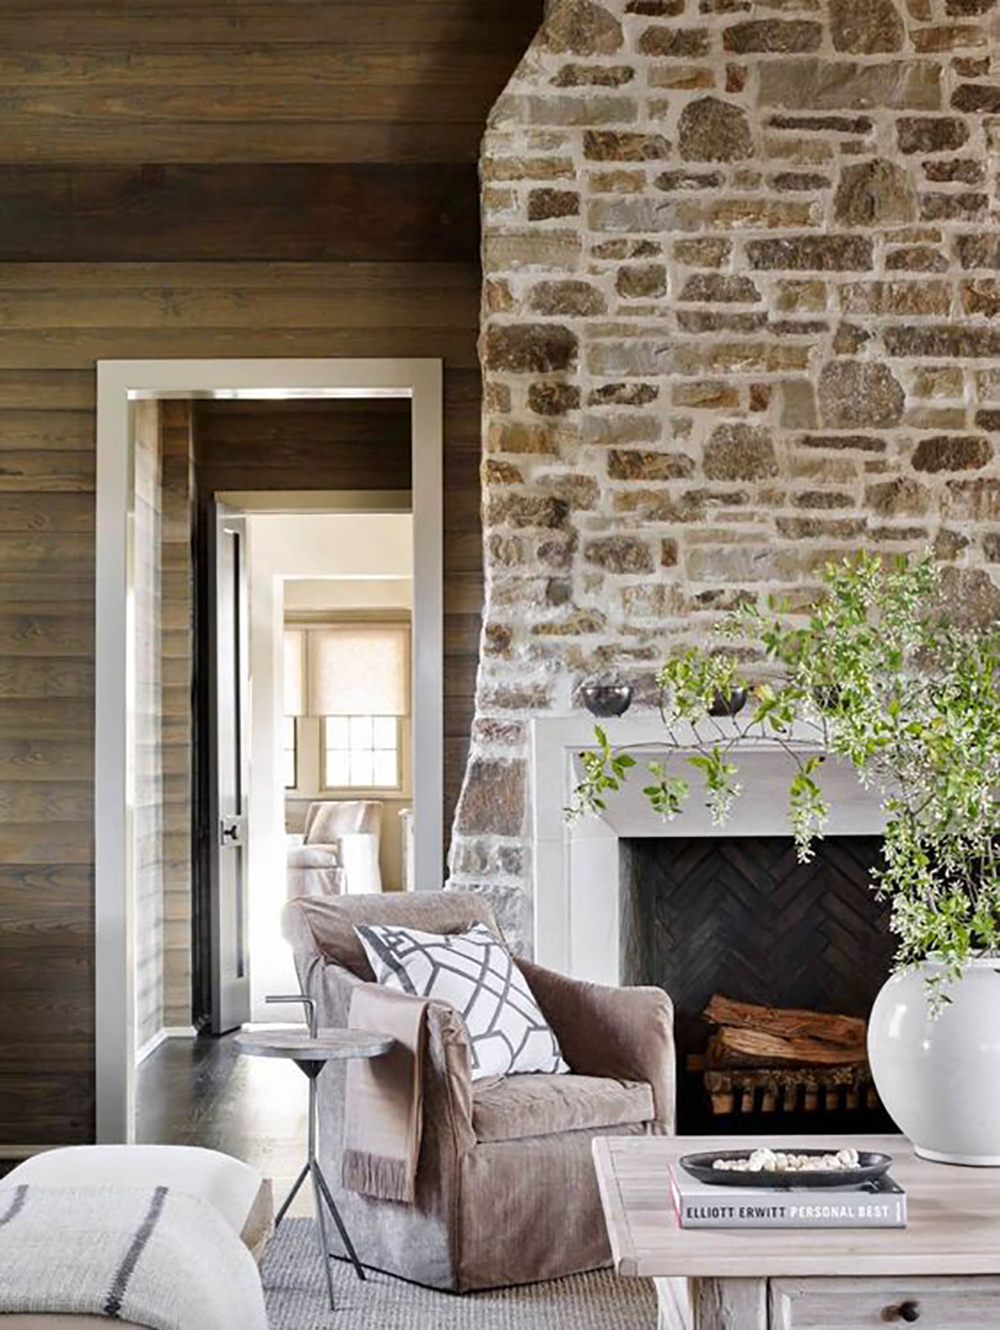
I really fell for these because, to me (and I realize this is completely personal preference) I loved the look of the stone and the softness that the mortar brought. I wanted to see both!


I could go on and on and on but these were all of the inspiration photos I showed Chris during my thesis on why the fireplace in our bedroom wasn’t showing its full potential. (haha). I really wanted a softer, cottage-looking, over-grouted stone fireplace and with the new white walls in our bedroom, I knew a light mortar would only add to the look.
Fortunately this is a very inexpensive DIY (we spent around $100!!, but add $99 more if you don’t have a corded drill–linked ours below). It’s even EASY. But it IS tedious and a little time consuming. I’d block out 1.5 days for this project (great for a weekend project!) because it’s not something that you can really start and stop. The mortar WILL dry and is kind of time-sensitive to get right. We spent about 14 hours from start to finish doing this project, but it wasn’t all active.
HOW TO OVER-GROUT YOUR FIREPLACE
One note: I don’t really know what the technical term for this tutorial is because we’re not using grout (the crevices in the stone are much too large for grout) we’re using mortar. But, “over-grouting” is still the term that I hear the most for this look. Definitely open to other titles.
Lowe’s had EVERYTHING we needed. It was so nice to be able to walk into the store with a short list and walk out (having only spent $108! on supplies) and immediately get started. You can do this too! Here’s what you’ll need.
Materials Needed
White Large Stone and Tile Mortar (we used 1 and 1/4 bags for our fireplace)
Mortar Piping Bag
Mortar Mixer attachment
Corded Drill
2 Buckets
Quikrete Concrete Dye (optional: we used BUFF and Charcoal)
Pointing tool (we used a shim for this part)
Stiff Craft brush
Cup of Warm Water
Grouting & Concrete Sponge
Wire Brush
Here’s how we did it!
Mixing the Mortar
1. For every 6 cups of dry mortar mix, we added 4 drops of BUFF concrete dye and 2 drop of CHARCOAL concrete dye (so it wasn’t SO stark white and blended with our wall a little better. You could add more for a darker/warmer look if you’d like!). We started by adding 3 cups of water and then kept adding more until the mix was semi-stiff (think the consistency of mashed potatoes.)

Piping the Mortar
2. Fill your piping bag 2/3 full. Twist the open end together to close it off and apply steady pressure to the back of the piping bag with one hand while guiding the tip with the other. Pipe the mortar into every crack allowing it to spill onto the front a bit. We did a trial of this and just added mortar to fill the cracks and we were not able to achieve the same look. You really have to OVER-fill it in this step.

Pointing the Stone
Right here, we took about a 2 hour break to let the mortar set just a bit. This will absolutely depend on your climate and once Chris reached the end, the first parts were ready for this step. But then we caught up and had to wait a couple more hours before continuing. In this step, we smooshed the mortar flat in place onto the front of the stone a bit. We used a shim for this part because we didn’t want the mortar to indent back into the stone, but they actually make pointing tools! You just really need something to press and work the mortar flat. If you find the mortar is scraping off, it might need a little more time to set.

In the bottom right hand corner, you can see where we flatted out the mortar compared to the rest of it where it’s still freshly piped. This part looks a little scary, like is this going to even turn out?, but hang in there because you’re in the home stretch!

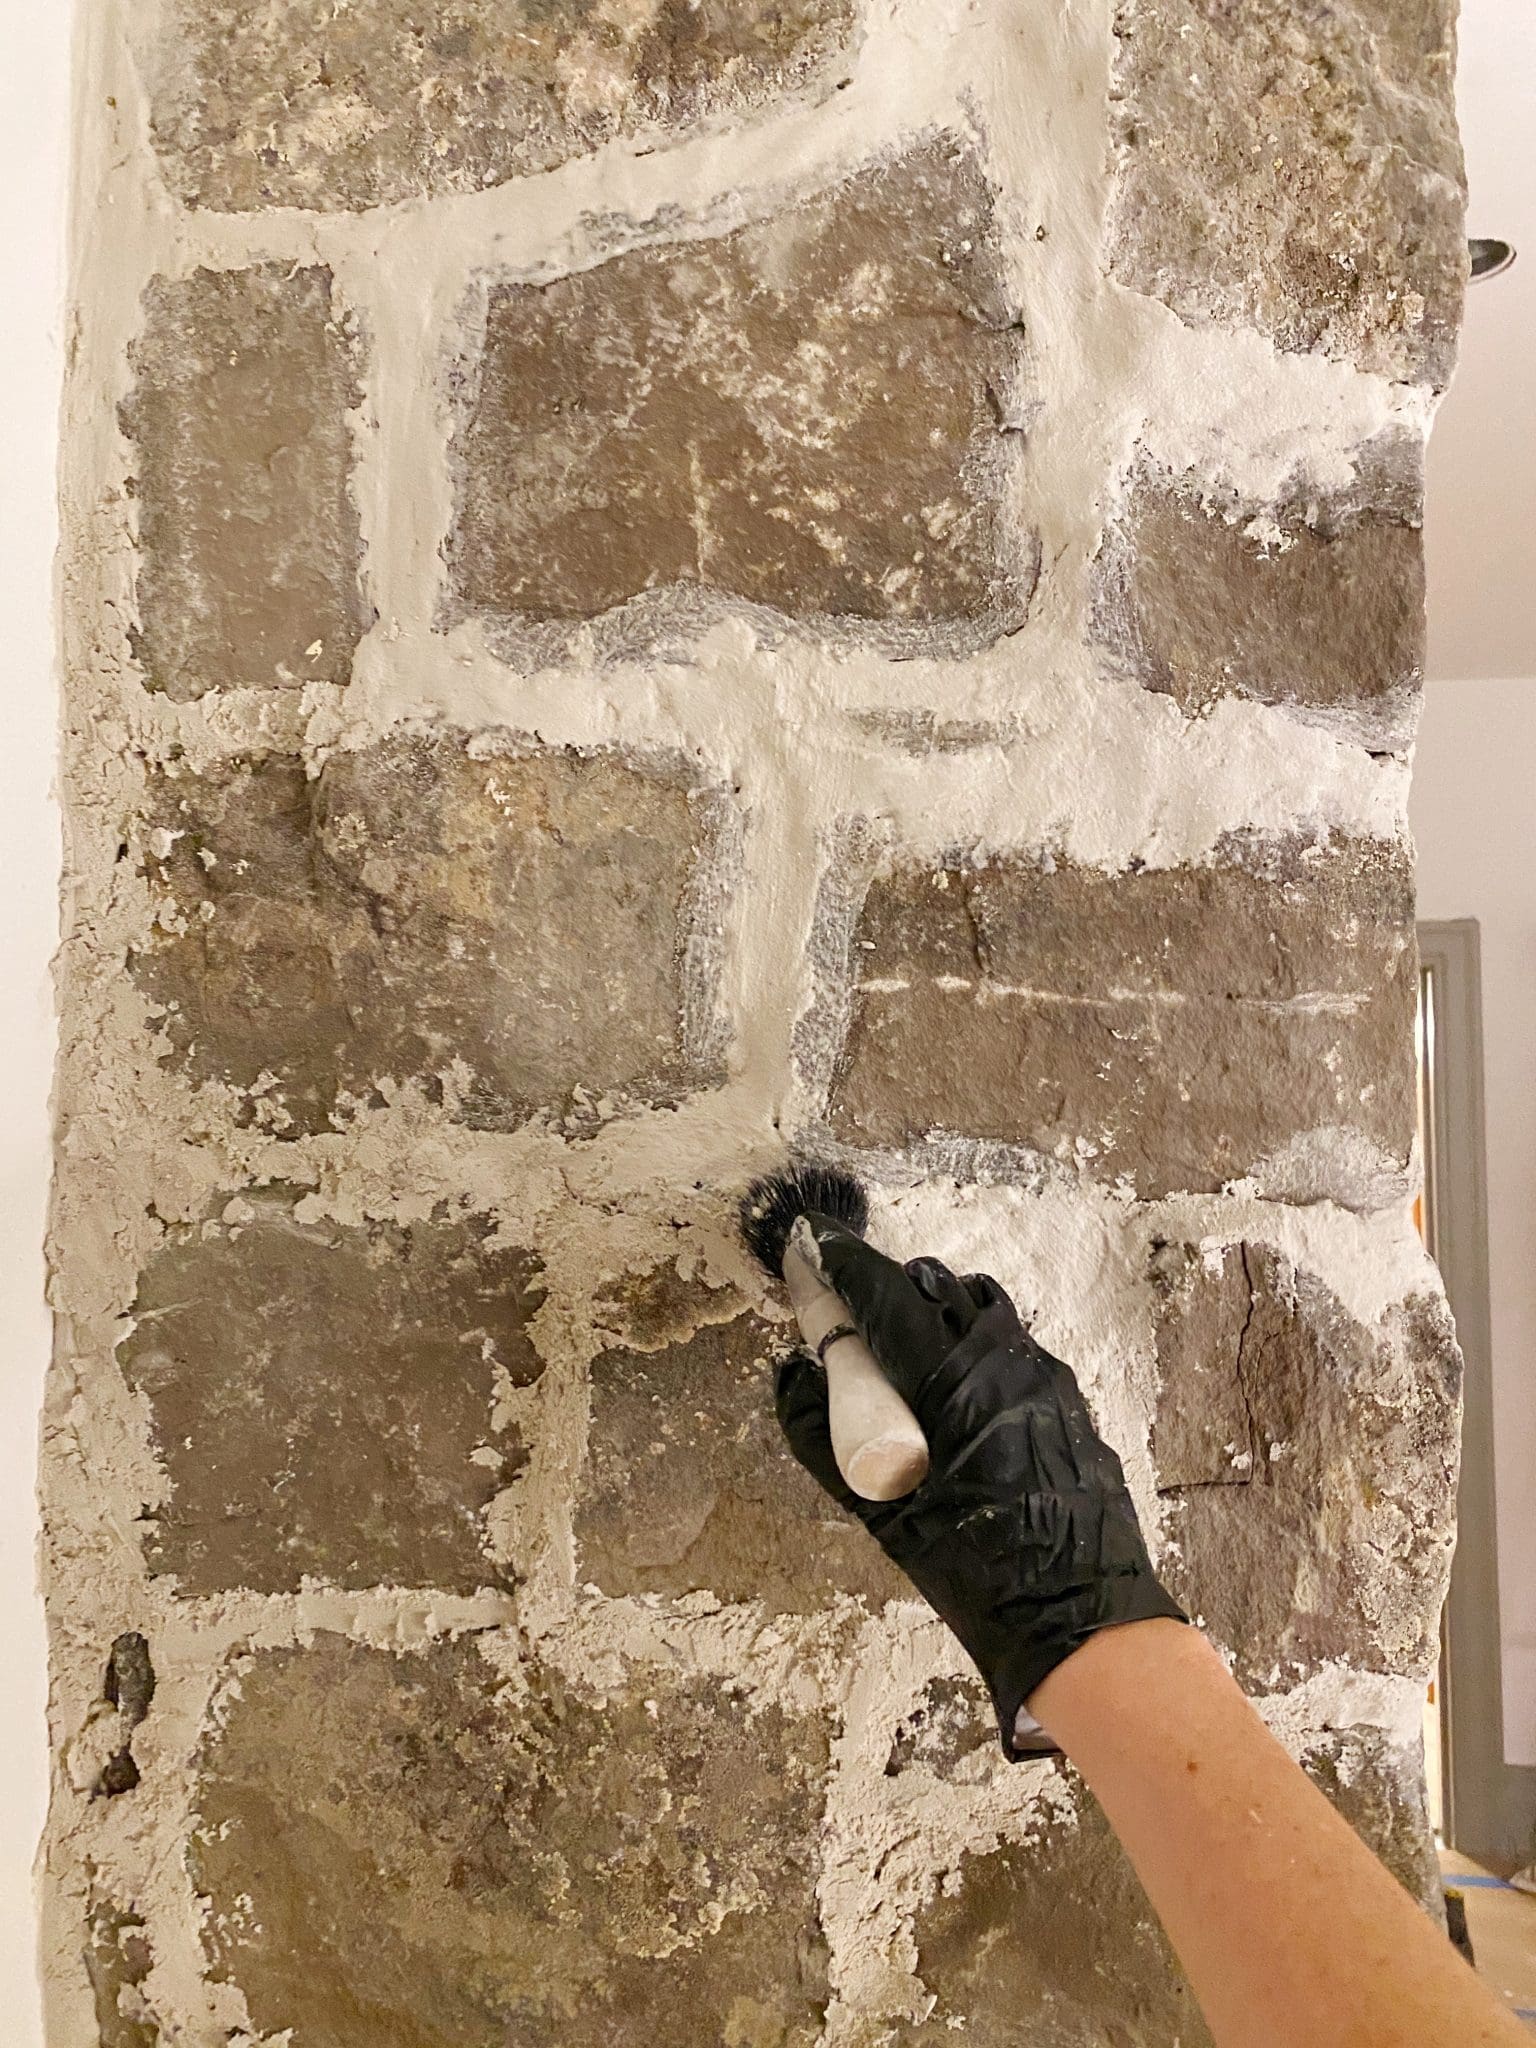
Brushing it smooth
The turning point of this project is brushing the mortar smooth. I used a stiff round craft brush for this step, dipped in warm water. You can do this immediately after the previous step (don’t wait or it may dry too hard!). If it isn’t going smooth, you can go in with a wire brush to help.
The last step is getting a scrubby sponge and water (you can add some coarse salt or sugar) and wiping off the haze that the brush strokes can add near the mortar. The finished product is absolutely charming and has so much character!


As a final step, we used this high heat spray paint to paint the fireplace vents black and WHAT A DIFFERENCE that made!!! We would love to add a concrete or limestone mantle (like our inspiration photos!) around the insert in the future, but we’re no strangers to a multi-stage makeover–clearly.


The new mortar has totally changed the entire feel of the fireplace and our bedroom! It went from heavy and over-powering to light and fresh and charming. This is one of those DIYs that might feel scary because how can you go back?! But I can’t tell you how much more we LOVE our fireplace now. And it feels so good to give it a fresh new life, too!
I can barely believe we pulled it off for $108 and it looks like a completely new fireplace. Would love to hear if you try this!


Just picked up all the supplies at Lowes! Hoping to transform my 60’s stacked stone fireplace before decorating for Christmas! Thank you for the shopping list! It was super easy to find all the exact things!
This is gorgeous! I wonder if I could do this to the rock on the exterior of my house. I want to update it to look more like a cottage than the Italian rustic vibe that it has right now.
Thank you for posting this, I gave god awful jagged stone fireplace and wanted to rip it down but husband doesn’t want to! I am definitely going to try your method.
That’s really impressive. If one has time and energy then it is quite possible.
I absolutely love this! Really softens and brings in contrast to the room at the same time. I want to give this a try on my fireplace!
Question. Did you also touch the color of the stones? If so, how did you do that?
Thank you!
We didn’t