2 weeks ago, we started a phase 1 kitchen renovation. Our goal was simple–to spend only $1000 to bring our kitchen to a place that we could live with for a year or so until we had more time to live in the space and figure out how we want it to function. Our big motive was a Thanksgiving shoot we had earlier this week and I’m happy to say, we made the deadline. But what’s more–we are sure we can now live with this kitchen much longer than a year, aesthetically at least.
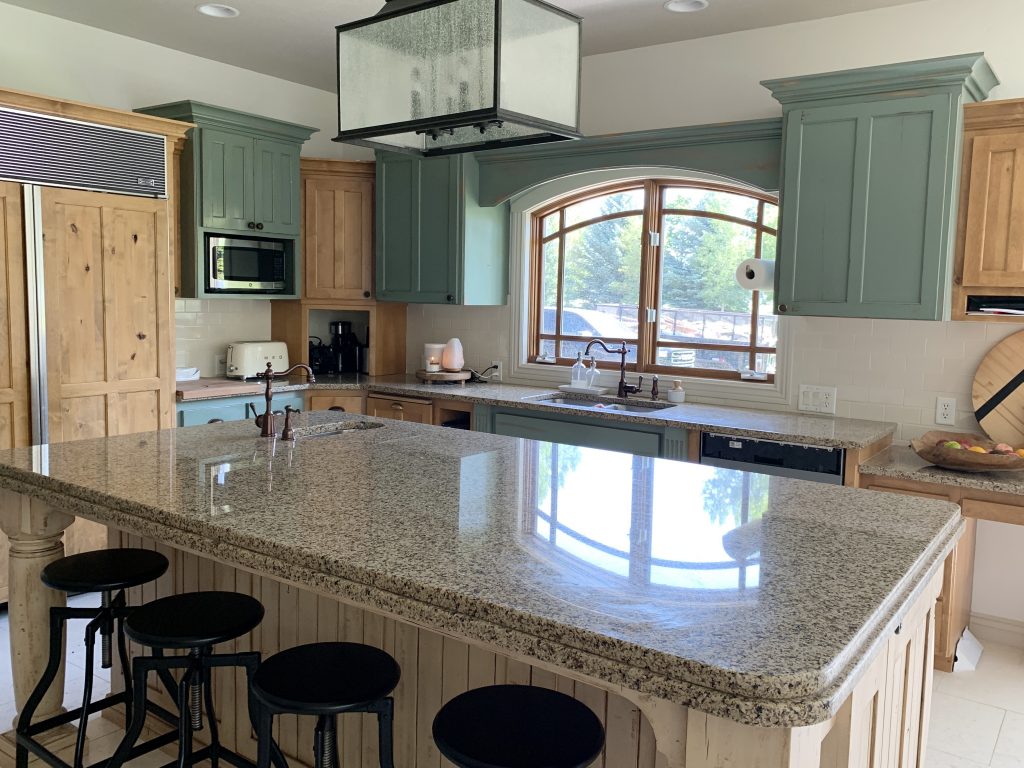
Here’s how it looked 2 weeks ago:
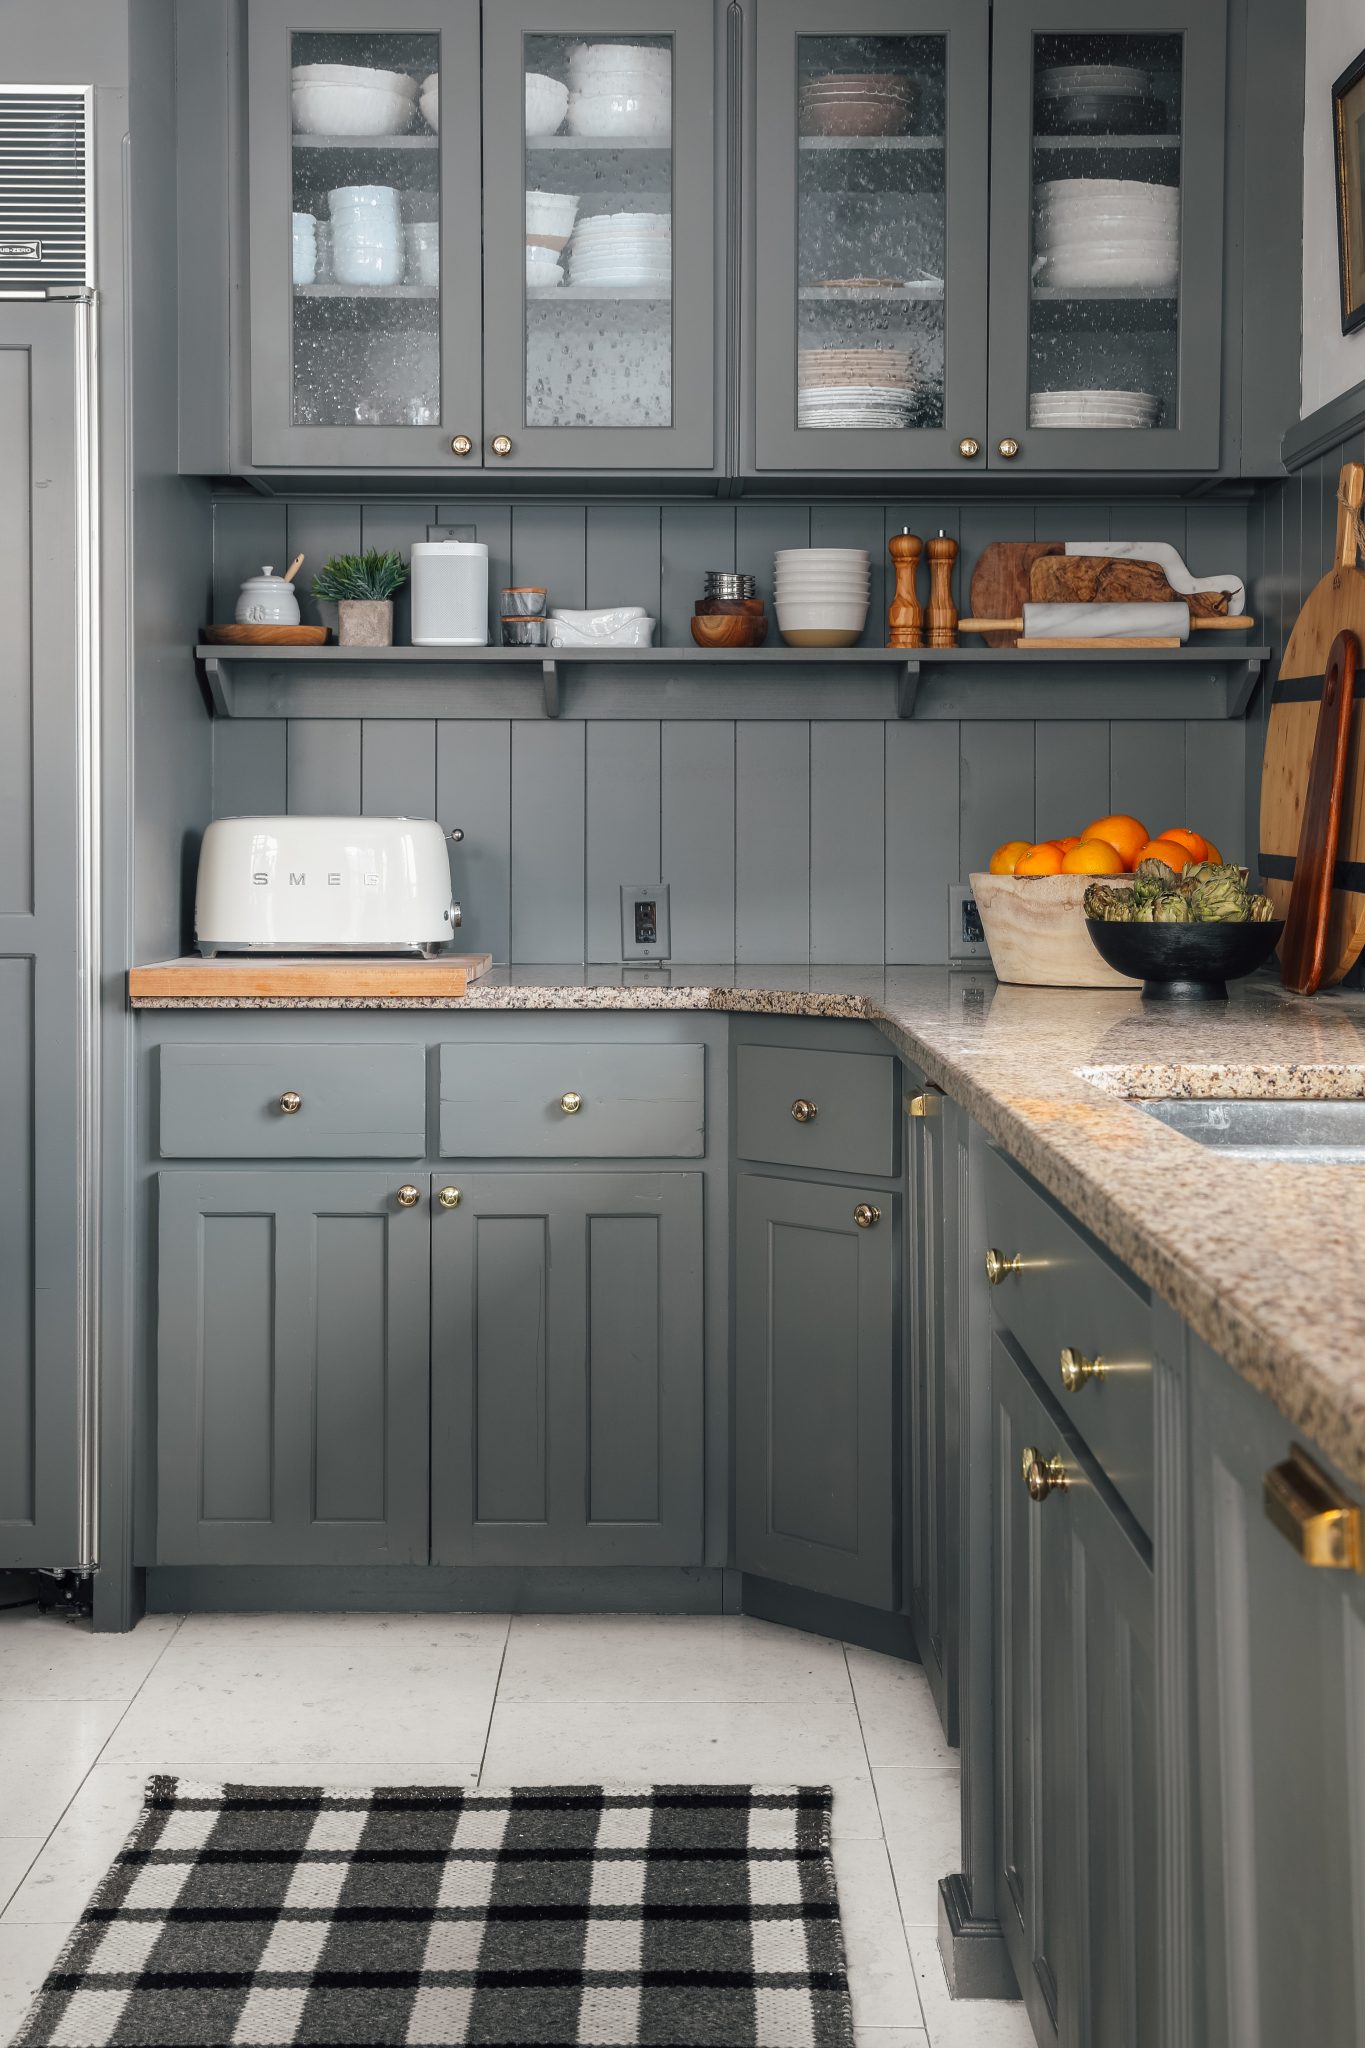
And today:
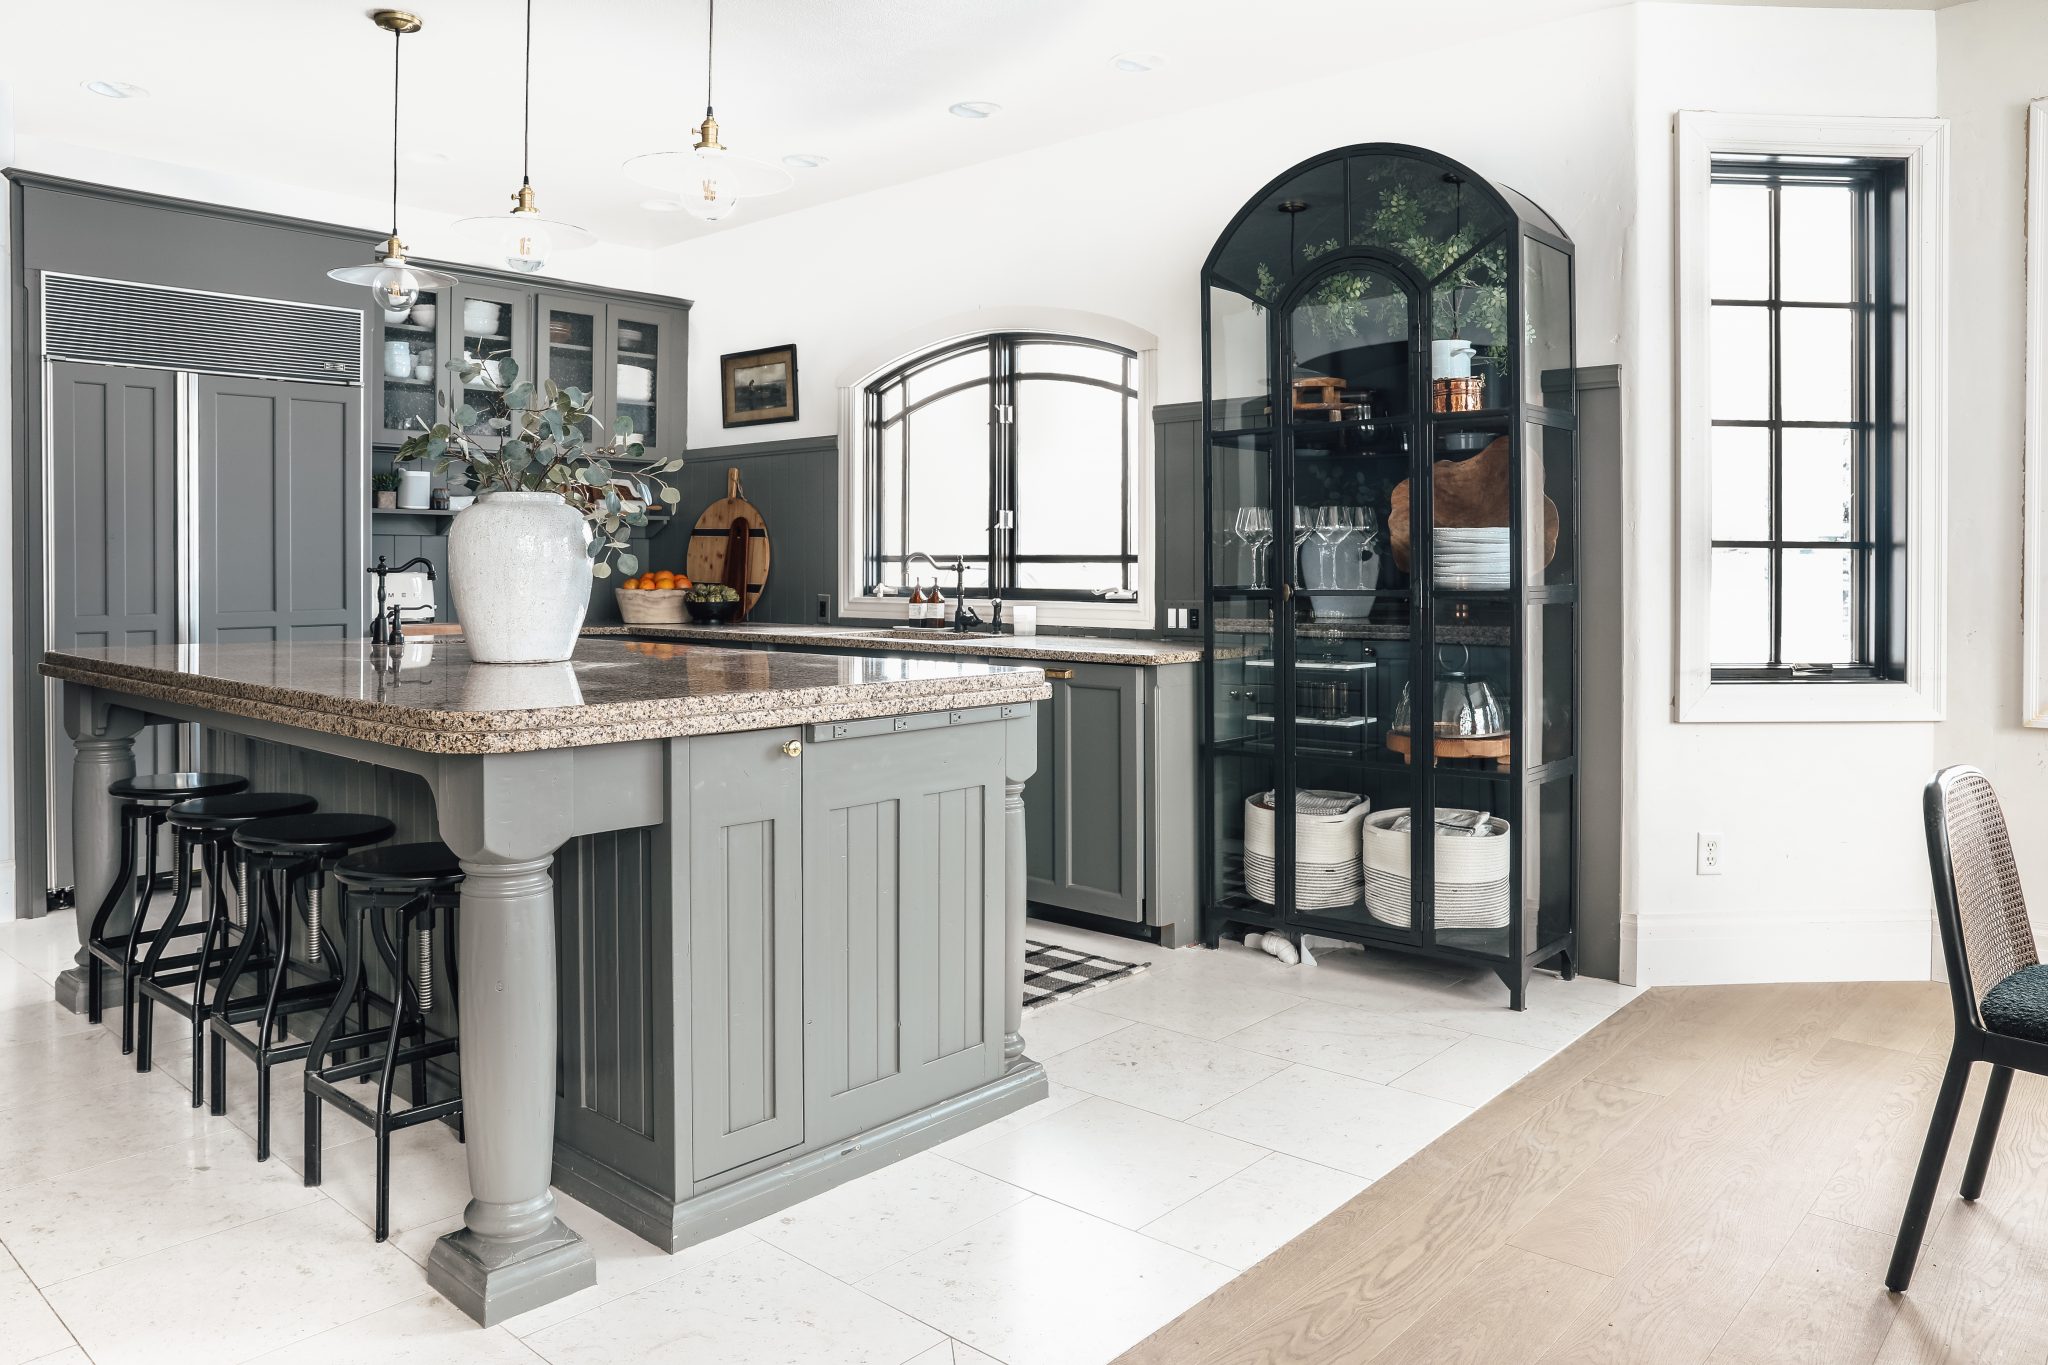
And a few more angles:

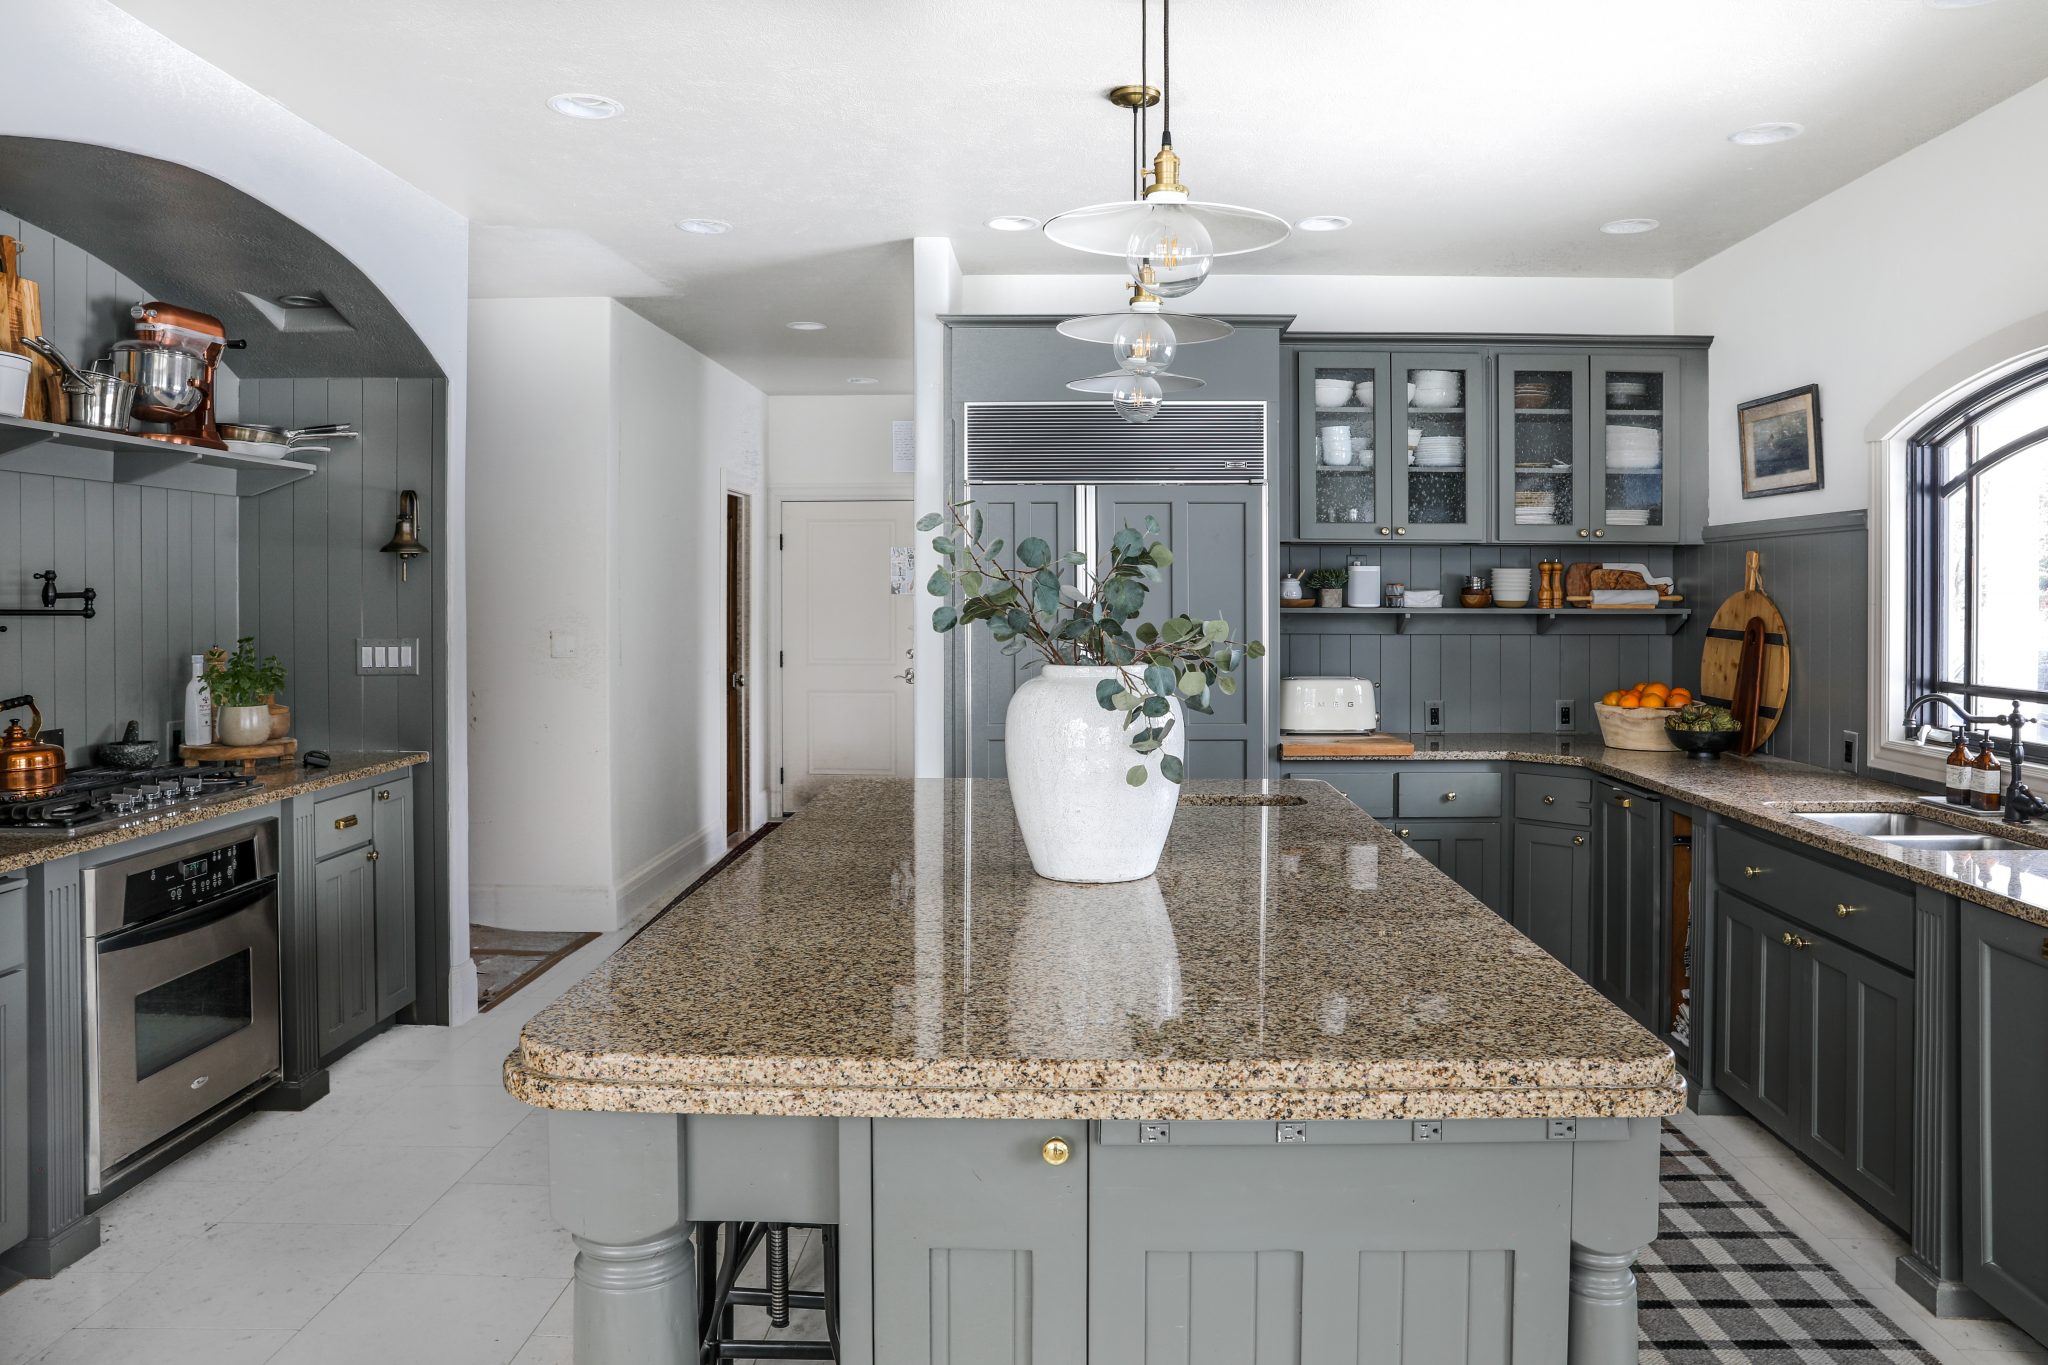
And the other side:


Same. Kitchen.
This renovation was all about working and using what we had. Countertops, floors, appliances and cabinets are big ticket items in any renovation, so we brainstormed ways to make what we currently had, look less dated and more like us without spending much money. It took a small financial investment and a relatively small time investment of two weeks (although I will say, we really pushed ourselves during that time) to make it happen.

So very many of you followed along religiously on Instagram the last two weeks and we can’t thank you enough for that (I saved the whole process in my story highlights, start with 1-ktchn) but in case you missed a few details, here’s a brief rundown of how we went from this:

to this:
I 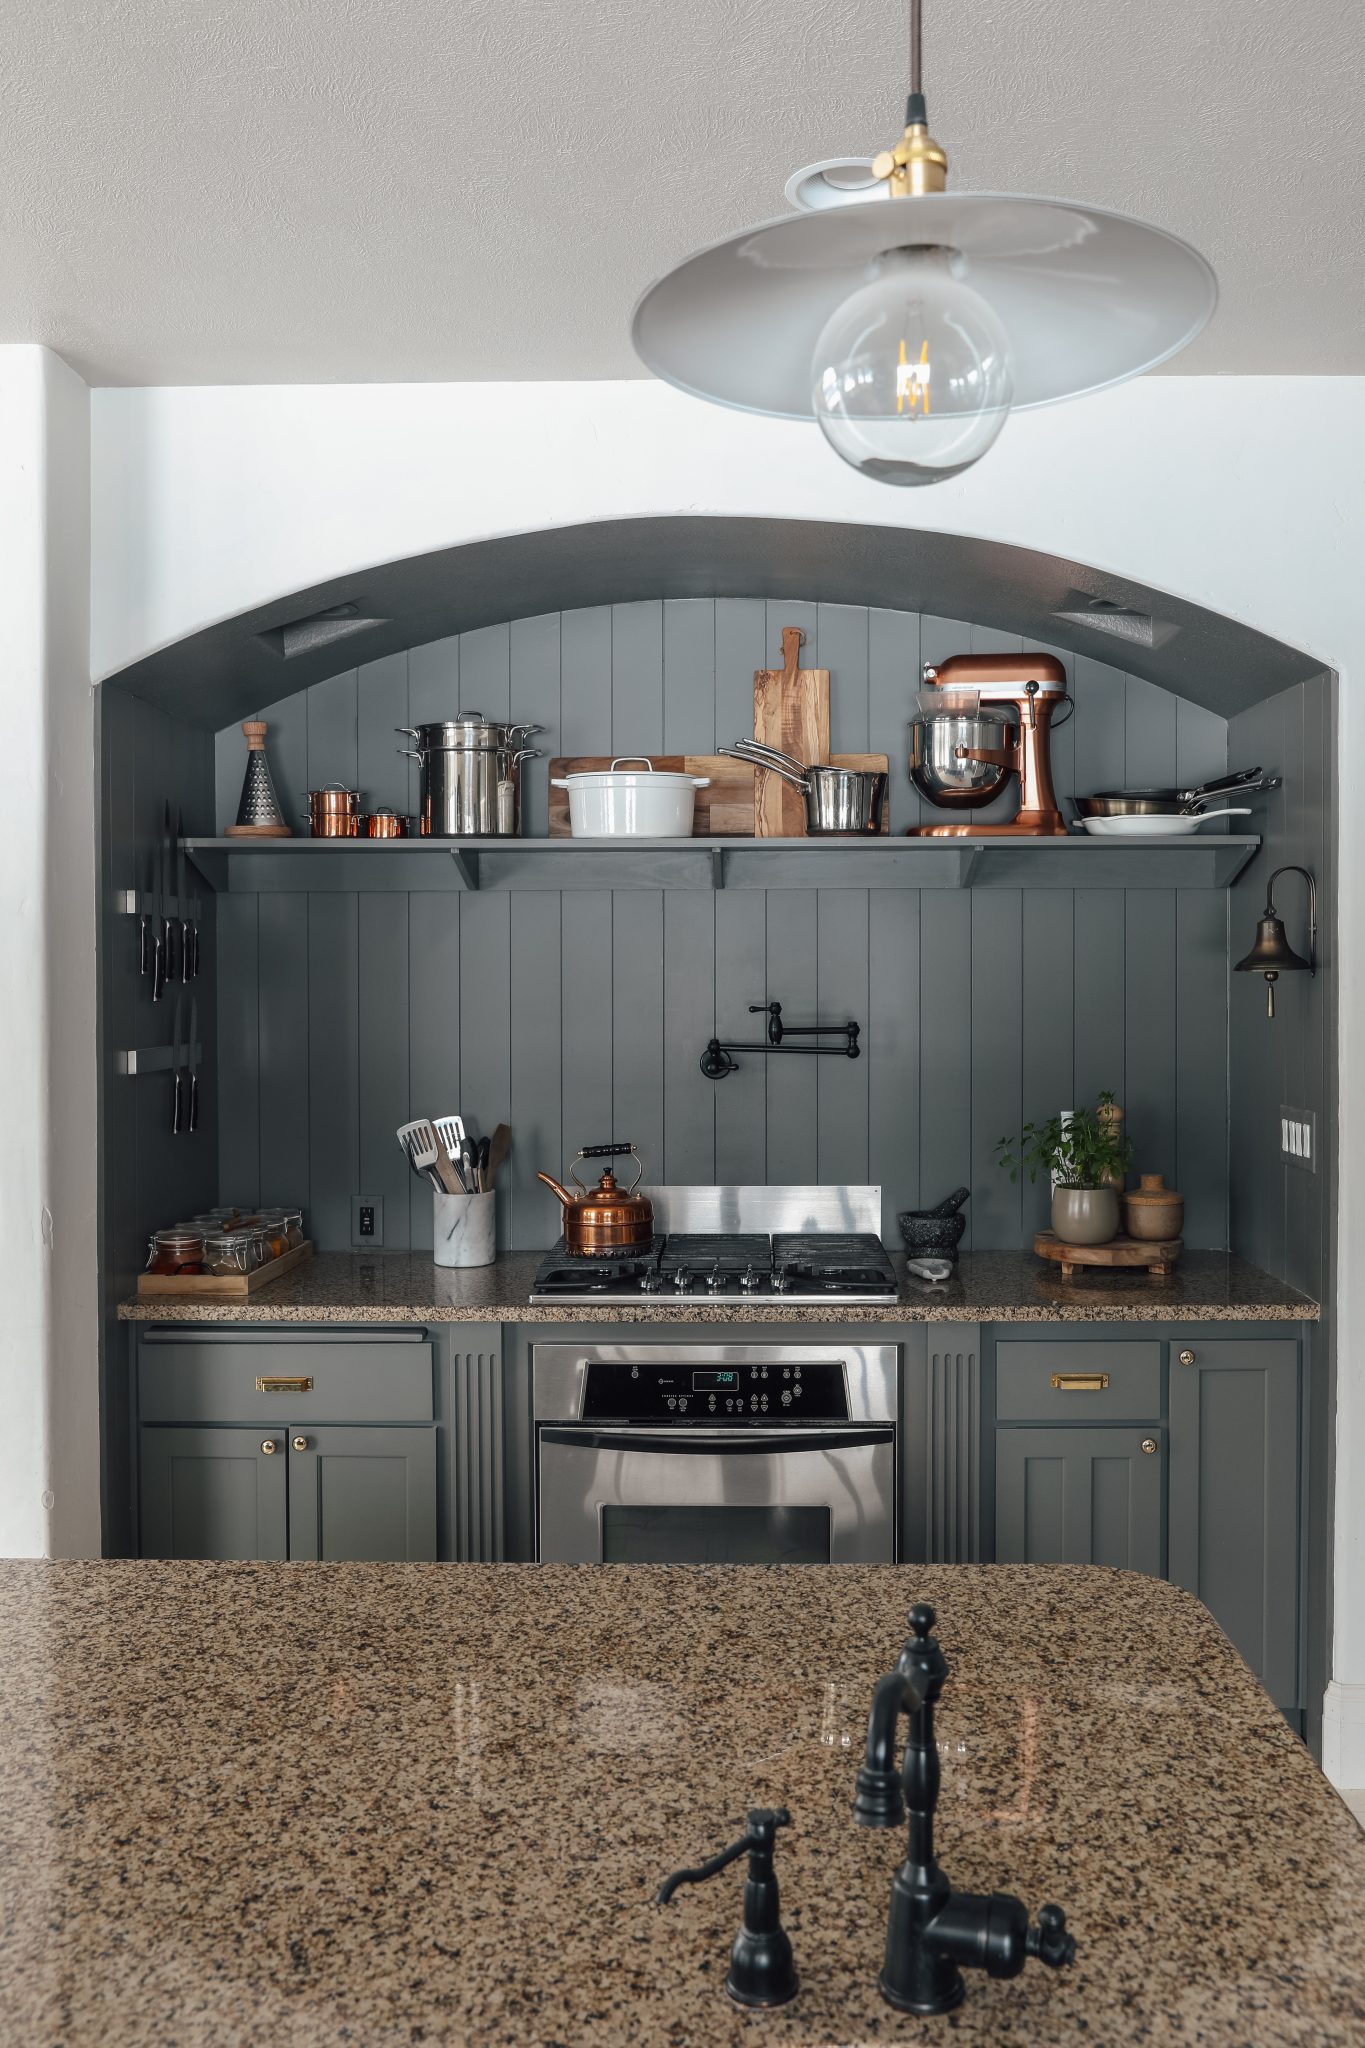
Here’s what we did to transform our kitchen into what it is today over the last two weeks:
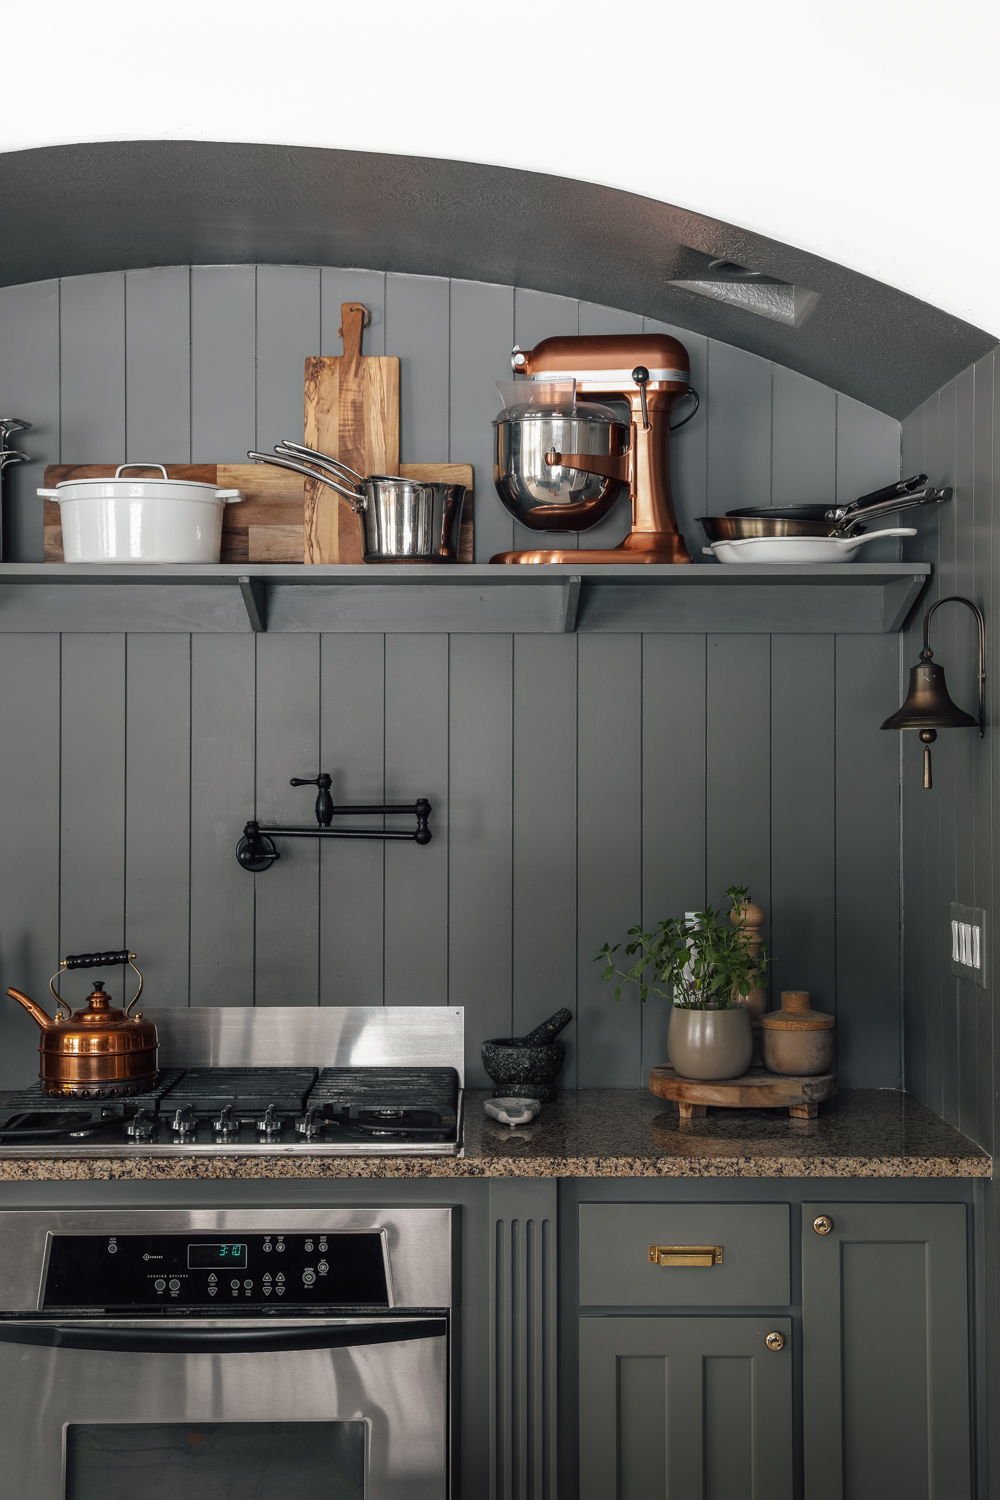
- Rearranged the cabinets. (read more here) We removed some uppers (and the kitchen desk area that only collected junk) to let the kitchen breathe, and moved others (the glass front cabinets by the range hood) and repurposed them in a place that made more sense. This also allowed us to have cleaner lines and get rid of the staggered upper cabinet look that we don’t prefer.
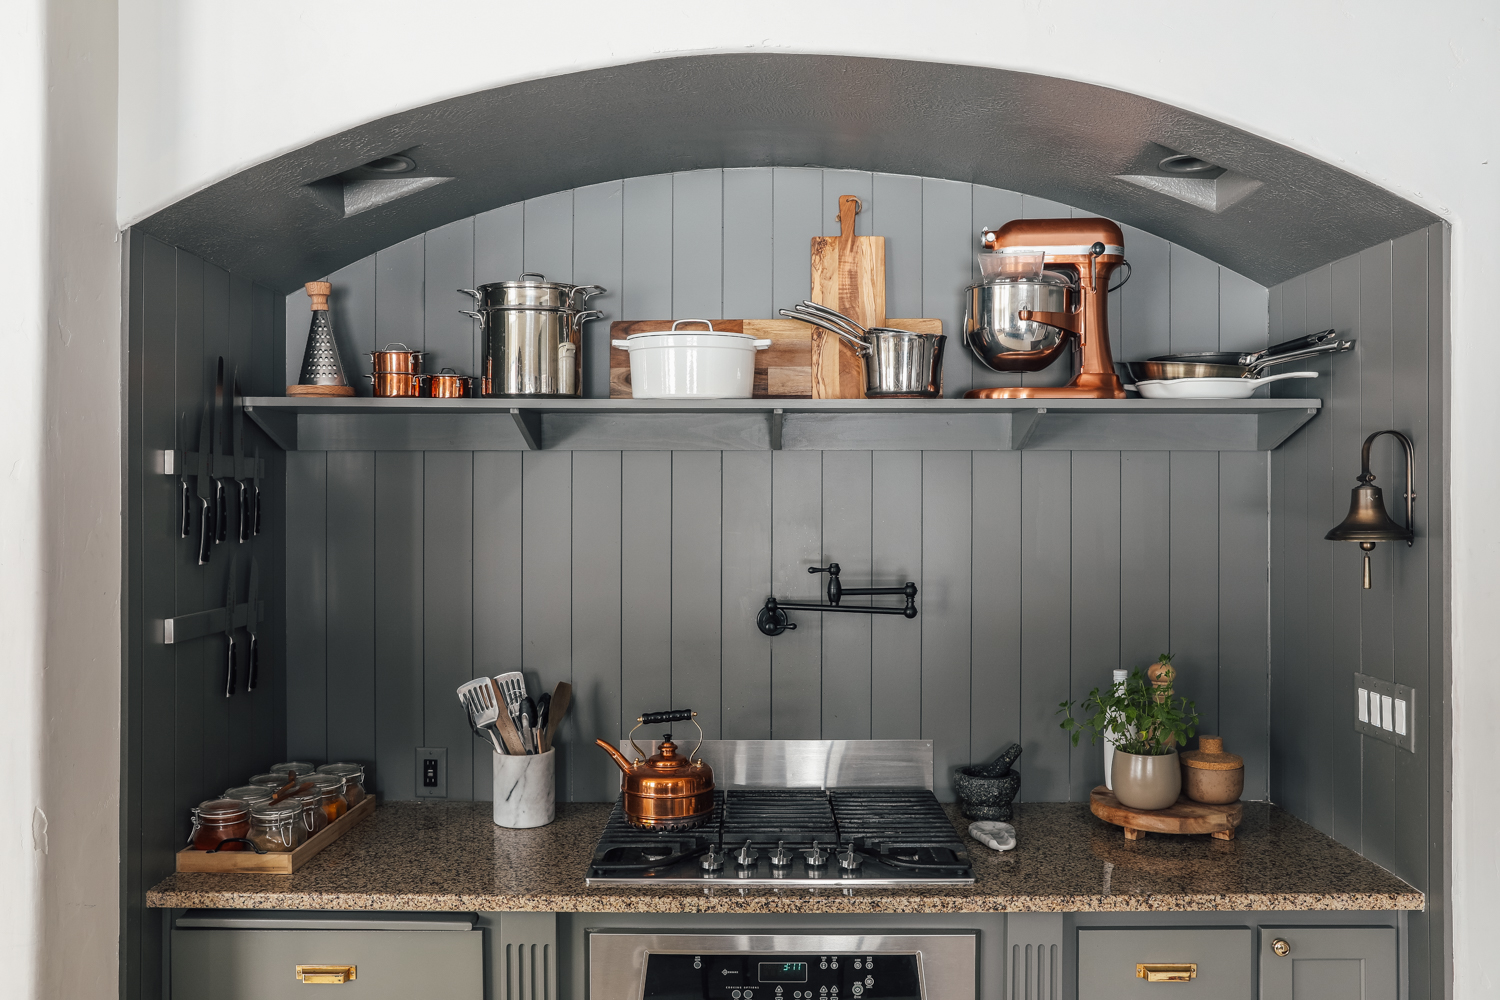
2. Our plan was to move the range hood up because it hit us (tall folk) right in the mouth area at its current height) but when we demo’d the cover, we saw that they actually installed the wrong kind of hood entirely that didn’t vent anywhere. Because we have another exhaust fan in the ceiling over the island area and plenty of windows in this area, we decided to go without a hood for this phase since in the future, we dream of moving our range to the other side of the kitchen.

3. Removed the tile backsplash and replaced it with vertical tongue and groove paneling. This decision was made during the project when the removal of some cabinets destroyed the tile. But it turned out to be a happy accident. We love the modern cottage vibe it brings to the kitchen.
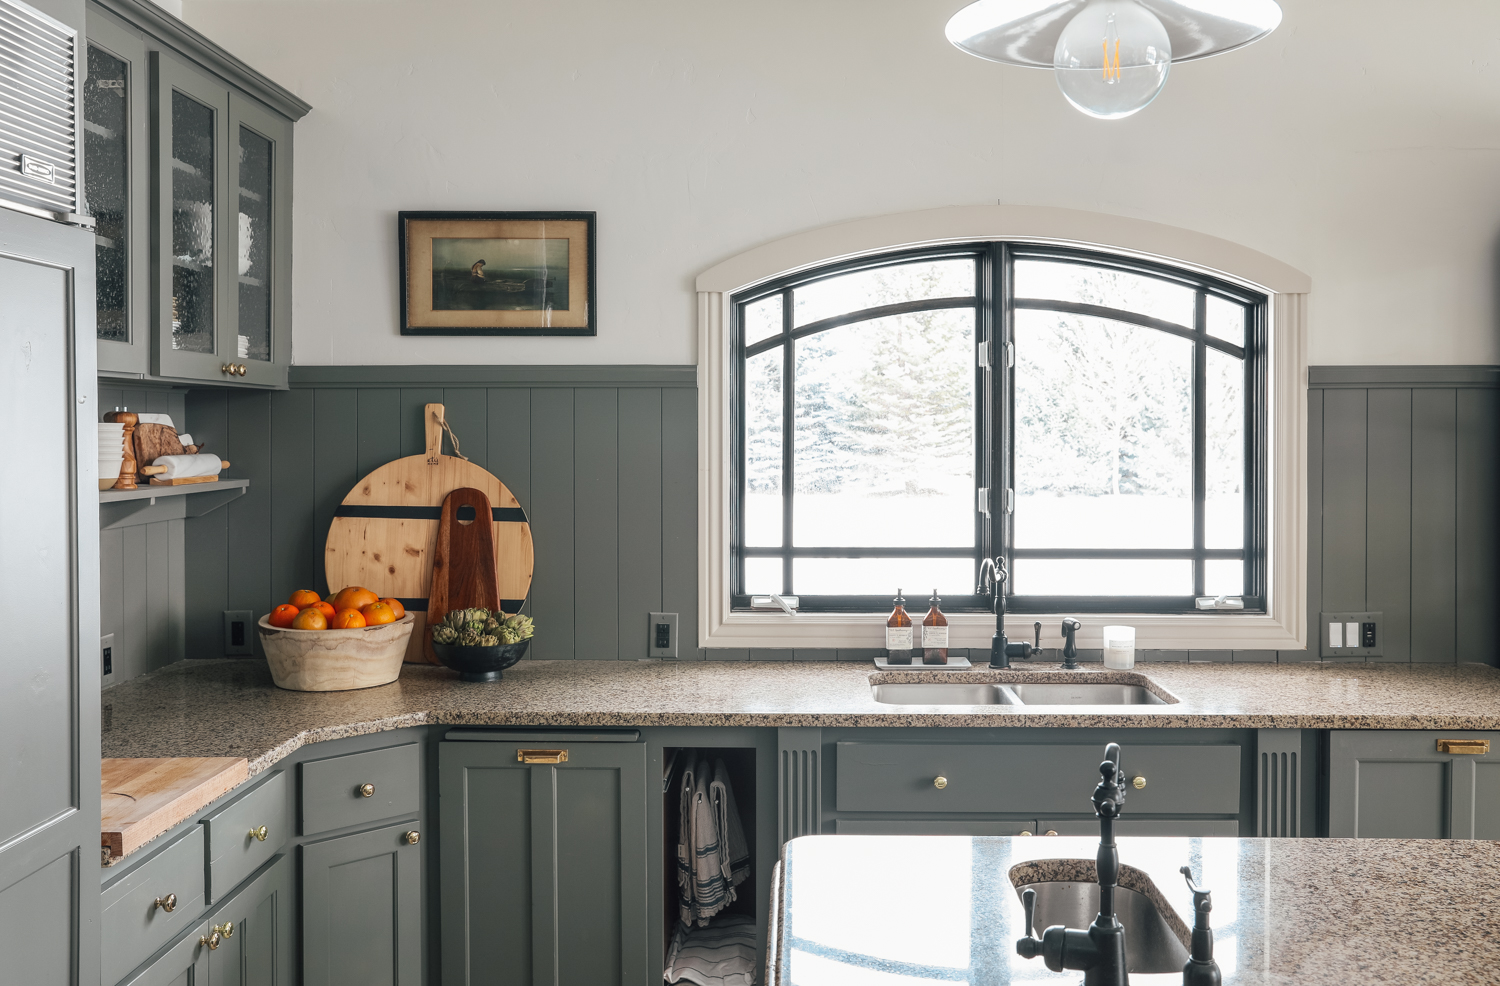
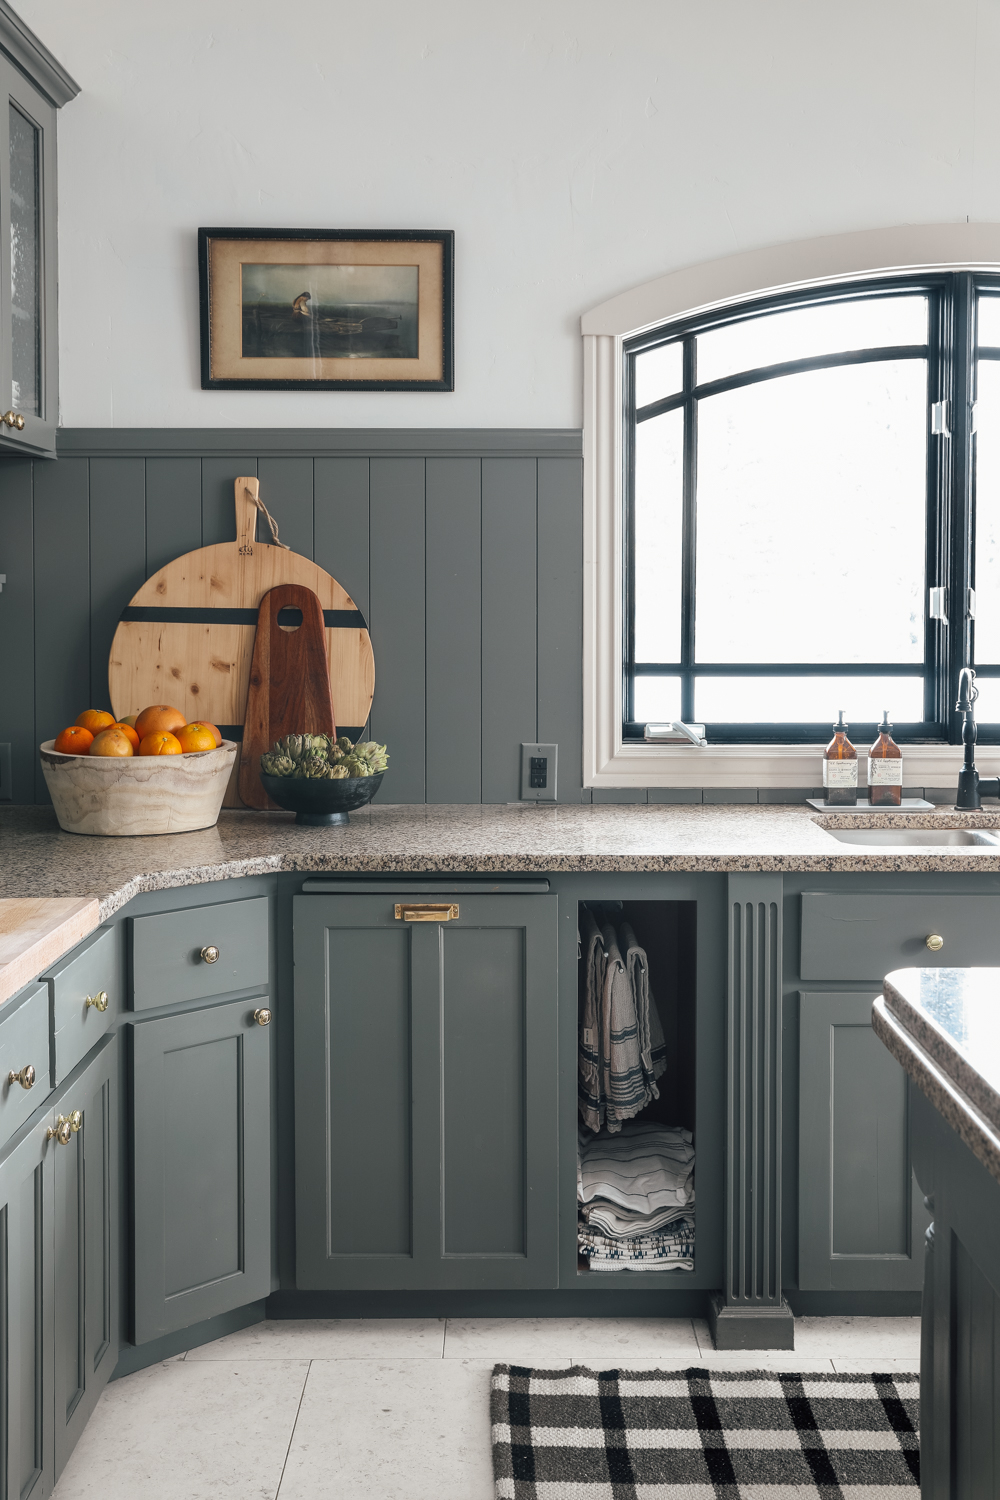
4. Painted everything the same moody green/charcoal/sometimes a tinge blue (it’s a total chameleon that changes throughout the day!) Thunderous by Sherwin Williams. You can read the full tutorial on how we did that here. Painting all the cabinets and the backsplash the same rich tone really unified our somewhat disjointed kitchen. There were 3 different kinds of cabinet fronts and a monotone color makes none of them stand out. Whew!
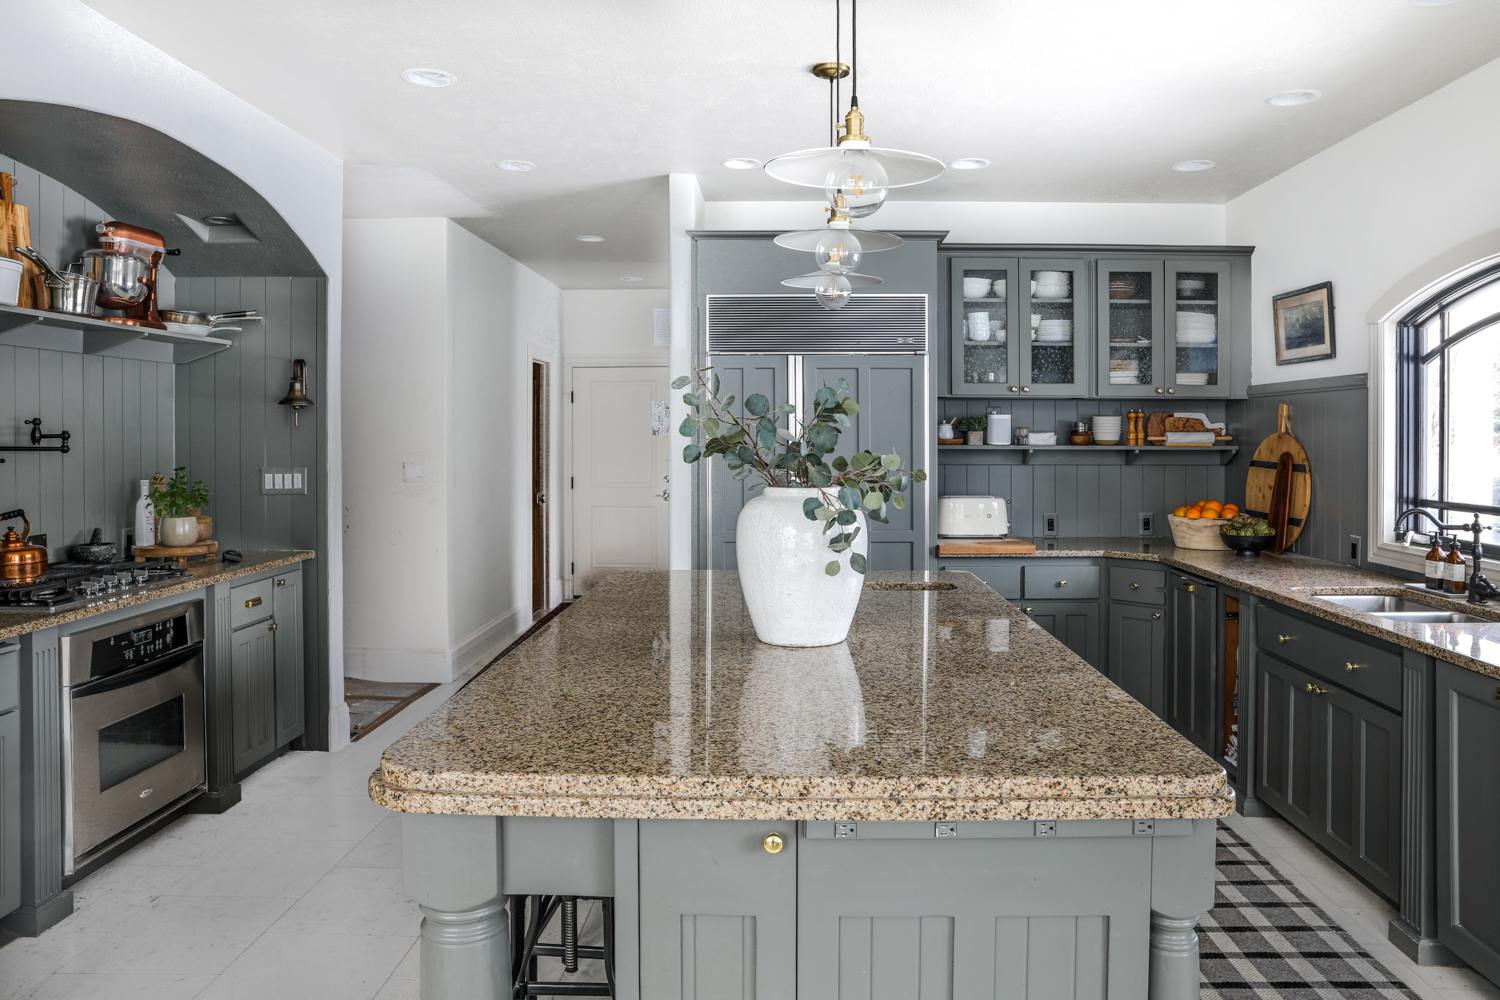
5. Built two simple open shelves, below the upper cabinets (9″ deep, 10″ board) and in the range nook (11″ deep, 12″ board). Chris used 1″ pine to whip these up and I painted them, again, the same color as the walls and cabinets so the pots, pans, mixers, bowls, boards–everything, popped!
6. Built and installed a cover for our panel-ready dishwasher. A few weeks ago, shortly after moving in, we had to get a new dishwasher because our old one sounded like a jack hammer when it was on. We went with a Panel-ready Bosch knowing we would eventually buy a cover for it, but instead Chris built one! The dishwasher came with a template for size and he used 1/2″ plywood with these trim pieces and 1/2″ cove moldings to make it. I primed and painted it and I can’t believe we even waited this long to do this.
7. Swapped out the lighting. In the spirit of using what we had, I remembered I had purchased two of these 14″ white enamel pendants for the cabin and never used them. I ordered one more and outfitted them with these slightly oversized G40 bulbs and I love the look and the memory that comes with them.

8. Updated the hardware. We had 5 bin pulls left over from our last house and I mixed in a bunch of these budget friendly polished brass knobs (they’re beautiful and heavy!) to freshen up the look.
9. Swapped all the receptacles for black ones and painted the cover plates to blend in better with the walls.

10. Spray painted our faucets (sink, prep sink and pot filler) a satin black. They were all that brown oil rubbed bronze with copper-ish peeking through. Two weeks ago, I didn’t even notice, but as the kitchen started to transform, it became clear they needed their own mini makeover, too.
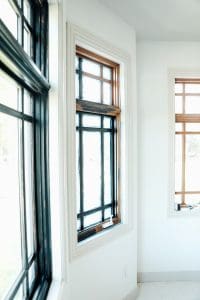
11.Painted the window sashes black–read that tale here.


12. And then the arched cabinet arrived on the day of our shoot. Just in time. I knew I wanted to get rid of the desk area and just put a free-standing china cabinet of sorts in its place to hold a lot of our servingware and table linens (those are in the baskets at the bottom) and this one was love at first site. It mimicked the arches we have everywhere in our home and the black and glass combo would have sold me. But then it was on sale for $1349 and I threw the budget out the window and ordered it, knowing I could and would love to use it elsewhere in our home even after we eventually really renovated the kitchen. Under the desk area there was tile missing and a whole house vacuum system (that we’re still figuring out) and this cabinet doesn’t exactly hide that, but I painted the floor the same color as our tile and it’s pretty disguised. We shrugged our shoulders and said “phase 1!”

We said that a lot during this renovation–phase 1! There are so many MORE things we could have done and some things we did that many wouldn’t do if they allotted $1000 of their budget to renovate their kitchen. And I think that’s the beauty of this project and this exercise–it would yield different results for everyone that participated. But everyone would end up with an improved space. I’m so glad we didn’t wait until a full gut renovation to spend time and money improving our kitchen.


There’s so many valuable lessons to be learned in a phase 1, whether it’s trying out a color or a skill or just the ability to fall in love with your house. A lot of you wondered what our final spend was on this kitchen, so I broke that down below. Please note, this was not how to redo your kitchen for $1000. This was a budget we set for ourselves knowing what tools, supplies, materials, cabinets, appliances, dishes and decor we already had. I encourage you to look at what you have and see how you can build on it!
window paint $9.96
brass knobs – $63.36
light bulbs – $29.94
black outlets – $179.16
lumber for shelves and dishwasher cover – $150.75
shiplap & crown – $297.82
painting materials – $122.96
sheetrocking materials – $33.83
extra pendant light – $143
SUBTOTAL: $1030.78
+ arched storage cabinet – $1349
TOTAL: $2379.78
Small investment. Huge impact. We can’t thank you all enough for supporting us during this renovation, but also through this entire year that has been bumpy for us, and the last 10+ years we’ve been doing this. It just keeps getting more fun and we credit that all to you.
Sources below (note: Most of the accessories we’ve had for years, so I’ve linked what I could!):
Paint Color: Thunderous by Sherwin Williams in a Satin finish
Range Nook
Hardware Knobs
Hardware Pulls
Dinner Bell (old, similar)
Round Wood Footed Tray (old, similar)
Oil Cruet
Pepper Grinder
Marble Spoon Rest
Marble Utensil Holder
Copper Tea Kettle
Pyramid Cheese Grater
Mortar & Pestle
Mini Copper Cocottes
Large Strainer Stock Pot
White Enamel Dutch Oven
Copper Kitchenaid Stand Mixer
vertical tongue and groove paneling
Island
Pendants
Bulbs
Over the Counter Wood Cutting Board
Knife
White Dipped Vase
Eucalyptus
Rattan Tray
Candle
Stools
Cabinet Side
Cream Smeg Toaster
Honey Pot
White Speaker
Long Wood board
Natural White Speckled Melamine Bowls
Marble Rolling Pin
Olivewood Salt and Pepper Mills
Round Pizza Board
Wood Fruit Bowl (similar)
Art (vintage)
Soap Set
Black and Cream Striped Cotton Rope Baskets (these are the best and affordable!)
Marble Tiered Serving Tray
Live Edge Wood Serving Bowl (styled on its side behind plates)
Copper Planters
Faux Stems
Dining Room


Hi Chris and Julia! I just had to tell you how much I loved your blog post! It couldn’t have come at a better time—my husband and I are diving into our kitchen remodel. We’re knee-deep in decisions, especially about bidding farewell to our outdated cabinets and counters. We’re considering a dumpster rental, but I’d love to hear your thoughts. Got any pearls of wisdom to share? Thanks so much!
What a difference. It is beautiful!
Amazing and beautiful transformation!!!!
Are you liking the tongue-and-groove paneling for your backsplash? I really like the look and we’re planning a (budget) kitchen remodel and our contractor is against this idea – he says it would be hard to clean. What is your experience after a year with it? Does dust show or is it hard to clean?
We’re loving it!!! It’s a breeze to wipe down when needed and because it’s installed vertically, there’s no dust!
Oh, I’m glad! Thank you!
I do love the colour you chose and I love how the tone transitions — even see it in your pictures. But I feel there was a bit too much of it and, to me, it feels rather dismal. Perhaps the tongue and groove paneling could have been a different tone . . . .