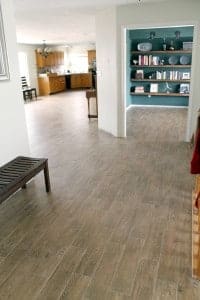
Although we showed you the “finished” floors in yesterday’s post, there is one part of the process that we haven’t covered–grout! In my post about Tips for Achieving Realistic Faux Wood Tile, I mentioned that “opting for a grout color a shade darker than our tile will keep things looking more natural.” Our grout lines were the smallest possible at 1/16″ (another great tip to keep things looking realistic!), so unsanded grout was our only option. After surveying all the colors, Mocha looked like the best bet. It didn’t contrast the tile too much, but matched the darkest shade in the wood grain pattern on the tile.

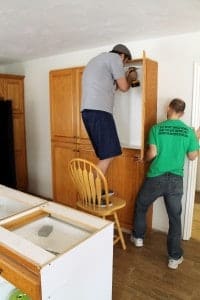
We actually hired out the grouting job. What!? It’s true. After Chris was up until anywhere from 11:30pm to 2:30am laying all of the floors, paying $500 for what we thought was a fool-proof job, seemed like the perfect celebratory gift–we tackled the clean-up and haze removal ourselves. Which was a little intimidating at first because there was a lot of haze:

We waited the recommended 24 hours after grouting for it to fully cure before tackling the haze. My mom and I went to our local Ace Hardware to pick up supplies for the job over the weekend. One of the workers there suggested that a solution of distilled vinegar and warm water will cut right through the haze. I loved the sound of the chemical free fix. He helped us find some mops and buckets, a scrubby for any stubborn areas and they even carried the vinegar.

We mixed about one part vinegar to 4 parts warm water. Since there was 1500 sq feet of haze to cover, two of my sisters pitched in, too, and we all tag-teamed the task while my mom was on clean water duty.

(^38 weeks pregnant–I’m going to pop!) We’d do a whole room, refresh the solution of vinegar and water and do it once more (twice in more hazy spaces).

It was so impressive to watch the haze lift right off the tile (thanks for the rec, Ace worker!) and the vinegar solution dried without a scent–no worries.

The only disheartening part was there was still a lot of variance in some of the grout lines as you can see above. While most of them cleaned up by our second pass through revealing that warm mocha color we picked out:

There were a lot of areas where the grout lines were much lighter and splotchy:

I took a toothbrush and the same vinegar solution to clean a test area–thinking it might still have some haze on it (??) but unfortunately, it dried just as light.

After some research into grout variance and asking our friends at The Tile Shop (where we got the grout), they said it was most likely user error while laying the grout–either too much water when mixing, not mixing it thoroughly enough or too much water when sponging it off. Bummer that the one part of the job we hired out seems to have managed to not turn out the way we hoped.
As for remedying the light grout lines, we ordered a grout dye and sealer in one to try out and will update you soon. The good news is we’re haze free and that part was a lot easier than we thought it would be. I was imagining buffing each individual tile with cheese cloth until the baby got here. Oy! In reality, it took us about 2 hours to do the entire 1500 square feet with items we found at our local Ace (or you might already have at home!).
Do you have a home maintenance project to tackle? Ace’s wide product selection (vinegar, people) and helpful customer service (our favorite!) can definitely help–but how about $100 to spend at Ace Hardware, too? Enter through the Rafflecopter widget below. (We’ll choose a winner Friday night and update this post.)
![]()
We’re excited to be collaborating with Ace Hardware as a part of their Ace Blogger Panel this year. Ace has provided us with compensation and the materials necessary to complete this project, but all opinions and sweat are our own.


I have to remove Haze and sealer from ceramic tile
Can I use vinegar and water
And will it work and remove
Haze and sealer.jane
Silly question. But did you use plain water before or after vinegar solution?
We don’t!
After I originally left a comment I seem to have clicked the -Notify me when new comments are added- checkbox and now whenever a comment is added I get four emails with the exact same comment.
Is there a way you are able to remove me from that service?
Cheers!
In the emails there should be an “unsubscribe” link. If not, let me know!
Thanks for the tip on de-hazing with vinegar solution. I had a similar experience with Tile Shop grout and learned their Superior brand grout MUST be mixed with Superior brand Admixture (not water) in order to achieve the color that matches their chip deck. Too bad for me, had to redo my tile installation. Too bad for The Tile Shop, they don’t know their own products!
This worked great thanks for the green idea!