There are DIY-ers out there building furniture from scratch! Chris and I have dipped our toes in the world of furniture building and while it can save you money (sometimes), it requires a lot of gumption. Staining unfinished wood furniture is a great middle-of-the-road place to be if you’re looking to stretch your budget and customize your furniture. It’s like having a semi-handmade piece in your home!
We purchased this unfinished wooden armoire to store fabric samples, wallpaper samples, paint decks and more to keep in the currently unoccupied “rec room” and gave it a little makeover. Seeing the warm wood in here makes me excited to add some wooden wall treatment to this room some day.
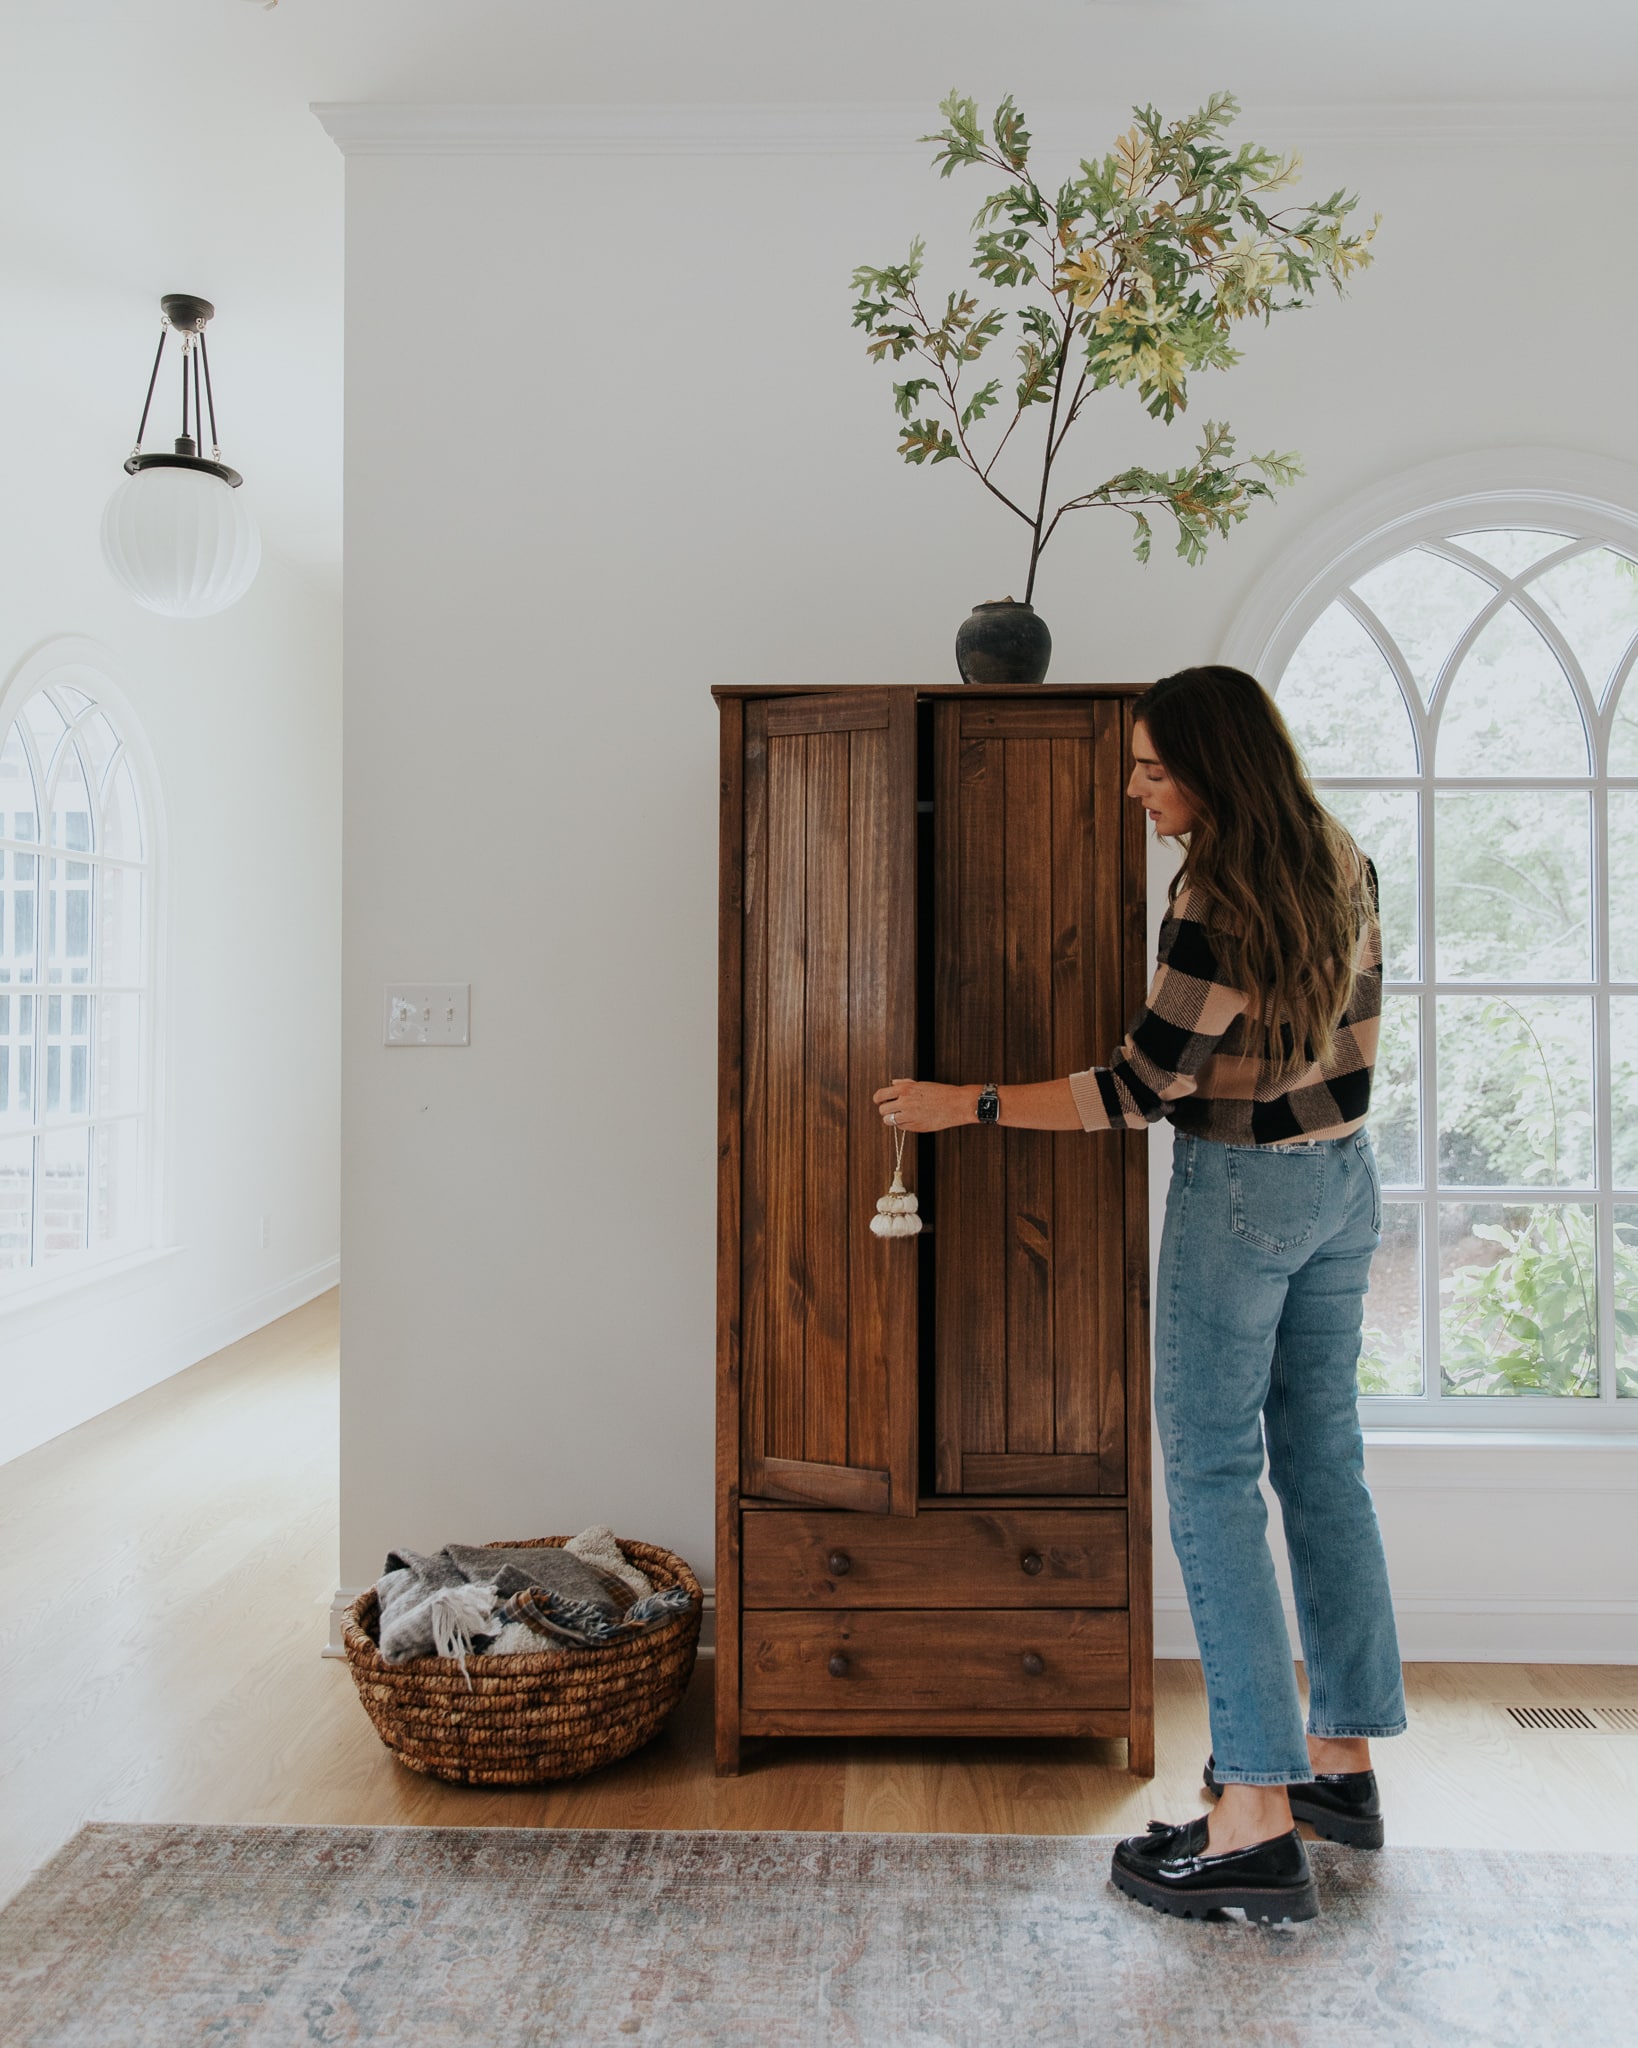
Armoire | Pendant | Runner | Vase | Outfit
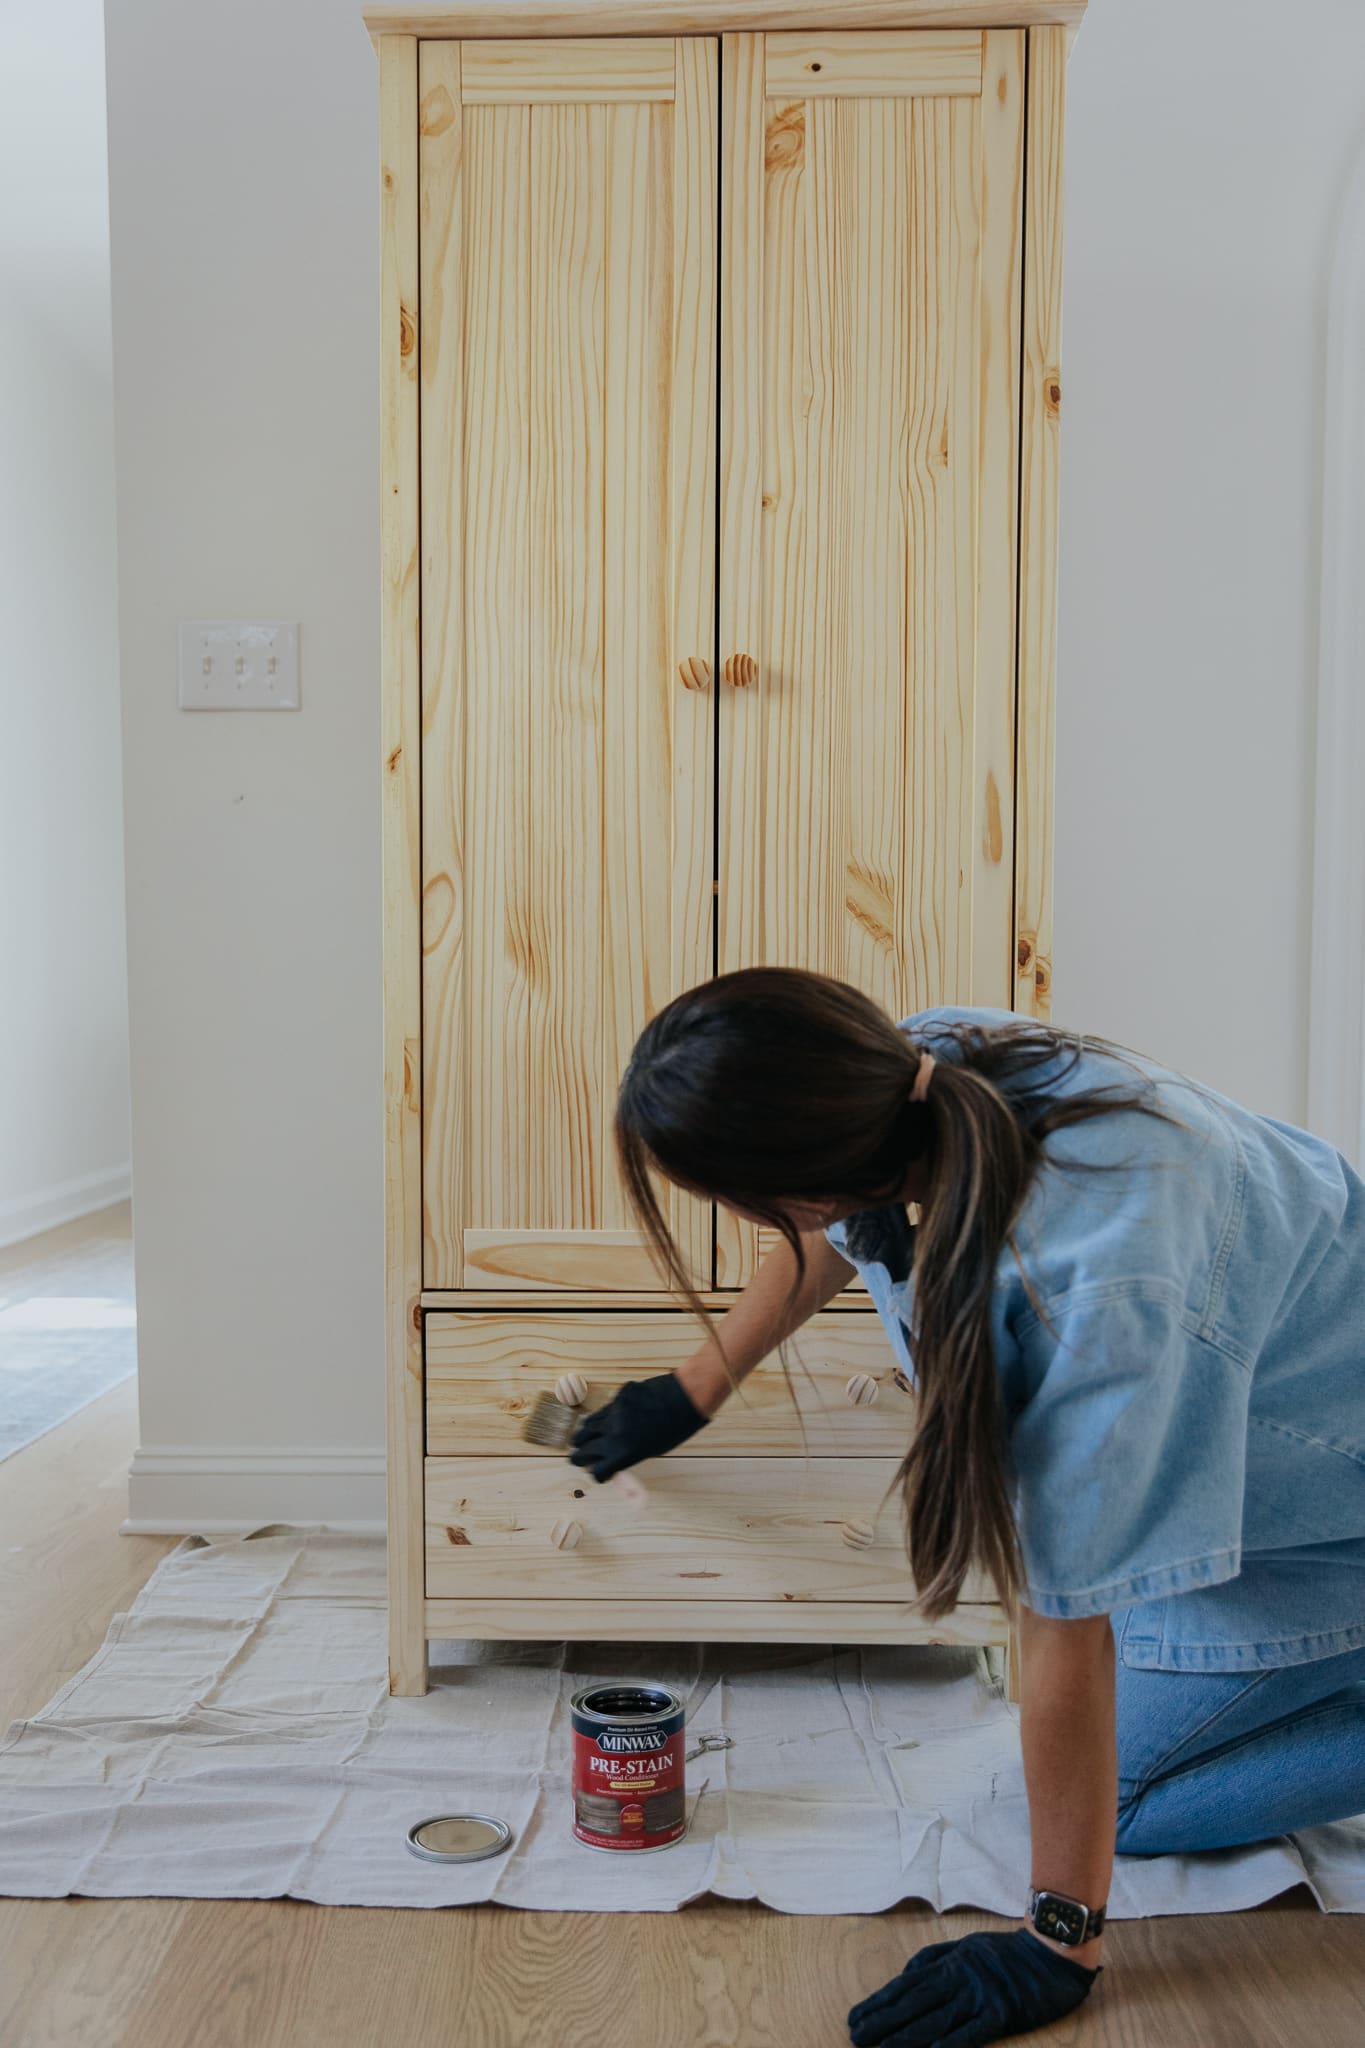
Here’s what it looked like in it’s raw, unfinished state.

The shape of the pine armoire is so good, but I wanted to find the perfect stain mid-to-dark stain that would complement our warm white oak floors. Here’s the steps I used, plus some tips for staining unfinished wood furniture!
1. Test the stain

Always test your stain on a test piece of wood to make sure it’s what you want. Even a stain that you’ve used before can look different across different woods. We actually did a test back in 2018, “How 6 Different Stains Look on 5 Popular Types of Wood” and it has been our top performing post every year since. Not only does the hardness effect how a wood will accept stain (harder woods tend to accept stains better and more evenly) but also the natural color of the wood, so always test!

In my case I planned to custom mix up a custom stain and I’m so glad I tested it first because what I thought I wanted looked awful on a test piece. Another pro-tip: If you’re planning to mix stains, mix them in a cup or paint tray rather than layering different stains onto the wood. I ended up with a 4:1 ratio of Minwax Honey to Simply White.
2. Prep the furniture
Hopefully if you buy unfinished wood furniture you won’t have to sand it, but I would recommend checking the smoothness and giving it a light sand with a high grit sandpaper. In our case we didn’t need to sand and I’m so glad because it has a lot of tricky grooves. Just make sure that if you sand, you clear off all the debris before staining!
3. Use a pre-stain wood conditioner

Do not skip this step! Pre-treating your wood with a conditioner is going to make all the difference. I used it on the outside of the pine armoire, and against my better judgment, I skipped it on the inside. The wood conditioner penetrates the grain of the wood so that it accepts the stain more uniformly. So when I started applying the stain on the inside of the armoire, the wood just soaked up the stain quickly and in splotches. It took several coats to get it all looking even and I had regrets about skipping this step! In other words, do as I say, not as I do. Lesson learned.
4. Use the best tools
At first I used one of those cheap foam crafting brushes and I quickly realized this would simply not do. So I swapped it out for a Purdy Bristle Brush, which worked so much better. But the best applicator was actually this Minwax Stain Pad! I think if you were doing a smaller staining project it wouldn’t be necessary, because it does soak up a lot of stain. But for a project like this, I was able to get into all the nooks and crannies with it, and once it was saturated it distributed the stain really evenly (not to mention quickly)! Whatever method, be sure to wear some latex gloves to avoid skin irritation and staining.
5. Stain with the grain (not against it)

A rule of thumb for any staining project is to apply the stain in the direction of the grain of the wood, rather than against it. The wood is going to accept the stain more evenly if you do this. If you have a larger piece, it helps to do it in sections.
6. Wipe off the excess
Depending on how deep and rich you want the stain, you can let it soak a bit before wiping off the excess with a dry cloth or paper towel. For this I wiped it off almost immediately and since pine is a softer, more absorbent wood, hardly any excess came off. For a harder wood you will want to let it absorb for longer.
7. Finish it with a sealant
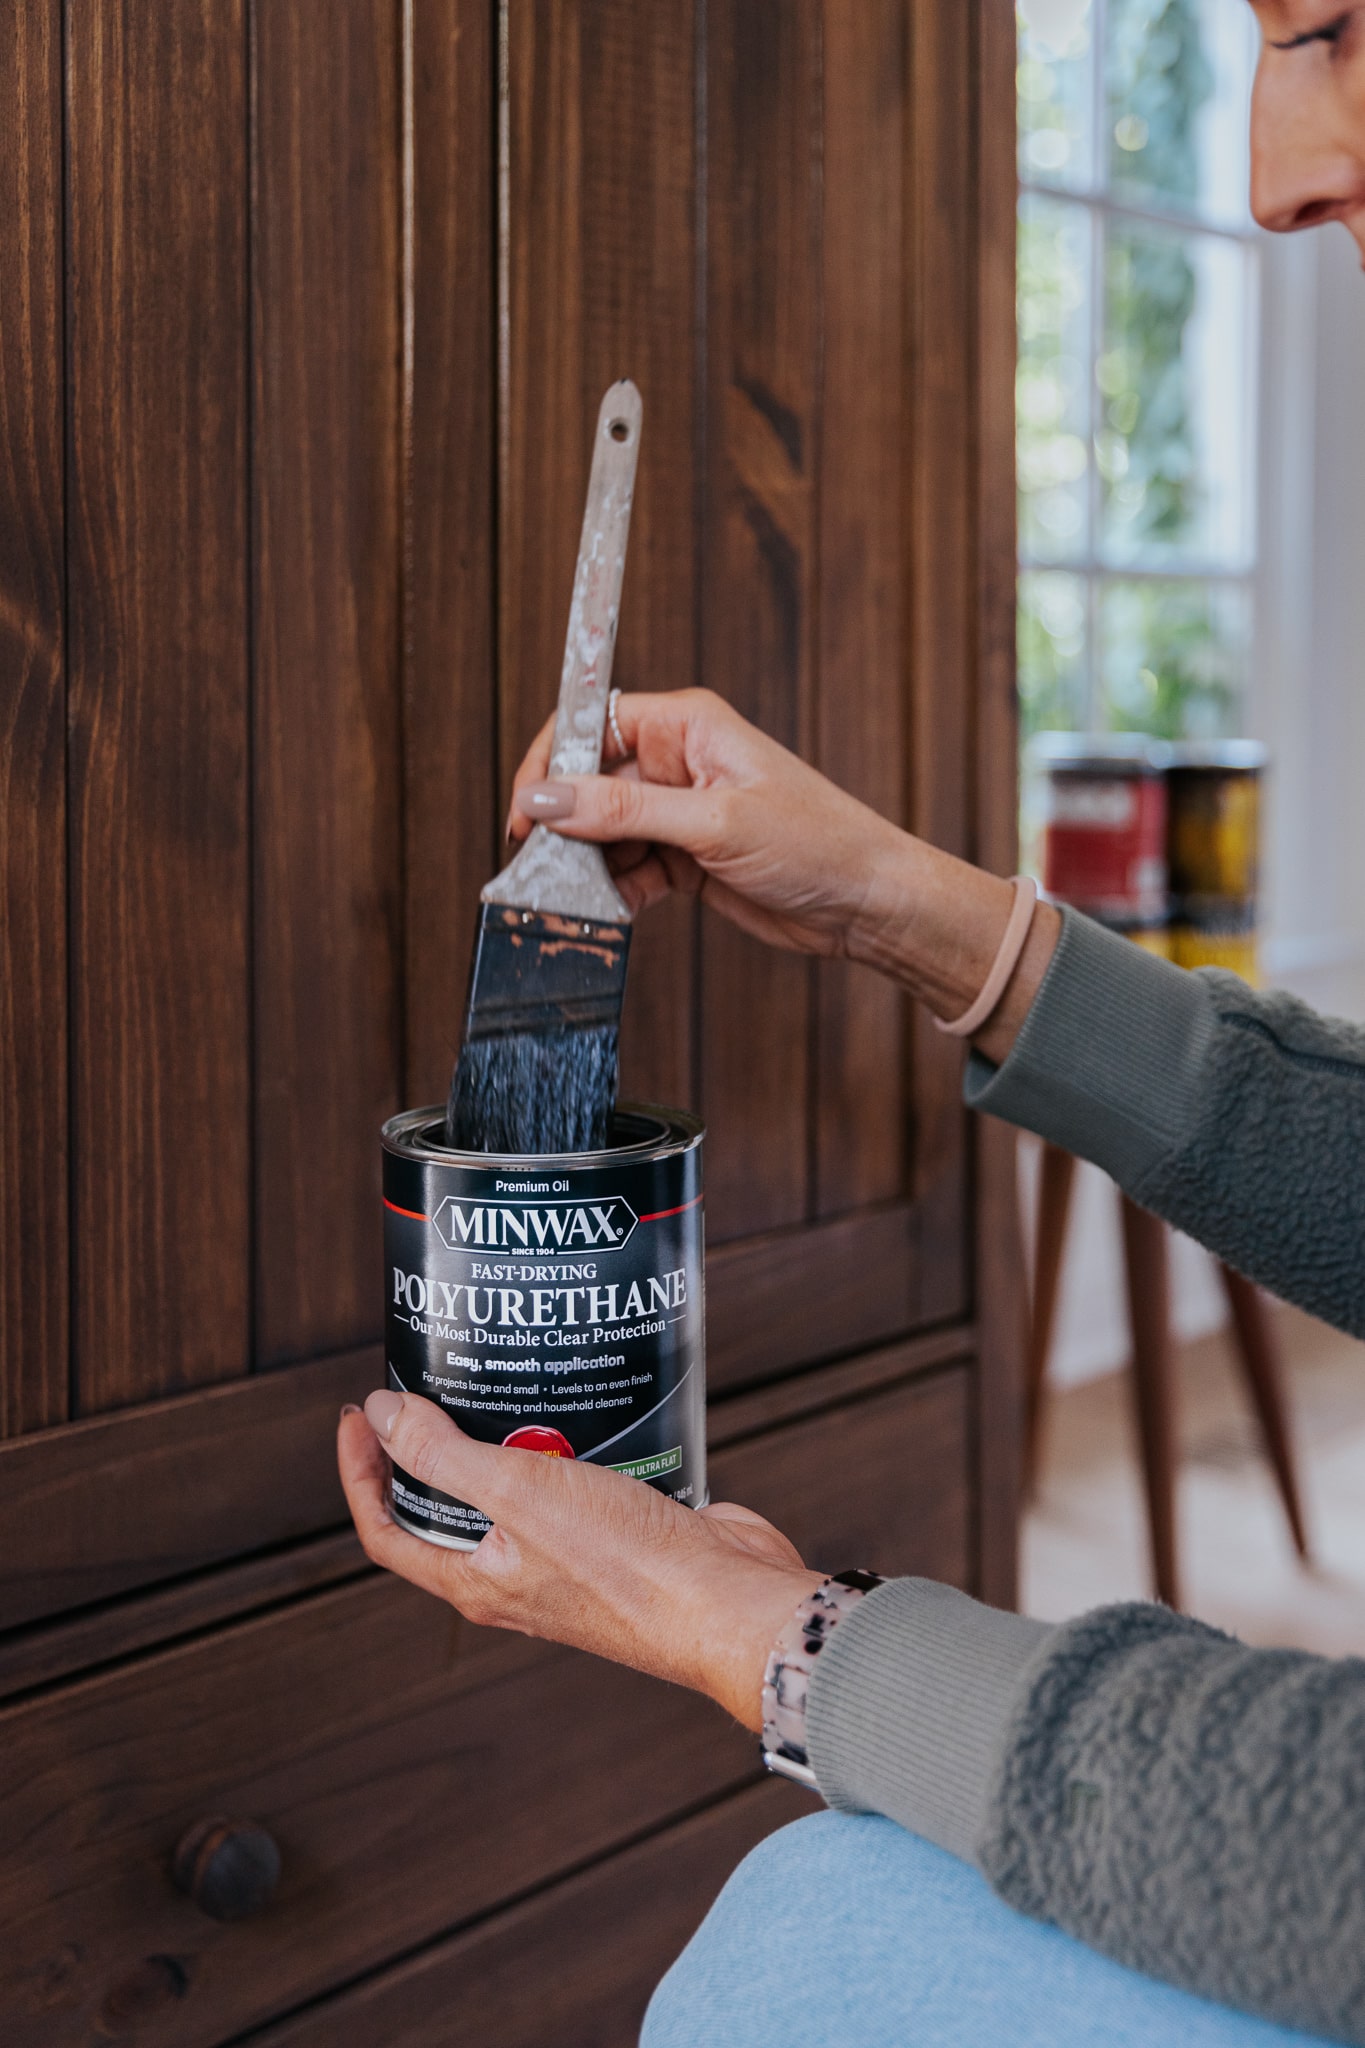
Stain can change the color of unfinished wood but it’s not a protectant so make sure you apply seal it! I used a clear, matte polyurethane finish and just brushed it on.

I’m obsessed with the finished look and I love having this beautiful semi-handmade piece for additional storage in our home!

Although these tips are for unfinished furniture, they go across the board with staining pretty much anything! So whether you’re refinishing something you picked up from Facebook Marketplace or are purchasing something unfinished, you might want to save this post for later. We went ahead and rounded up a bunch of unfinished wood furniture if you’re wanting to stain something for your own home.
Unfinished Wood Furniture

1. Side Table $95
2. Grimsby Armoire $409
3. Stool $39
4. Harveysburg Wood Server $299 (no longer available unfinished)
5. Pedestal Dining Table $179
6. 3-Drawer Dresser $276 (no longer available)
7. Nightstand $148
8. Tall Storage Cabinet $271 (no longer available)
9. Wood Ladder Dining Chair Set $329
10. Tea Table $45
11. Half Moon Console Table $182
12. Phillips End Table $127
13. Round Accent Table $89
14. Lowell Coffee Table $192
15. Micheals Wood Bench $309
16. Sheaf Back Arm Chair $133


Hi. I will be buying an unfinished, already sanded wood tabletop from a big box store to replace my IKEA tabletop. Color isn’t important so I don’t need to stain it. Can I use Minwax Polyurethane to seal the tabletop? How many coats? Thanks!
Yes, you can absolutely use Minwax Polyurethane to seal it. Polyurethane is actually our go-to recommendation because it’s incredibly durable and water-resistant. If you want that ‘raw wood’ look without the yellowing of traditional poly, I often reach for a matte or ultra-flat finish. It protects the wood without making it look plastic-y or shiny.
Beautiful and thanks for the tips. What about a piece that you need to remove stain from and restored? My grandmother’s 1934 Singer sewing machine wood table needs restoration and I want to do the restoration for it. Tips?
I recently bought a finished side table that turned out to be way more honey colored than I wanted. Unfortunately, it was somewhat expensive and non-returnable. I’d like to stain it with a little more of a gray wash. Any tips on staining finished furniture?
You can clean it thoroughly, sand it down lightly and then use a gel stain, which sits more on top of the wood than soaking in. There are probably guides to this on other sites!