The renovation struggle is real, folks. You meticulously plan, you order, and then, after everything’s installed, a creeping doubt can still set in. For me, it was picture lights. I’d opted for dark bronze ones for our living room, but the moment they were up, I immediately thought, “Should I have gone with brass?!” It seemed like brass would have been a more seamless choice with the other accents in the room.
Now, a picture light isn’t exactly a pair of shoes you can easily return. Once it’s unboxed and installed, I’d be looking at a high restocking fee and the cost of installation again.
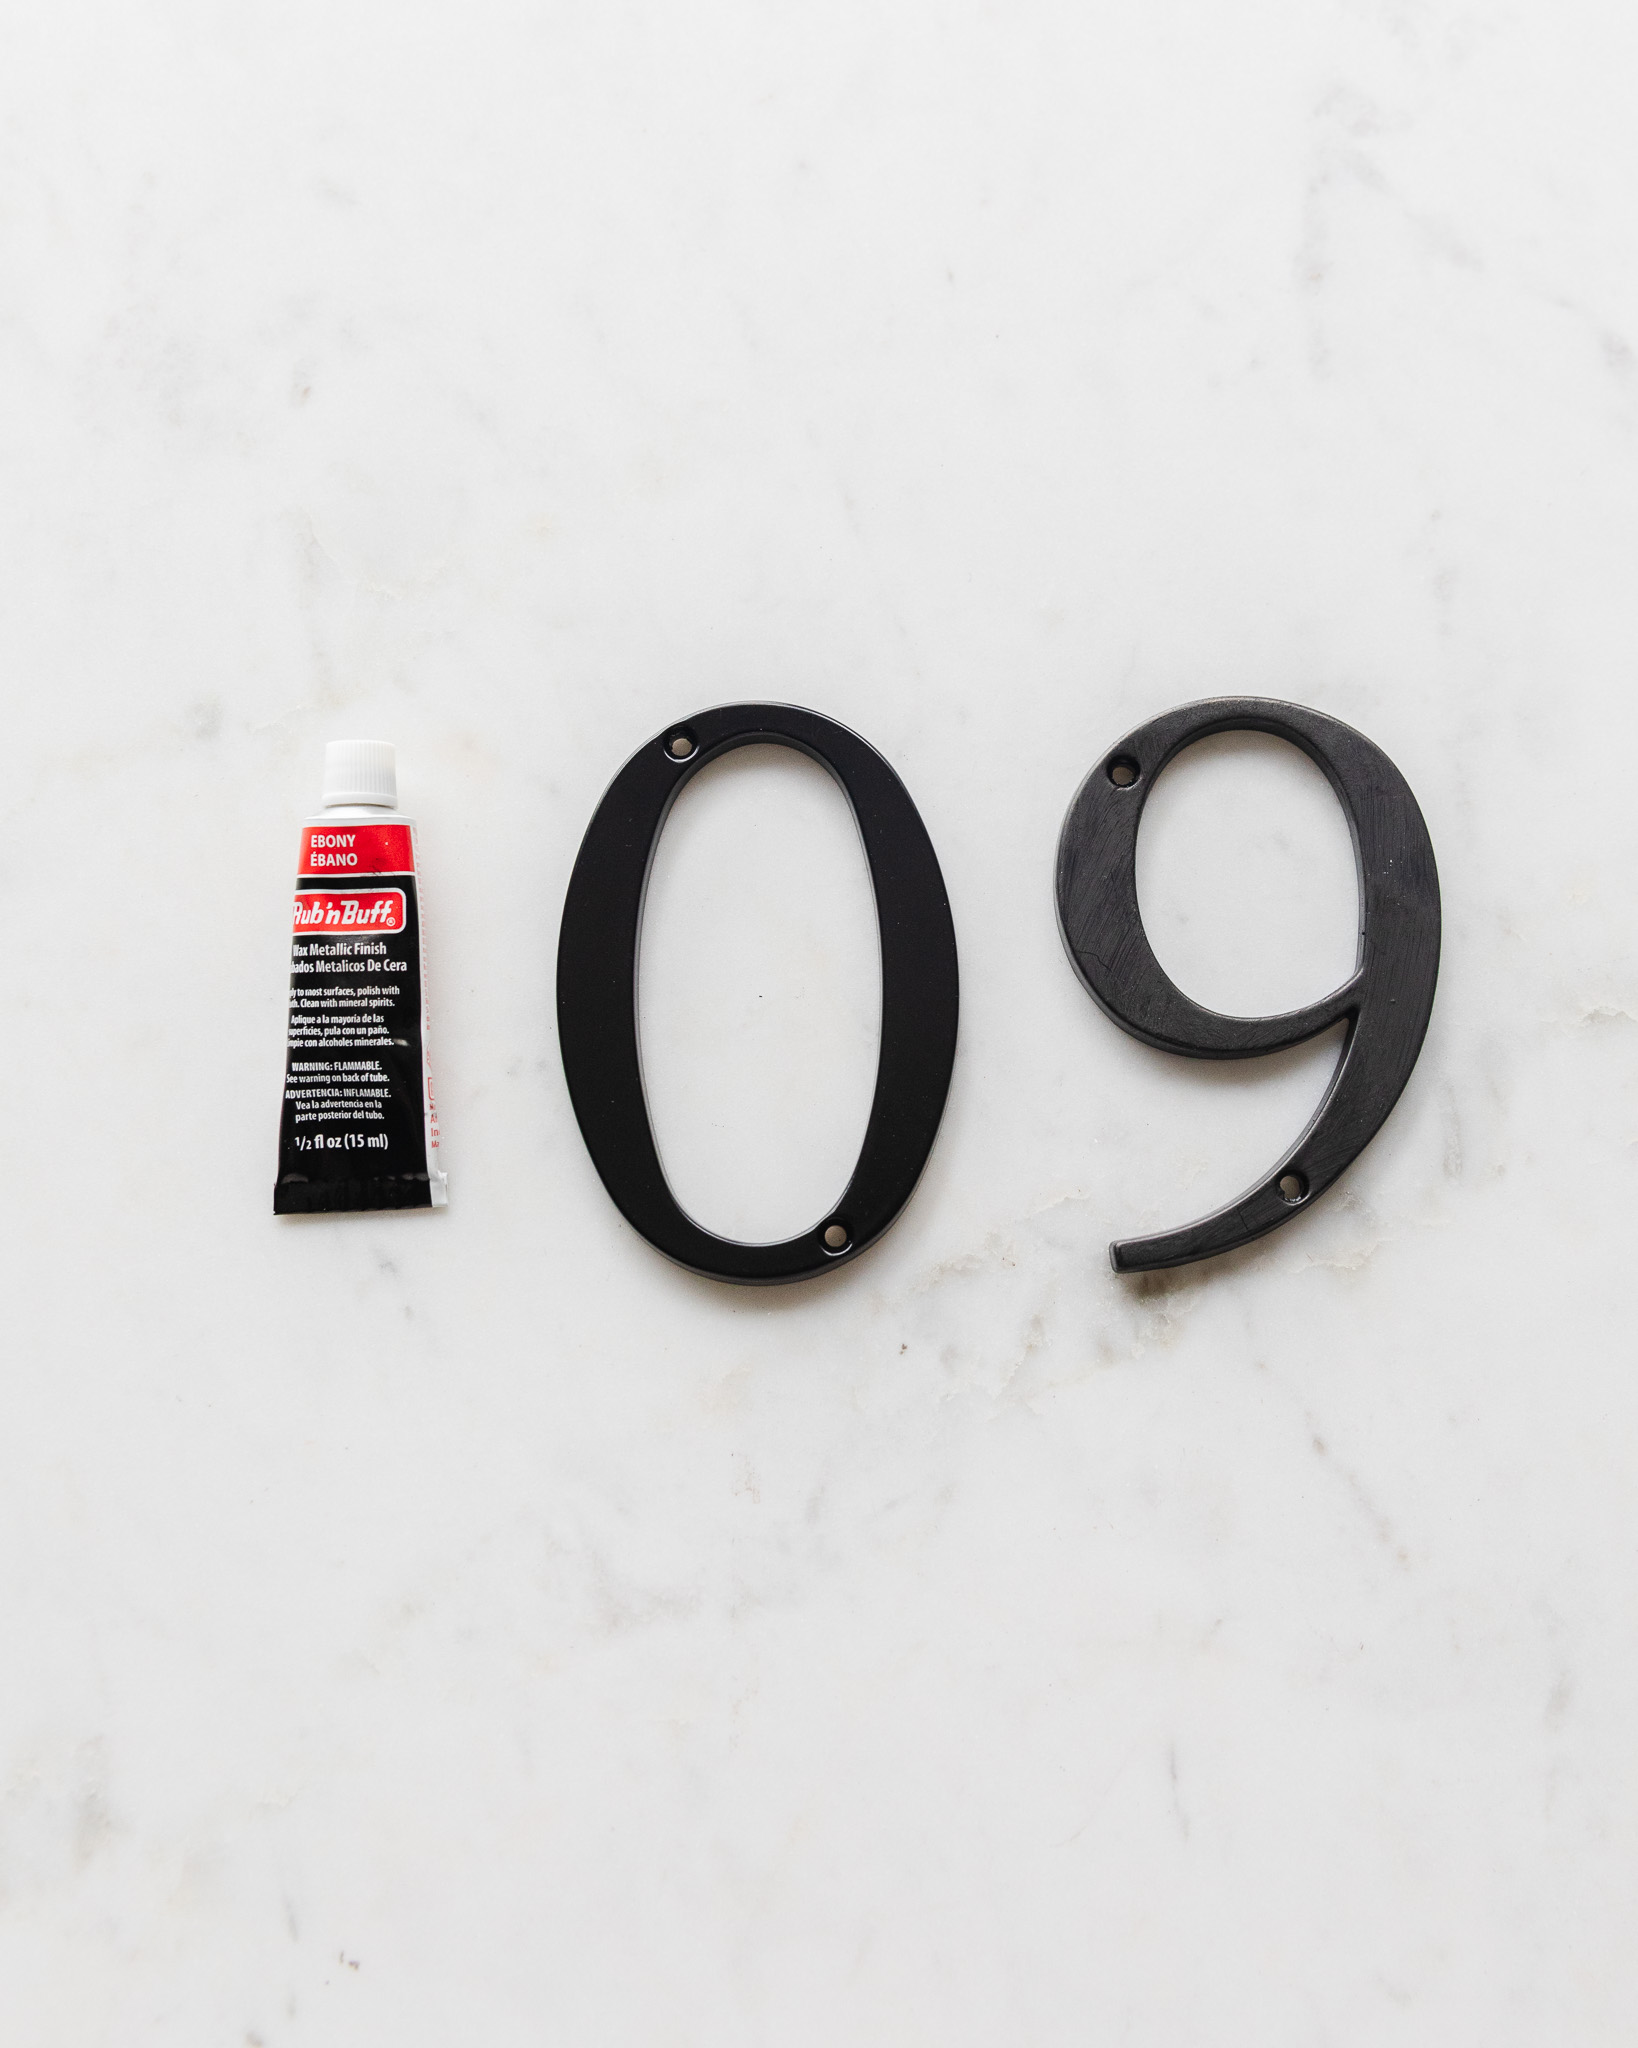
But then, I realized that I could probably DIY the brassy gold look with Rub ‘n Buff. Since the lights were installed, I didn’t want to do spray paint, plus Rub ‘n Buff supposedly gives you a more aged, authentic look that spray paint often misses.
The only problem? I’d never used Rub ‘n Buff before. And using it for the first time on a prominent fixture like a picture light felt, well, intense. Especially if I wanted these new lights to complement the existing picture lights in our home.
What Is Rub ‘n Buff?
Rub ‘n Buff is a metallic finish made from a blend of Carnauba waxes (extracted from a specific palm tree), fine metallic powders, and select pigments. This combo works together to create a look that you can’t get with paint. The cool thing is that it self-seals—which acts as a waterproof barrier—thanks to the Carnauba wax (the same ingredient in many car waxes, shoe polish, chewing gum, and lip balms!). It also has a high melting point and can produce a high-gloss finish. You can use Rub ‘n Buff on metal, glass, ceramics, and even wood.
Testing All the Rub ‘n Buff Colors
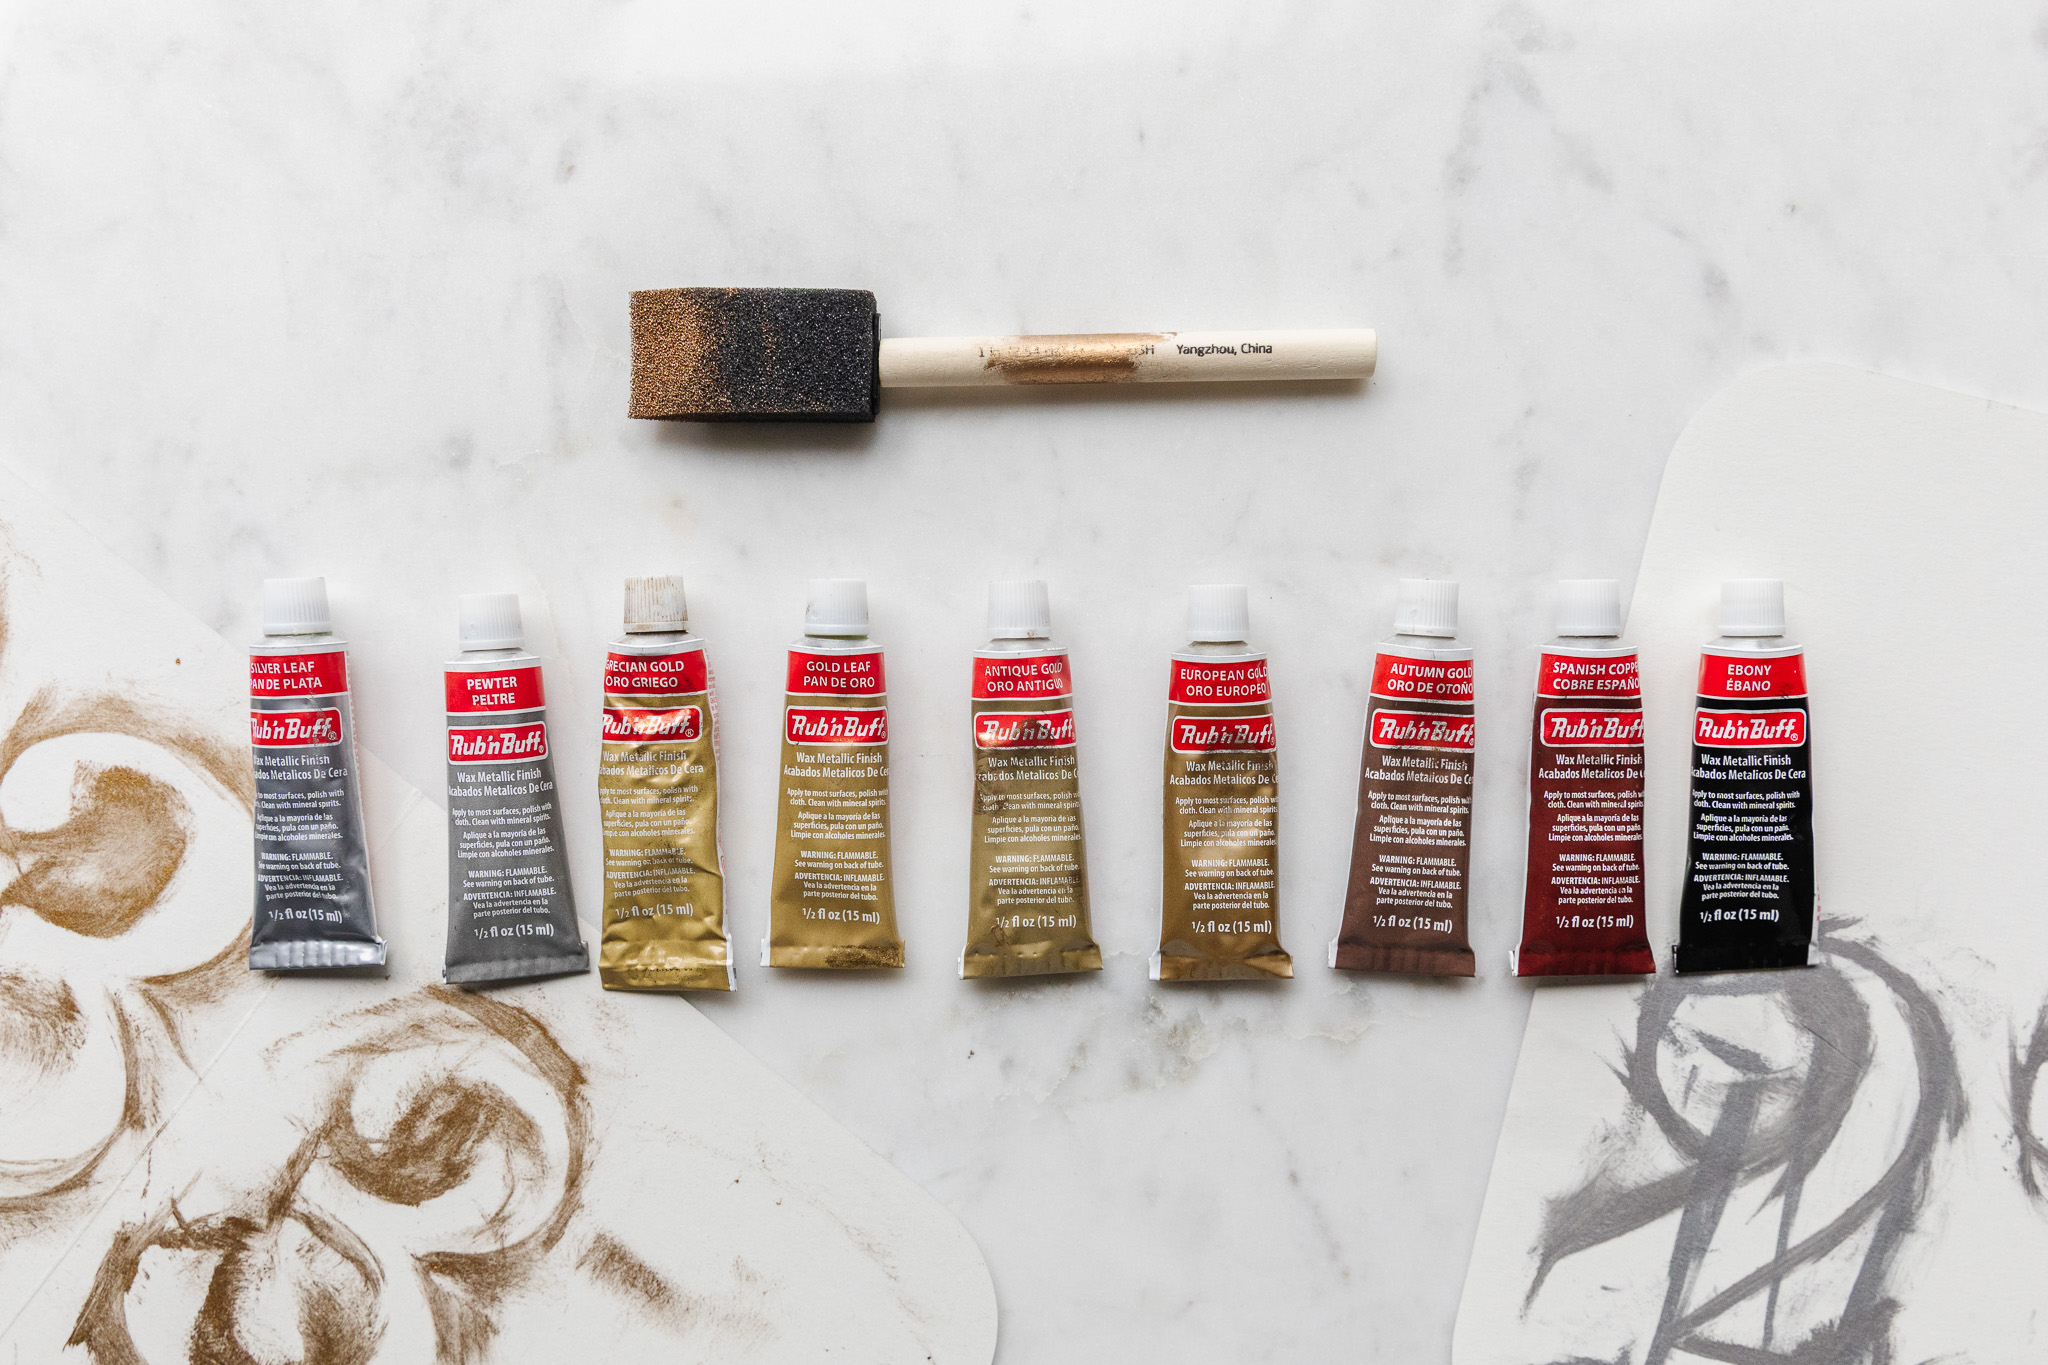
There are nine Rub ‘n Buff colors currently in retail right now—there previously were 11 other options including Antique White and Olive Gold that were discontinued. Panic-ordering all of the current in-stock Rub ‘n Buff shades ensued, followed by a deep dive into “best Rub ‘n Buff” blog posts. But then I realized, I just needed to see it for myself to decide the best metallic finish.

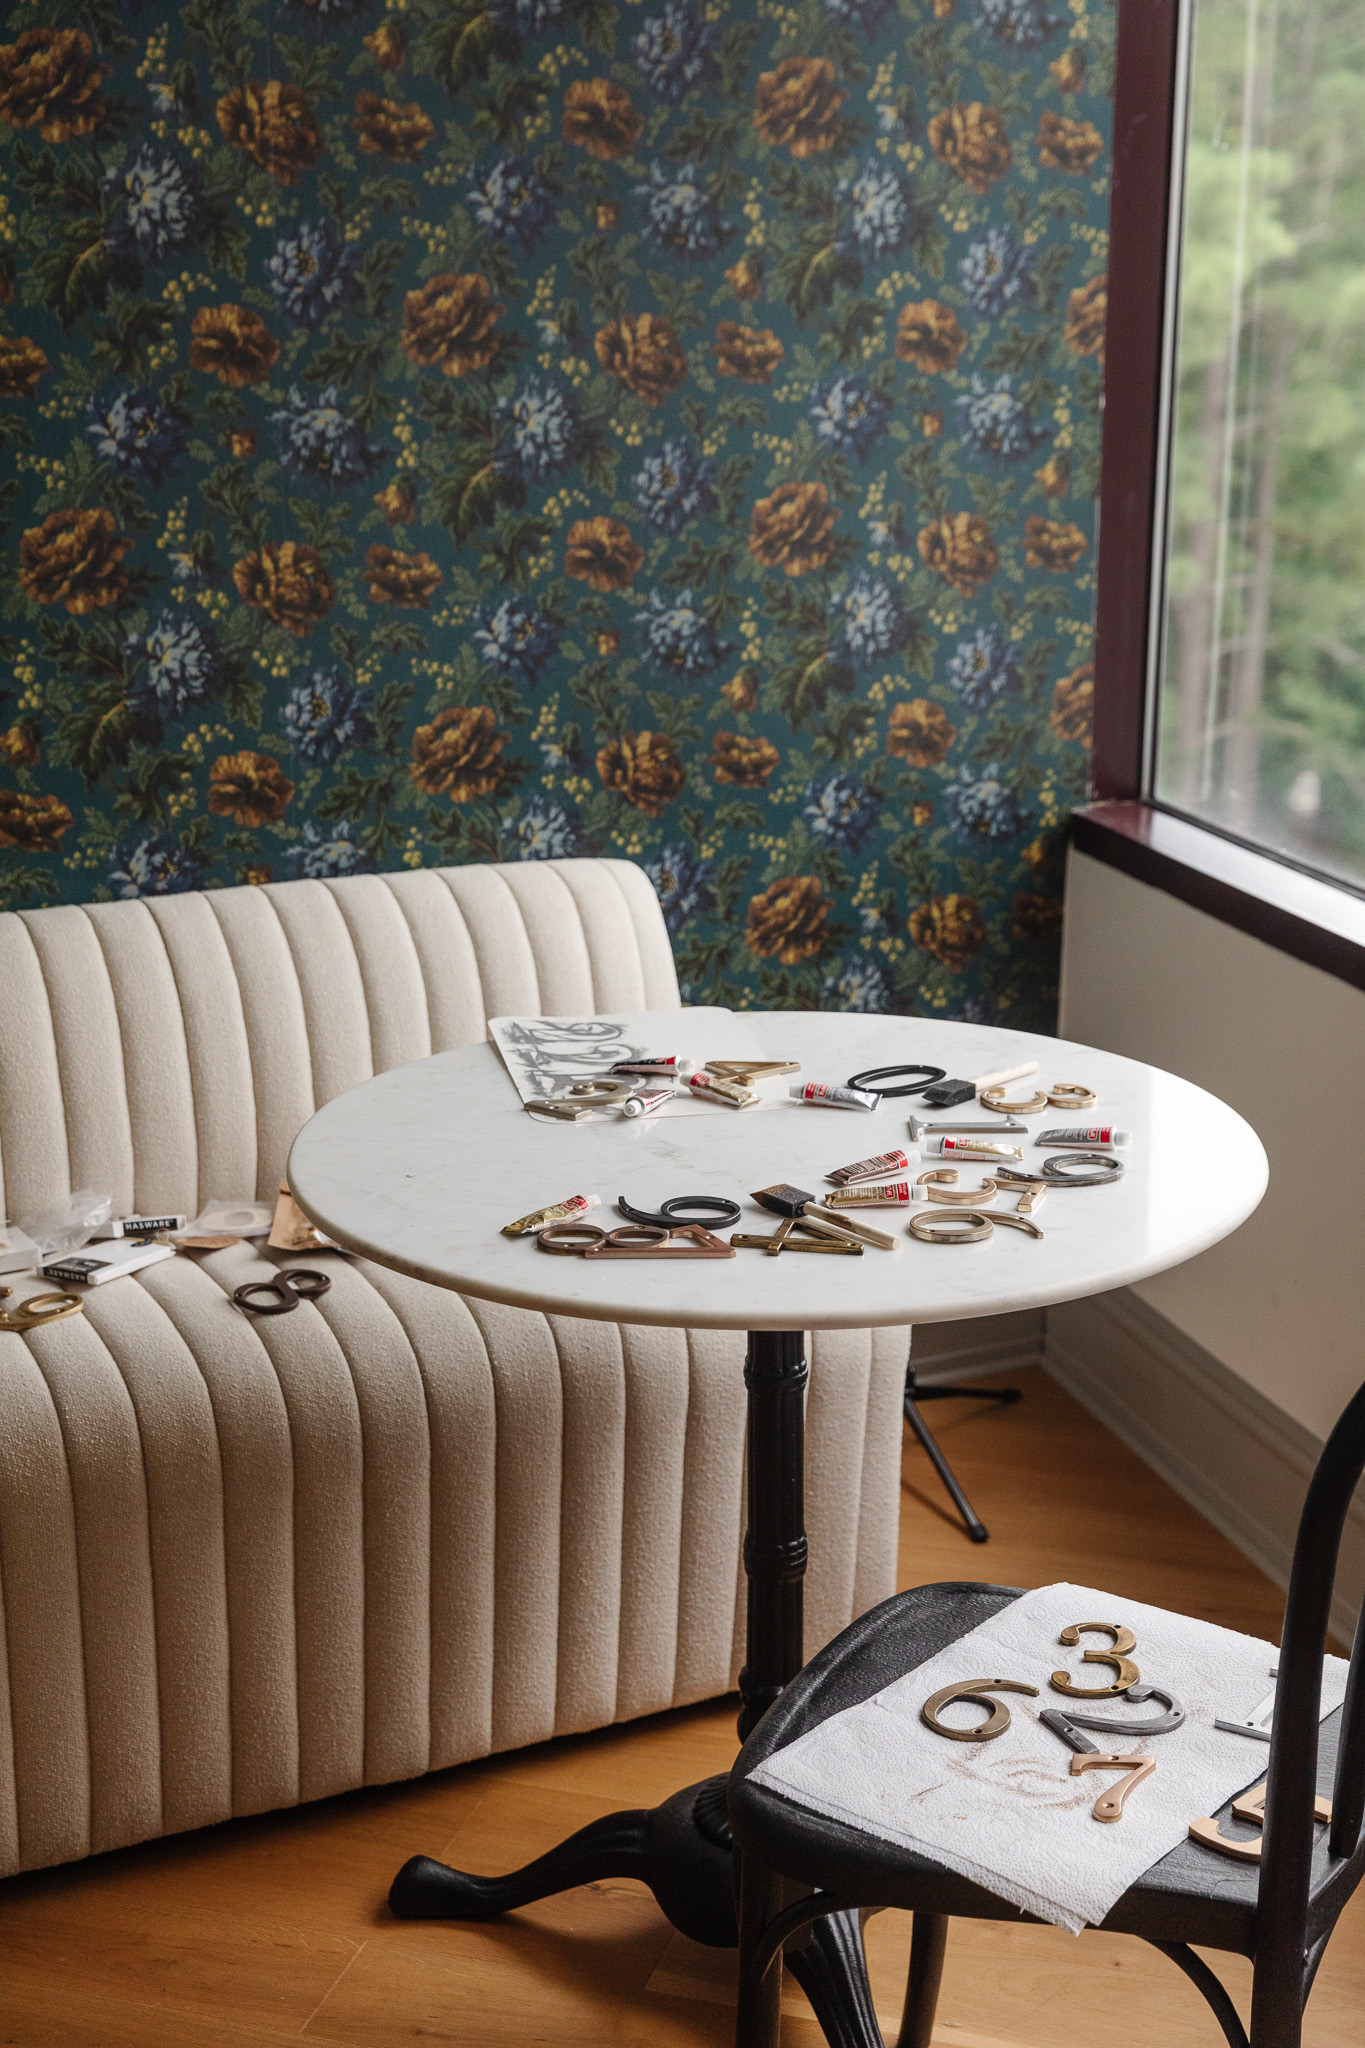
And since I’m already testing the gold colors, I decided to test every Rub ‘n Buff color on three different materials: brass, silver, and black to see what they’d look like. My “canvases” were house numbers – perfect for small, distinct samples. I also did a test sample on some unfinished wood house numbers, but they didn’t come to life like with the metals, so I dropped it from the test. I prefer an antiqued look, so I didn’t do a super thick layer on any of the numbers. I wanted to see how each metallic wax finish color complemented the natural color of the house number metals.
How to Use Rub ‘n Buff
You’re going to need these supplies:
- Foam brushes or rag
- Disposable gloves
- Lint-free cloth (optional if you want the item to be less matte in the end)
- Newspaper or old boxes to hold the items you’re “painting”
- Your selected item to apply the product to (must be clean and dry)

First, knead the rub ‘n buff tube a little like you would toothpaste. That helps it mix around the oil if it has separated some on the shelf. Then puncture the top of the tube using the back of the cap, and squeeze less than a toothpaste-sized bit on the application tool of your choice (we used disposable foam brushes).
Take a sponge brush or rag you don’t mind ruining and dab about a toothpaste’s worth for every 5″ of surface area. You may want to add another coat depending on the look you’re going for: I did two coats of the silver leaf and pewter colors because the brassy gold was showing through.
If you have an ornate frame or candlesticks that have more nooks and crannies, you’ll need to buff them a bit more after. I went over each number to dab on the Rub ‘n Buff and then brushed it around to smooth it out. You don’t want too-obvious “lines” in your work, so that’s why the foam applicator is my preference.
It dries to the touch really quickly, but wait for a few hours if you’re going to buff it with a piece of cloth or seal it with clear lacquer (important for anything that might need extra protection, like house numbers). If you need to remove it from anywhere, like your hand or the floor, just use some water and dish soap on a paper towel and slightly scrape it with your fingernail or something with a bit of abrasion.
Each Rub n’ Buff Color Individually on 3 Metals
I’ll show you each of the Rub ‘n Buff colors on the three metals so you can see the difference. From left to right, you’ll see the color on brass, the color on silver, and the color on black.


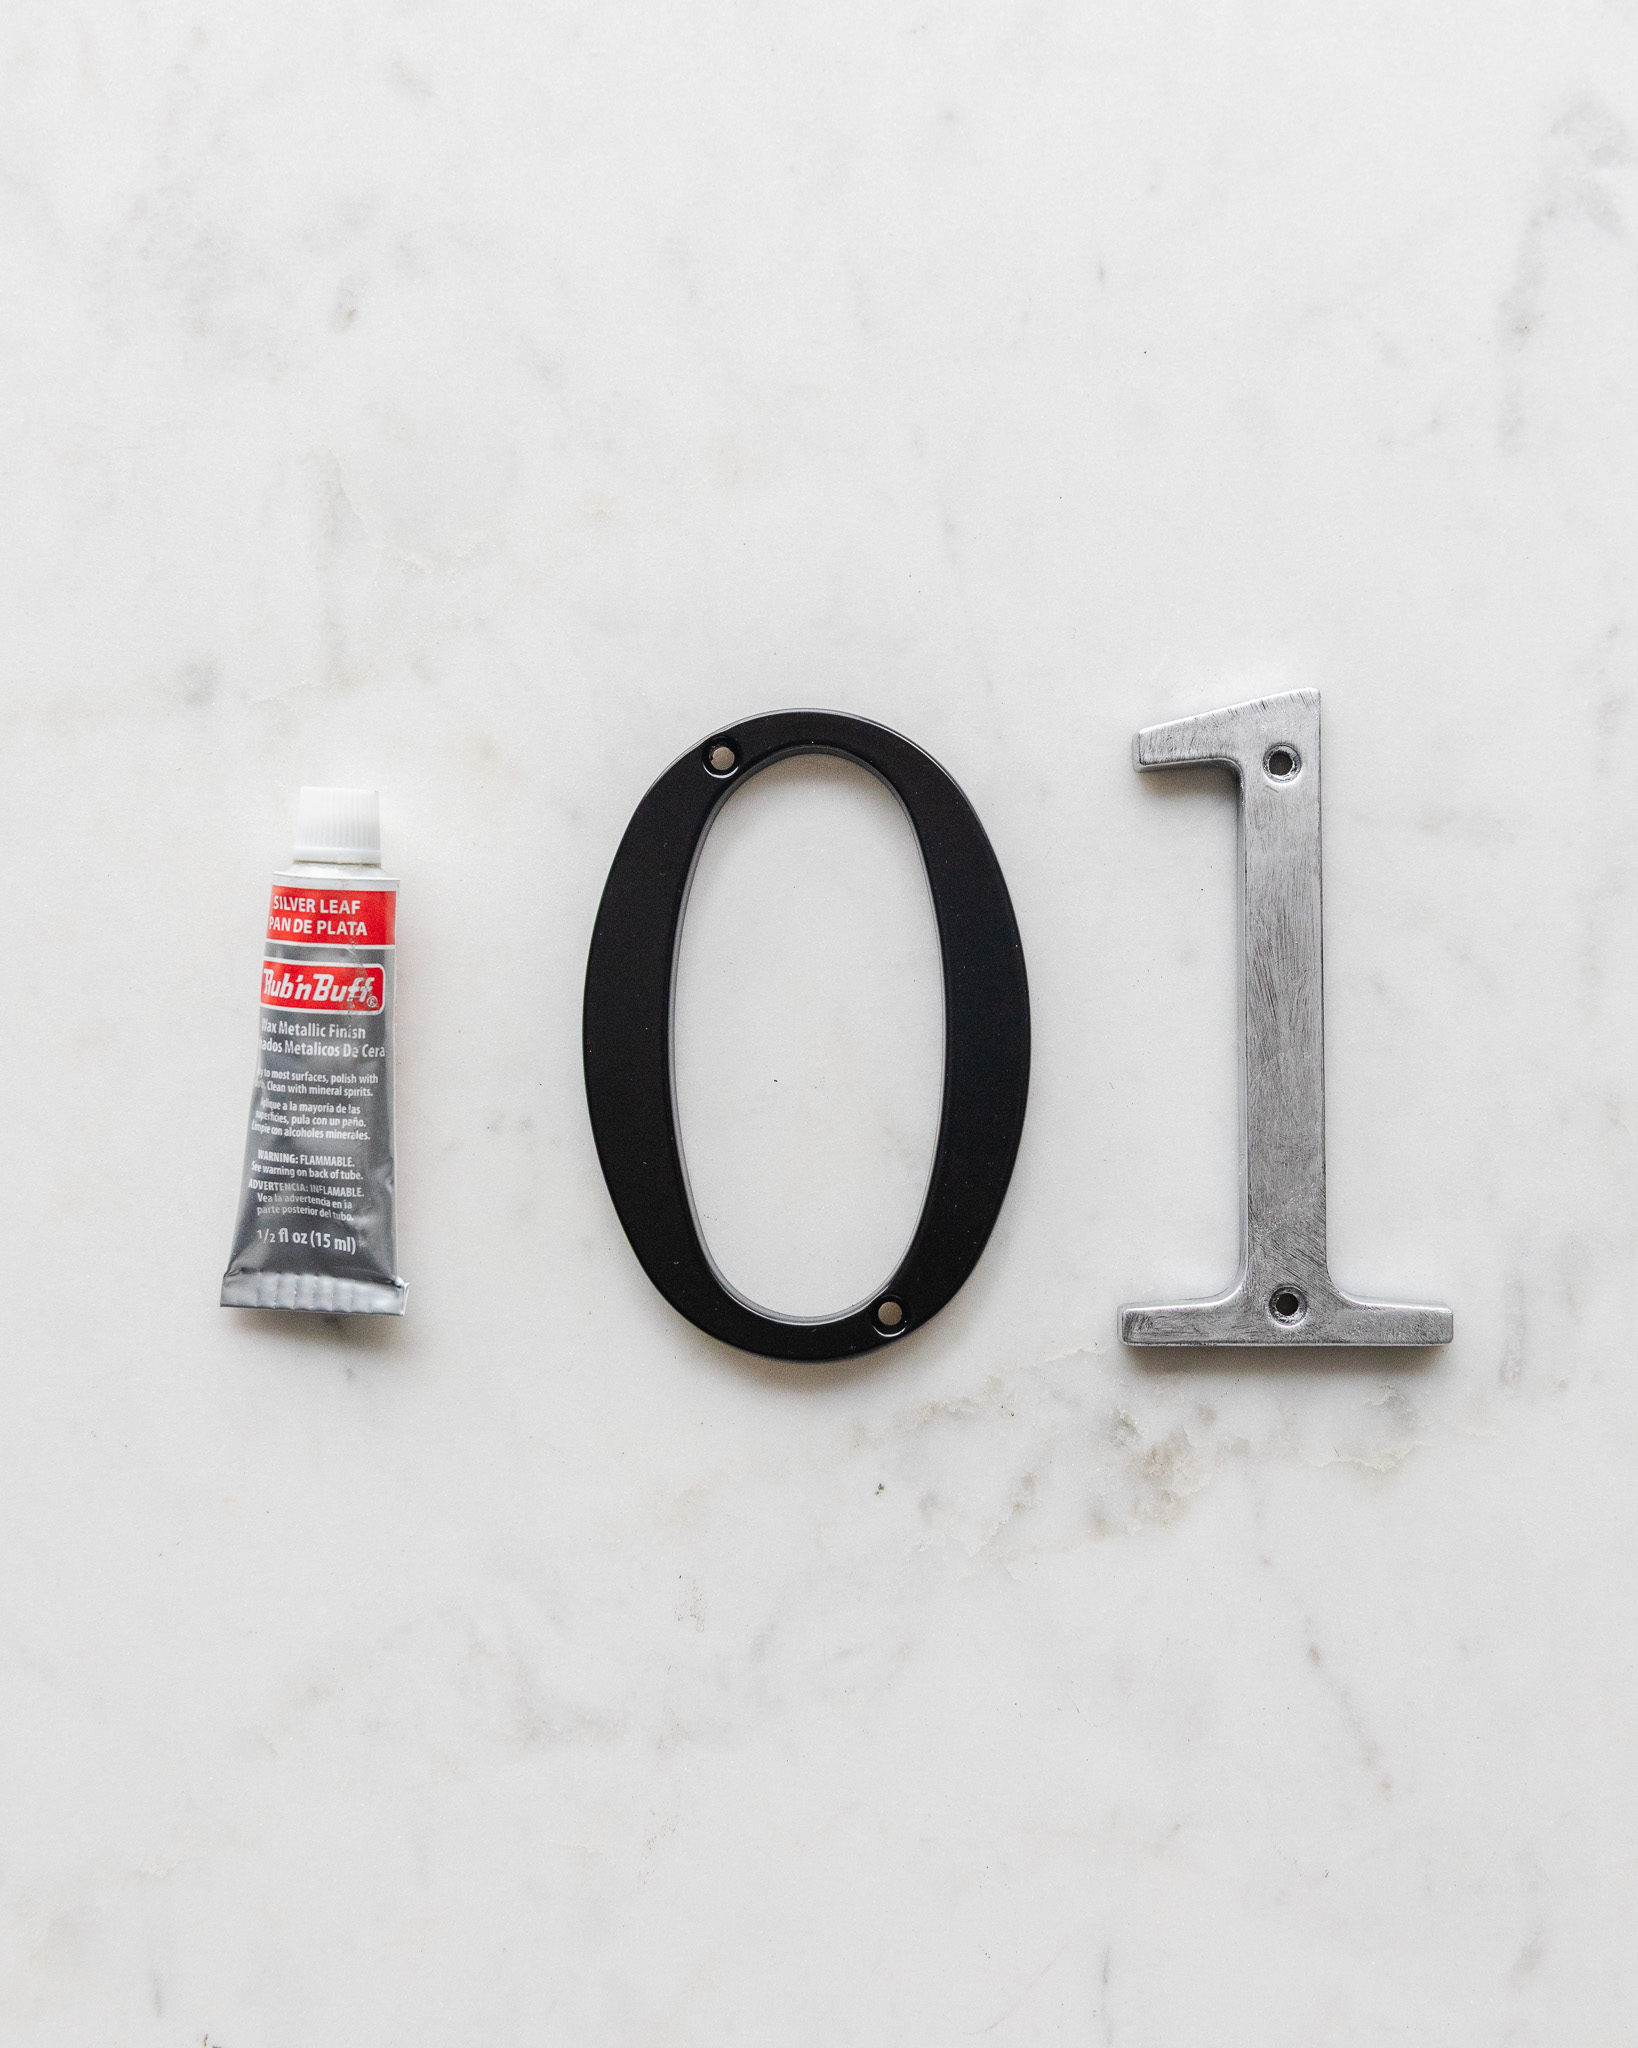
1 – Silver leaf (Pictured: Before & After on Black Metal)
This is a very bright silver. I like that it gives the silver metal a slightly more matte look. If I had to choose between Ebony on silver metal and Silver Leaf on black metal, I’d go with this one on black metal.
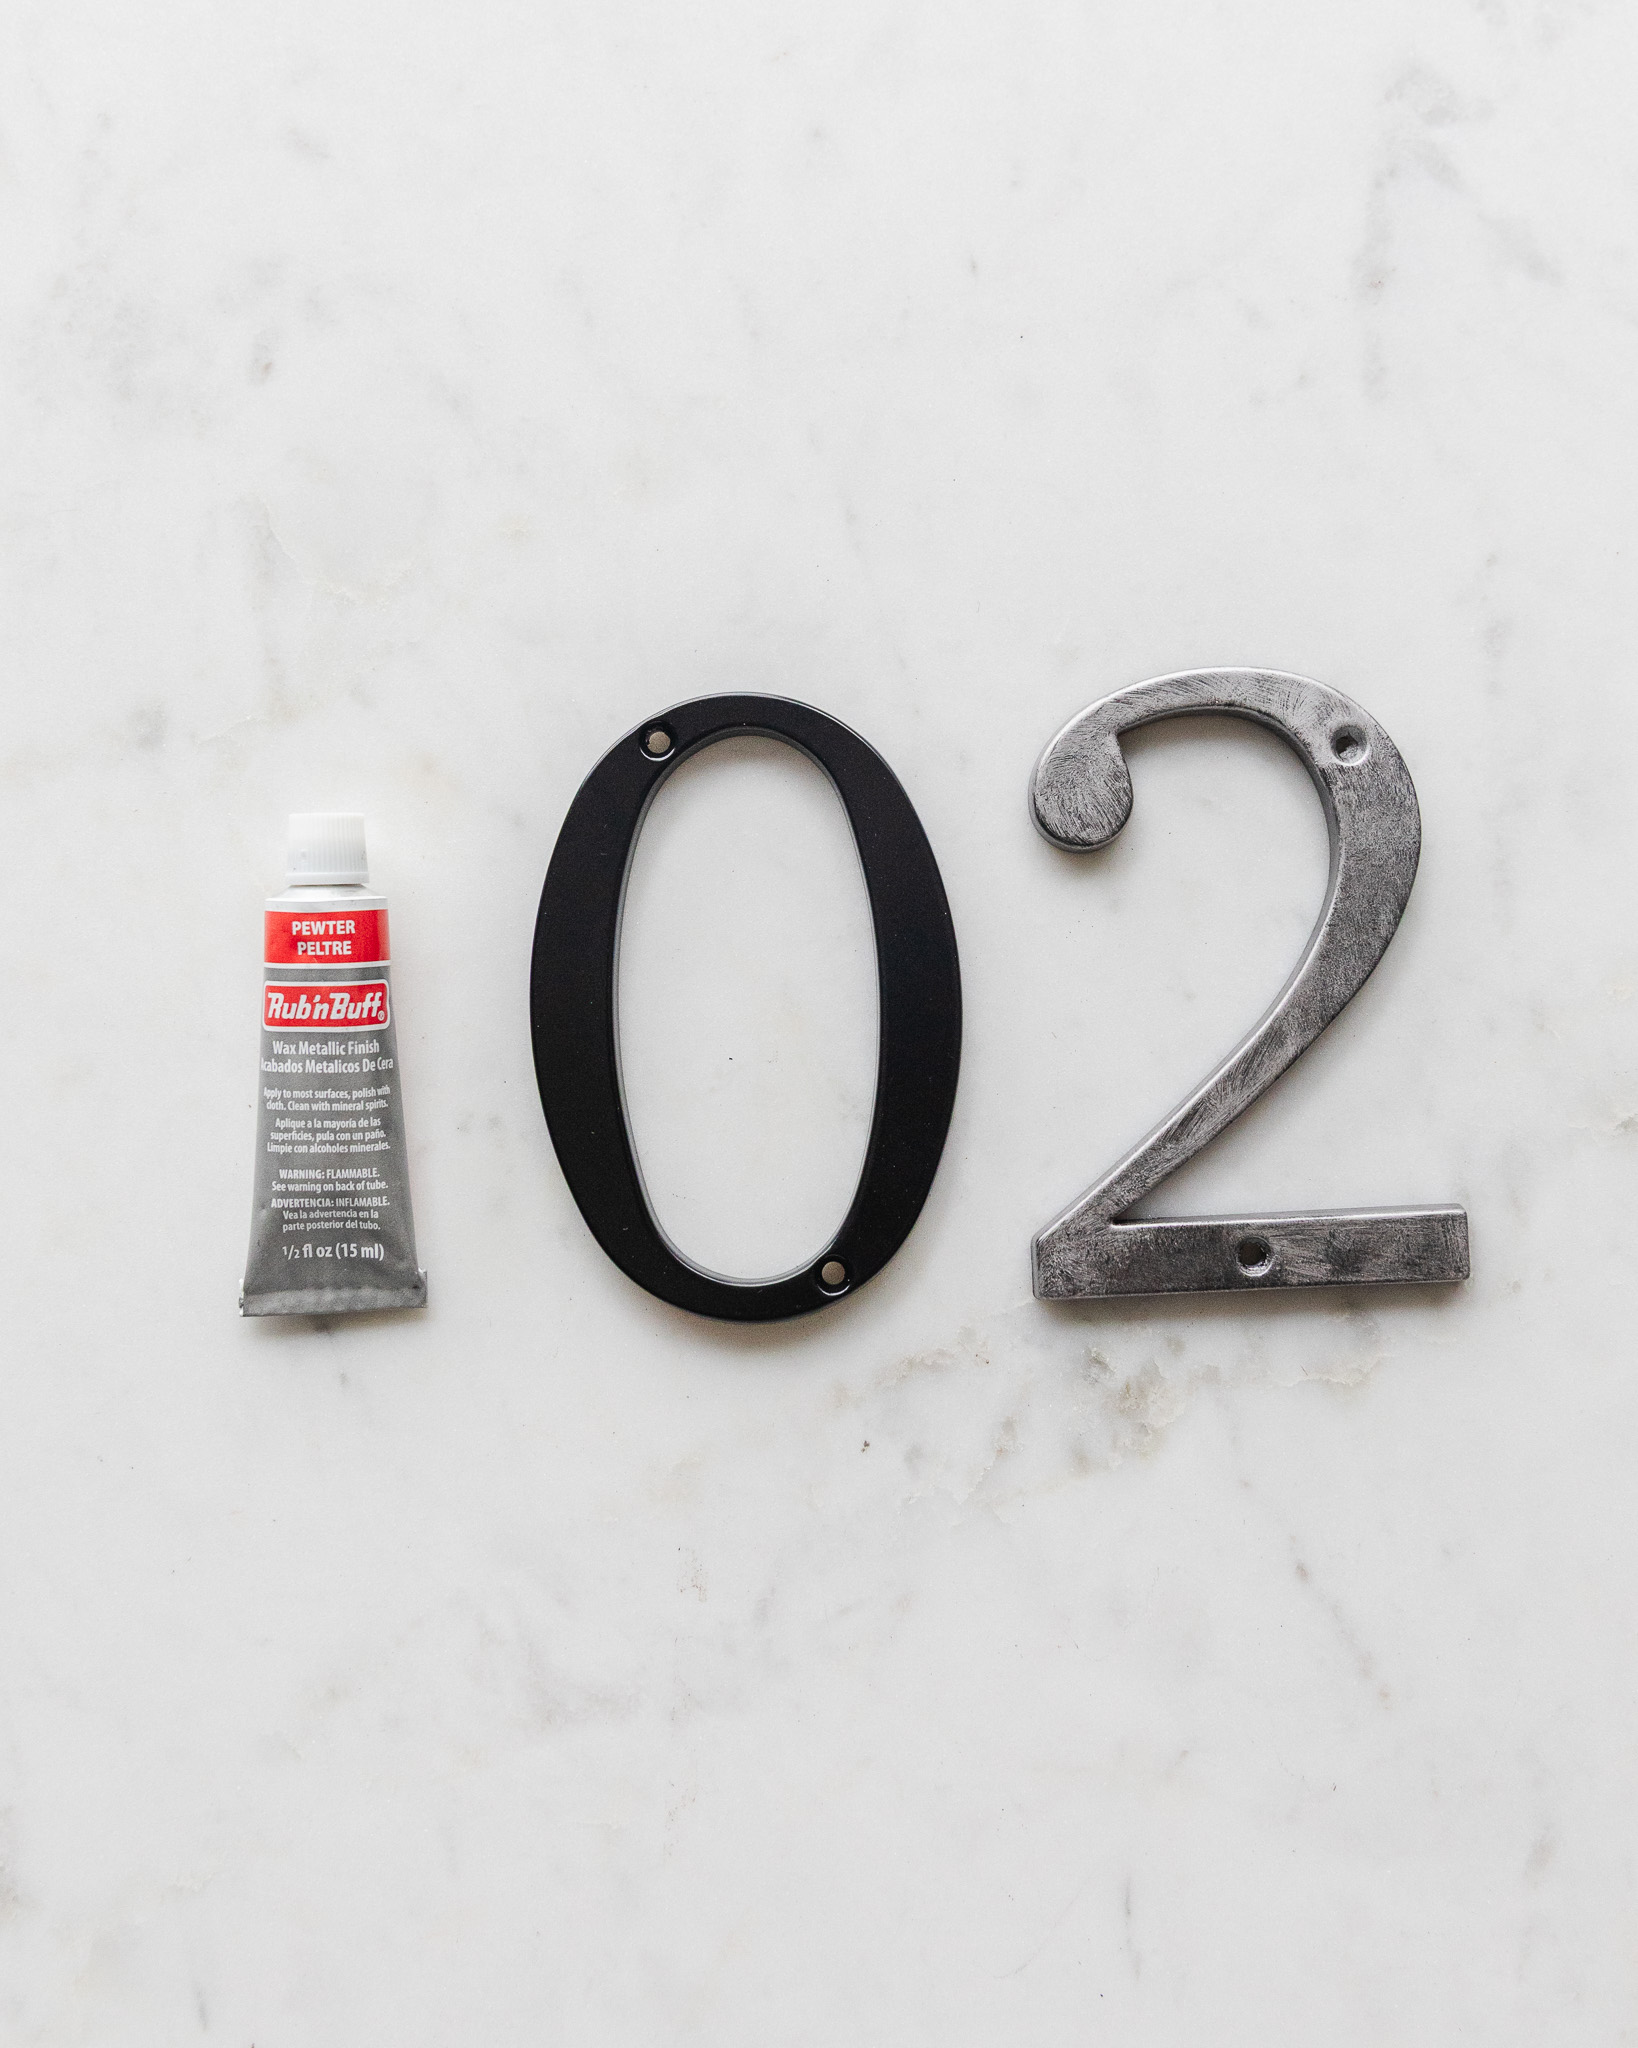
2 – Pewter (Pictured: Before & After on Black Metal)
This Pewter is my preference over the Silver Leaf above. It’s a really beautiful color on the silver metal and black metal, giving both a more aged, historical look. If you put Pewter over brass metal, it almost comes off as a polished nickel look, with that warmth to it. Love the undertones on this one.
3 – Grecian Gold (Pictured: Before & After on Black Metal)
Grecian Gold is my second favorite color of all nine options! The warmth of the gold is so vibrant on the black metal. On brass metal, it adds a lot of dimension. The Grecian Gold on black metal reminds me of the hardware in my kitchen, which is some of the most expensive hardware in my house. So that’s high praise!

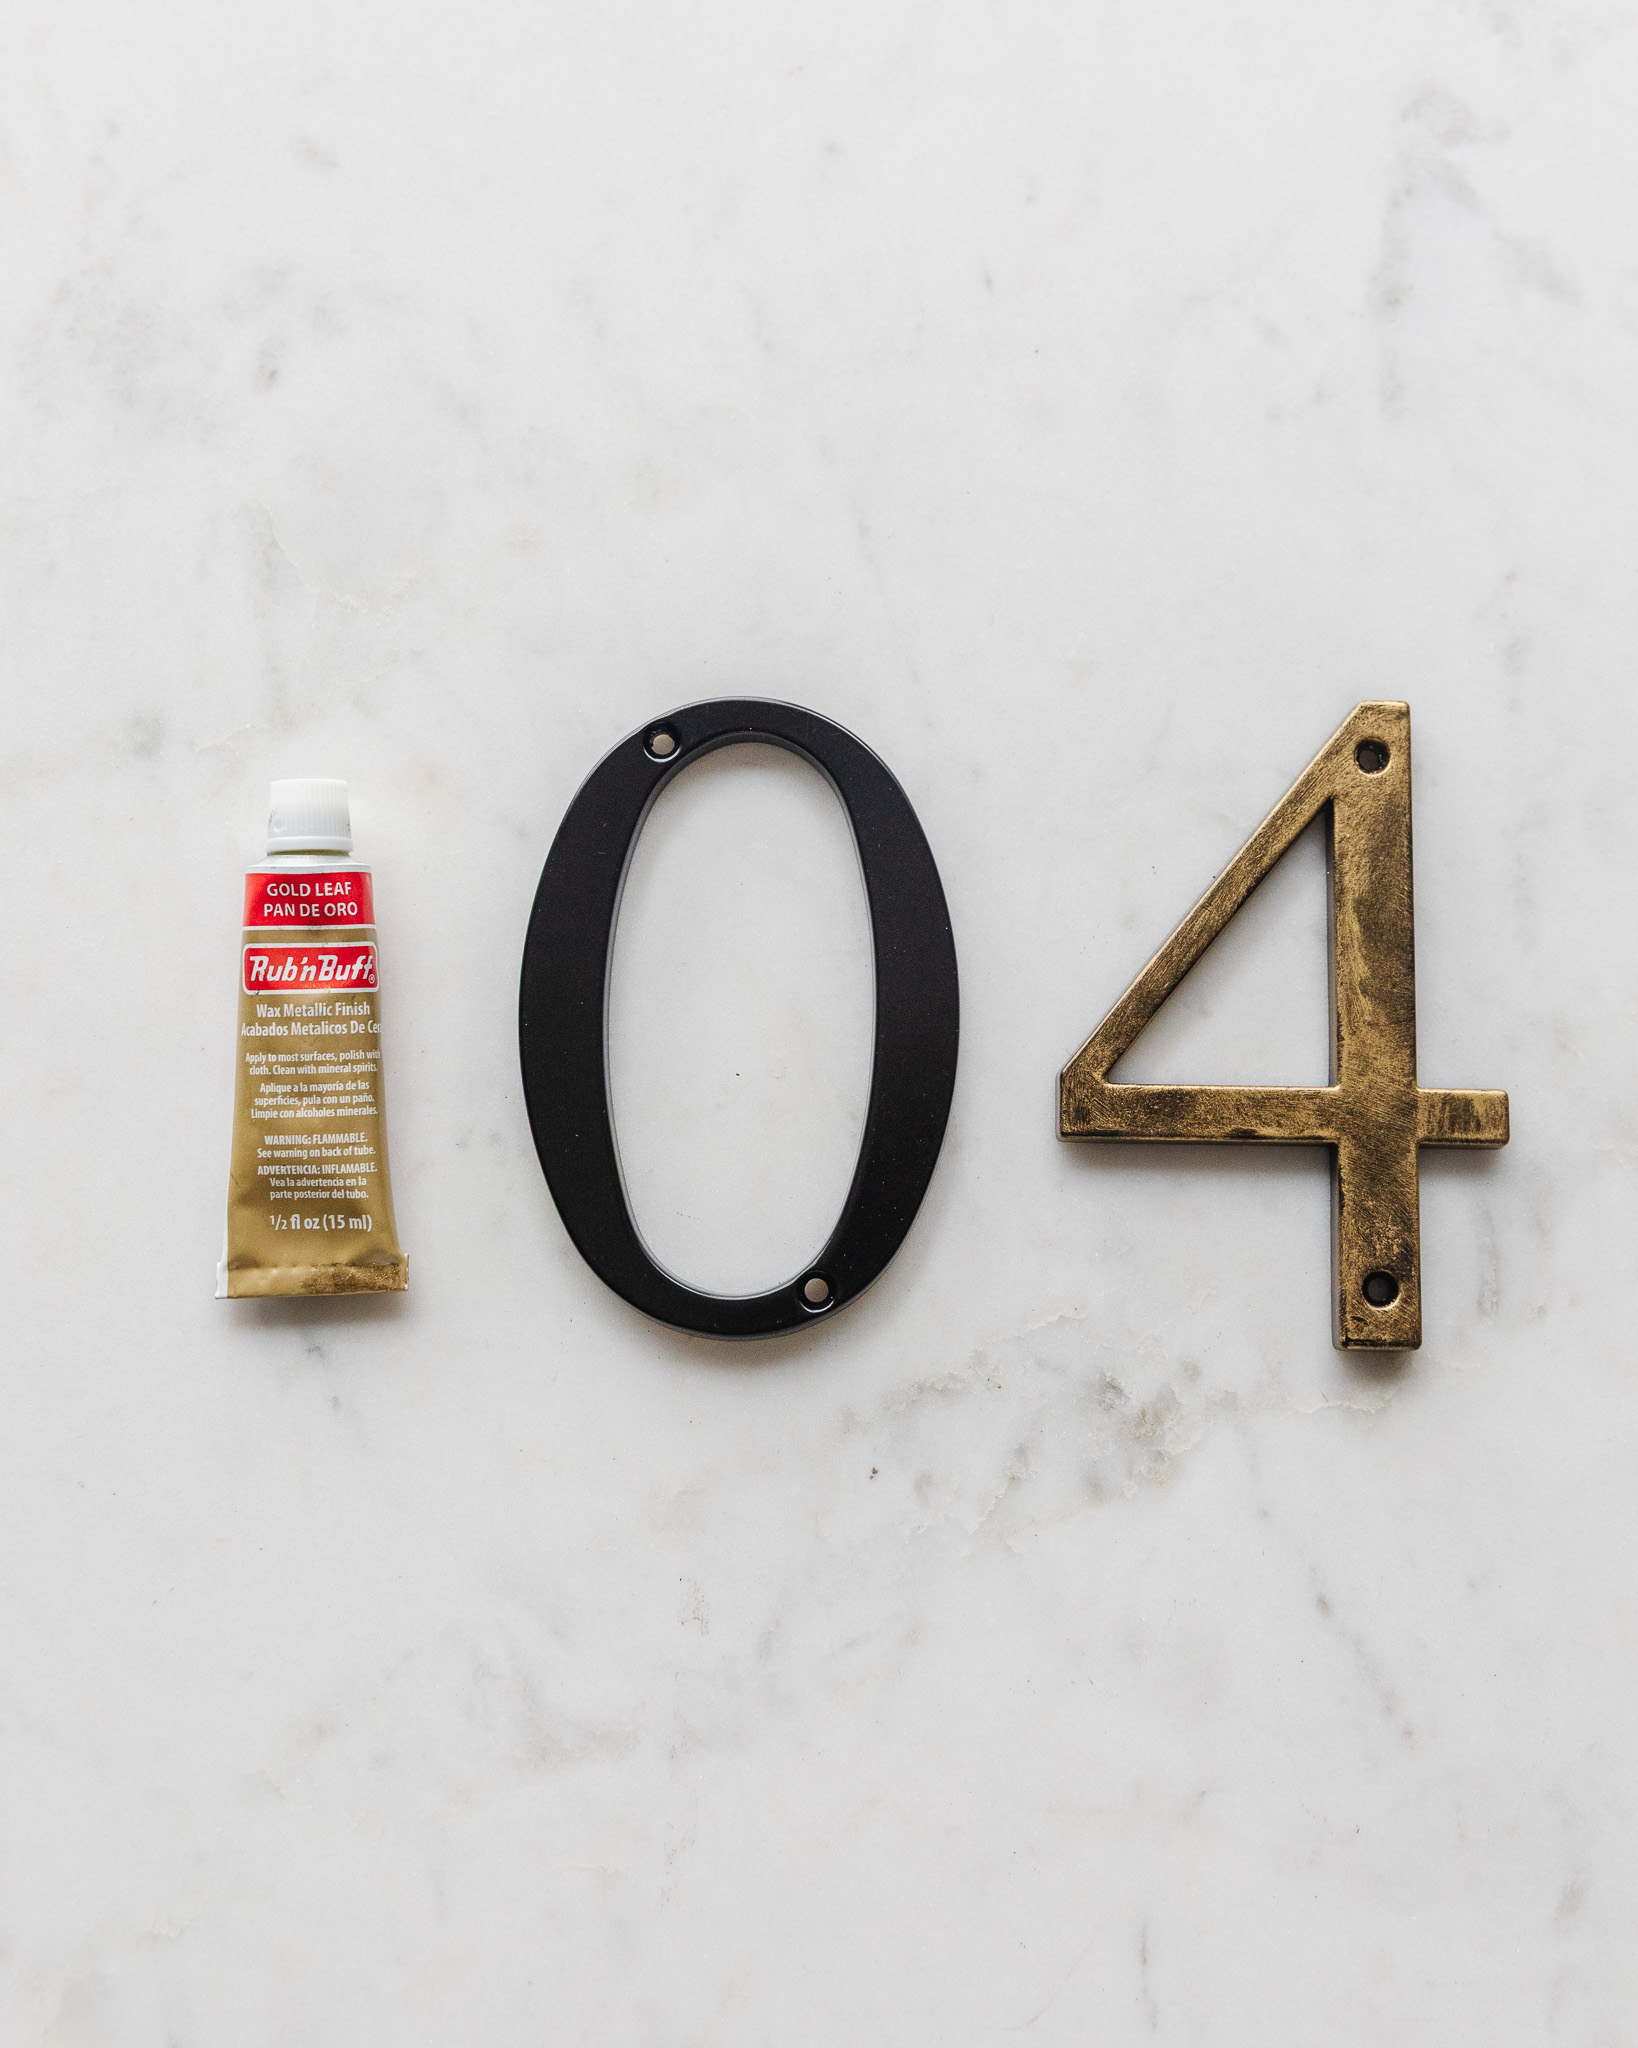
4 – Gold Leaf (Pictured: Before & After on Black Metal)
This Gold Leaf is a classic gold. Of course, it doesn’t really show up over brass metal. But it does give the brass a more matte look. It looks lovely over black as you can see below. I do see more green undertones than some of the other golds.
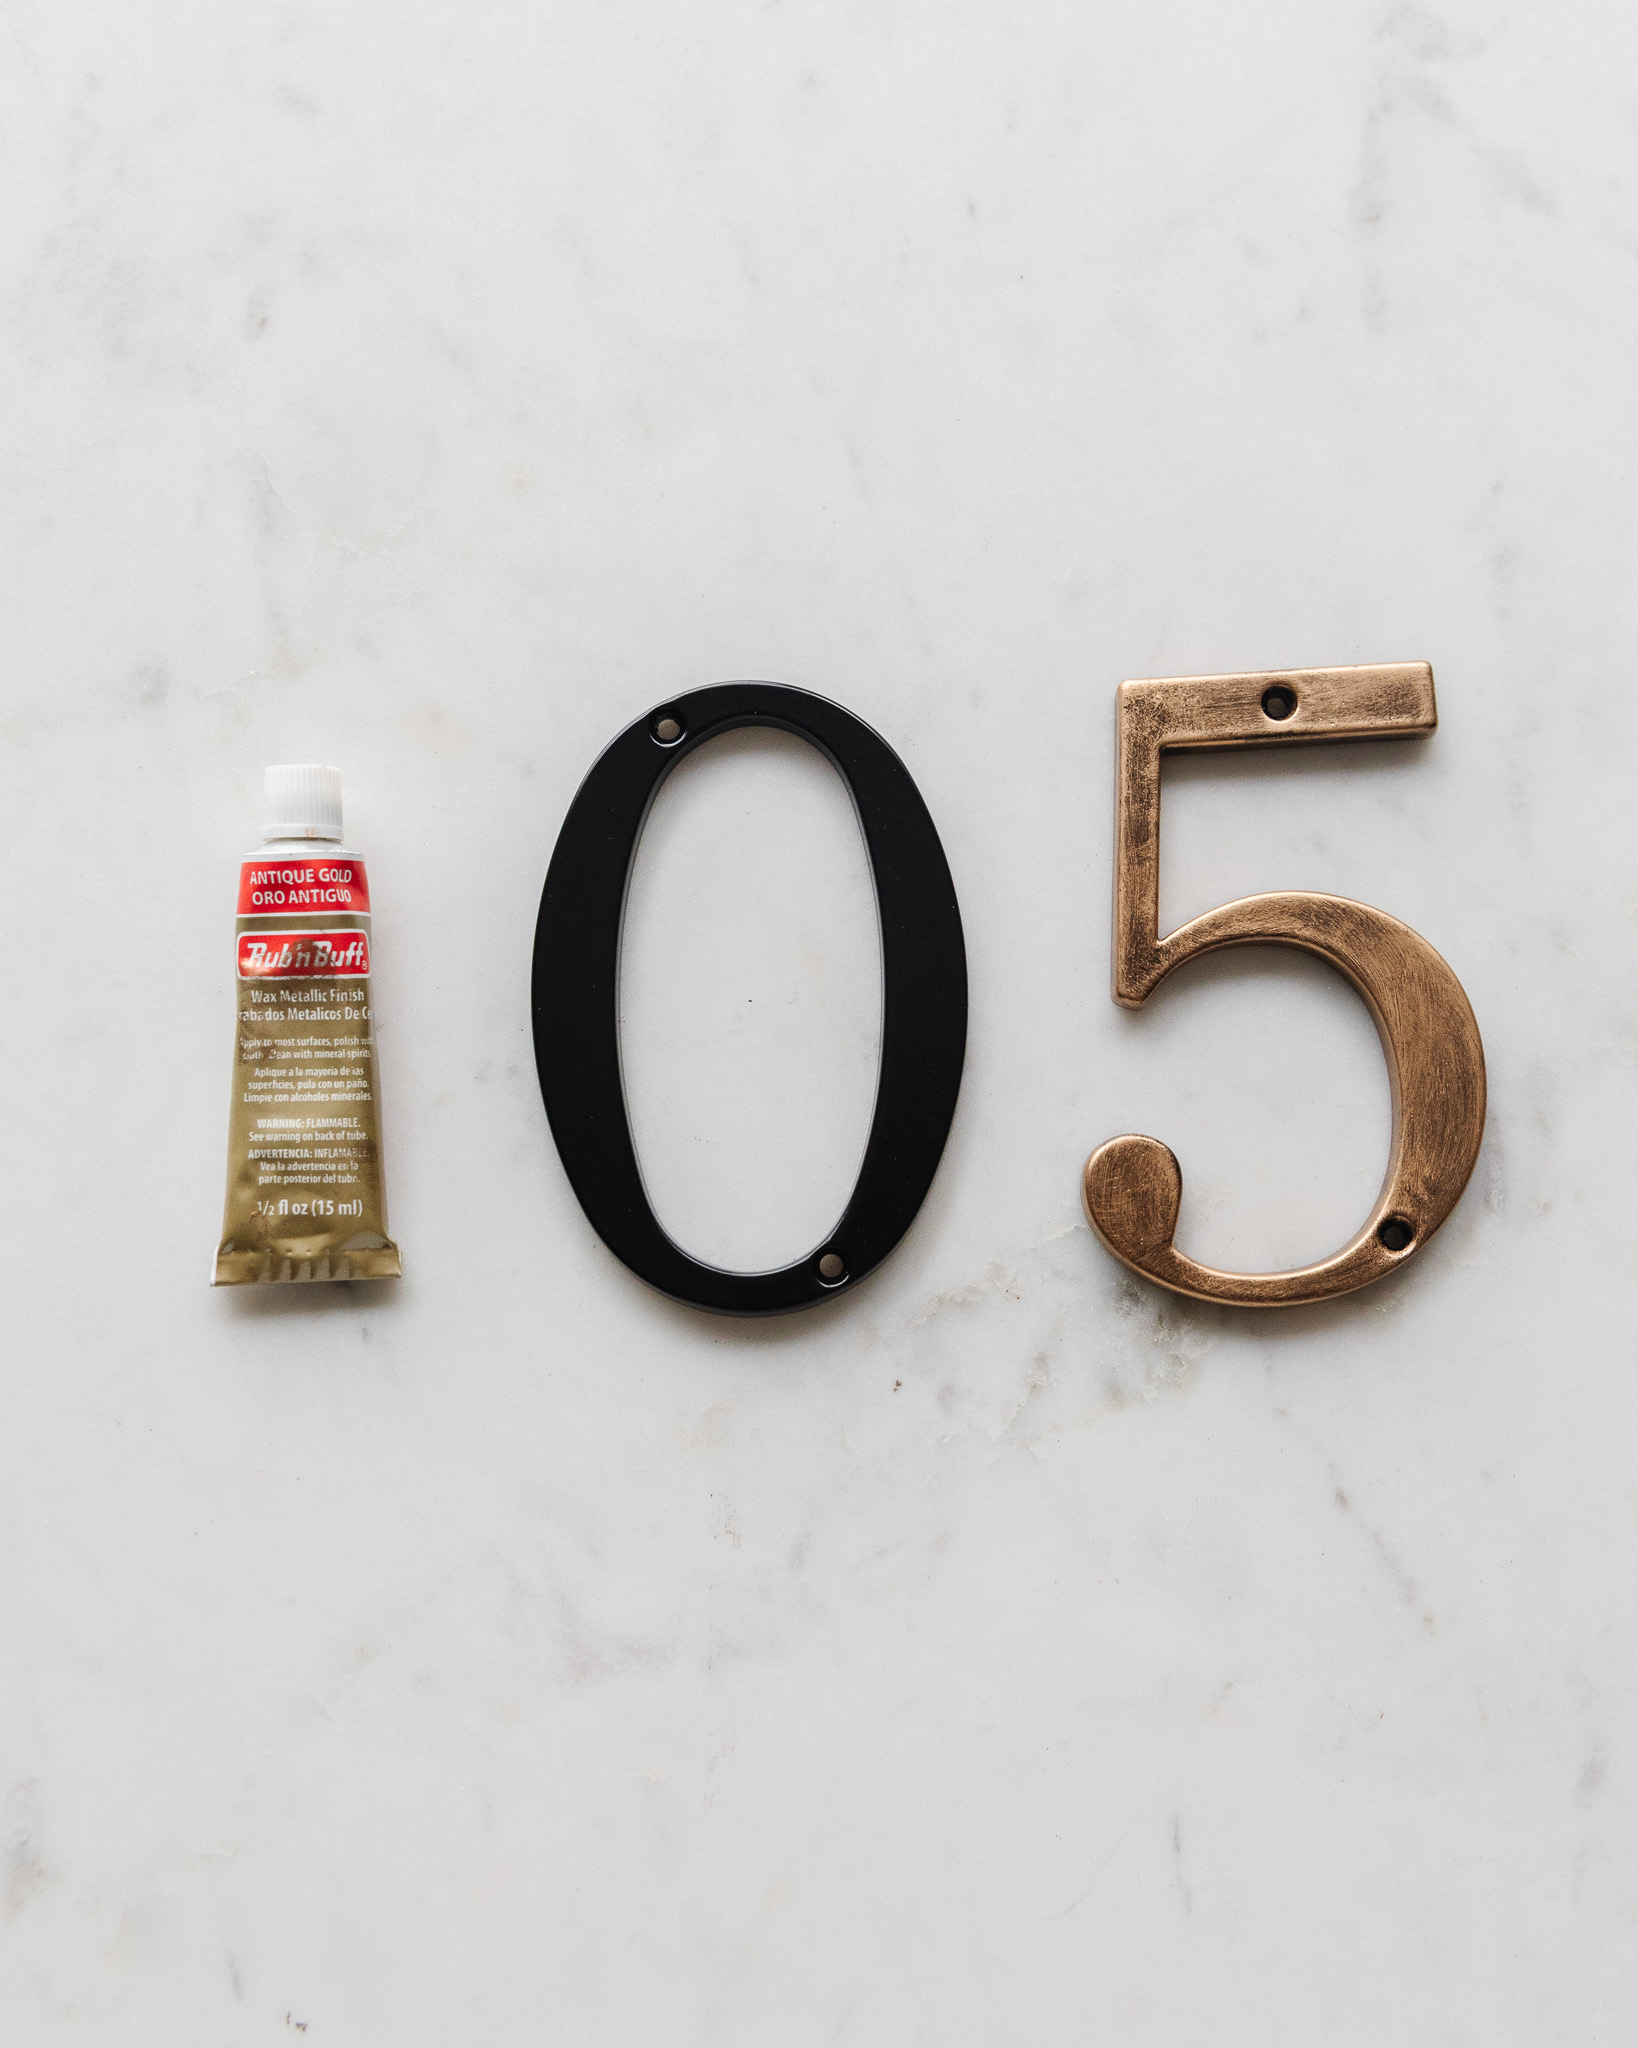
5 – Antique Gold (Before & After on Black Metal)
When I look at Antique Gold, I’m getting more of a champagne gold color versus the other golds. Not a bad thing at all—it just depends on what look you’re going for! I actually really like it.
6 – European Gold (Before & After on Black Metal)
This one is really pretty—it’s actually my favorite of all of them! It makes every piece look like it has some history. If you want your brass to look more aged, like a vintage piece, then add European Gold on top. It makes the silver look so much more expensive. And on black? It looks like something I could have collected in an antique shop in Florence!

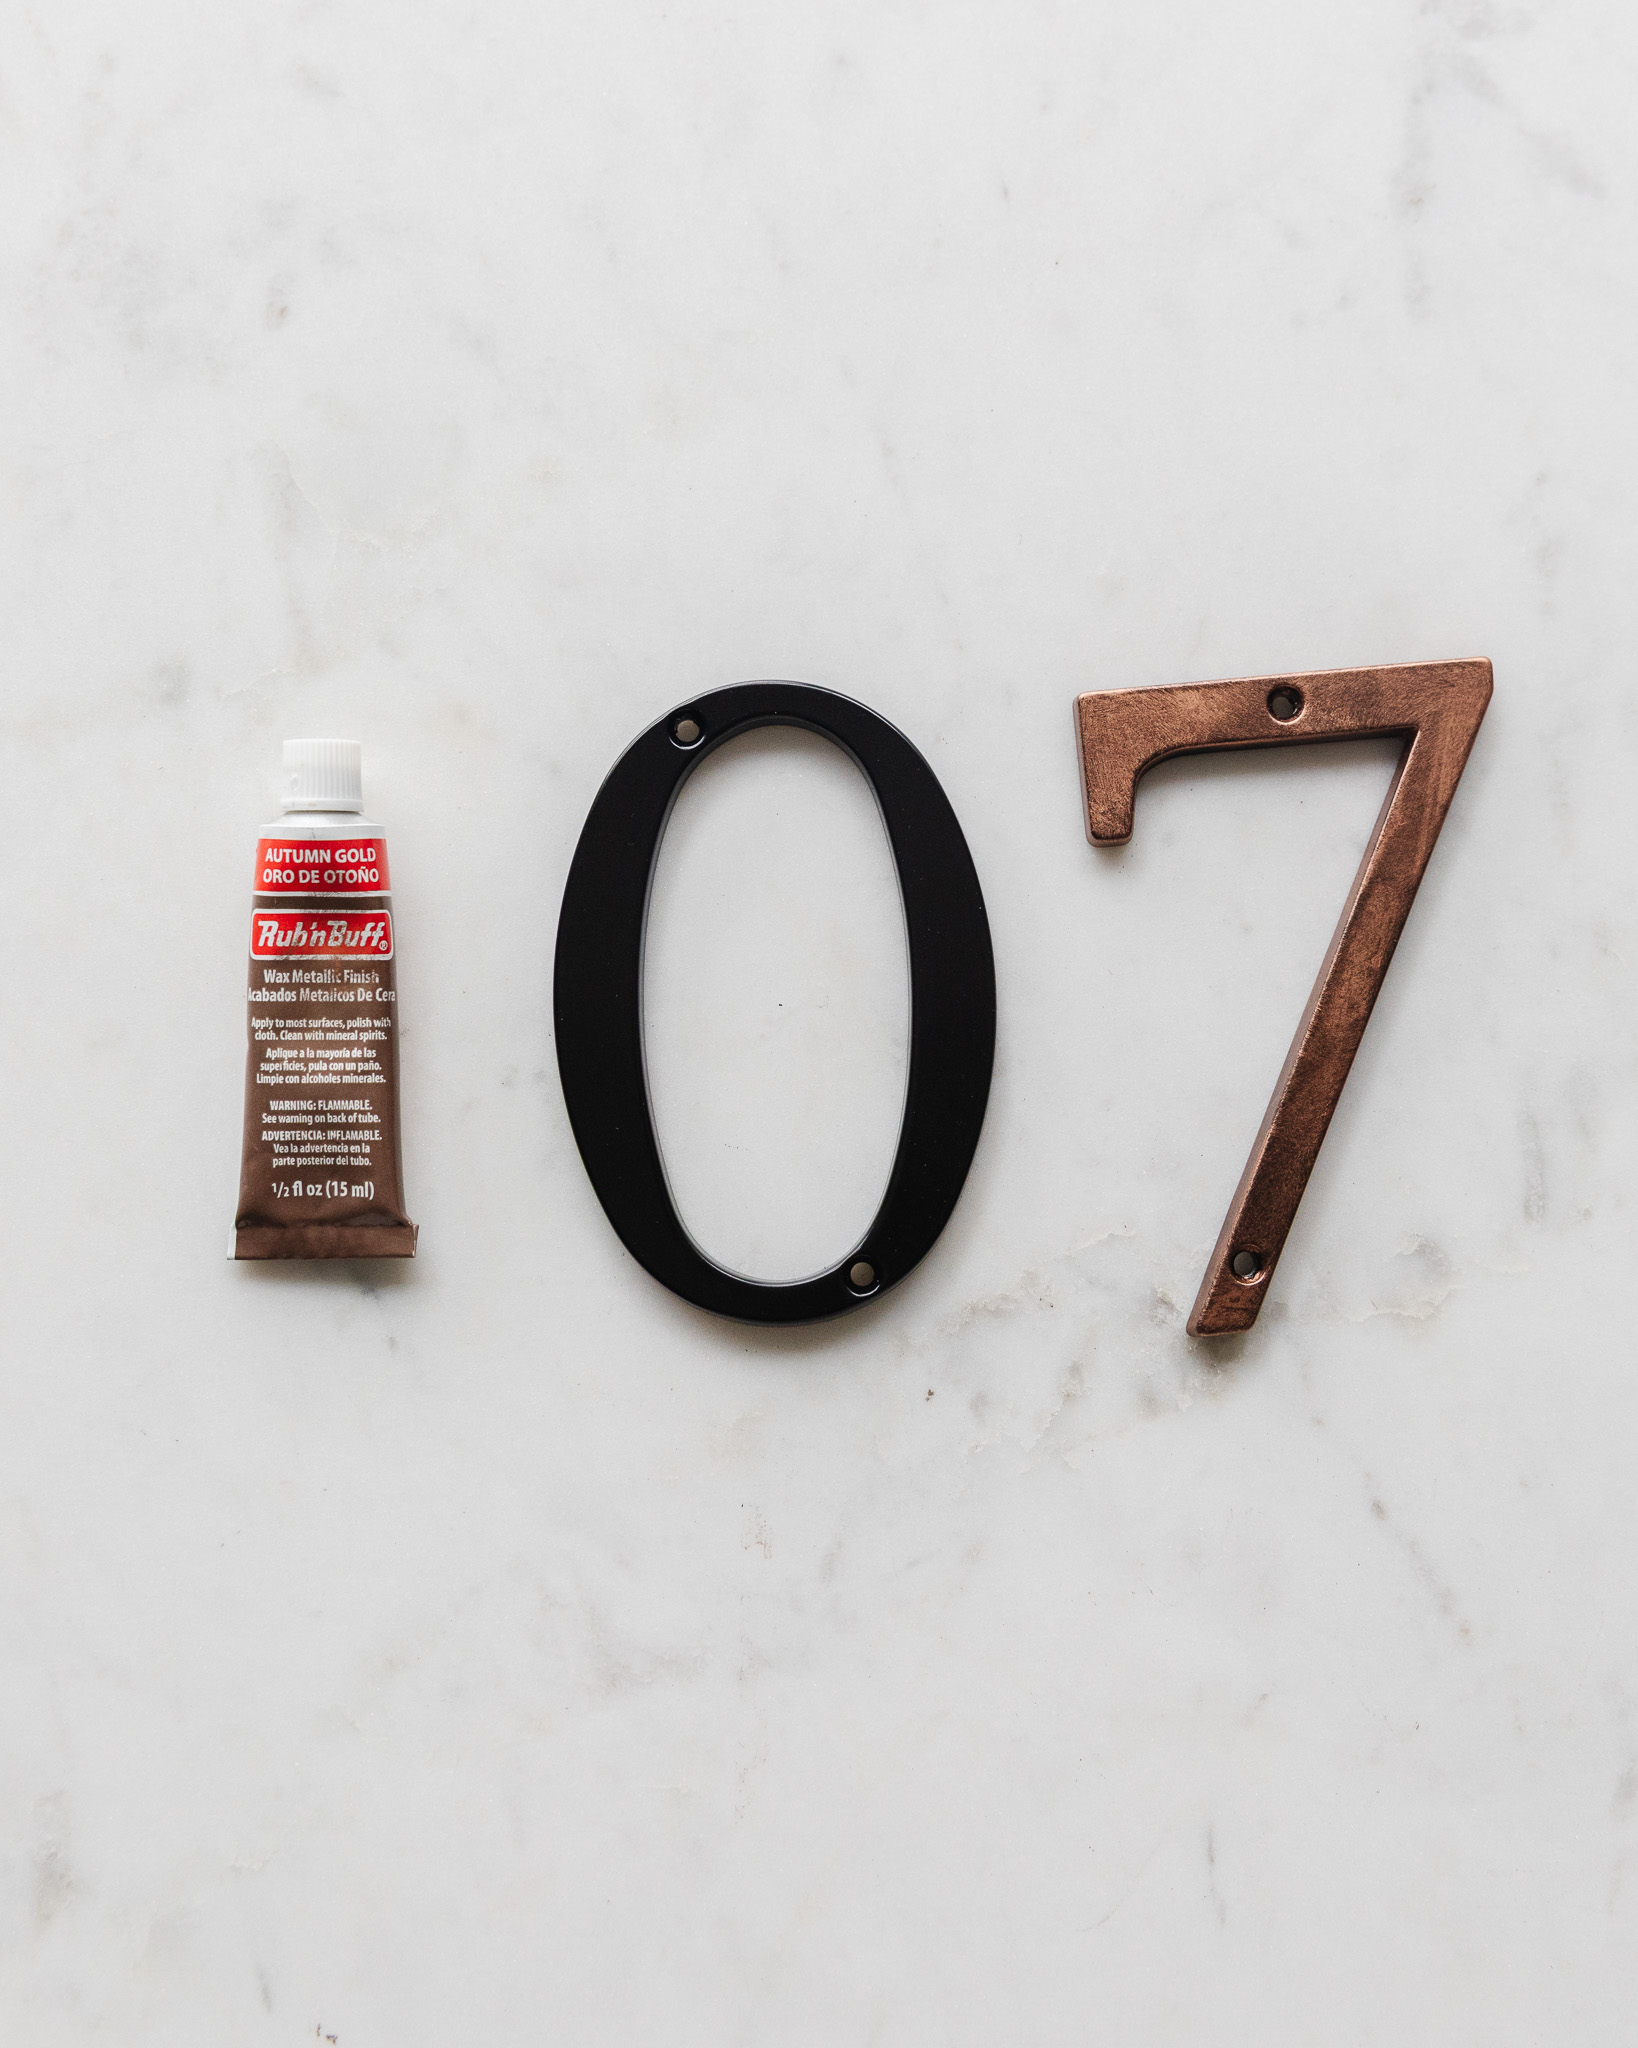
7 – Autumn Gold (Before & After on Black Metal)
I’m not sure why this isn’t called copper, as to me, it’s more copper than No. 8! Autumn Gold is gorgeous on the silver—even better than the brass. And on black? It’s incredible. I’m a very big fan! This is more of the copper color that I’d want over No. 8.
8 – Spanish Copper (Before & After on Black Metal)
This one is almost brown. When I first put it on, I wasn’t sure about it, but now it’s giving off Ralph Lauren vibes on the black! Not a big fan of it on brass or silver. It is more like an aged copper look than the “newer” copper look of No. 7, Autumn Gold.

9 – Ebony (Before & After on Black Metal)
This Ebony color makes the sheen of black more matte and brushed, so it’s more dimensional. I probably wouldn’t get this one for anything gold or brass—you’d be better off spray painting. The silver metal is interesting with it, but I’d still prefer to use Silver Leaf on black metal instead of the inverse.
Every Rub ‘n Buff Color on 3 Metals
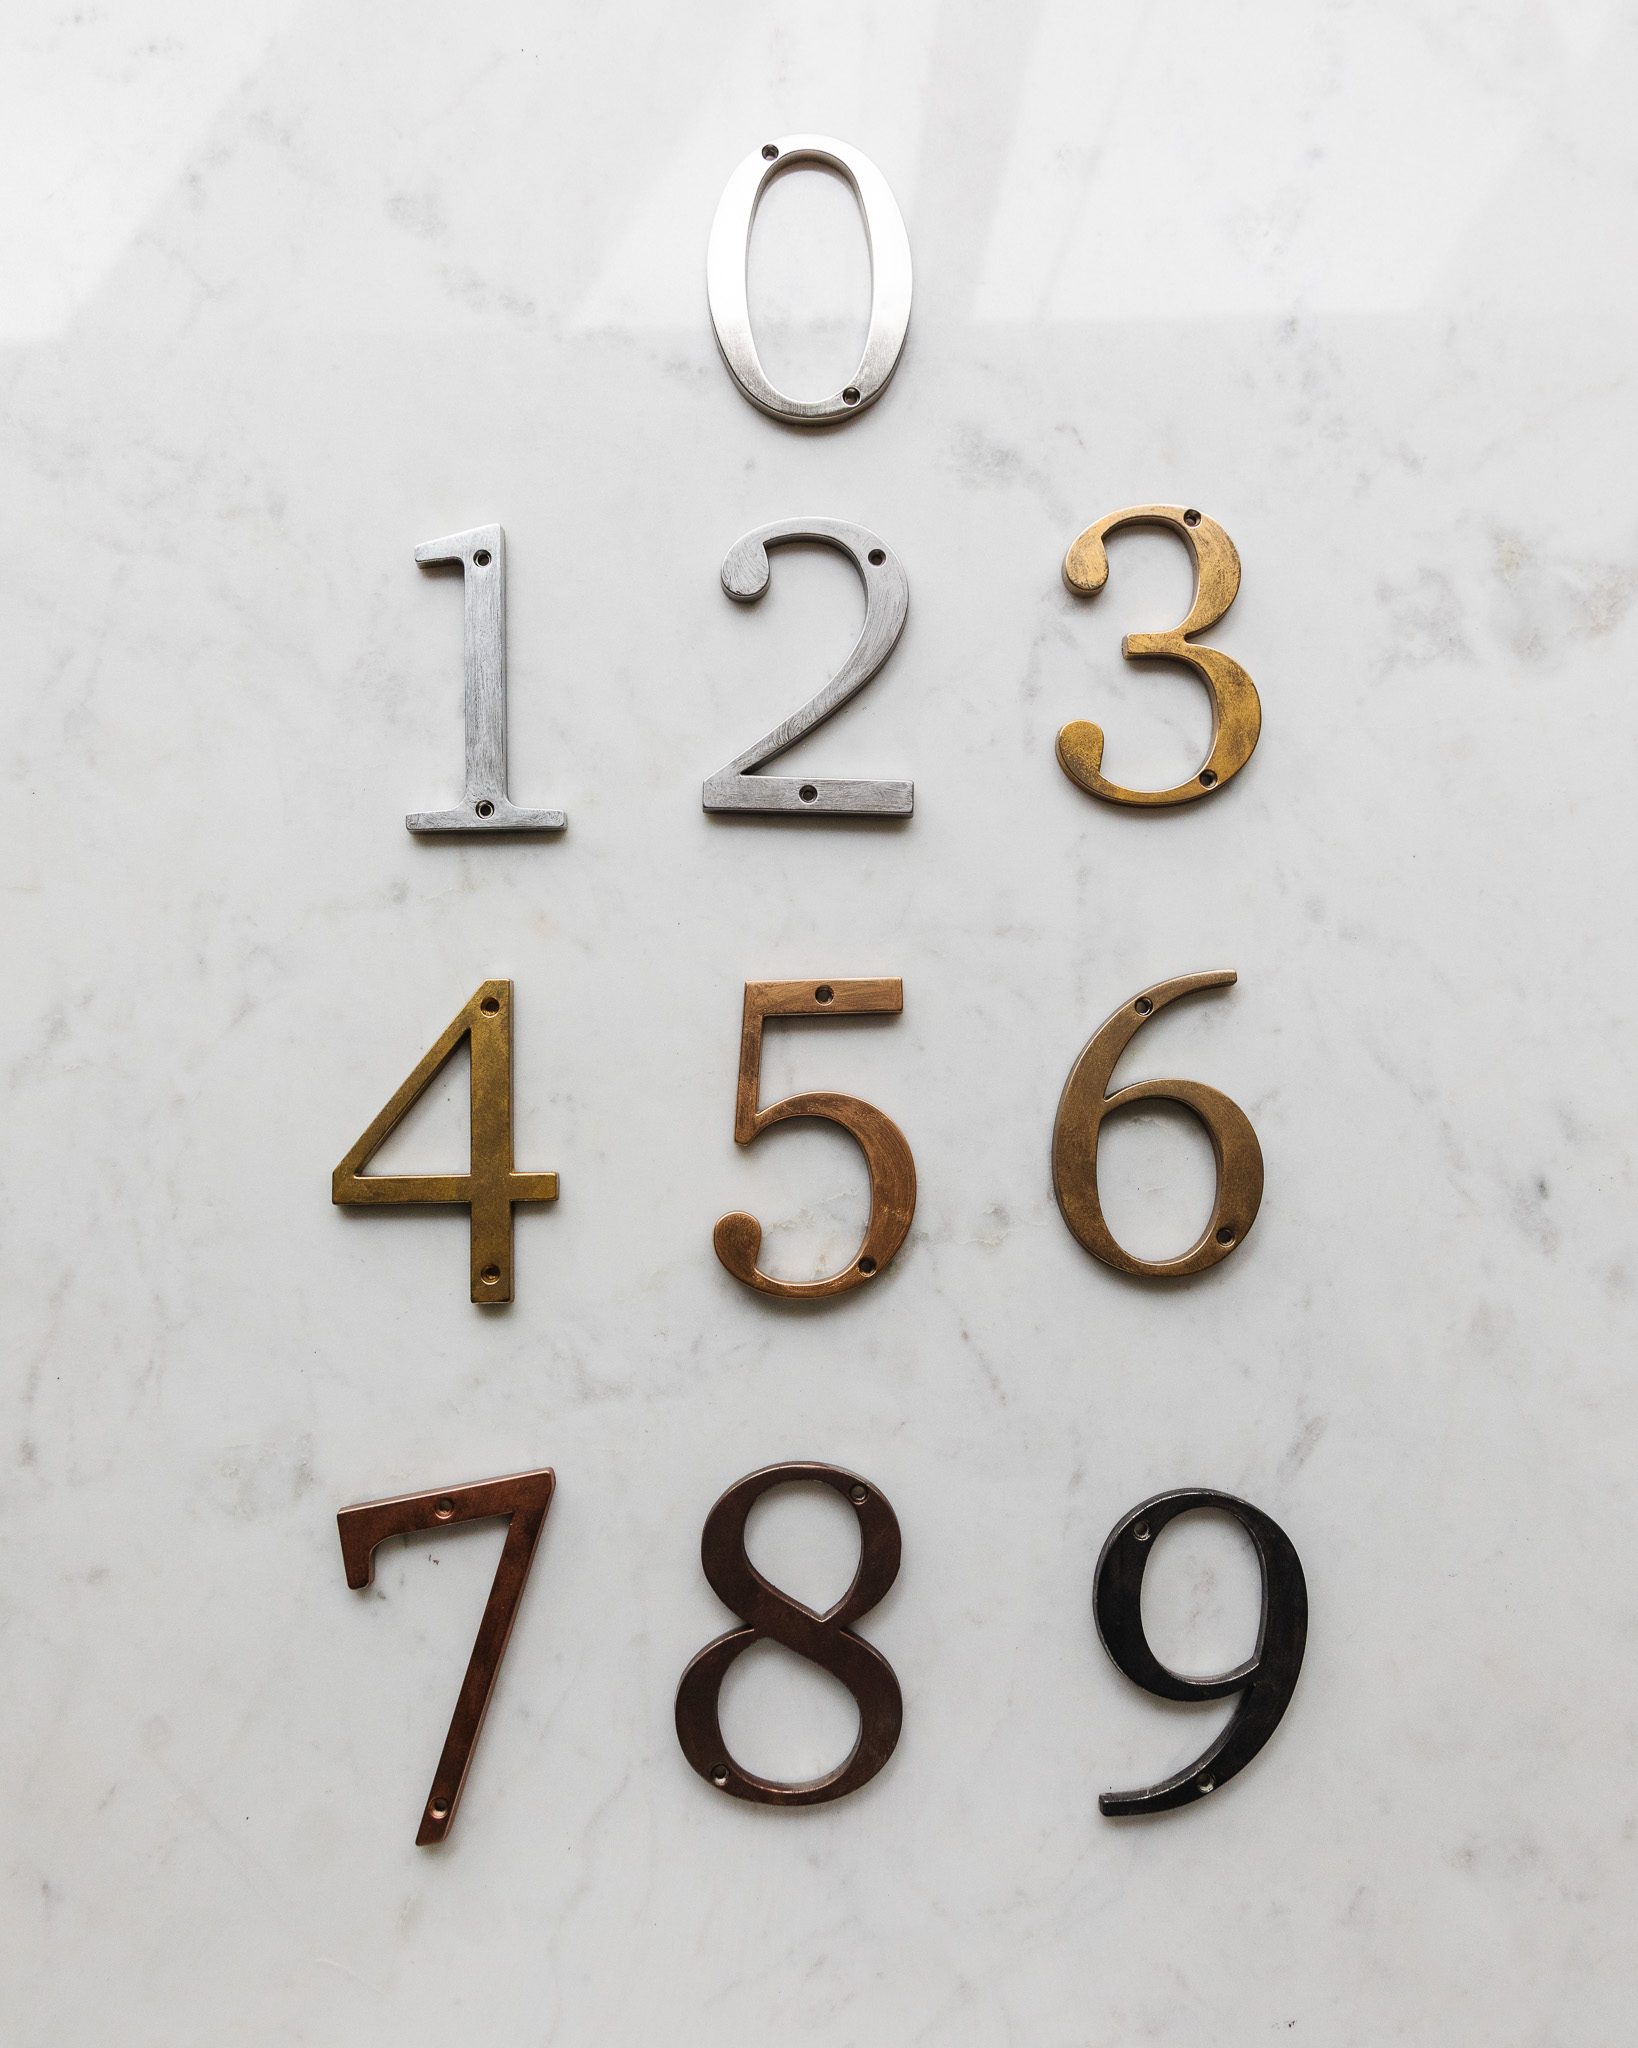
Below you can see every Rub ‘n Buff color on a single metal color. House number 0 is the original example of what the house numbers looked like before we applied the Rub ‘n Buff.
Rub ‘n Buff on Brass Metal Fixtures
Here are each of the 9 Rub ‘n Buff colors on brass:

House Numbers | 1. Silver Leaf | 2. Pewter | 3. Grecian Gold | 4. Gold Leaf | 5. Antique Gold | 6. European Gold | 7. Autumn Gold | 8. Spanish Copper | 9. Ebony
Rub ‘n Buff on Silver Metal Fixtures
Here are each of the 9 Rub ‘n Buff colors on silver:
House Numbers | 1. Silver Leaf | 2. Pewter | 3. Grecian Gold | 4. Gold Leaf | 5. Antique Gold | 6. European Gold | 7. Autumn Gold | 8. Spanish Copper | 9. Ebony
Rub ‘n Buff on Black Metal Fixtures
Here are each of the 9 Rub ‘n Buff colors on black:
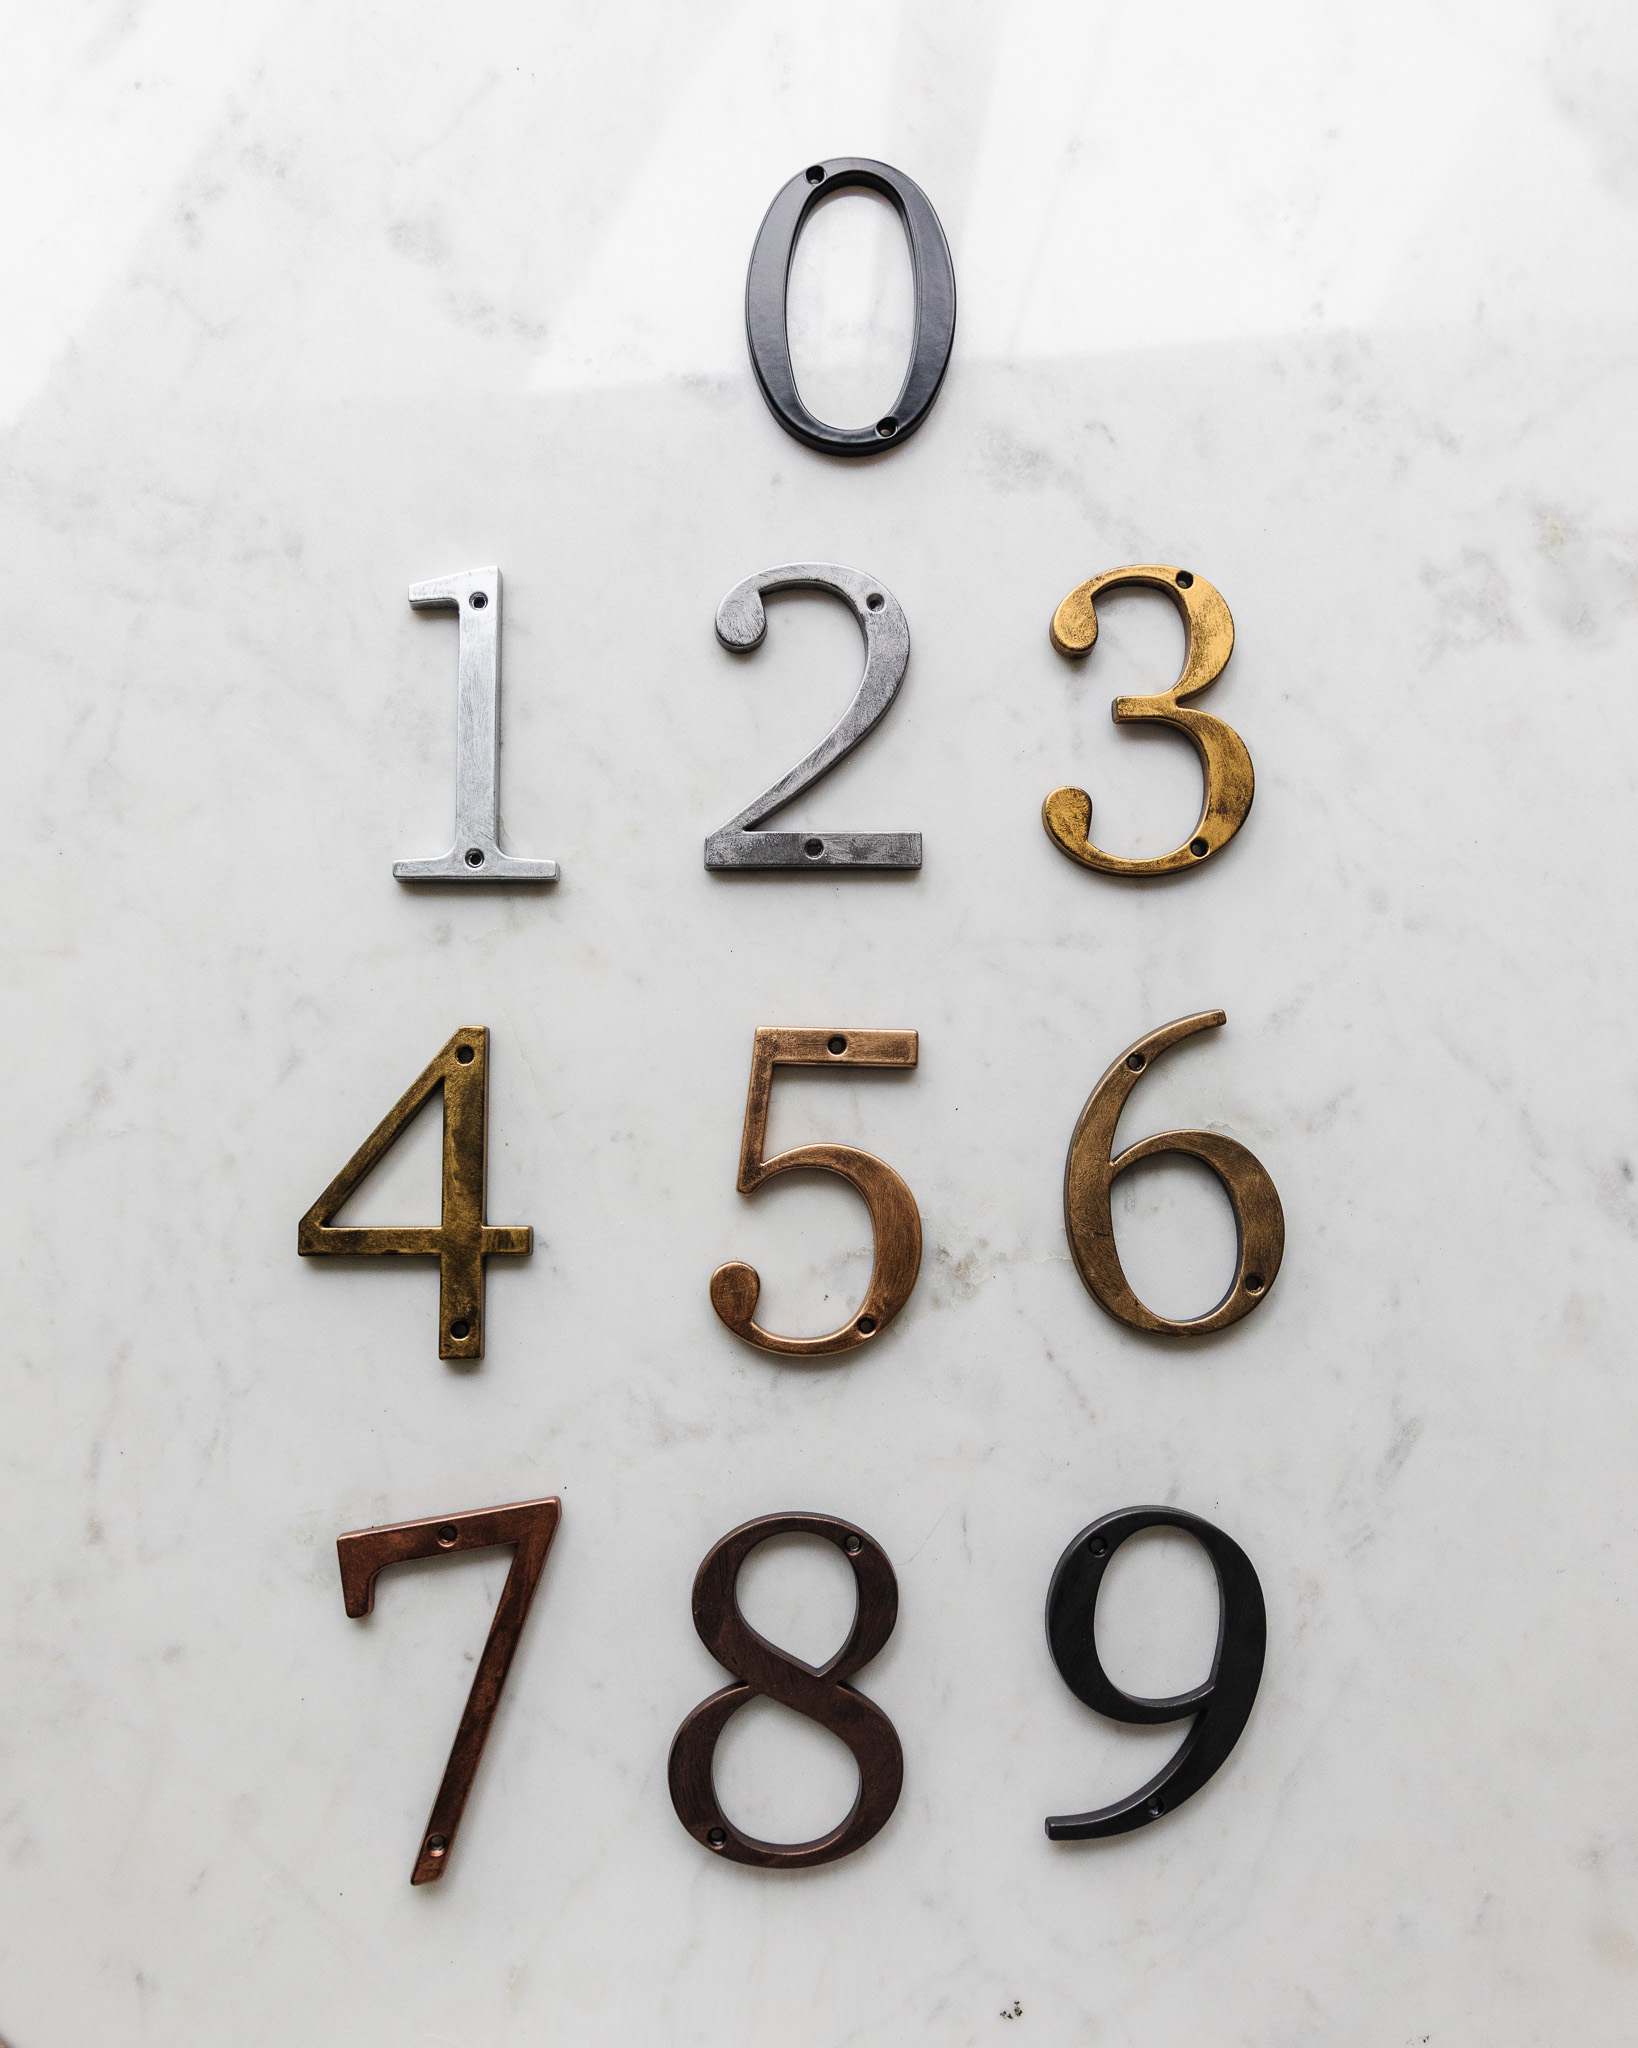
House Numbers | 1. Silver Leaf | 2. Pewter | 3. Grecian Gold | 4. Gold Leaf | 5. Antique Gold | 6. European Gold | 7. Autumn Gold | 8. Spanish Copper | 9. Ebony
The Benefits of Rub ‘n Buff vs. Spray Paint
So, what makes Rub ‘n Buff such a game-changer for DIY projects?
- Less Messy: Compared to spray paint, Rub ‘n Buff feels far more controlled and much less messy.
- Indoor Use: You can use it indoors without the overwhelming fumes. There’s a slight odor, but nothing like a spray can.
- Easy Touch-Ups: If you notice a brushstroke or an uneven spot, it’s simple to go back and touch up while it’s still wet.
- Not Permanent: Here’s the best part – it’s washable with water and dish soap! This was a huge relief for a first-timer like me especially when I dropped some on our Stuga floors in the CLJ Studio while painting. (Oops.)
- Dimensional Finish: This is the key benefit. Rub ‘n Buff isn’t fully opaque; it allows the undertones of the original material to show through slightly. This creates a beautifully dimensional finish that genuinely looks aged and authentic, which is precisely the look I was going for.
- Goes a Long Way: I used barely any product at all with this test! I could Rub ‘n Buff every picture light in my house and still have plenty of product to spare.
The Final Verdict
Even before I finished the test, I realized that the picture light color was working just fine in the room. But now I have a great option if I ever change my mind down the line! I did apply Rub ‘n Buff to some black candlesticks I had, just to see how it would look on a larger item. I couldn’t get my favorite color, European Gold, out of my head!
Candlesticks painted with European Gold
The beauty of Rub ‘n Buff is that you can customize it to your preferred color and look. You have nine color options. You can choose to do a thin or thick layer. You can buff it to make the end product more shiny—but I like the patina effect you get when it’s less polished. You can use this metallic wax finish on so many home decor accents, from mirrors to frames to hardware. I did notice it can show wear (like scratches) if you don’t seal it, so keep that in mind depending on what you’re using it for!
Want to Reference This Post Later?
If you want an easy way to keep this post handy for your next project, I made a pinnable graphic for ya!

What’s your favorite Rub ‘n Buff color? Share your projects in the comments!
Chris Loves Julia Product Tests
- We Tested 10 Solar Path Lights To Find The Perfect Glow
- Putting Kitchen Towels to the Test
- We Tested the Top 5 Amazon Pillows–Here’s My Favorite!
- Putting Bed Pillows to the Test
- Ranking the Top 7 Duvet Inserts on Amazon
- The Ultimate Cordless Stick Vacuum Test!
- We Tested Rug Pads–Here’s Our Favorite!
- We Tested 30 Hand Soaps to Find the Best of the Best
- Hunting for The Best Can Opener
- The Quest For the Best Hair Towel Wrap
- Unwrapping The Best: Putting Gift Wrap Cutters to The Test
- The Ultimate Test: Finding the Best Nugget Ice Maker
- We Tested Tons of Shaker Bottles For “Sexy Water”—Here Are the Winners
- Let’s Cut to the Chase: The Best Knife Sharpeners
- The Ultimate Test: The Best Waterproof Doormats
- Tried & Tested Dripless Tapered Candles
- Which Holiday Window Candles Are Right for You?
- The 9 Best Chef’s Knives
- Blender Wars! Testing And Ranking 7 Of The Best Blenders
- Product Test: Portable Phone Chargers
- The Ultimate Test: The Best Steam Mops
- Product Test: Mandoline Slicers


I’ve used the Antique Gold on a few projects, but my favorite was a cheap picture frame that had a raised curlique design. I painted the frame terra-cotta, then used a wide, soft brush to lightly apply the Rub ‘n’ Buff to just the raised design. When it was dry, I buffed it out. The results were stunning! The frame looks like a true antique.
This is exactly the info I needed! Thanks for putting this together.
I am going to use Grecian Gold on a black metal coffee table with glass top. You mention sealing? With what product would I use? Best post I have ever read regarding rub n buff. Great job
You can use water-based or acrylic sealant to prolong the finish of Rub ‘n Buff (as recommended by the manufacturer if you’re sealing!) I’d probably try Rustoleum Gloss Crystal Clear Acrylic Enamel Spray Paint in a small area to see if that’s the look you like!
I want to tone down a new aluminum mirror frame which is simple, brushed, but just too cold looking. Gold is not an option. My bathroom fixtures are all brushed nickel, but are not as “glaring” as the mirror frame. What is my best option?
Hello! I’ve had a polished nickel floor lamp on my wish-list for a while now, but the ones on the market are over my budget. (drooling over vintage Ralph Lauren ones!) SO I was wondering if I could DIY with rub-n-buff until my dreams come true.
Would you recommend using silver leaf or pewter on a black swing-arm lamp? Or pewter on a brass swing-arm lamp? Just curious your thoughts. Thanks Julia!!